
Operations Training
Operations Training
Operations Training
Release 90
innovating a safer world
innovative247.com/onpremise
Table of contents
Viewing an Open/Close Schedule
Creating a New Open/Close Schedule
Changing an Open/Close Schedule
Creating Schedules for Special Days and Holidays
Creating Schedules for Special Periods
Understanding the Composite Schedule
Viewing Entries in the Alarm Log
Inserting Comments into the Alarm Log
Removing an Installation from Test
Changing the Display of the Test Queue
Viewing Details of an Installation
Searching for Open/Close Statuses
Viewing Details of an Installation
Viewing Service Log Entries — Service Tickets
Creating a New Service Request
Viewing the Miscellaneous Service Log
Paging a Technician or Installer from the Service Request
Using the Communication Log Queue
Setting Up Alarm Translation Tables
SBN OVERVIEW
Module topics
This module includes the following topics:
Logging on to SBN
Using the SBN Main Menu
Searching for Programs
Creating Custom Menus
Configuring SBN Options
Searching for Accounts
Logging off of SBN
Logging On to SBN
 Log on to SBN the same way you log on to
most Windows applications.
Log on to SBN the same way you log on to
most Windows applications.
To log on to SBN:
Start SBN. The Logon dialog box opens.
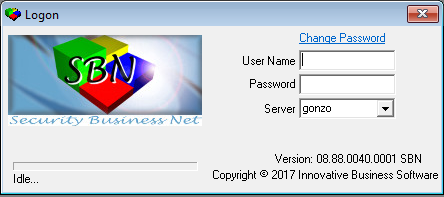
Complete the following fields:
In User Name — type your user ID.
Note: This field is not case-sensitive.
In Password — type your password in upper case.
Note: This field is case-sensitive.
If the version on the machine does not match the version specified on the server, SBN asks if you want to proceed.
In Server – Choose the server, if it does not already appear.
The SBN Main menu opens.
If the version on the machine does not match the version specified on the server, SBN asks if you want to proceed.
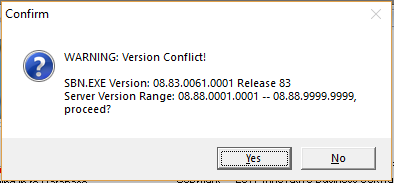
Note: Some companies may prevent user from logging in if a version conflict exists.
Using the SBN Main Menu
When you first open SBN and maximize the
window, you see four main areas of the window:
SBN menu in the left pane
Menu bar
Custom menu 1thru 10 (initially blank)
Status bar

Working in the SBN Main Menu
In the main menu you can explore, view, and search the menu tree. The menu lists all programs available in SBN, based on your user access profile. You can create, and name multiple custom menus based on your user function.
You can access the main menu from anywhere in SBN by using the shortcut [CTRL+M].
Expanding/Collapsing the Menu Tree
You can expand or collapse the entire menu tree.
To expand the menu tree:
Right click on the main menu, select Menu.
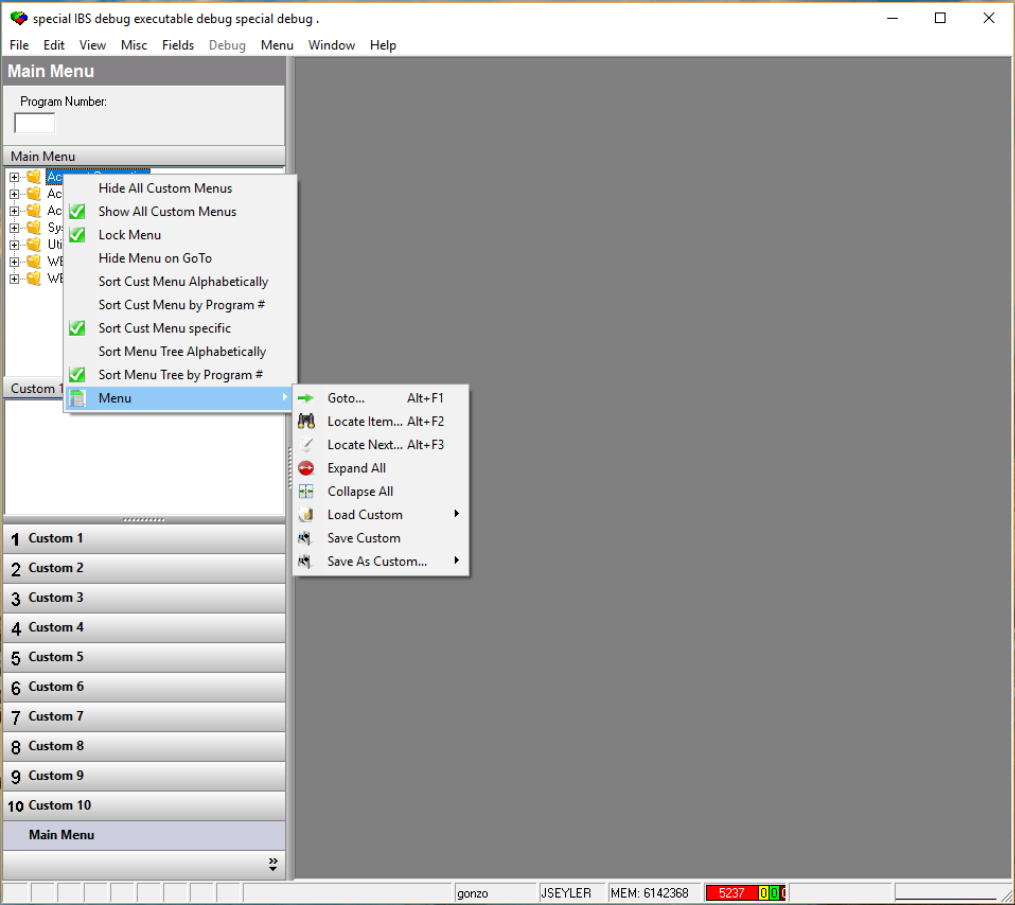
Choose Expand All.
The menu expands to display a list of all programs available in SBN.
Collapsing the menu tree
From the main menu, select Menu.
Choose Collapse All.
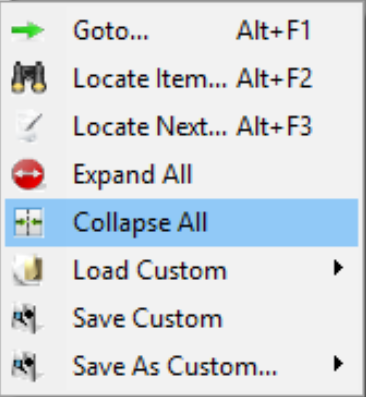
The menu collapses to its original state.
Searching for
Programs
You can access an SBN program by:
Locating the program name in the main menu of SBN and double-clicking it
Using the Locate Item menu options
To search for a program by name:
From the main menu, select Menu.
Choose Locate Item [ALT+F2].
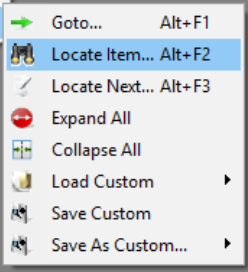
The Locate Item dialog box opens.
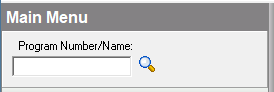
Type part or all of the program name or number.
Note: Try to type only the first letters/digits that you are certain about as the search feature looks for an exact match.
SBN locates the first program name that matches your search.
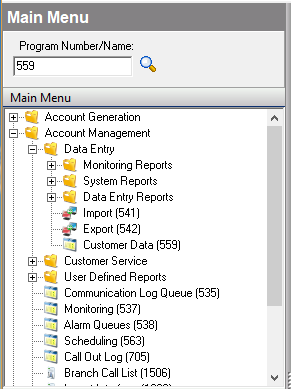
If the program is not the one you need, choose Locate Next [ALT+F3].
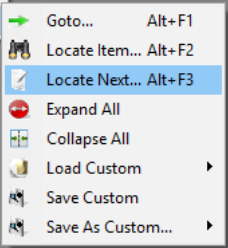
SBN locates the next program name that matches your search.
Using a Shortcut to a Program
Once you become familiar with program
numbers, you can use the SBN shortcut Go To, which
takes you directly to that program when you type the number.
To use the shortcut:
If you have several windows open, be sure to access the main menu first as you cannot use this feature from any other window.
In the main menu, select Menu.
Choose Go To [ALT+F1].
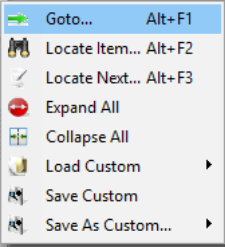
The Go To dialog box opens.
Type the three or four digit program number.
Press ENTER.
The main window of the program opens.
Creating Custom
Menus
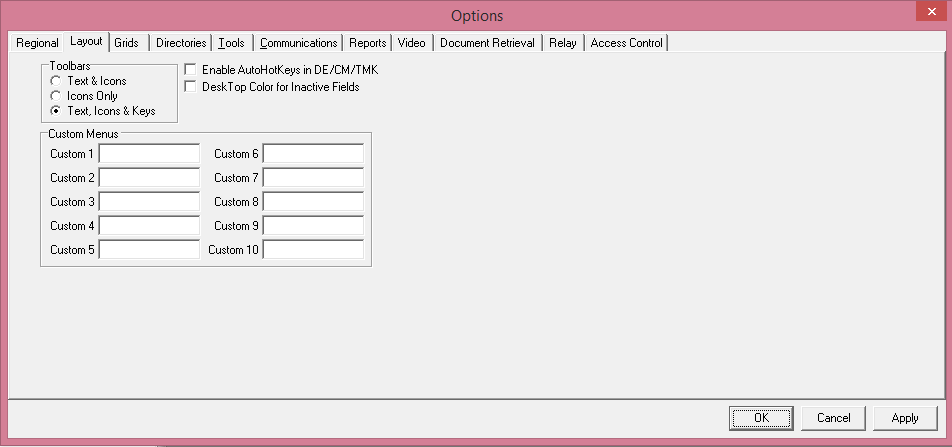
You can create up to ten custom menus by selecting the program you use most and dragging it into the right pane of the window. SBN provides ten custom menu names (numbered 1-10), but you can create your own descriptive names in SBN Options.
To create a custom menu:
In the main menu, select Menu.
Expand the menu to see available programs.
Locate the first program you want to add to the custom menu and drag it and drop to the custom menu
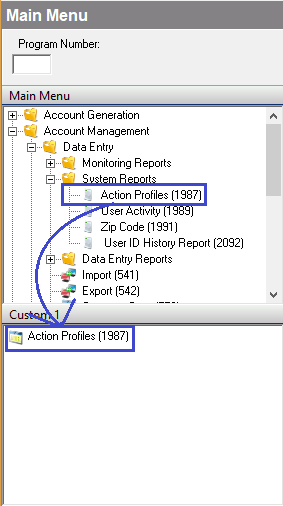
Locate each program that you want to add and drag then drop.
Note: To remove a program from a custom menu, you can drag it from the custom panel and back into the main menu.
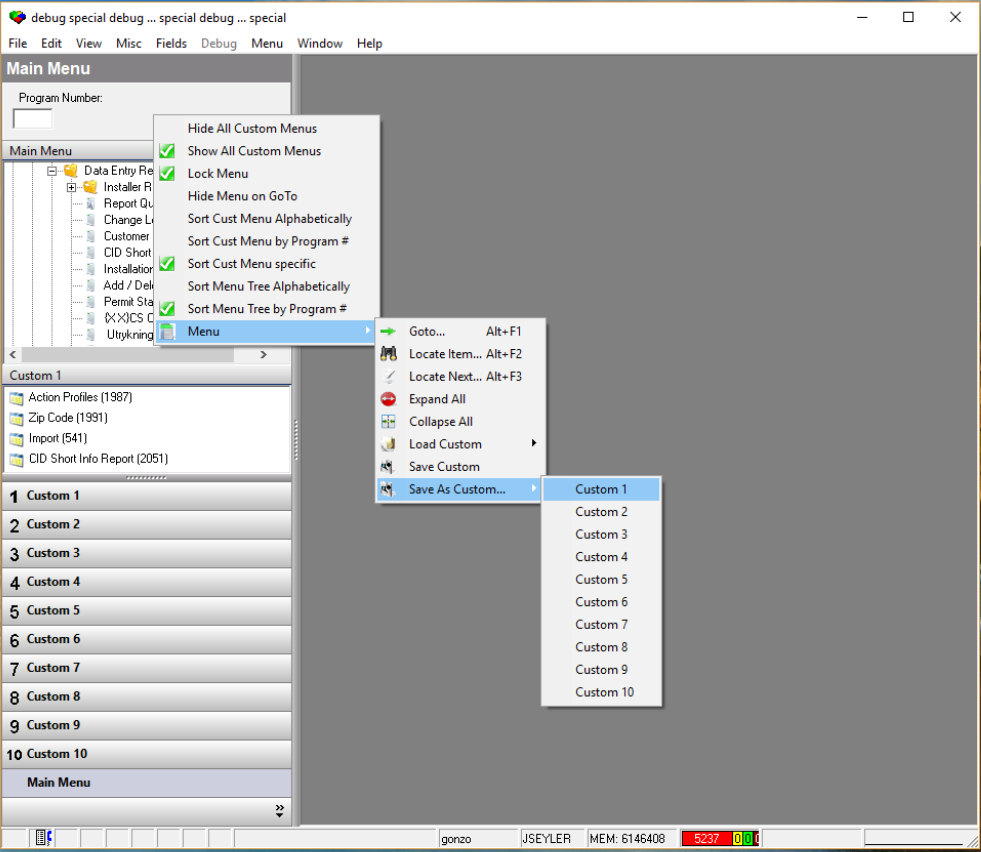
Right click on Menu > Save As Custom and choose a custom menu number (1-10) from the list.
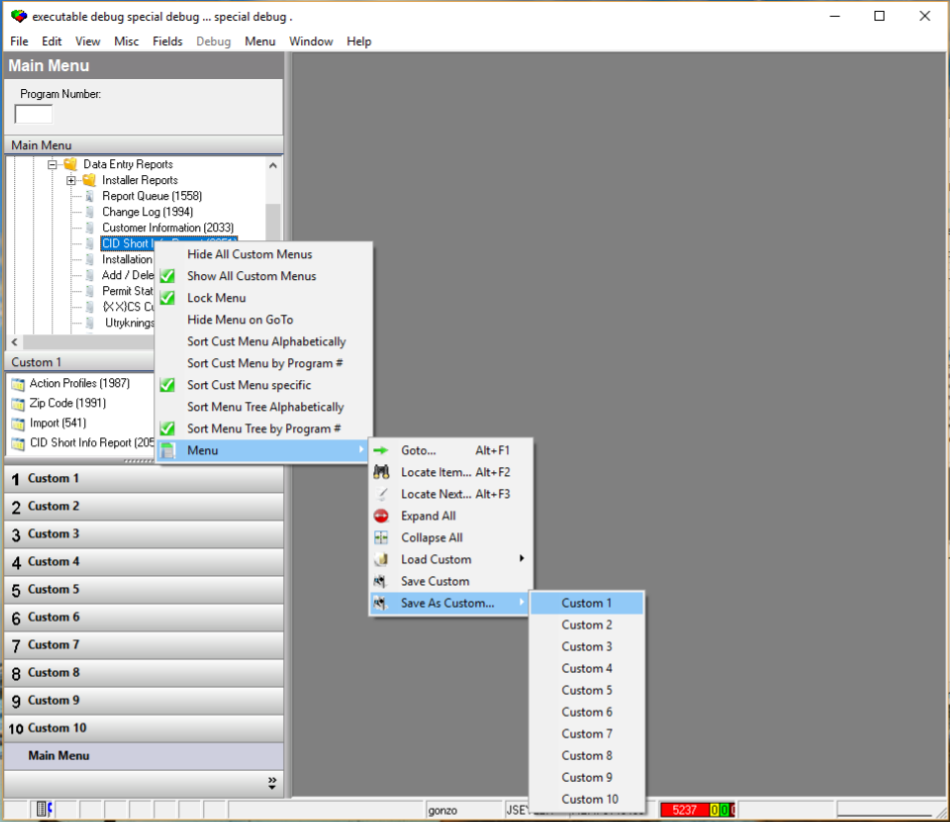
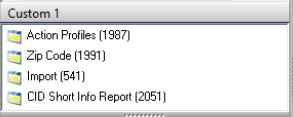
SBN adds your custom menu to the list.
Loading a Custom Menu
When you log into SBN, the main menu
defaults to your first custom menu.
To load any other custom menu:
In the main menu, Right click >Load Custom.
Select the custom menu you want to open.
The title bar displays the name of the menu.
Naming Custom Menus
To name your custom menus:
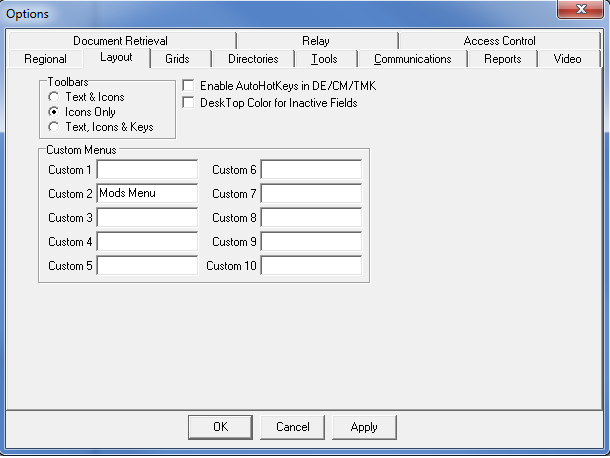
In the main menu, choose View > Options [CTRL+O]. The Options window opens.
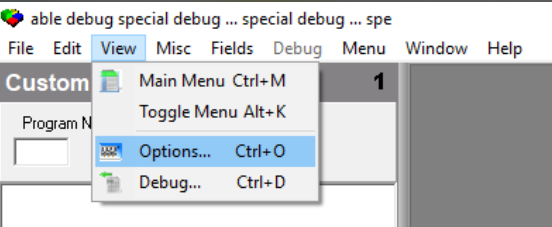
Select the Layout tab.
The Options program displays the Layout tab.
In the Custom Menus fields type descriptive names for your custom menus.
Choose Apply. SBN saves the names of your custom menus.
Configuring SBN
Options
SBN contains several options tabs so that you can customize the way SBN displays information.
To access the Options tabs from anywhere in SBN, choose View > Options [CTRL+O].
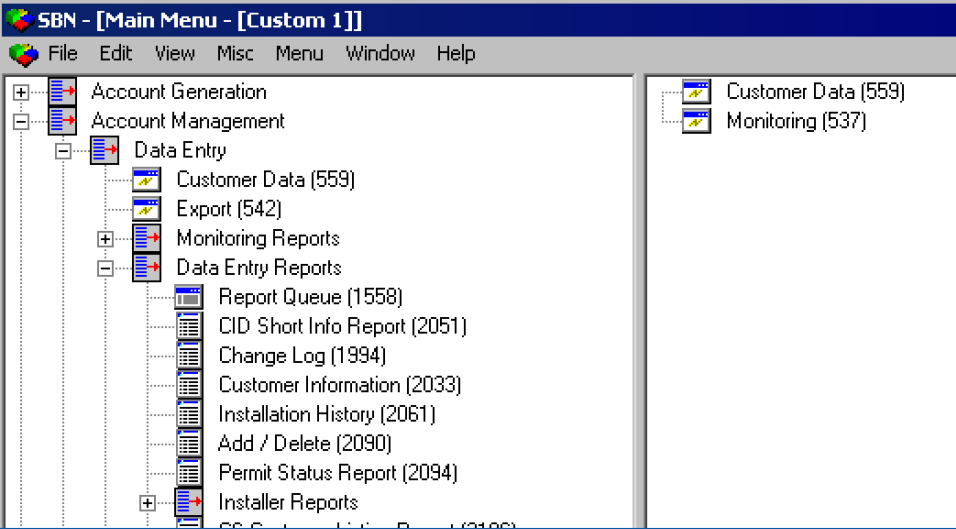
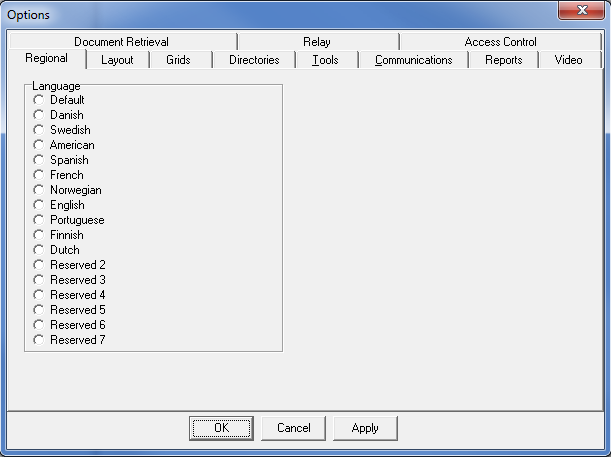
The Options Window
The following graphic shows the options window. The window defaults to the Regional tab.
Configuring Regional Options
Use the Regional tab to specify the language in which SBN text appears. If text appears in a language you do not use, set your regional options to Default.
To configure your regional options:
In the Regional tab, click the radio button to the left of one of the following:
The specific language you want to use.
Default.
Choose Apply.
SBN saves your regional options.
Configuring Layout Options
Use the Layout tab to specify the appearance of toolbars in SBN.
To configure your layout options:
From the Options window, select the Layout tab. The Options window displays the Layout tab.
Select a toolbar option.
Text & Icons — SBN displays toolbar buttons with text and icons.

Icons Only — SBN displays toolbar buttons with icons only.

Text, Icons & Keys — SBN displays toolbar buttons with text, icons, and hotkeys.

Select or clear the Enable AutoHotKeys in DE/CM/TMK (Data Entry, Contract Master, and Marketing) option.
Note: To avoid conflicting hotkey assignments, SBN uses a method that reassigns hotkeys as Innovative adds or removes features, so they may change occasionally. The current hotkey is always the underlined character in the menu item or label. For example, the menu item File has F for the hotkey. Use the hotkeys, by pressing ALT+ the hotkey, or in this example ALT+F.
Select or clear the Desktop Color for Inactive Fields. This changes the background color of inactive fields when you view windows in SBN.
Note: When you select Desktop Color for Inactive Fields, all inactive fields in SBN change to the Windows desktop color. You can configure the desktop color according to user preference.
Note: If your desktop color is white and you select Desktop Color for Inactive Fields, your inactive fields will appear the same in both View mode and in Change mode.
Choose Apply.
SBN saves your Layout options.
Note: If you are in an SBN program when you change your options, you will need to close the program and reopen it to see your changes applied.
Configuring Grids Options
Use the Grids tab to specify how SBN will display grids in different windows.
To configure your grids options
From the Options window, choose the Grids tab. The Options window displays the Grids tab.
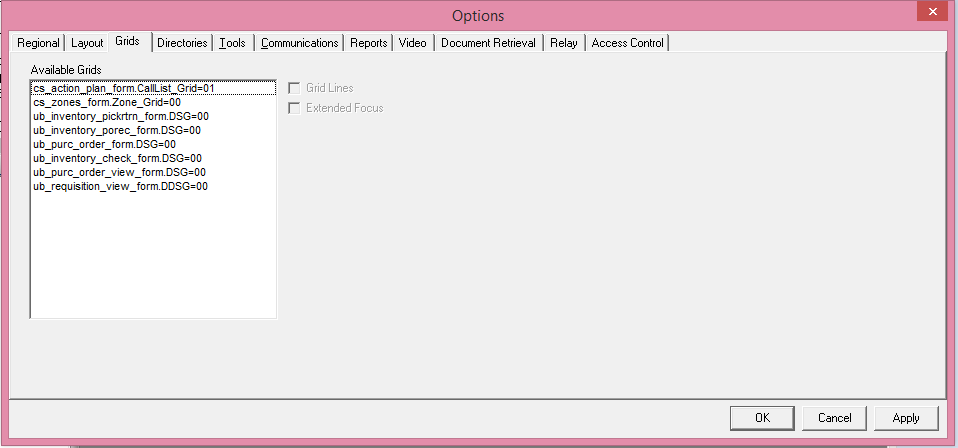
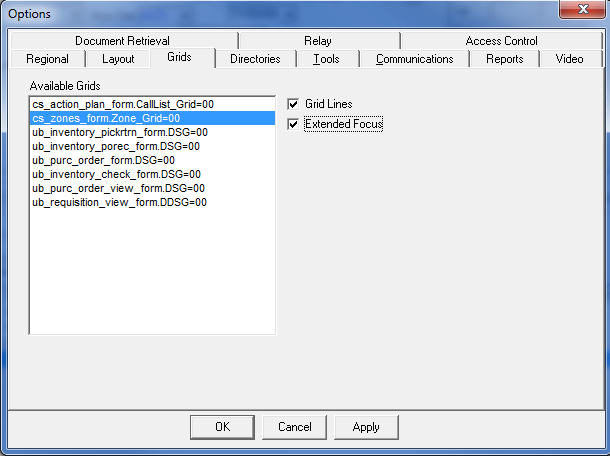
To enable grid lines, select the form name and enter a check mark in the Grid Lines box.
Choose Apply.
Note: When you view the selected grid, grid lines will appear. See the example below.
To enable extended focus (enables SBN to highlight the row and column in a grid), select the form name and enter a check mark in the Extended Focus box.
Choose Apply.
Note: When you view the selected grid in change mode, SBN will highlight the row and column and will focus on the selected cell. See the example below.
Repeat steps 2-5 for each form, as needed.
Searching for Accounts
You may access the Search window in SBN
from the following programs:
Marketing
Customer Service
Data Entry
Monitoring
Contract Master
In each of these programs, you can choose Search [ALT+F1] to access the Search window.
Important: You cannot be in New or Change mode when you perform a search.
You can perform three kinds of searches:
Basic — requires that you search with specific information, such as a phone number or passcard.
Advanced — allows you to search with partial information with wildcards.
Check — allows you to search with a wildcard for check number. Additionally, you can search by a range of payment dates or by a range of payment amounts.
Performing a Basic Search
You can access the Basic tab in the Search window from the following programs:
Marketing (program #562)
Customer Service
Data Entry (program #559)
Monitoring
Contract Master
The following graphic shows the Basic tab.

When you search for a record using the Basic tab, you can fill only one search parameter. You cannot use wildcard characters except in the CID field. You can type a partial CID with the % wildcard and the search will display a list of results.
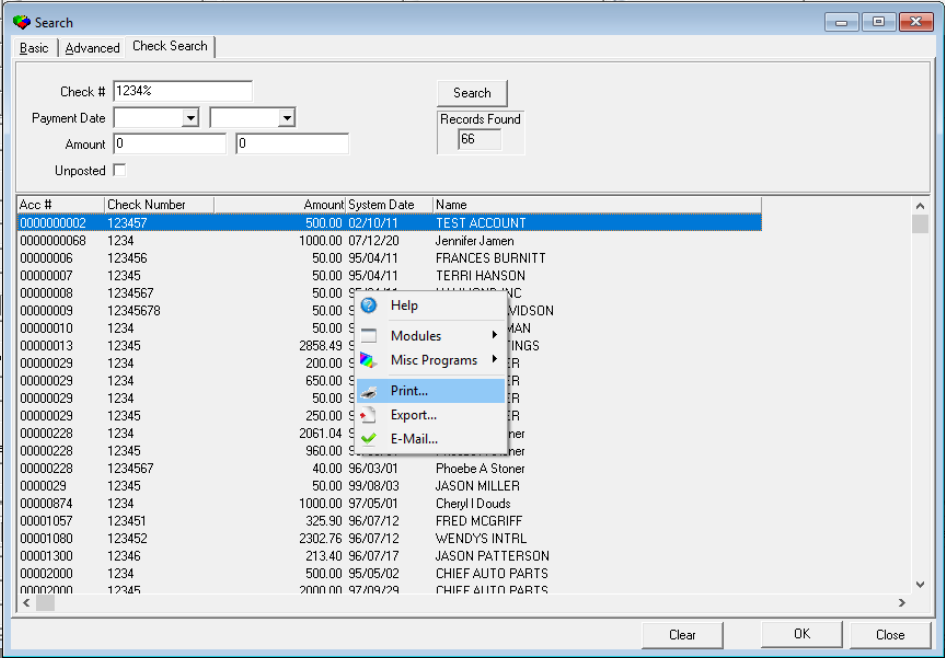
If SBN locates a single record, SBN automatically displays it in the program from which you began the search. If SBN finds multiple records that match your search parameters, a dialog box opens from which you can choose the correct record. You can right-click in the list and choose Print to print the entire list of results.
To perform a basic search
In a program that offers the search feature, choose Search [ALT+F1]. The search window opens and displays the Basic tab.
Complete one search parameter. You may choose to the right of many of the parameters to browse for the relevant information.
In CID — select a customer number. You can type a % wildcard with a partial CID.
In Passcard — type the passcard number.
Note: While passcards are unique, some codewords (account or contact) may be the same. If option ba121 is on, the search includes these codewords.
Note: If you access the Search window from Insert Test or Open/Close Status, and type a passcard and extension, the passcard and extension will default into Insert Test or Open/ Close Status.
In Phone — type the phone number.
In Payment No — type the credit card or bank account number in the first field, followed by the routing number in the second field. You may leave the routing number field blank.
In Tax No — type the tax number.
Press [ENTER].
One of the following occurs:
If only one result matches your search parameters, SBN displays the account information in the program from which you accessed the Search window.
If more than one result matches your search parameters, a dialog box opens with the search results. Select the correct account.
To print the search results in the dialog box, right-click in the list of results and choose Print.
To perform another search, choose clear.
Repeat steps 2-4.
Performing an Advanced Search
You can access the “Advanced” tab in the Search window from the same programs as the Basic search.
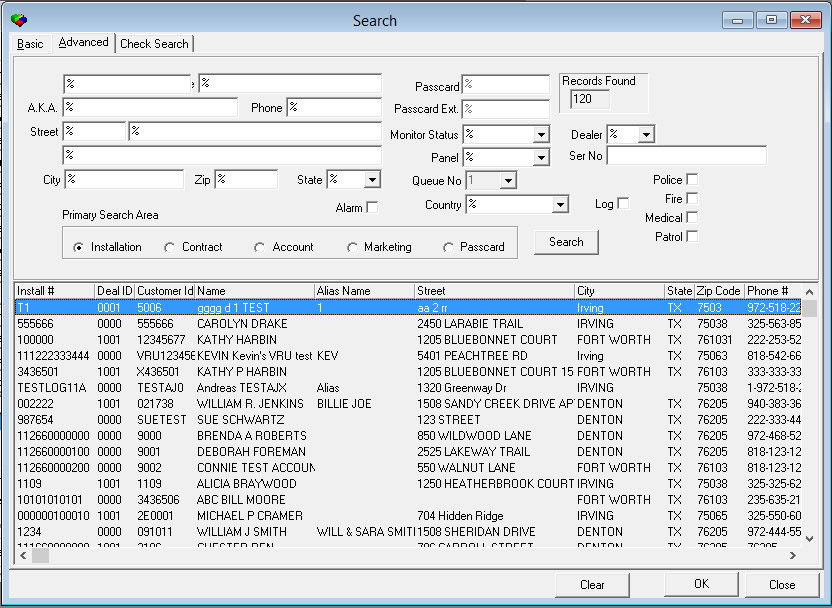
The following graphic shows the “Advanced” tab.
In an advanced search you can use partial information with wildcards. The search parameters in the “Advanced” tab are case sensitive, so you must type data exactly as the database stores it.
You can type as much or as little information in the search parameters, as needed. The more information you enter, the more you limit the search. The less information you enter, the longer the search may take, and the results may be extensive. If you leave all fields blank, SBN searches all records. Innovative recommends that you limit your search as much as possible.
The “Advanced” tab displays search results differently depending on the area you select in the Primary Search Area radio buttons:
Installation number for Installation
Contract number for Contract
Account number for Account
Inquiry number for Marketing
The search results also display the monitoring status for each account that matches your search parameters.
Note: The radio button defaults to the area from which you accessed the Search window, but you may override the default.
Using Wildcard Characters
You may use wildcard characters in every search parameter in the “Advanced” tab. With wildcard characters you can type partial information to search for specific data.
The wildcard characters tell the search feature what to look for. For example, if you are familiar with searching using MS-DOS, you probably know that an asterisk (*) is a wildcard that can represent any number or type of characters. In SBN, you can use several types of wildcard characters. The following table describes the wildcard characters available in SBN.
| Wildcard | Use |
|---|---|
| % | Use percent sign a to represent any number of characters. Examples: To search for all phone numbers beginning with “972”, type?972%. Results will include numbers such as 972-555-1212 and 972-1234. To search for all names ending with “sen”, type?%sen. Results will include names such as Jacobsen, Dobsen, and Williamsen. |
| _ | Use an underscore character to include any single character. Examples: To search for all results for Sheryl or Cheryl, type?_heryl. To search for all results for Smith or Smyth, type?Sm_th. |
| [ ] | Use brackets to include a specific range of characters, such as [a-f] or [1473-1500]. Example: To find an address on a specific block, type?[800-900] Main Street. Results will include addresses such as 800 Main Street, 819 Main Street, and 900 Main Street. |
| [^] | Use a carat to exclude a range of results. Example: To find addresses on a street, excluding a specific block, type %[^800-900] Main Street. Results will include addresses such as 518 Main Street and 10015 Main Street, but not 800 Main Street or 850 Main Street. |
Tips for Successful Advanced Searches
When you perform an advanced search, remember the following:
Last and First Name, Telephone, Street name/number are indexed fields, meaning SBN can search these fields more quickly. We recommend you type the known information in the first part of the field and then type the % wildcard. This speed’s up the search because SBN searches alphabetically. For example, if you are trying to find a customer named Hanson or Hansen, you might type Hans% for the search criteria in the name field.
Street address: Do not use the % wildcard for the street number. Generally, the fastest search method is to type the house number (in Street 1) followed by % (for any street name).
If you do not find an account after a first attempt, try again with less information. For example, if the known information is ANGELA SMITH and the search did not find the account, you might try ANGELA%. You could find the last name was misspelled.
To perform an advanced search
From a program that offers the search feature, choose Search [ALT+F1]. The SBN Search window opens.
Select the Advanced tab.
The Search window displays the “Advanced” tab. All fields default with the % wildcard.
Narrow the search by completing one or more fields.
Choose Search.
If one result matches your search parameters, SBN displays the account information in the program from which you accessed the Search window. SBN Overview
If more than one result matches your criteria, SBN displays a list in the pane below the search parameters. Choose the correct account from the list.
To perform another search, choose Clear.
Repeat steps 2-4.
Performing a Check Search
You can access the Check tab from the same programs as the Basic and Advanced tabs:
Marketing
Customer Service
Data Entry
Monitoring
Contract Master
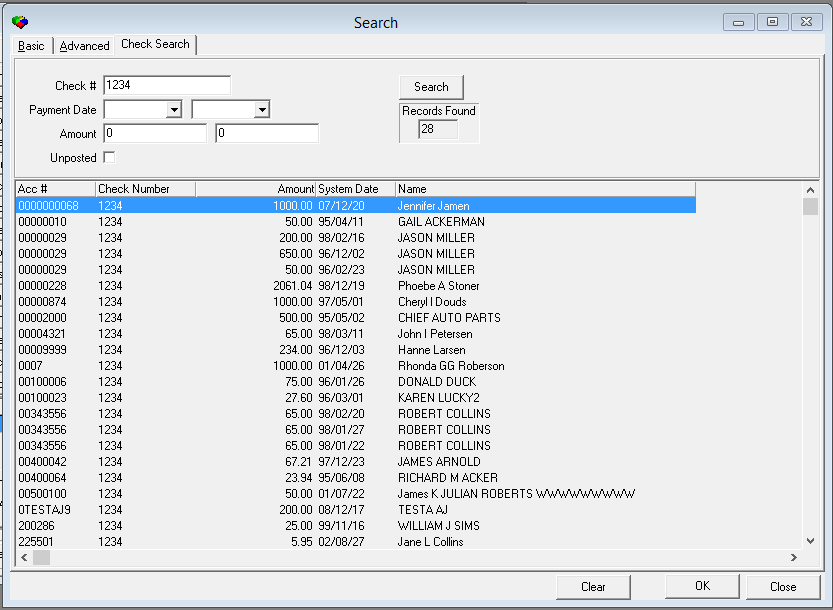
The following graphic shows the Check tab.
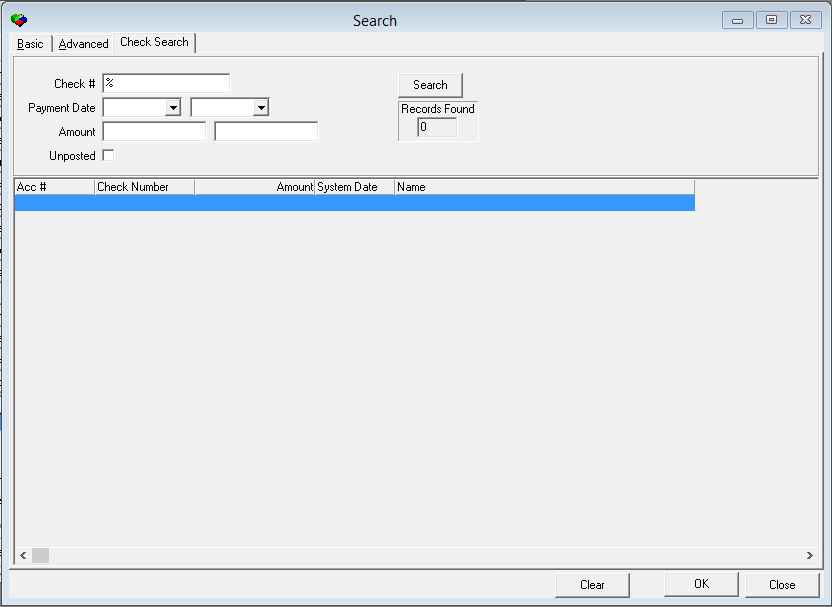
When you search for a record using the Check tab, you must enter a check mask or a range of payment dates. You can type a partial check number with the % wildcard.
To perform a check search
From a program that offers the search feature, choose Search [ALT+F1]. The SBN Search window opens.
Select the Check tab.
The Search window displays the Check tab.
Complete as many fields as needed for your search:
In Check Number — type the check number.
Note: You can use the % wildcard to search for a partial check number.
In Payment Date — select a range of dates.
In Amount — type a range of amounts.
In Unposted — enter a check mark to include unposted payments.
Choose Search.
SBN displays a list of results that match your search parameters.
To print the search results, right-click inside the results list, and choose Print.
To clear the tab for a new search, choose Clear.
Repeat steps 3-4.
Logging off SBN
You may log off of SBN to:
Log on as another user
Exit the program completely
To log on as another user:
From the main menu, choose File > Log off.
SBN asks if you are sure.
Choose Yes. The Logon dialog box opens.
Log in as another user.
To exit SBN completely:
From the main menu, choose File > Exit. SBN asks if you are sure.
Choose Yes. SBN closes.
DATA ENTRY
Module topics
This module includes the following topics:
Data Entry
Creating a New Account
Creating a Template
Copying a Current Record
Copying Zones or Action Plans
Data Entry
This program is referred to as Service/Data Entry because some of the tabs deal with customer service while others are for data entry.
The Data Entry Window
To access this program, select Customer Data (program #559) from the main menu of SBN. Use Data Entry to enter, edit, and maintain installation information. For descriptions of the fields in this screen, refer to the full Data Entry and Basics documentation.
The following graphic shows the Data Entry window.
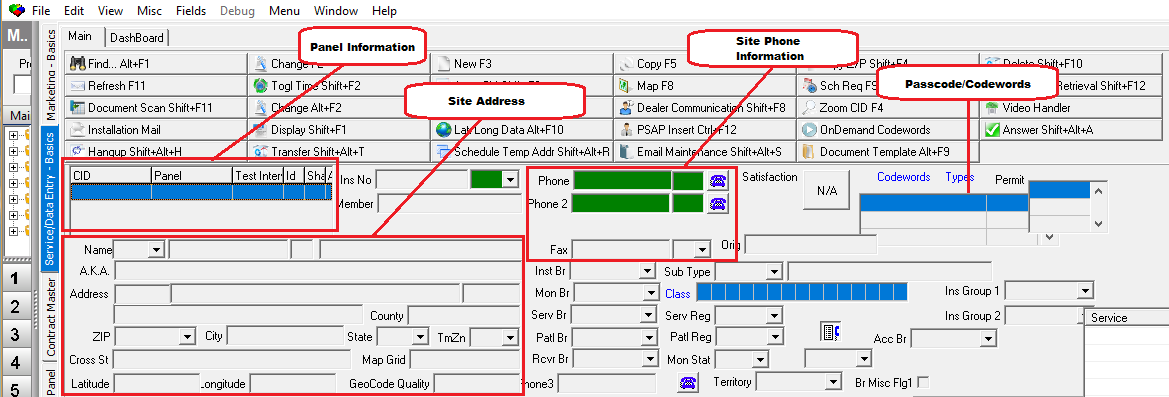
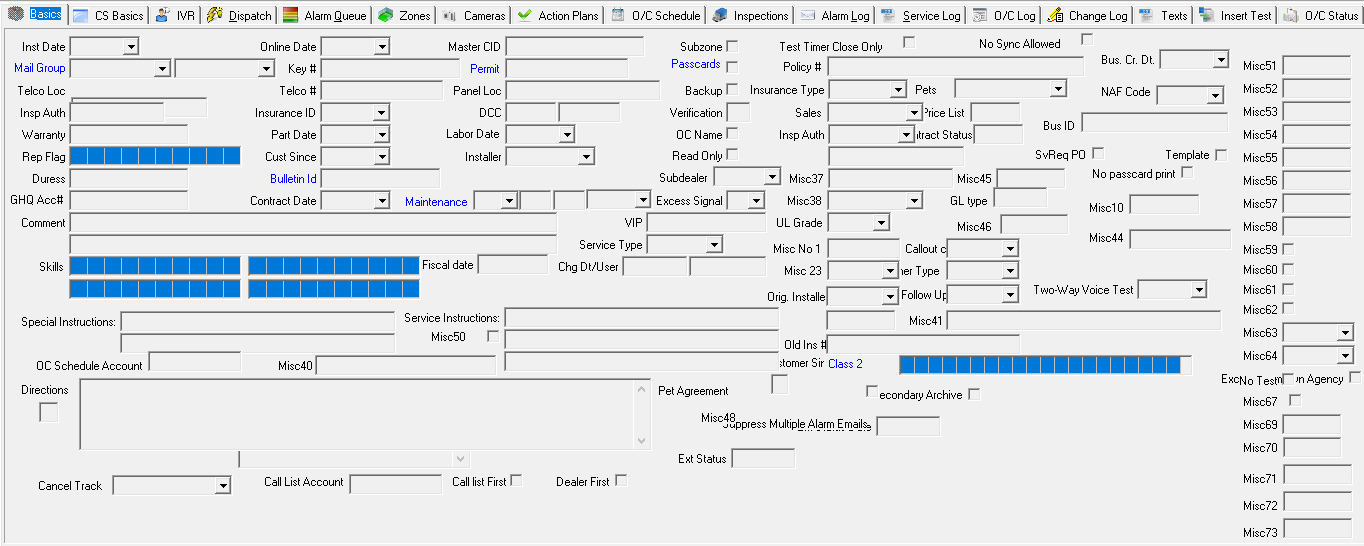
The Data Entry Basics Tab
To access the Data Entry Basics tab, select Customer Data (program #0559) from the main menu of SBN, then select the Basics tab.
Use the Data Entry Basics tab to enter additional customer information for the installation. You must be in
Change mode or New mode to enter information in the Basics tab.
The following graphic shows the Basics tab, which appears immediately below the Data Entry window.
Note: The NAF Code, Business Create Date, and Business ID fields were added to the Basics tab. These fields are customer-specific and have no SBN functionality.
Changing the Focus of the Screen
SBN provides shortcuts and graphic displays to show where your cursor is actively focused on the screen.
You can change the focus of the screen by using [CTRL+T] to toggle between the main Data Entry window and the tabs below it. When you use [CTRL+T] to shift the focus, the first fields in the section to which you are shifting highlight and flash for a few seconds.
When the focus shifts to the main Data Entry window and the first field contains data, SBN highlights the field.
When the focus shifts to one of the tabs below the main Data Entry window, SBN highlights the title of the tab and applies all keyboard actions to the tab.
Creating a New Account
In Service/Data Entry you can create new installation record.
You must be in New mode in Data Entry to create a new installation record.
To enter a new account in Data Entry:
1. In Service/Data Entry, choose New Record [F3].
All fields open. A new row of buttons appears above the CID grid.
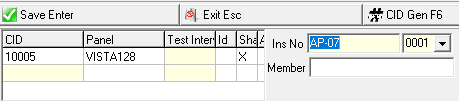
2. In the CID grid, type a new CID or choose Auto Generate CID [F6].
If you choose Auto Generate CID [F6], SBN displays the generated CID.
3. Enter details in the CID grid
or...
Choose Zoom in/out of Sublevel [F10].
The CID grid appears in an easier-to-read dialog box with the generated CID number.
4. Enter details in the CID Zoom dialog box.
5. Choose Save Record [ENTER].
The CID pop-up window closes, and the details appear in the CID grid.
6. In Ins No — type a new installation number or choose Auto-Generate Ins# [F7].
7. Complete the fields.
Note: The dealer that a user selects for the installation determines which branches appear in the drop-down menus for the Data Entry Branch fields (Installation Branch, Monitoring Branch, Service Branch, etc). The Branch field menus only display branches associated in Branch Profiles (program #1530) with the dealer a user selects for the installation.
8. Choose Save Record [ENTER].
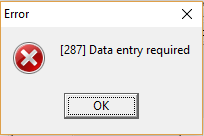
Note: You must complete all required fields before you can save your changes. If you attempt to save without completing one or more required fields, those fields flash several times and then SBN displays the following message:

Creating a Template
Once you create an account, you can save it as a template to prevent other users from changing the information.
To create a template:
1. In Service/Data Entry create a new account.
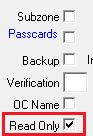
2. In the Basics tab, enter a check mark in Read only.
3. Choose Save Record [ENTER].
Note: You may now use this account as a template and copy the information into a new installation.
Note: Your action profile must include action 559/17 to change a read-only template.
Copying a Current Record
You can copy a current record into a new installation, including:
Data
Zones
Action plans
Open/close schedules
When you copy the record, you may copy the required fields or leave them blank.
To copy a current record:
1. In Service/Data Entry, choose Copy Current Record [F5].
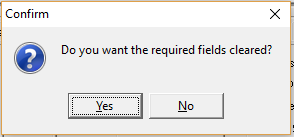
SBN asks if you want to clear the required fields.
2. Choose Yes if you want to leave the required fields blank; choose No if you want to copy the entire installation.
3. Enter a CID manually or choose Auto Generate CID [F6].
4. Complete the fields, as needed.
In Ins No — you can manually enter the installation number or choose Auto Generate Ins# [F7].
5. Choose Save New Record [ENTER].
Copying Zones or Action Plans
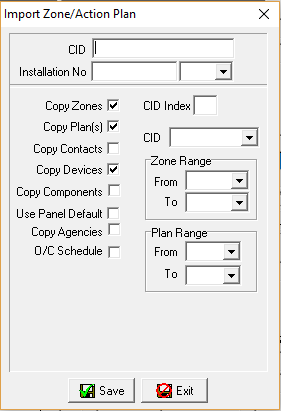
You may want to create a new installation and copy specific information from another installation. The Copy Zones / Plans function allows you to copy:
Zones
Action Plans
All Contacts from the Action Plan tab
All inspection devices
All physical components
Panel Defaults
Agencies
O/C Schedules
When you copy zones or action plans, the results of the copy function appear in the Change Log.
To use the copy zone/plans:
1. In Service/Data Entry, choose Copy Zone/Plan [SHIFT+F4].
An Import Zone/Action Plan dialog box opens.
2. Complete the fields as desired.
3. Choose Save [ENTER].
SBN asks if you are sure.
4. Choose Yes.
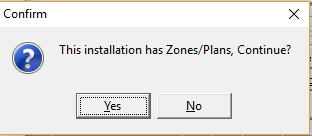
SBN informs you that the destination installation already has zones and action plans and asks if you want to continue.
5. Choose Yes.
SBN copies the information based on the parameters you selected.

ACTION PLANS
Module topics
This module includes the following topics:
Understanding Action Plans
Using the Call List
Dealer Call Preference
Understanding Action Plans
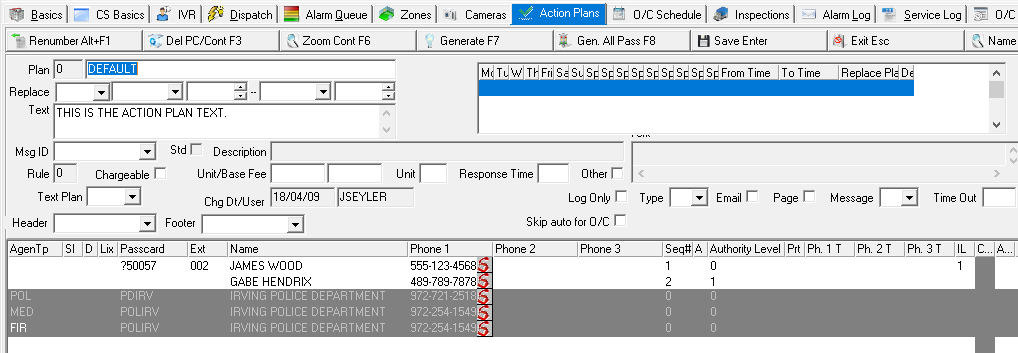
Use the Action Plans tab to create an action plan — a customer-defined method for handling an emergency situation such as a fire or break-in. Each installation must have at least one — but may have an unlimited number — of action plans. You may create a temporary plan for each action plan. You may also enter patrol information for each plan.
From Action Plans, you can create plans for everyday use, temporary replacement plans, and permanent substitute plans. Create temporary replacement plans for periods of two weeks or less; dispatchers typically use these plans when a customer goes out of town or is on vacation. Create permanent substitute plans for specific days of the week or holidays; dispatchers typically use these plans when a customer has a different schedule on a particular day of the week. For instance, if the customer’s mother visits every Monday and she needs special assistance, the customer would request a permanent substitute plan for Mondays in case of an emergency.
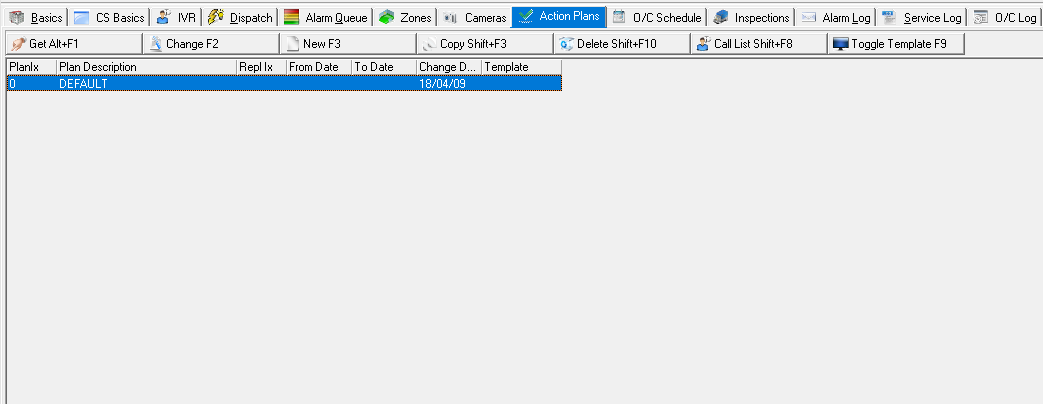
The Action Plans tab displays information about all plans and contacts for each installation.
To access the Action Plans tab, select Service/Data Entry (program #0559) from the main menu of SBN, then select the Action Plans tab.
The tab displays previously defined action plans for the installation.
For descriptions of the columns in this screen, refer to the full Action Plans documentation.
Viewing Details of an Action Plan
SBN allows you to view the details of defined action plans for an installation.
To view details of an action plan:
1. In Service/Data Entry (program #0559), open the account for which you want to view an action plan.
2. Select the Action Plans tab.
3. Select the action plan you want to view.
4. Double-click your selection or choose Get Record [ALT+F1].
The details of the action plan appear in the lower left pane of the Action Plans tab.

Adding an Action Plan
An installation can have multiple action plans.
To create an action plan:
1. From the Action Plans tab, choose New [F3].
The tab displays the Action Plans window with open fields.
2. Complete fields.
Note: In a cell that contains a menu; use the Page Down button to expand the menu. Use the down arrow to drop to next row.
3. Choose Save [ENTER].
Changing an Action Plan
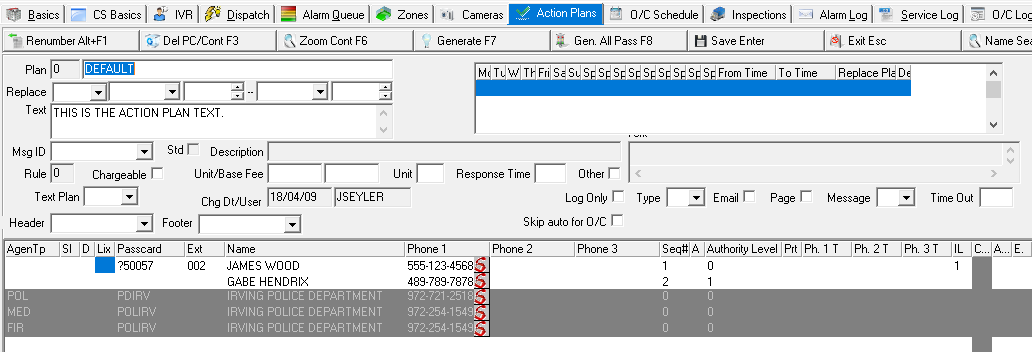
You may need to change an action plan.
To change an action plan:
1. From the Action Plans tab, select the action plan you want to change.
2. Choose Change Record [F2].
The tab displays the Action Plans Change window with open fields.
3. Change details, as needed.
Note: In a cell that contains a menu; use the Page Down button to expand the menu. Use the down arrow to drop to next row.
4. Choose Save [ENTER].
Viewing Agency/Contact Details
You can view details of any agency or contact on any action plan from the details screen of an action plan or from the Action Plans Change window.
To view agency/contact details:
1. Choose Zoom Agency or Contact [F6].
The Passcard Holder and Agency Information table at the bottom of the Action Plans tab opens with details of the selected agency or contact.
Adding Agency/Contact Details
You can add agencies or contacts to any action plan from the details window of an action plan or from the Action Plans Change window.
To add a contact:
Note: You must be in Change [F2] or New [F3] mode to complete this procedure.
1. In the Passcard holder and Agency Information table, click in a blank box under the Name column.
2. Complete the following fields:
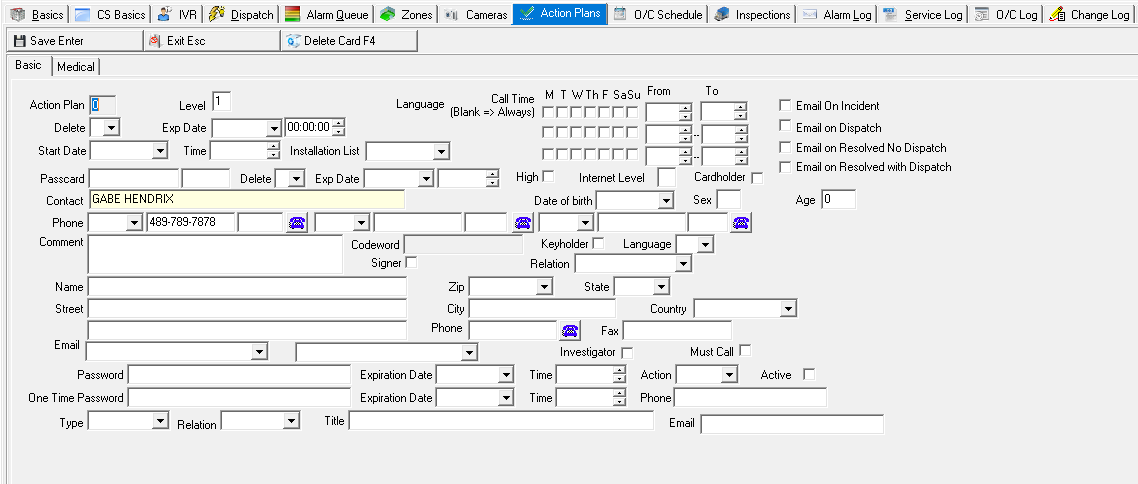
In Name — enter the name of the contact.
In Phone — enter at least one phone number for this contact.
In Sequence Number — enter a sequence number for the contact on this line.
In Authority Level — select an authority level for this contact.
3. Choose Save [ENTER].
To add an agency:
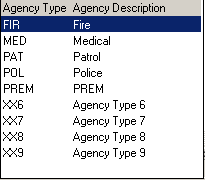
1. In the Passcard Holder and Agency Information table, double-click in an empty box under the Agency
Type field.
A menu of agency types appears.
2. Select the type of agency to add.
3. Double-click in the empty box under the Passcard field.
A menu of available agency IDs for the city and zip code of the selected account appears.
4. Select the correct agency.
SBN fills the Passcard, Name, and Phone Number fields for the selected agency.
5. Enter a Sequence Number for the selected agency.
6. Choose Save [ENTER].

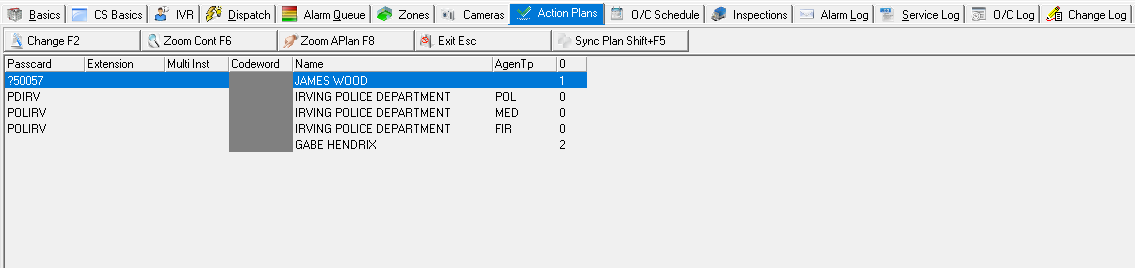
Using the Call List
The Call List contains all of the contacts for the selected installation and summarizes each call sequence for each action plan.
Viewing the Call List
You can view the Call List for the installation.
To view the Call List:
1. From the Action Plans tab, choose View Call List [SHIFT+F8].
The Call List appears.
2. After you view the Call List, choose Exit [ESC].
Changing the Sequence of a Call List
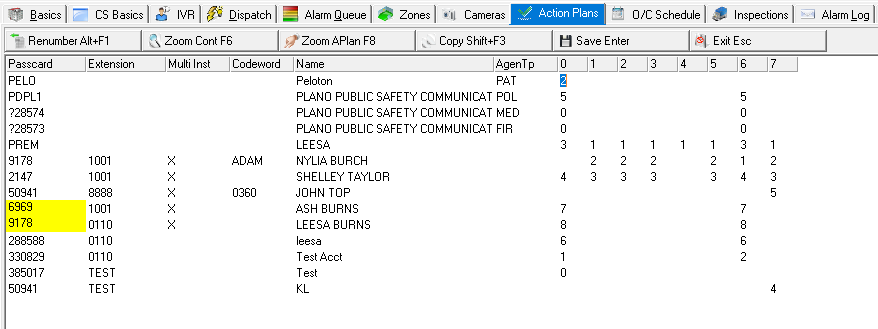
To change a call list sequence:
1. From the Action Plans tab choose View Call List [SHIFT+F8].
The Call List appears.
2. Choose Change [F2].
The grid of the Call List opens for changes.
3. Choose Renumber Contact Sequences [ALT+F1].
4. Enter all changes, as needed.
5. Choose Save [ENTER].
Dealer Call Preference
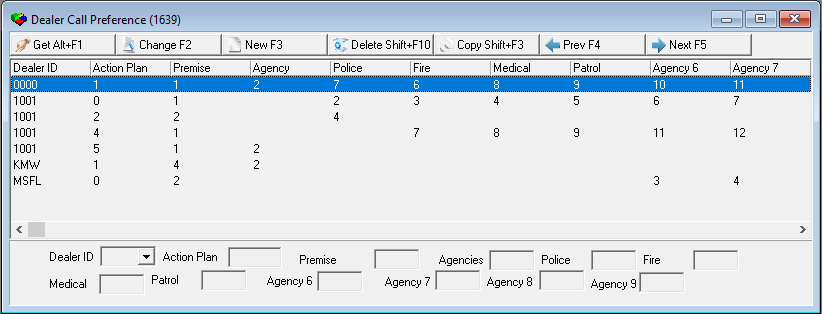
Use Dealer Call Preference (program #1639) to define the order in which premise and agency action plan contacts with a sequence number of 0 (zero) appear in the call list of Dispatch for all installations associated with a specific dealer.
The Dealer Call Preference Window
The following graphic shows Dealer Call Preference as the program opens.
Creating a Dealer Call Preference Sequence
Use the following steps to create a new dealer call preference sequence:
1. Choose New Record.
The fields open for changes.
2. Enter details of the new call preference sequence.
3. Choose Save.
Changing a Dealer Call Preference Sequence
Use the following steps to change a dealer call preference sequence:
1. Select the call preference sequence you want to change by double-clicking on it or choose Get Record.
Most fields open for changes.
2. Enter changes.
3. Choose Save.
Deleting a Dealer Call Preference Sequence
Use the following steps to delete a dealer call preference sequence:
1. Select the call preference sequence you want to delete.
2. Double-click your selection or choose Get Record.
3. Choose Delete Record.
A confirm dialog box opens.
4. Choose Yes.
SBN removes the call preference sequence from the list.
OPEN/CLOSE SCHEDULE
Module topics
This module includes the following topics:
The Open/Close Schedule Tab
Viewing an Open/Close Schedule
Creating a New Open/Close Schedule
Changing an Open/Close Schedule
Creating a Temporary Schedule
Creating Schedules for Special Days and Holidays
Creating Schedules for Special Periods
Understanding the Composite Schedule
The Open/Close Schedule Tab
Use the Open/Close Schedule tab to enter, change, and delete schedules for installations for which you want to monitor open/close times. Schedules contain operational information such as
Hours
Holidays
Temporary schedules for individual installations
You also use the Open/Close Schedule tab to enter Multiple schedules for:
Seasonal hours
Weekend hours
Holiday hours
Temporary one-time schedules
To access the Open/Close Schedule tab from the main menu of SBN, select Service/Data Entry (program
#559) then select the Open/Close Schedule tab.
Open/Close Schedule
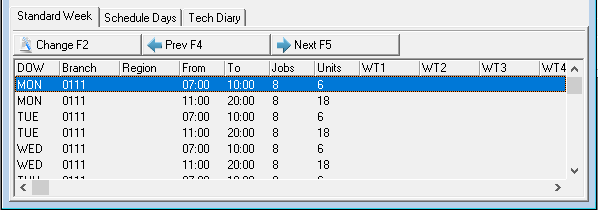
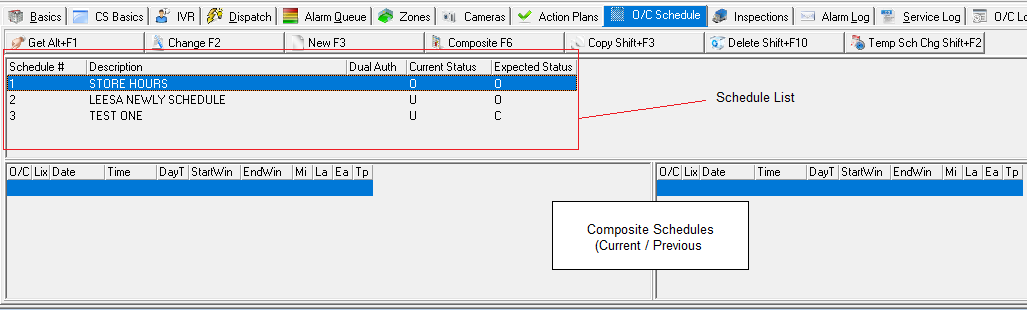
The tab displays defined open/close schedules for the selected installation in three panes:
The upper pane displays basic information about the defined schedules
The lower panes display composite schedule views
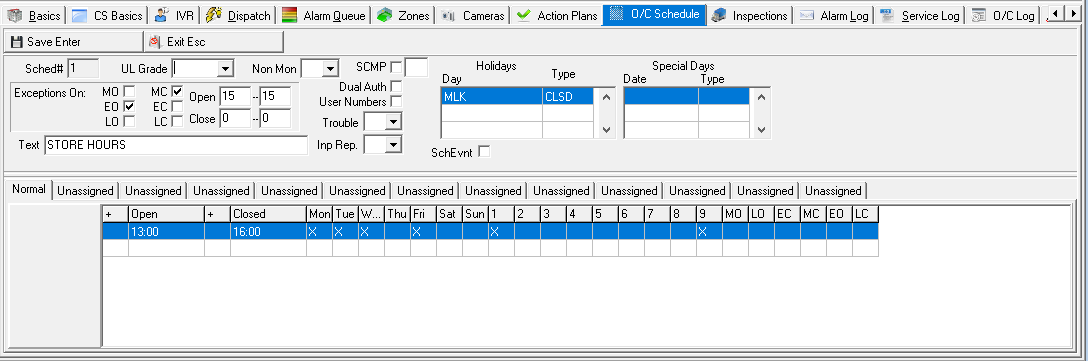
The Open/Close Schedule Window
When you choose functions in the Open/Close Schedule tab to view, enter, or edit schedule information, the Open/Close Schedule window opens. Use the Open/Close Schedules window to
Record hours and options for the open and close of an installation
Create multiple open/close schedules for a premise.
View, edit and enter all information for a schedule
The Open/Close Schedule window contains four major sections:
Schedule Grid
Exceptions
Holidays and Special Days
Special Periods
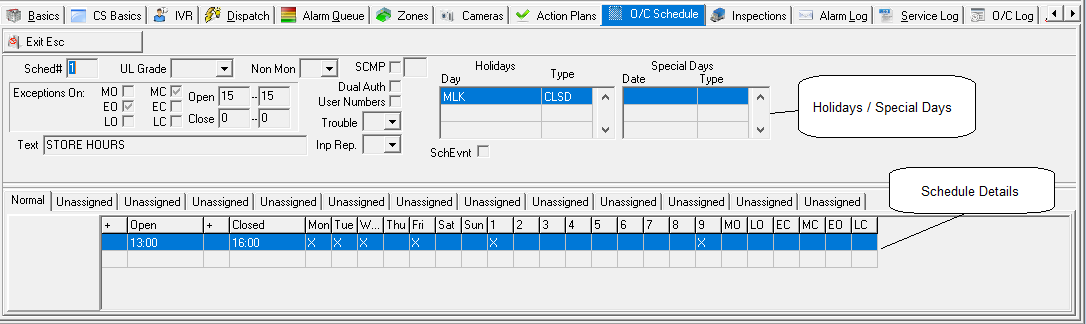
Viewing an Open/Close Schedule
To view details of an open/close schedule:
1. From Service/Data Entry, open the account for which you want to view the open/close schedule.
2. Select the Open/Close Schedule tab.
3. If the account has more than one open/close schedule, select the open/close schedule you want to view.
4. Double-click your selection or choose Get Record [ALT+F1].
The Open/Close Schedule window displays the selected open/close schedule for the selected account in read-only mode.
Note: This schedule can be used on multiple installations by listing in the OC Schedule Account. Use this field to link a CID that controls all open/close schedules for this installation. When you enter a CID in this field, the open/close schedules from that CID appear in the Open/Close Schedule tab for this installation. You cannot add or update O/C schedules from this installation; you must update them in the Open/Close Schedule account.
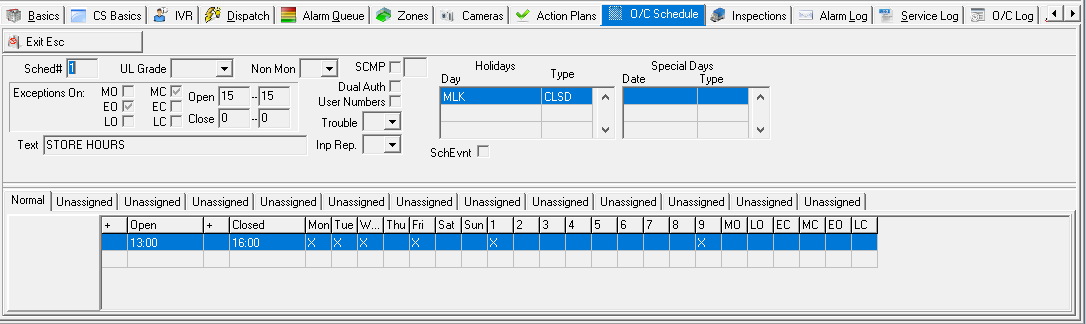
Creating a New Open/Close Schedule
You can create up to sixteen (16) open/close schedules for an installation:
Seven (7) day-of-the-week schedules
Nine (9) special day schedules
To create a new open/close schedule:
1. From Service/Data Entry, open the account for the installation for which you want to create an open/
close schedule.
2. Select the Open/Close Schedule tab.
3. Choose New [F3].
The New Open/Close Schedule window appears.
4. In the Schedule Grid — enter details by double-clicking in the right of the grid cell:
In cells in which you select an open, close, or a specific day, double-click in the right of the cell. A check mark will appear. When you go to the next field, SBN changes the check mark to an X.
In cells in which you select a time, you can manually type the time, or you can double-click in the right of the cell and use the up and down arrows to select a time.
Note: When you enter a new schedule, only one line for schedule information appears, but after you enter data in the first two fields, another line appears. The schedule grid can contain up to 20 lines.
5. In the Exceptions fields:
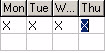
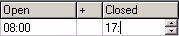
Select the exception to the schedule by clicking in the cell to enter a check mark.
In Open and Close — enter a range of minutes in which an exception may occur.
Note: Exceptions allow you to specify which type of signals you want reported for each schedule. SBN will generate alarms based on actions defined by the type of exception.
6. Choose Save [ENTER].
The new schedule appears in the Schedule List. Details appear in the current composite schedule panel.

Changing an Open/Close Schedule
To change an open/close schedule:
1. From Service/Data Entry, open the account for the installation for which you want to change an open/
close schedule.
2. Select the Open/Close Schedule tab.
3. From the Open/Close Schedule tab, select the schedule you want to change.
4. Choose Change [F2].
The Change Open/Close Schedule window opens with details of the selected schedule.
5. Enter the changes to the selected schedule.
6. Choose Save [ENTER].
Creating a Temporary Schedule
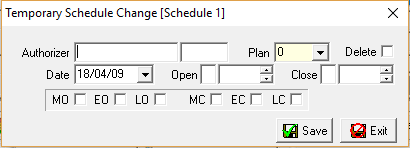
You can create a temporary schedule change from the Open/Close Schedule tab. This action is best when you need to create a schedule change for one day only.
The exceptions that you choose in the temporary window override any exceptions in the permanent schedule.
To create a temporary schedule:
1. From Service/Data Entry, open the account for the installation for which you want to create a temporary open/close schedule.
2. Select the Open/Close Schedule tab.
3. Select Temporary Schedule Change [SHIFT + F2].
The Temporary Schedule Change dialog box opens.
|
Complete the fields. | |
|
Choose Save [ENTER]. |
Creating Schedules for Special Days and Holidays
In the Holidays and Special Days grids you can create up to 50 one-day schedule changes for each open/close schedule.
Defining a Special Schedule
Before you can apply a special day or holiday schedule to a day or date, you must define the special schedule.
To define a special day schedule:
1. From Service/Data Entry, open the account for the installation for which you want to create a special or holiday open/close schedule.
2. Select the Open/Close Schedule tab.
3. From the Open/Close Schedule tab, choose Change [F2].
The Change Open/Close Schedule window opens.
4. In the Schedule Grid:
Enter schedule details in the first available line of blank cells.
Enter an X under the day number you choose for this definition. For example, if you enter an X under day
2, the schedule becomes the definition “Day 2” that will appear in the Types column of the Special Days
grid.
5. Choose Save [ENTER].
Adding a Special Day Schedule
After you define a special day schedule, you can add a special day schedule to an installation.
To create a special day schedule:
1. From Service/Data Entry, open the account for the installation for which you want to create a special or holiday open/close schedule.
2. Select the Open/Close Schedule tab.
3. From the Open/Close Schedule tab, choose Change [F2].
The Change Open/Close Schedule window opens.
4. In the Special Days grid:
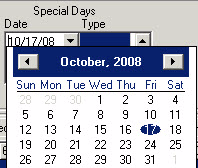
Click in the right of a blank Date field.
A calendar appears in which you select the date to which you want to apply the special day schedule.
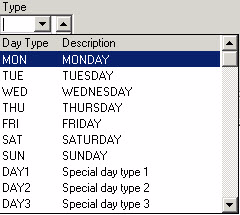
Click in the right of the corresponding blank Type field.
A menu of defined schedules appears.
Select a defined schedule to apply to the date.
5. Choose Save [ENTER].
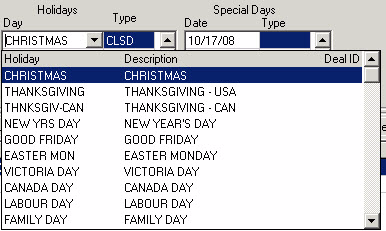
Creating a Holiday Schedule
To create a holiday schedule:
1. In the Holidays grid, click in the right of a blank Day field.
A menu of previously defined holidays appears.
2. Select the holiday to which you want to apply a schedule.
3. Click in the right of the corresponding Type field. A menu of defined schedules appears.
4. Select a defined schedule to apply to the holiday.
5. Choose Save [ENTER].
Creating Schedules for Special Periods
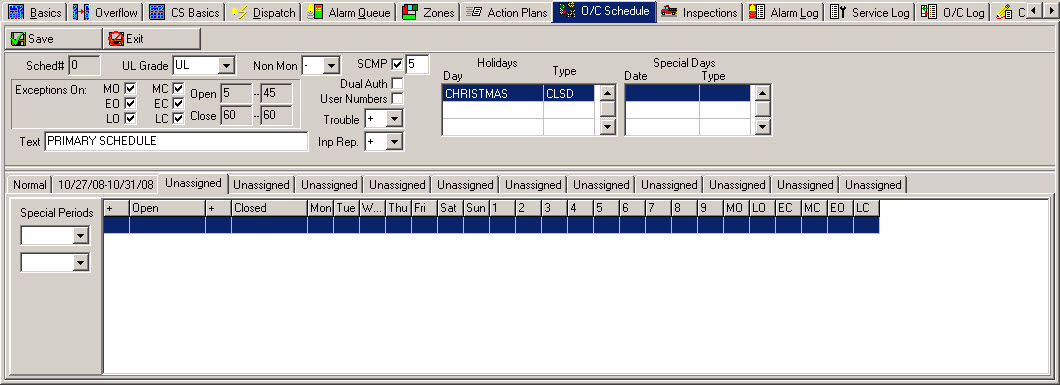
In the Open/Close Schedule tab you can also create twelve special periods in which you can apply different schedules to a group of dates.
To create special periods:
1. From Service/Data Entry, open the account for the installation for which you want to create a special period open/close schedule.
2. Select the Open/Close Schedule tab.
3. From the Open/Close Schedule tab, choose Change [F2].
The Change Open/Close Schedule window opens.
4. In the Unassigned tabs (to the right of the Normal schedule) click the down arrows of each field to select a range of dates for the special period schedule.
Calendars appear in which you select the dates to which you want to apply the special period schedule.
5. In the corresponding row of the Schedule Grid, enter schedule details.
6. Choose Save [ENTER].
Understanding the Composite Schedule
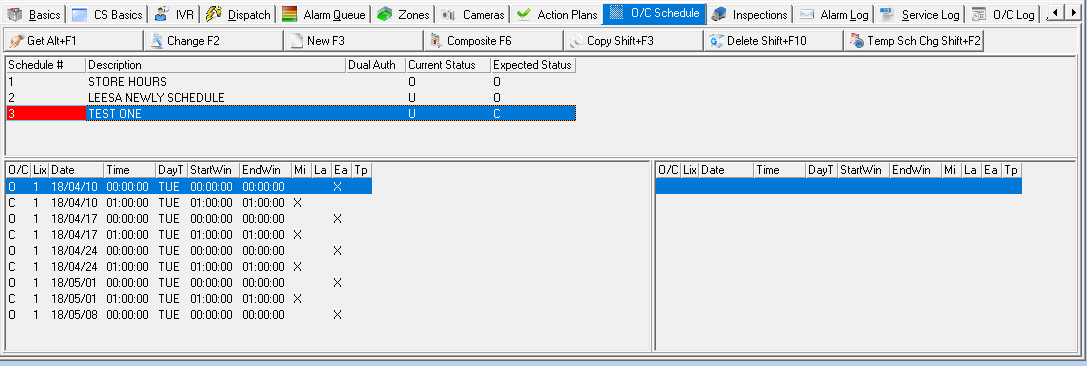
The left pane of the composite view displays the status of the current running schedule. When you make
changes to the current running schedule through the Temporary Schedule Change dialog box, the previous
current running schedule moves to the right pane.
To view the composite schedule:
1. Select the Open/Close Schedule tab.
2. From the Open/Close Schedule tab, choose View Composite Schedule [F6].
The composite schedule you are currently viewing appears in the left pane of the composite view and the number of the schedule appears highlighted in red.
If a schedule change is made, the composite schedule you were viewing moves into the lower right pane of the composite view while the new, changed schedule appears in the lower left pane.
ZONES
Module topics
This module includes the following topics:
The Zones Tab
Adding a Zone
Changing the Status of a Zone
The Zones Tab
A zone is a specific protected location or device customer’s premises. Use the Zones tab to created zone numbers for these protected locations and devices. Creating zones simplifies the identification of each
area when operators receive alarms or users do testing. The Zones tab displays:
Information about all zones for this installation
Status information about each zone, which comes from Monitoring
You can create up to 1,000 zones for each account. After Dispatch takes an alarm, the zone that generated the alarm turns red.
To access the Zones tab from Service/Data Entry (program #0559), choose the Zones tab.
Viewing the Zones Tab
The Zones tab displays information about all zones for an installation as well as helpful status information
about each zone, which comes from Monitoring. Fields in the upper left pane of the tab identify the current
view of the tab:
The Zone Screen Name field (in blue text) identifies the name of the view.
The Include/Exclude Hidden Display field indicates whether the displayed zone list includes or excludes
hidden zones.
The Include/Exclude Template field indicates whether the displayed zones include or exclude template
zones.
Changing the View of the Zones Tab
The Zones tab has two available views:

Include/Exclude Hidden Zones
Include/Exclude Template Zones
Note: When you are in Change mode, all zones appear regardless of whether you have selected Exclude
Hidden zones. When you save the changes, the display mode returns to Exclude Hidden zones if you have
selected it.
To change the view of the Zones tab:
1. From Service/Data Entry (program #559), open the installation for which you want to view zones.
2. Select the Zones tab.
3. Choose Toggle Viewing of Hidden Zones [F7] or Toggle Template [F9].
4. Repeat the procedure to return to the original view.
Viewing Details of a Zone
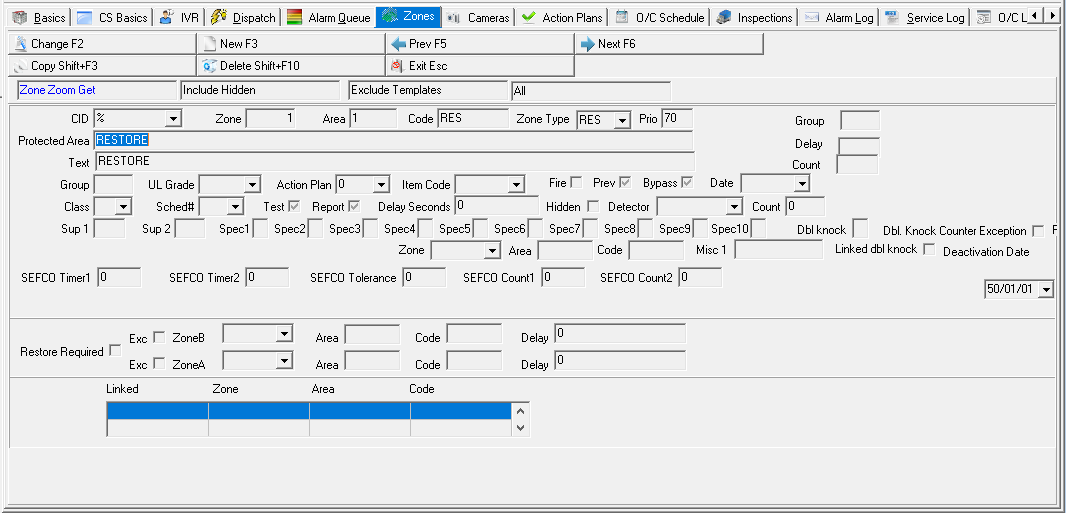
The Zones Details window displays additional information about the selected zone.
1. From the main Zones tab, select the line of the zone for which you want to view details.
2. Double-click your selection or choose Get One Zone [ALT+F1].
The Zones Details window appears with details of the selected zone.
Note: If the selected zone is a template zone, the toolbar will not display the Change Record or Copy buttons. When you choose Previous Record or Next Record the buttons available on the toolbar may change.
Note: If the CID box displays a %, the selected zone is a global zone, attached to all CIDs. Option mo156 must be “on” to support global zones.
Note: You may define system zones (from the systemzones table) as global zones.
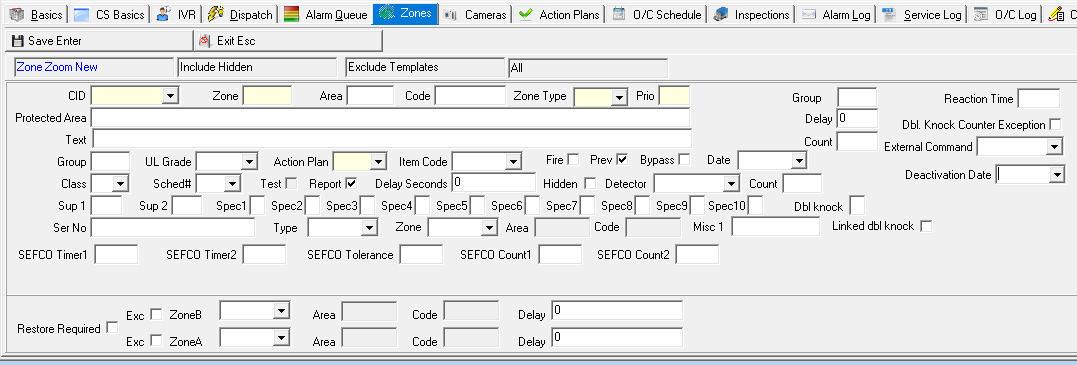
Adding a Zone
From the main Zones tab, you can add a new zone to a selected installation.
To create a new zone:
1. From Service/Data Entry (program #559), open the installation to which you want to add a zone.
2. Select the Zones tab.
3. Choose New [F3].
The New Zone window appears.
Note: In New mode the CID field defaults to %.
4. Complete the fields, as needed.
5. Choose Save [ENTER].
Note: You can also add a new zone from the Zone Details window using this procedure. If you add a new zone from the Zone Details window, you will see this same window.
Note: You may define a zone for a system-generated O/C exception — such as an MC or MO — with an area and then attach that zone/area combination to an action plan. Then, when those system-generated O/C exceptions occur, SBN will route the event depending on the zone/area combination.
Changing the Status of a Zone
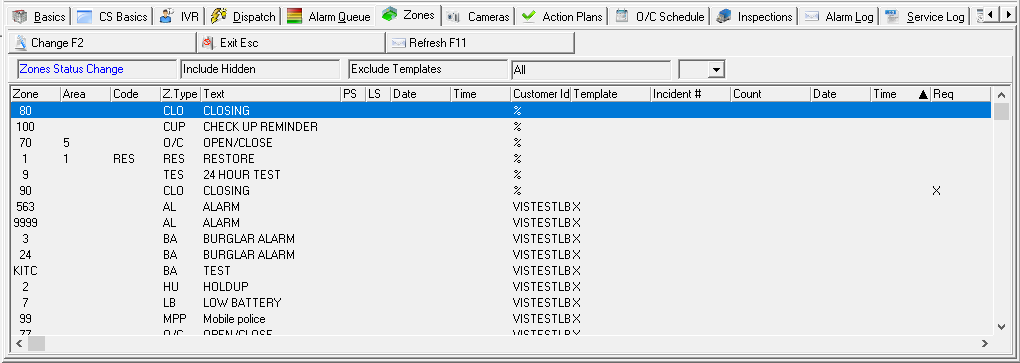
In the Zone Status window, you can manually change the physical status of an existing zone for the selected installation. You can use this function to force a zone that requires a restore to be restored without receiving a restore signal. You may choose between five status designations for the zone:
A = Alarm
R = Restore
T = Trouble
O = Open
C = Close
To change the status of a zone:
1. From the main Zones tab, select the zone for which you want to change the status.
2. Choose Change Zone Status [F8].
The Zone Status window appears.
3. Select the zone for which you want to change the status.
4. Choose Change [F2].
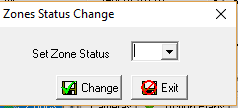
The Zone Status Change dialog box opens.
5. In Set Zone Status — select the new status for this zone.
6. Choose Save [ENTER].
Defining System Zones
The System Zones functionality allows you to attach system-generated events to actual zones, template zones, or global zones. Once your system events are linked to your predefined zones, you can enter these zone IDs into your installation. You can further route system-generated events by area. If, for example, you have Open/Close signals arriving in several different areas within a zone, you can enter your defined zone for a Missed Close and specify the area, which allows you to tie these events to separate action plans.
Example
You receive Open/Close signals on perimeter and interior zones. The Missed Close event is tied to MCL in the system zone table.
Regular open/close signals report to Zone 1, Areas 1 and 2. When a missed close comes in for Area 2, the system uses the MCL zone tied to Area 2 and uses action plan 4.
|
|
|
|
|
|---|---|---|---|---|
|
|
|
|
|
|
|
|
|
|
You can define the MCL zone for each area.
|
|
|
|---|---|---|
|
|
|
|
|
|
ALARM QUEUE
Module topics
This module includes the following topics:
The Alarm Queue Tab
Viewing the Alarm Queue
Viewing a Selected Alarm
The Alarm Queue Tab
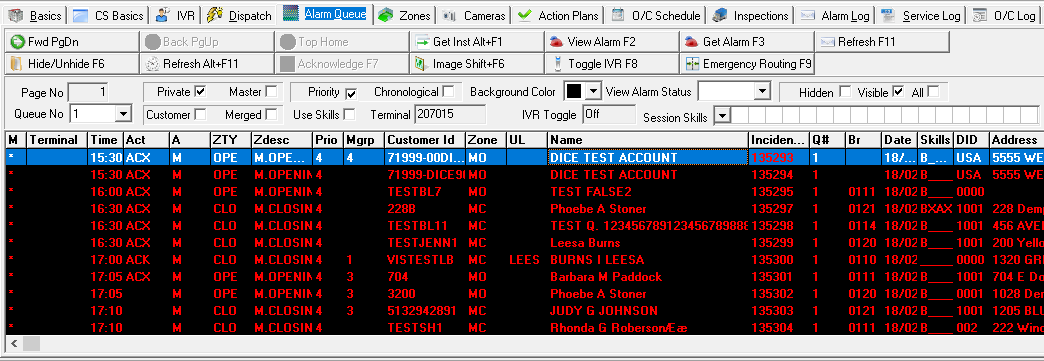
In the Alarm Queue tab, you can view all alarms present in SBN that have not yet been resolved and you can change and enter alarm queue information. You can change or narrow the list of alarms that you can view by using the display parameters.
Note: Incidents in the Alarm Queue flash if the operator who is assigned to that alarm has logged out of the system. This allows other operators to see the incidents that are no longer assigned to an operator.
To access the Alarm Queue tab, from the main menu of SBN select Service/Data Entry (program #559) and then select the Alarm Queue tab.
Priority View Selection:
Note: SBN only applies the priority settings in Queue Priorities (program #1725) when option mo206 is on. When this option is off, SBN displays all alarms in the Alarm Queue regardless of whether the Hidden, Visible, or All check box is selected. If action 537/130 is inactive, these check boxes are protected.
Understanding the Colors of the Alarm Queue
SBN color-codes all alarm lines in the Alarm Queue. The colors allow you to quickly determine the status of each alarm.
The following table lists the default colors used in the Alarm Queue and status of each color.
|
|
|
|
|
|
|
|
|
|
|
|
|
|
|
|
|
|
|
|
Hiding/Unhiding Parameters
You can hide the parameters in the upper pane of the Alarm Queue to give yourself more room to view alarms. In Alarm Queue, choose Hide/Unhide Parameters [F6].

Setting the Refresh Interval
You can set the automatic refresh interval in the Alarm Queue to any rate from 0 to 300 seconds.
To set the refresh interval:
1. In Alarm Queue, choose Refresh Interval [ALT+F11].
The Timer Value menu appears.
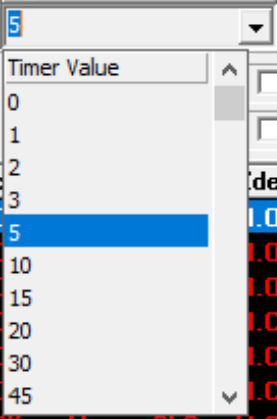
2. Choose a refresh interval.
SBN resets the refresh interval to the new timer value.
Viewing the Alarm Queue
Different views of the Alarm Queue allow operators to handle specific alarms. You can change the view of the Alarm Queue by selecting parameters in the upper pane to view:
Different queues — SBN contains up to 64 Alarm Queues
Different alarms
You can also change:
The order of the alarms
The background color of the grid in the Alarm Queue
Viewing a Different Queue
To view a different queue and pages
1. In Alarm Queue, in Queue No — select the number of the queue you want to view.
SBN displays all alarms in that queue.
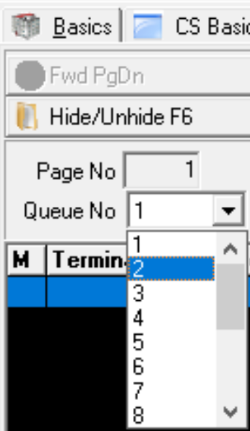
2. If the selected queue contains more than one page of alarms, you can navigate within those pages by choosing:
Scroll Forward 1 Page [PGDN]
Scroll Backwards 1 Page [PGUP]
Go To Top of Log [HOME]
Changing the Display of Alarms in the Queue
Once you have selected the queue you want to view, you can choose which alarms to view and how SBN will display them.
To change the display of alarms in the queue:
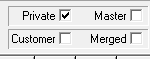
1. In Alarm Queue, enter a check mark in one of the following boxes: Private, Master, Customer, or Merged.
2. Enter a check mark in either the Priority box or the Chronological box.

Note: Priority sorts the alarms in descending order beginning with the highest priority.
Note: Chronological sorts the alarms in chronological order beginning with the oldest alarm.
3. Enter a check mark in the Use Skills box to activate the skill filtering set up in Personnel (program #1811)
and in the Data Entry Basics tab.
If you leave this box blank, user skills are inactive and all entries in the queue are active.
4. In Background Color — you may select a different color for the background of the Alarm Queue.
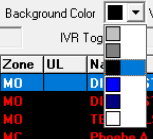
As you select parameters, SBN changes the view of the Alarm Queue.
Viewing Installation Details
You can view details of the installation associated with an alarm, such as:
Codeword
Classes
To view details of an installation:
1. In Alarm Queue, highlight the alarm for which you want to view installation details.
2. Choose Get Installation [ALT+F1] from the toolbar.
The main window of Data Entry displays the installation details.
Viewing a Selected Alarm
You can view a selected alarm in the queue in the Dispatch tab.
To view an alarm in Dispatch:
1. In Alarm Queue, highlight the alarm you want to view.
2. Choose View Selected Alarm in Queue [F2] from the toolbar.
SBN displays the alarm in the Dispatch tab.
Note: You cannot treat the alarm until you get the alarm. See Dispatch for more information.
Acknowledging an Alarm
To acknowledge all alarms for a customer:
1. In Alarm Queue, enter a check mark in the Customer box.
2. Choose Acknowledge [F7] from the toolbar.
All alarms for the selected customer turn yellow.
Note: After you acknowledge the alarms, SBN displays ACX in the Operator Action column in the Alarm Queue. SBN also displays the acknowledged alarms in the Dispatch tab. The Event List displays
The code ACX, which indicates the alarm was acknowledged,
The time it was acknowledged.
DISPATCH
Module topics
This module includes the following topics:
The Dispatch Tab
Treating Alarms
Viewing the Alarm Queue
The Dispatch Tab
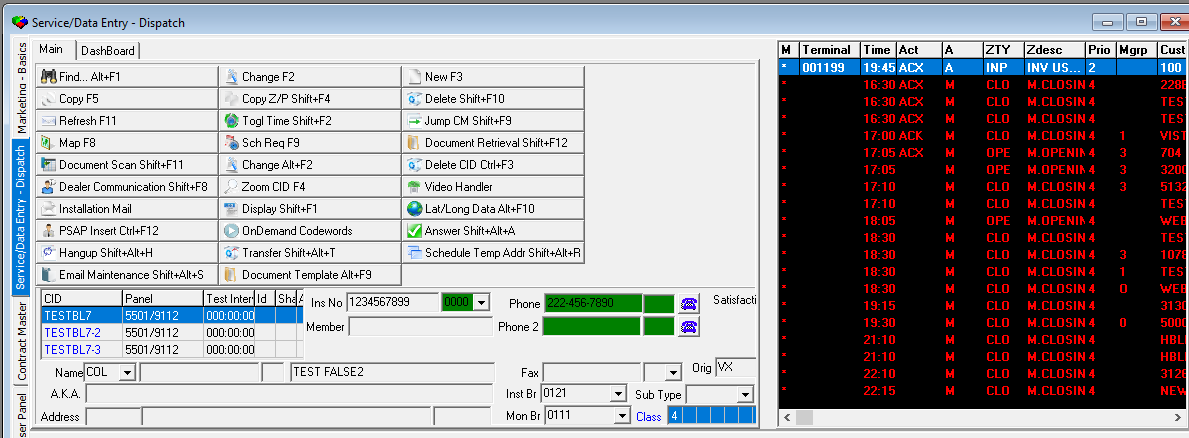
Use the Dispatch tab to view and treat incoming alarms.
To access the Dispatch tab, from the main menu of SBN select either Monitoring (program #537) or Data
Entry (program #559) and then select the Dispatch tab.
The Dispatch Tab
The Dispatch tab contains three panes:
Dispatch and related information
Alarm information
Call List information
Dispatch and Related Information
The upper pane of the Dispatch tab displays the following information:
Open Service Request — If this CID has an open service request, the service request number flashes red. You can right-click the number, then choose Service Log, and SBN jumps to the Service Log.
Related Incidents — flashes when another signal exists for the same CID.
Auto Feed — If you select this check box, SBN automatically gets the next alarm one second after an operator resolves the current alarm, when additional alarms are waiting in the queue.
Use Skills — allows you to toggle skills on/off.
Terminal ID — allows you to view the terminal id of the operator handling the alarm. This terminal ID
flashes if it is not the terminal currently viewing the alarm.
Beep indicator — allows you to toggle the alarm beep on/off.
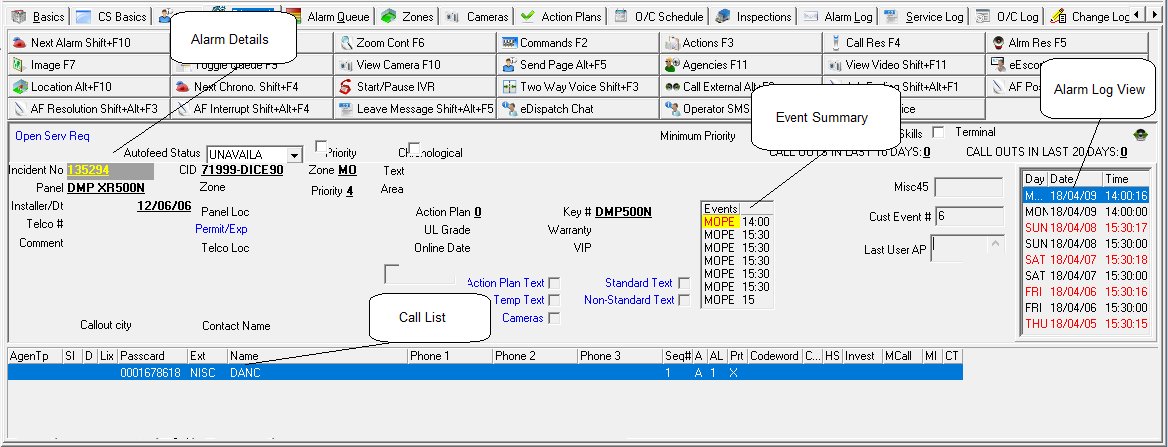
Alarm Information
The Alarm Information pane contains the following information related to the current alarm:
Incident number
CID
Zone
Zone text
Panel ID
Priority
Protected area
Permit
Action Plan text
Temporary text
Standard text
Non-Standard text
List of event abbreviations
Call List Information
The Call List Information pane displays the contacts and agencies associated with the action plan tied to the zone for the current alarm. This list displays the contacts in the correct sequence for calling. The Call List also displays the following information:
Agency type
Passcard number
Name
Phone numbers
Sequence
Authority level
Treating Alarms
Use the Dispatch tab to perform actions and resolve alarms. To treat an alarm, you must perform the following actions:
Get the alarm
Read the action plan, standard, temp, non-standard, and temporary text
Call contacts and dispatch agencies
Enter actions
Resolve calls
Resolve alarm
Getting an Alarm
Use the following to steps to get an alarm:
1. In the Dispatch tab, choose Get Next Alarm [SHIFT+F10].
SBN displays the alarm in the Dispatch tab.
Pop-up windows of text may appear.
Viewing Texts
The Dispatch tab contains four text indicator fields:
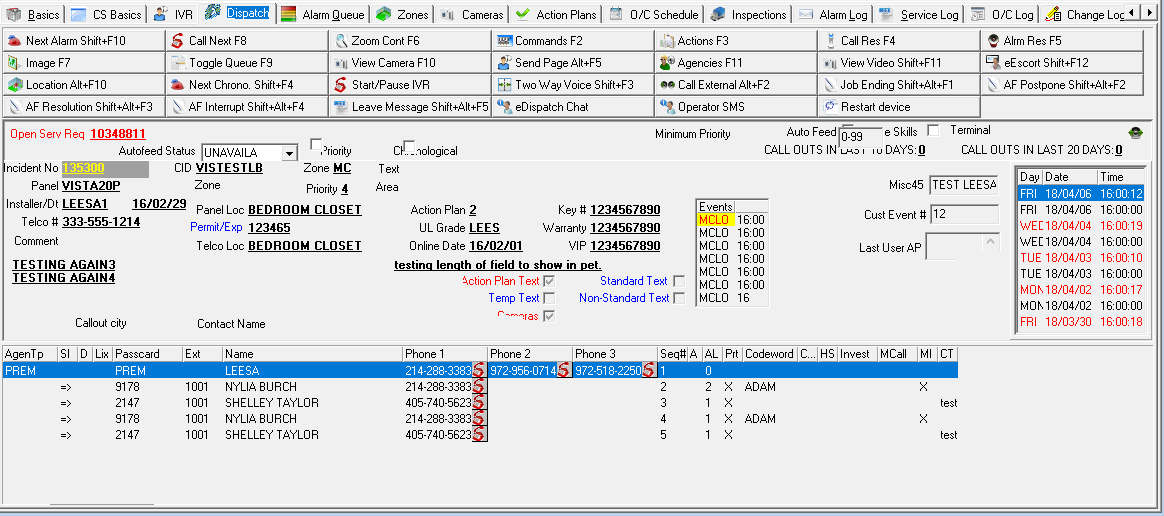
Action Plan
Text Temporary
Text Standard Text
Non-Standard Text
If any of these fields contain a check mark, pop-up windows of text may automatically open you Get the alarm in Dispatch.
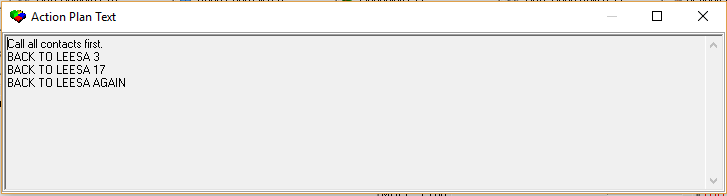
To view the action or temporary text:

|
In the Dispatch tab, choose Get Next Alarm [SHIFT+F10] |
|
|
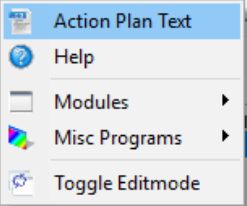
A right-click menu appears.
3. Select the corresponding text icon from the right-click menu.
The pop-up window of text appears.
Calling Agencies and Contacts
To call agencies and contacts in the correct order:
1. In the Dispatch tab, choose Call Next Contact [F8].
An Event Extensions dialog box may open.
2. Select the event extension for the call you just made and enter a comment, if needed.
3. Choose Save [ENTER].
SBN highlights the line for the contact blue and creates a log entry.
Note: If you choose Esc or Exit without Saving, SBN will not change the color of the contact line and will not create a log entry.
Resolving a Call
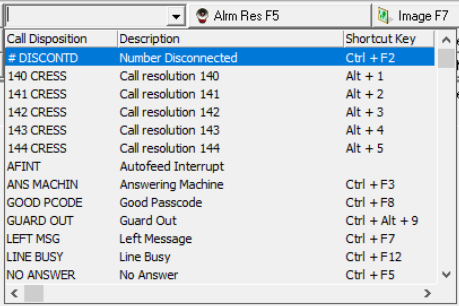
To attach standard resolution codes to any call you place:
1. In the Dispatch tab, choose Call Res [F4].
A menu of call resolutions appears.
2. Select the appropriate resolution to the call.
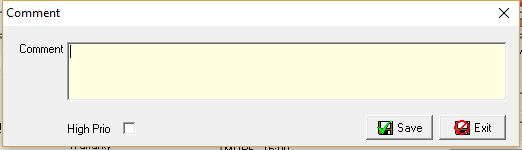
Adding a Comment to an Incident
To add a comment that will appear in the Alarm Log for the installation. You may also use this function to add a comment or high-priority comment to an incident that is currently being handled by another operator.
1. In the Dispatch tab, choose Monitoring Actions [F3].
A menu of Monitoring Actions appears.
2. Select COMMENT [ALT+CTRL+L].
The Comment dialog box opens.
3. Type up to four lines of text.
4. Enter a check mark in the High Priority box to flag this comment as High Priority.
Note: You may not add a high priority comment to a resolved event.
5. Choose Save [ENTER].
SBN displays COM in the Events List. SBN will display high priority comments in the Alarm Log with the
event title, H.COMM, in blue text and the text of the comment in green text.
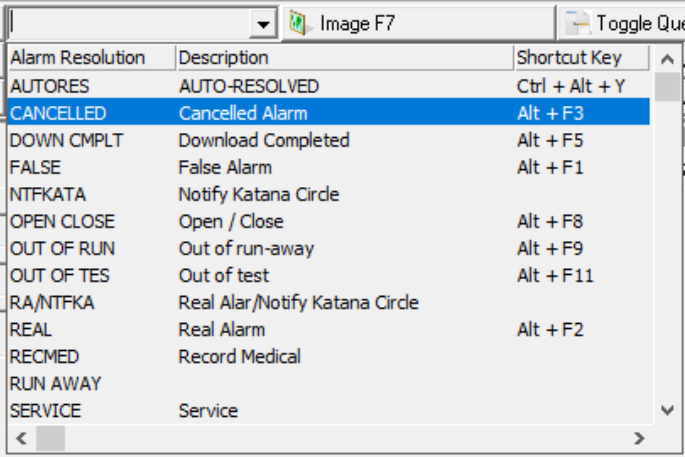
Resolving an Alarm
To resolve an alarm by attaching a standard resolution code:
1. In the Dispatch tab, choose Alarm Res [F5].
A menu of alarm resolutions appears.
2. Select the appropriate resolution for the alarm.
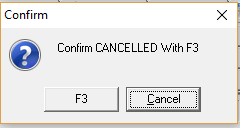
SBN displays a confirmation message with a random keystroke that you will use to confirm the resolution.
3. Confirm the resolution with the required keystroke or choose the function button in the confirmation
message.
An Event Extension dialog box may open in which you can enter a predefined extension to the alarm
resolution and enter a comment in the line provided. SBN will log both items in the Alarm Log with
the alarm resolution.


Viewing the Alarm Queue
You can view the Alarm Queue from Dispatch by choosing the Toggle Queue [F9] button.
ALARM LOG
Module topics
This module includes the following topics:
The Alarm Log Tab
Viewing Entries in the Alarm Log
Inserting Comments into the Alarm Log
Patching the Alarm Log
Setting the Refresh Interval
The Alarm Log Tab
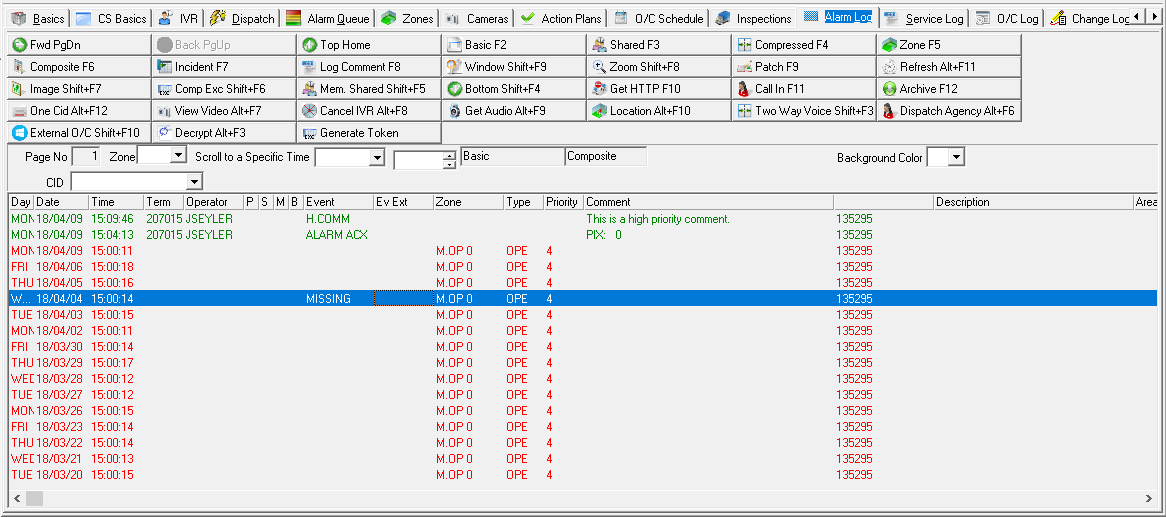
Use the Alarm Log tab to view all signals, incidents, and alarm-related operator actions for the selected installation. You can also use the Alarm Log to add comments to an incident or to the log in general.
Note: Action 537/132 is required to display passcard and VRU code numbers in the Comment column. When option ma013 is on, the word ‘Emailed’ appears in the Comment column for Email monitoring events.
The Alarm Log has several views for displaying the information.
Understanding Status Colors
The Alarm Log displays lines in different colors so that you can tell at a glance the status of each incident. The following list explains the different color possibilities.
|
|
|
|
|
|
|
|
|
|
|
|
|
|
|
|
Navigating the Alarm Log
If the Alarm Log has more than one page, you can choose the following buttons/keys to navigate to other pages:
Scroll Forward One Page [PGDN]
Scroll Back One Page [PGUP]
Go to Top of Log [HOME]
Note: When you choose this button, SBN returns you to the first page. This button is active at all times, even if the Alarm Log contains only one page.
Go to Bottom of Log [Shift +F4]
Note: When you choose this button, SBN jumps to the end of the Alarm Log. This button is active at all times, even if the Alarm Log contains only one page.
Note: When you choose Go To Bottom of Page, the auto-refresh timer will not force the Alarm Log to return to your previous place.
Note: Choose this hotkey combination to jump to the top of the page you are currently on. This function does not have a button.
Viewing Entries in the Alarm Log
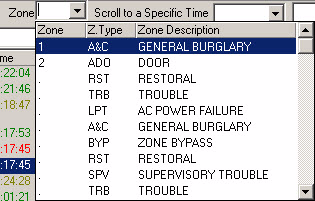
To view entries in the Alarm Log for a specific zone or for a specific date and time:
1. In Alarm Log, in Zone — select the appropriate zone.
2. Choose Get One Zone [F5].
SBN displays all incidents for the specified zone in the Alarm Log.
To view entries for a specific date and time:
1. In Alarm Log, complete the Scroll to a Specific Time fields.
2. Choose Scroll to a Specific Time [SHIFT+F9].
The Alarm Log displays all incidents up to that date and time.
Changing the View of the Alarm Log
The Alarm Log contains several views. The following table describes each view and the button to choose
to display the view.
View Name Description
Basic Displays all alarm incidents for this installation.
Shared Displays all events for multiple installations that utilize the subzone feature. (Not Used).
Compressed Displays a condensed view of each incident with a one- line format. To view all events for a specific incident, highlight the incident line and press the Incident view button.
Composite Displays all events for the installation including any scheduled or unscheduled opens or closes.
Incident Displays all events for a specific incident. This view is used in conjunction with the Compressed view.
Comp. Exc. Displays all events for one installation including alarms and unscheduled opens or closes. This view does not display Log Only or non-incident events.
Mem. Shared. Displays all events for multiple CIDs that share the same member number.
One CID Displays alarm activity and any related comments or actions for one CID that is associated with an account that has multiple CIDs.
Inserting Comments into the Alarm Log
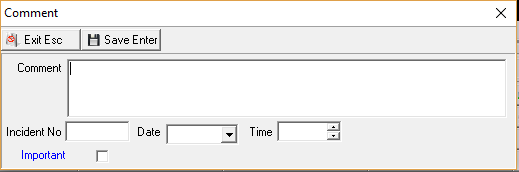
You can insert comments into the Alarm Log. Each comment can refer to a specific incident or exist as a stand-alone comment.
To enter comments into the Alarm Log:
1. In Alarm Log, highlight the incident to which you want to add comments.
2. Choose Log Comments [F8].
A Comment dialog box opens.
3. Complete the fields, as needed.
If you complete the Date and Time fields, the Manual (M) column in the Alarm Log displays an X.
If the Alarm Log contains only one open incident, SBN attaches the incident number to the comment. If the Alarm Log contains no open incidents or more than one open incident, the incident number for the comment remains blank.
4. Choose Save [ENTER].
Patching the Alarm Log
Use Patching to change the Alarm Resolution or the Supervisor Override flag for an incident. The Supervisor Override flag determines if an incident prints when you generate a consumer report. You can only make changes to incidents that have occurred within the last 7 days. When you patch the Alarm Log:
The Supervisor Override field will display an X
The incident will not print on an incident report sent to the customer
To patch the Alarm Log:
1. In Alarm Log, highlight the incident you want to change.
2. Choose Patch Alarm Log [F9].
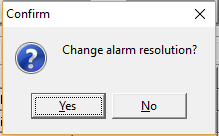
If the incident contains an alarm resolution code, SBN asks if you want to change the alarm resolution.
Note: If the incident does not contain an alarm resolution code, jump to Step 7 for information about changing the Supervisor flag.
3. Choose Yes to change the resolution code or choose No to change the Supervisor flag.
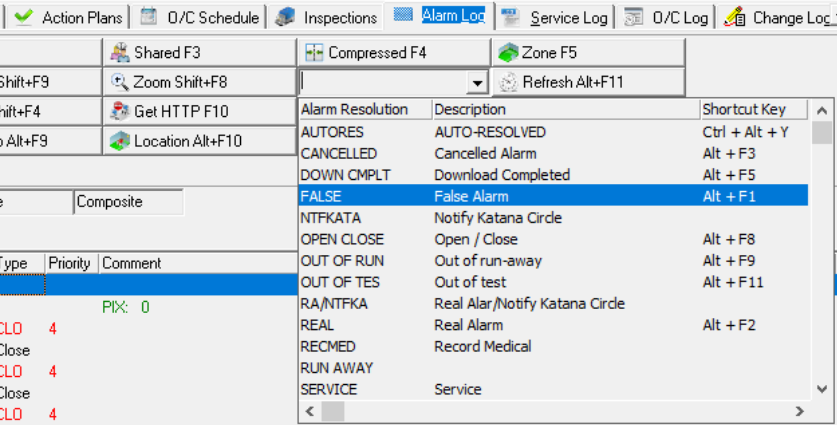
When you choose Yes, a menu of alarm resolutions appears under the Patch Alarm Log button.
4. Choose the new resolution code.
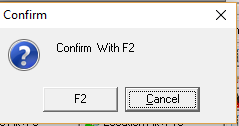
SBN displays the hotkey to use to confirm the message.
5. Press the appropriate hotkey to confirm the alarm resolution.
An Event Extension dialog box opens.
6. Select an event extension and enter a comment, if needed.
7. Choose Save [ENTER].
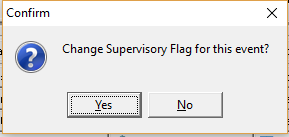
SBN asks if you want to change the supervisory flag for this event. If the incident contains no alarm resolution code or you do not wish to change the alarm resolution code, SBN displays the following message.
8. Choose Yes.
The Supervisor Override column in the Alarm Log for the selected incident displays an X.
Setting the Refresh Interval
You can set the automatic refresh interval in the Alarm Log to any rate from 0 to 300 seconds.
To set the refresh interval:
1. In Alarm Log, choose Refresh Interval [ALT+F11].
The Timer Value menu appears.
2. Choose a refresh interval.
SBN resets the refresh interval to the new timer value.
INSERT TEST
Module topics
This module includes the following topics:
The Insert Test Tab
Inserting Zones into Test
Changing a Monitoring Status
Removing an Installation from Test
The Insert Test Tab
Use the Insert Test tab to insert installations into Test or Runaway mode. You can
Insert a zone or group into test immediately.
Set a future date and time to insert a zone or group into test.
Remove an existing account from the test queue.
View the previous test record or the next test record
Toggle the queue mode from Test to Runaway
Change the monitoring status for the installation.
View the test results for specific zones or groups.
To access Insert Test, from the main menu of SBN select Service/Data Entry (program #559), then select the Insert Test tab.
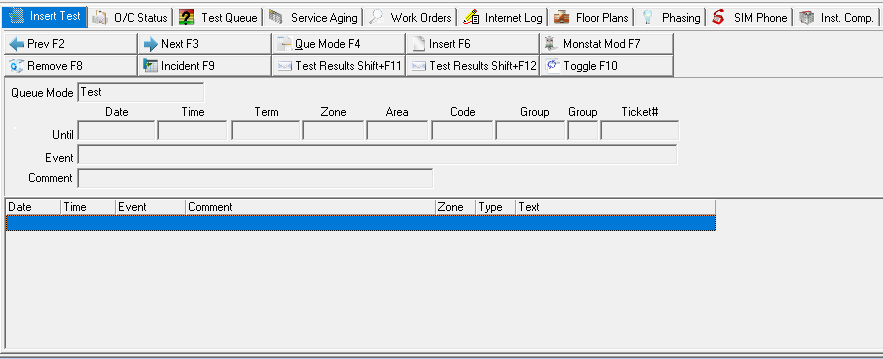
The Insert Test tab contains two panes:
The upper pane contains parameter fields for the test.
The lower pane displays details of an installation in test.
Inserting Zones into Test
To insert all of the zones of an installation into test:
In Service/Data Entry (program #0559) open the record of the installation you want to put into test.
Note: SBN does not allow you to put installations into Test or Runaway mode that have the No Test check box selected in the Basics tab of Data Entry (program #559), unless you have action 559/218 enabled in your user action profile.
2. Select the Insert Test tab.
3. Choose Insert Record [F6].
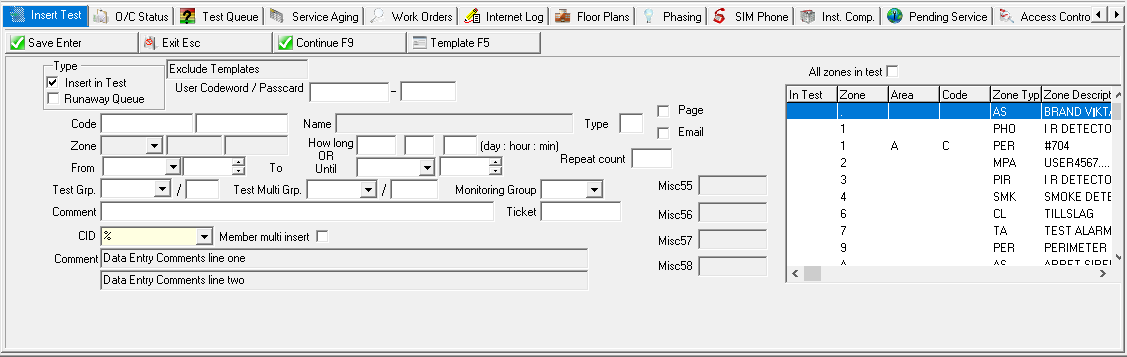
The Insert Record window opens.
4. Enter a check mark in either the Insert in Test field or the Runaway Queue field to place the installation zones in the test or runaway queue.
5. Complete the fields, as needed.
6. If you want to enter another installation into test, choose Continue [F9] or choose Save [ENTER] to insert the test and return to the Insert Test tab.
SBN asks if you are sure.
7. Choose Yes to insert in test or choose No to cancel.
SBN displays a confirmation.
8. Choose OK.
SBN returns you to the Insert Test tab.
Navigating between Tests
When the Insert Test tab contains more than one entry, you can navigate between entries by choosing
Previous Record [F2]
Next Record [F3]
Toggling between Queues
Use Toggle Queue Mode to toggle between the Test and Runaway queues. Placing an installation in test notifies the central station that you are going to test an installation’s zones and to ignore all alarms. Placing an installation in runaway notifies the central station that there is a problem with a device and you are going to be testing the device.
Note: When an installation is in test mode, the signals appear in the Alarm Queue. When an installation is in runaway mode, the signals do not appear in the Alarm Queue.
To toggle between queues:
1. In Insert Test, choose Toggle Queue Mode [F4].
The Queue Mode field identifies the current queue.
2. Choose Toggle Queue Mode [F4] again to return to the previous queue.

Changing a Monitoring Status
In the Insert Test tab, you can change the monitoring status of the selected installation. Any changes that you make to the monitoring status appear in the Alarm Log.
To change a monitoring status:
1. In Insert Test, choose Change Monitoring Status [F7].
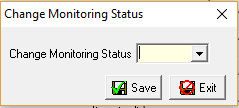
A Change Monitoring Status dialog box opens.
2. In Change Monitoring Status — select a new monitoring status.
3. Choose Save New Record.
SBN asks if you are sure.
4. Choose Yes.
Removing an Installation from Test
You can manually remove an installation from test before the date and time that SBN has scheduled them to be automatically removed. Once an installation is removed from test, the Insert Test tab automatically refreshes.
Note: Some zones require a restore before an installation can be removed from testing.
To remove an installation from test:
1. In Insert Test, choose Remove from Test [F8].
SBN asks if you are sure.
2. Choose Yes.
SBN removes the installation from test and returns you to the main Insert Test tab.
TEST QUEUE
Module topics
This module includes the following topics:
The Test Queue Tab
Changing the Display of the Test Queue
Viewing Details of an Installation
Getting a Selected Alarm
Refreshing the Test Queue Tab
The Test Queue Tab
The Test Queue is a log of all activity in the Test and Runaway queues. You can view the Test and Runaway queues individually or combined by choosing the appropriate view. The Test Queue is directly related to Insert Test, where you place installations into test. Highlighted text in Test Queue displays in white.
Use one of the following methods to access the Test Queue tab:
Double-click the flashing Test symbol when it appears in the status bar of SBN.
Double-click the flashing Runaway symbol when it appears in the status bar of SBN.
Select Data Entry (program #559) from the main menu of SBN and then select the Test Queue tab.
Viewing the Test Queue
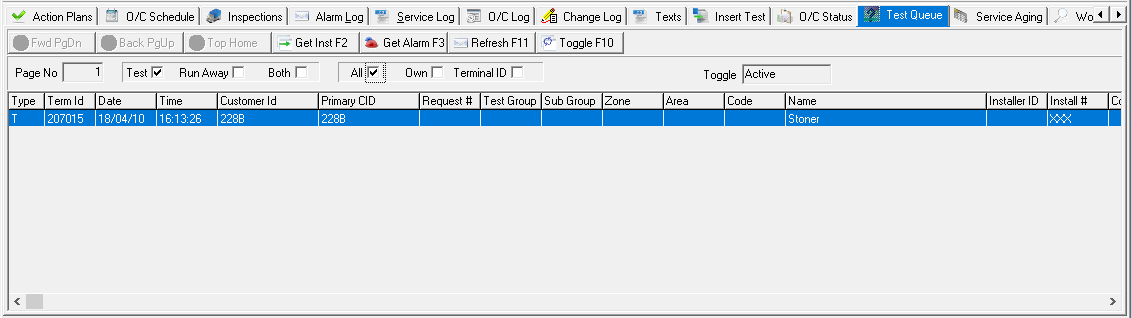
The Test Queue tab contains two panes:
The upper pane — in which you select view parameters
The lower pane — in which you view installations in test according to the selected view parameters
Navigating the Test Queue
If the Test Queue has more than one page, you can use the following buttons/keys to navigate through the other pages:
Scroll Forward One Page [PGDN]
Scroll Back One Page [PGUP]
Go to Top of Log [HOME]
Note: When you choose this button, SBN returns you to the first page. This button is active at all times, even if the Alarm Log contains only one page.
[CTRL+HOME] to jump to the top of the page you are currently on
Note: This feature does not have a button.
Changing the Display of the Test Queue
You can change the display of the alarms in the Test Queue. When you select the parameters that define the display, SBN changes the view of the Test Queue.
You can view:

Only alarms in test
Only alarms in runaway
Both test and runaway alarms
All installations in test regardless of the operator
Only the installations associated with your own user ID
Installations sorted by terminal ID
Viewing Details of an Installation
To view details of the installation in the Test or Runaway Queue:
1. In the display pane of the Test Queue tab, highlight the installation placed in the Test or Runaway queue.
2. Choose Get Installation [F2].
SBN displays the details of the installation in the Data Entry window.
Getting a Selected Alarm
To access the Dispatch tab to treat an alarm:
1. In Test Queue tab highlight the installation for which you want to access the Dispatch tab.
2. Choose Get Selected Alarm from Queue [F3].
SBN displays the alarm in the Dispatch tab.
3. If another user has not already treated the alarm, treat the alarm.
Note: If another operator has already treated the alarm, you can take the alarm from the operator and then treat it.
Note: If the alarm was not acknowledged prior to this action, SBN creates an acknowledge event.
Refreshing the Test Queue Tab
Use SQL Refresh to update the Test Queue. To refresh the Test Queue tab, choose SQL Refresh [F11].
TEXTS
Module topics
This module includes the following topics:
The Texts Tab
Viewing Action Plan Text
Entering Temporary Text
The Texts Tab
Use the Texts tab to:
View text attached to a specific action plan
Enter temporary comments
Note: Temporary comments entered in the Texts tab appear in Dispatch when a signal is received on any zone for this installation.
To access the Texts tab, from the main menu of SBN select Service/Data Entry (program #559), then select the Texts tab.
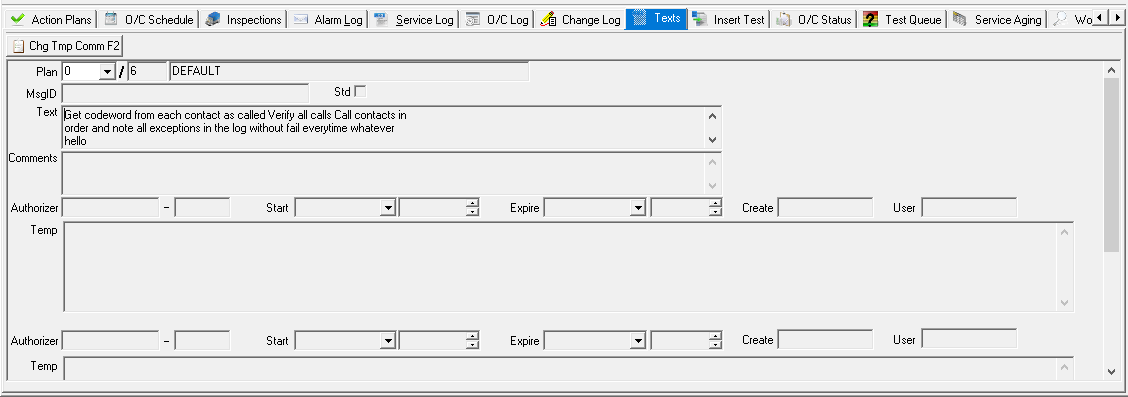
Viewing Action Plan Text
To view text attached to specific action plans:
1. In Service/Data Entry (program #559) open the installation for which you want to read the text attached to an action plan.
2. Select the Texts tab.
3. In Plans, select the action plan for which you want to read text.
The corresponding text appears in the Text field.
Entering Temporary Text
Use the Texts tab to add or change temporary text attached to an installation. Each installation can have only one temporary comment at a time.
If you change temporary text before the expiration date, SBN replaces the original temporary text with the new temporary text.
Note: SBN logs all entries and changes to temporary texts in the Alarm Log.
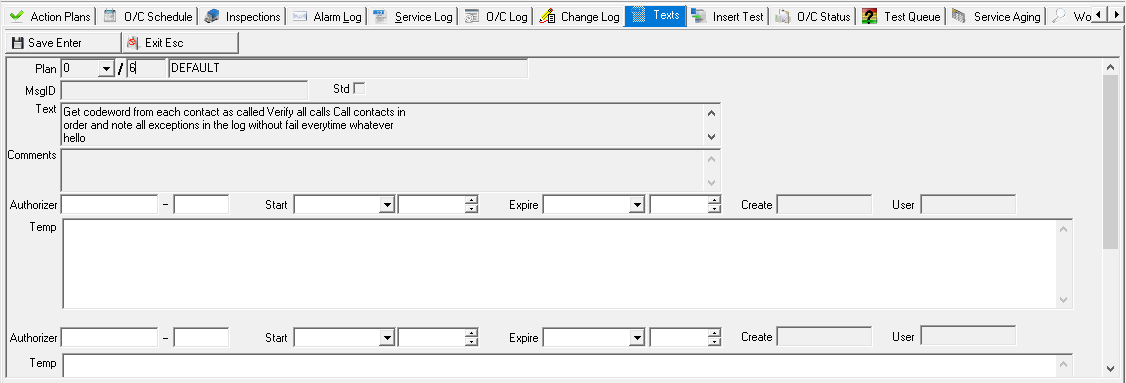
To enter temporary text:
1. In Service/Data Entry (program #559) open the installation for which you want to enter temporary text.
2. Select the Texts tab.
3. Choose Change Temp Comment [F2].
Fields in the lower section of the tab open for changes.
4. Complete the fields, as needed.
Note: The Temp field has a limited amount of space for each line. You must press TAB to continue to the next line.
5. Choose Save [ENTER].
The Create and User fields display the date and ID of the user who entered the comment.
Note: When action 559/473 is turned off and you search for an installation in the Data Entry Master window (program #559) that has temporary text entered in the Texts tab, the Temporary Text window appears. When action 559/473 is turned on, the Temporary Text window does not appear when you search for an installation in program #559, regardless of whether the installation has temporary text entered.
OPEN/CLOSE STATUS
Module topics
This module includes the following topics:
The Open/Close Status Tab
Searching for Open/Close Statuses
Viewing Details of an Installation
Viewing Zone Information
The Open/Close Status Tab
In the Open/Close Status tab you can view the status of all zones attached to a passcard.
To view the Open/Close Status tab, from the main menu of SBN select Service/Data Entry (program #559), then select the Open/Close Status tab.
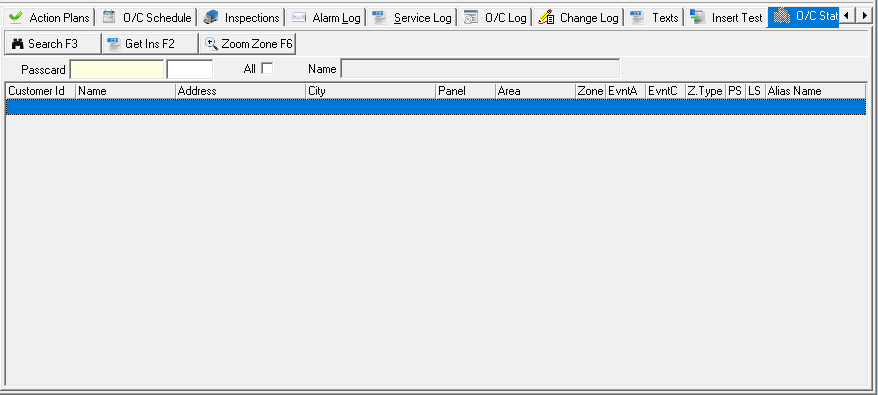
The columns in the Open/Close Status tab remain blank until you perform a search.
After you perform a search, the columns will display
Customer ID
Name
Address
City
State
Zip code
Panel
Area
Zone
Event area
Event code
Zone type
Physical status
Logical status
Searching for Open/Close Statuses
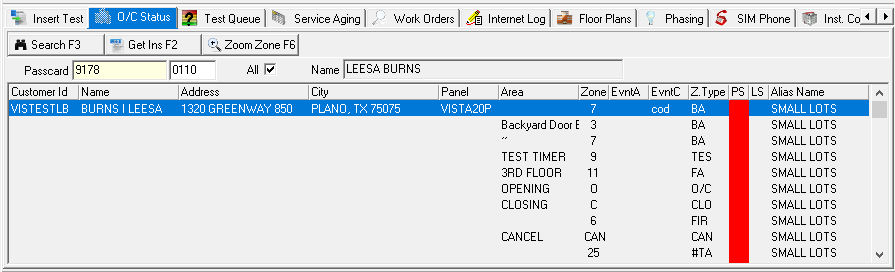
To display the open/close statuses, you must search by specific passcard. SBN displays all open/close statuses assigned to that specific passcard.
To display open/close statuses:
1. In the Open/Close Status tab, type a passcard number and extension, if required.
2. Enter a check mark in the ALL box if you wish to include all zones for the installation attached to the entered passcard.
Note: If you leave the ALL box blank, only zones in the Alarm Queue, Test Queue, or Open status will appear in the search results.
3. Choose Search [F3].
SBN displays the search results in the tab.
Viewing Details of an Installation
From the Open/Close Status tab you can view details of the installation to which a selected zone is attached.
To view installation information:
1. In the Open/Close Status tab, perform a search by passcard.
2. From the search results select the zone for which you want to view the details of the installation.
3. Choose Get Installation from List [F2].
SBN displays the details of the installation in the main Data Entry window.
Viewing Zone Information
To view the zone information for a selected zone:
1. In the Open/Close Status tab, perform a search by passcard.
2. From the search results select the zone for which you want to view information.
3. Choose Zoom Zone [F6].
The Zone Information window displays details of the selected zone.
OPEN/CLOSE LOG
Module topics
This module includes the following topics:
The Open/Close Log
Navigating the Open/Close Log
The Open/Close Log
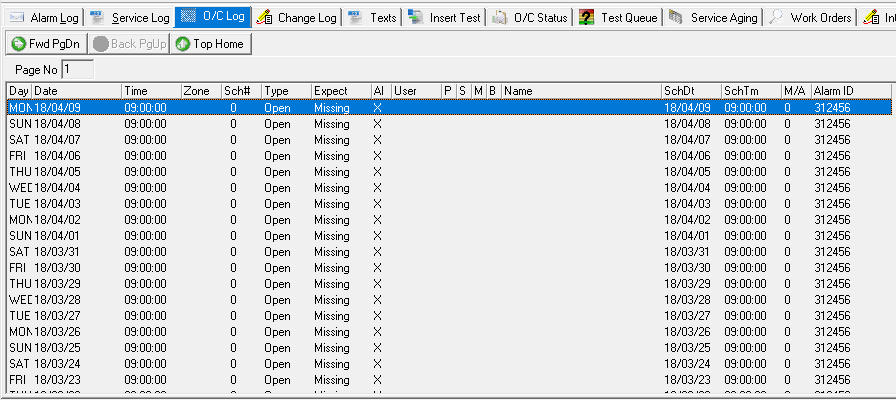
Use the Open/Close Log to view all open/close events when the system received a signal on an account. The log displays:
Date Time Zone
Schedule
Type
Expected
Authority level
User
Name
Schedule date
Schedule time M/A
To access the Open/Close Log, from the main menu of SBN select Service/Data Entry (program #559), then select the Open/Close Log tab.
Navigating the Open/Close Log
If the Open/Close Log has more than one page, you can move between pages by choosing:
Scroll Forward One Page [PGDN]
Scroll Back One Page [PGUP]
Go to Top of Log [HOME]
[CTRL+HOME] to jump to the top of the page you are currently on
Note: This feature does not have a button.
CHANGE LOG
Module topics
This module includes the following topics:
The change Log Tab
The Change Log Tab
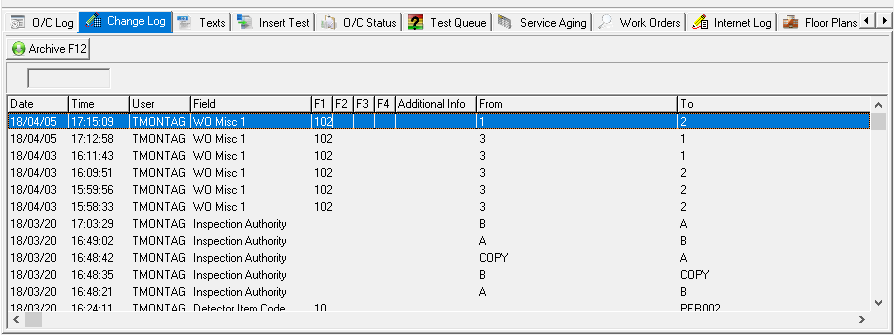
Use the Change Log tab to view all changes made to an account. The log uses abbreviations to indicate the field where the changes were made. The From and To columns display what the field contained prior to and after the change.
To view the Change Log for an account:
1. From the main menu of SBN, select Service/Data Entry (program #559).
2. Open the account for which you want to view the Change Log.
3. Select the Change Log tab.
The tab displays all changes to the selected account.
SERVICE LOG
Module topics
This module includes the following topics:
The Service Log Tab
Viewing Service Log Entries — Service Tickets
Creating a New Service Request
Changing a Service Request
Closing a Service Request
Viewing the Miscellaneous Service Log
Paging a Technician or Installer from the Service Request
Reopening a Service Request
The Service Log Tab
Use the Service Log tab to view all service issues entered for the selected installation. The initial view of the Service Log tab shows the service history in list form. For more detailed information on a specific service request, please see Viewing Service Requests.
The following graphic shows the Service Log as it opens.
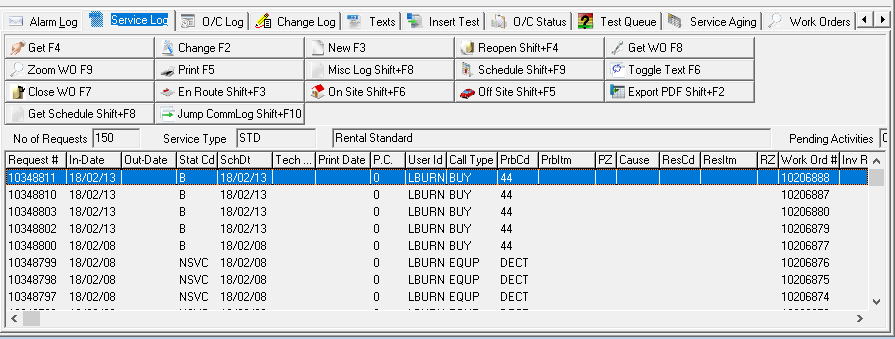
Viewing Service Log Entries — Service Tickets
To view entries for a specific service request, choose View Service Request [F4].
The Service Log Details window appears.
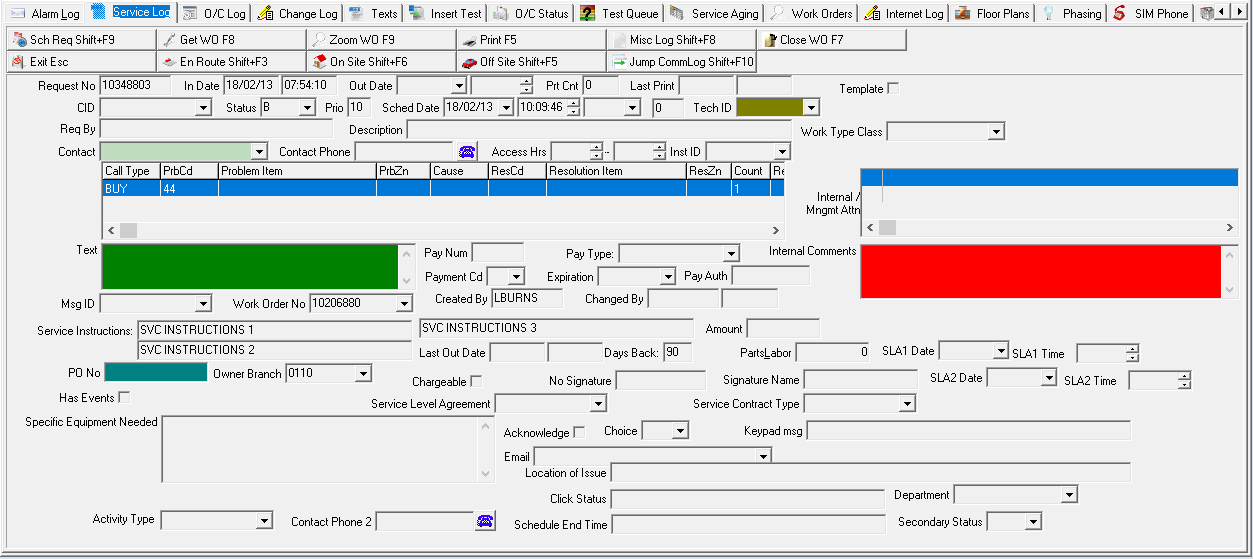
Creating a New Service Request
From the Service Log tab, you can create a new service request for the selected installation. Before the
Details window opens in New mode, SBN may display the following messages or windows:
A message if this installation has an overdue balance.
A message if another service request is still open on this installation.
A message stating the last date, time, and days back since the last closed service request.
To create a new service request:
1. Choose New Record [F3].
Messages may appear. See possible messages above.
2. To continue with the new service request, choose Yes on each message.
The Details window opens in New mode. The CID field defaults to %.
Note: The layout of the Problem/Resolution grid is now user-controlled.
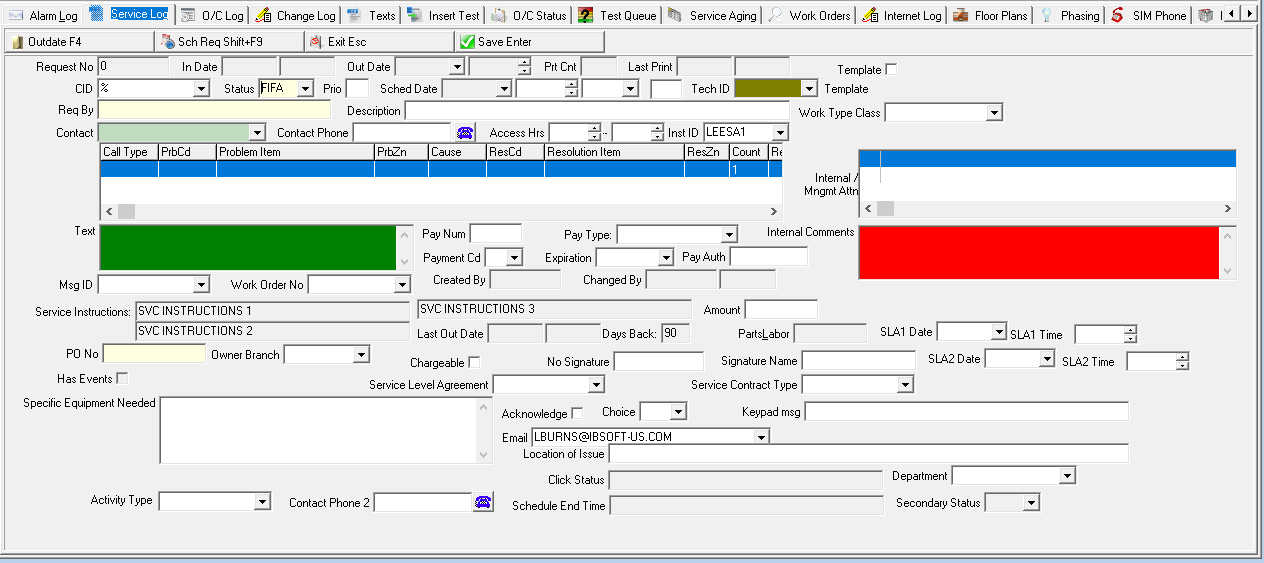
|
Complete the fields. | |
|
Choose Save [ENTER]. |
Each problem in the Service Request creates a separate line on the Service Log tab.
Changing a Service Request
You may only change details of a service request if the associated work order is open/uninvoiced.
To change service request information:
1. From the Service Log tab select the service request you want to change.
2. Choose Change [F2]. The Details window opens in Change mode.
3. Change the information, as needed.
4. Choose Save [ENTER].
Note: You may not save changes to a service request if the associated work order is closed/ invoiced. If you try to save changes and the associated work order has been closed/invoiced, SBN displays the message: “Invalid Entry!”
Note: A Secondary Status Required check box and column were added to Service Request Codes (program #1525). If you select this check box for a status code, a Select Secondary Status dialog box appears when you attempt to change the status of a service request in the Service Log tab. If you do not select a Secondary Status in the dialog box, SBN does not change the service request status. A read-only Secondary Status field was added to display the Secondary Status of the service request as assigned in the Select Secondary Status check box.
Closing a Service Request
From the Detail window in Change mode, you can close or outdate a completed service request. You can also close or outdate a service request from the Detail window in New mode.
To close a service request:
1. From the Detail window in Change mode, choose Outdate/Close Request [F4].
SBN asks for confirmation.
2. Choose OK to confirm that you want to close this service request.
Additional fields appear in the lower pane of the window.
3. Complete the fields.
Note: The Mileage, Time, and Total fields default from information entered in Scheduling (program
#0563) or through interface systems such as the Voice Response Unit (VRU) or Mobile SBN.
4. Choose Save [ENTER].

Viewing the Miscellaneous Service Log
The Miscellaneous Service Log tracks information about the status of each service request. You may access the Miscellaneous Service Log from the main Service Log tab and from the Detail window in the following modes:
View
Change
To view the Miscellaneous Service Log:
1. Select the appropriate service request.
2. Choose View Service Request [F4].
3. Choose Miscellaneous Service Log [SHIFT+F8].
SBN displays the Miscellaneous Service Log for this service request.
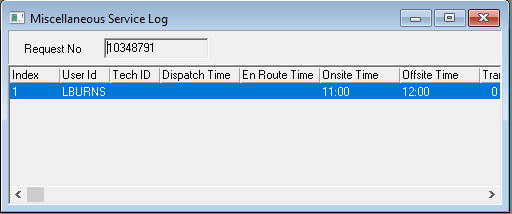
Paging a Technician or Installer from the Service Request
You can page a technician or installer directly from the Details window in the following modes:
View
Change
To page a technician or installer:
1. Select the appropriate service request.
|
|
|
|
|
|
|
|
The Paging dialog box appears.
Note: If option sv047 is on, this dialog box will default with the Installer paging information.
4. Enter any additional information into the Paging dialog box.
Note: SBN enters the customer information in the Message box.
5. Choose Save [ENTER].
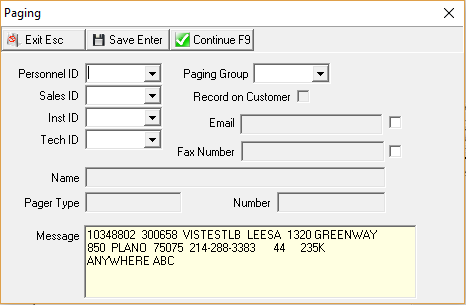
Reopening a Service Request
From the main Service Log tab, you can reopen a service request that has previously been outdated.
To reopen a service request:
1. Select the outdated service request that you want to reopen.
2. Choose Reopen Service Request [SHIFT+F4].
SBN reopens the service request.
COMMUNICATION LOG
Module topics
This module includes the following topics:
Using the Communication Log
Using the Communication Log Queue
Using the Communication Log
The Communication Log maintains a log of all communication with customers. You can use the Communication Log to enter, view and search communications for an account, contract, or installation through the Service/Data Entry, Marketing, and Contract Master programs.
You must have a record active in one of these programs to get customer data in the Communication Log. Thus, you can only view and enter log entries from branches contained in your branch user profile.
The program groups log entries by:
Account
Contract
Installation
User (Default)
Department
Note: If you access the Communication Log from the main menu, the log only contains entries in the User ID mode.
You can toggle the display to each group type and to detail or summary view.
To access this program, choose Communication Log (program #1888) from the main menu of SBN. You can also access the log by pressing [CTRL+W] from anywhere in the system.
The following graphic shows the Communication Log with information displayed. For descriptions of the columns and fields in this window, see the document Communication Log.
Changing Display Modes
The Communication Log contains five display modes. You can change the display mode by choosing Toggle Comm Log Mode [F6]. The first three display modes present Communication Log entries that relate to a particular aspect of an account. The User and Department modes display Communication Log entries that belong to you or your department.
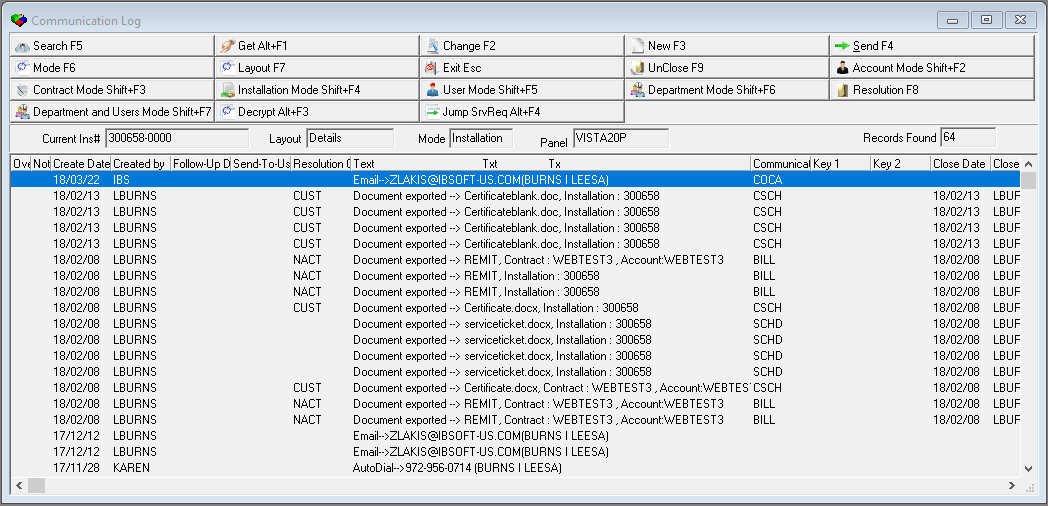
|
|
|
|
|
|
|
|
|
|
|
|
The log also contains two display layouts:
Detail
Summary
You can change the layout by choosing Toggle Comm Log Layout [F7].
Viewing Details of an Entry
You can view details of a Communication Log entry.
To view details of an entry:
1. In Communication Log (program #1888) select the entry for which you would like to view details.
2. Choose Get Record [ALT +F1].
SBN opens the Communication Log Details window.
3. Use Next [F3] or Previous [F4] to view other entries from the Communication Log for the selected installation, account, or contract.
Creating an Entry in the Communication Log
You can only create new entries in the Communication Log from the following modes:
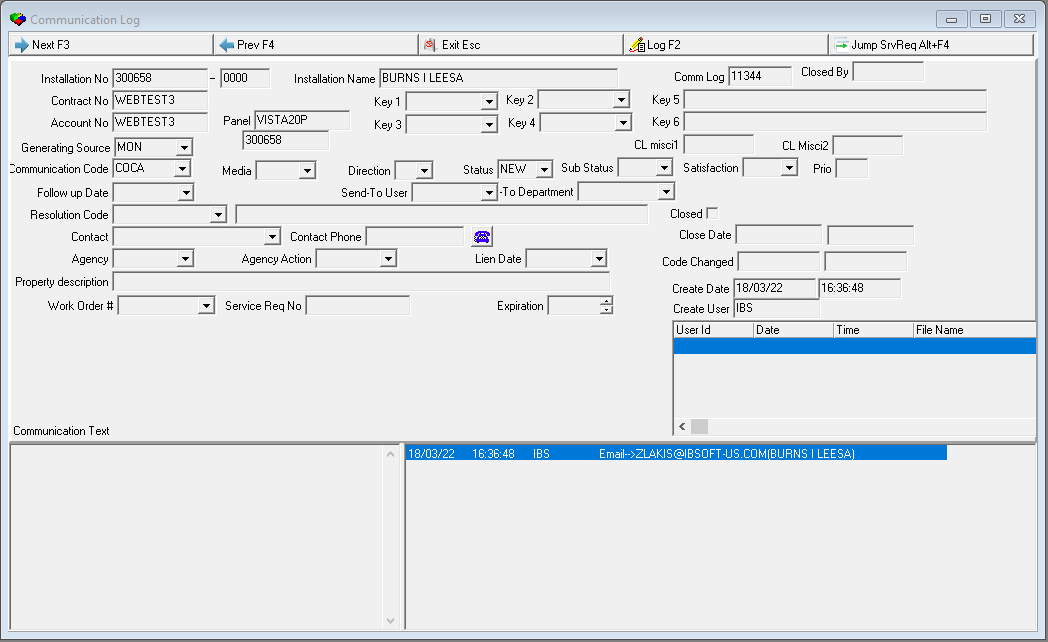
Account
Contract
Installation
The New [F3] button is not available in the User mode.
To create a new entry:
1. Access the Communication Log by choosing [CTRL+W].
2. Choose New [F3].
SBN opens fields in the Communication Log.
3. Complete the fields.
Note: You must either send the entry to another user, a department, or assign a resolution code and close.
4. Choose Save [ENTER].
Note: All times for each entry correspond to the user’s time zone.
Sending an Entry to Other Users
You can specify another user to follow up on a Communication Log entry by sending the entry to that user. Entries that you send appear on the user’s Communication Log.
If you send a Communication Log entry with a past-due follow-up date to another, the entry appears on both your Communication Log and on the new user’s Communication Log.
Note: To have an entry appear in your Communication Log, or to resolve an entry that you create, send the entry to yourself.
To send an entry to another user:
1. In Communication Log (program #1888), choose Send to another user [F4].
The Communication Send dialog box opens.
2. In Send-To User — select the ID of the user to whom you want to send the entry.
3. In Follow-up Date — select a follow up date, if necessary.
4. Choose Send [ENTER].
Note: You may only send Communication Log entries that you have created or on which you have taken some action.
Note: You may only send a Communication Log entry to one user at a time. If you send the entry to a second user, SBN will remove it from the User mode of the first user and enter it into the User mode of the second user.
Reading Entries Sent to You
SBN alerts you when Communication Log entries have been sent to you.
If you are logged into SBN when another user sends you a Communication Log entry, an alert icon will flash in the lower left corner of the SBN status bar.
Note: The alert icon will continue to flash as long as you have unread messages in your User mode. To read Communication Log entries sent while you are logged into SBN
1. Double-click on the alert icon.
The Communication Log opens in Installation mode.
2. Choose Toggle Comm Log Mode [F6] until you reach User mode.
The unread message will appear with an asterisk in the NotReadFlag column.
3. Double-click on the unread message or select the message and choose Get Record [ALT +F1].
The message appears in the lower right pane of the window.
4. When you finish reading the message, you may choose:
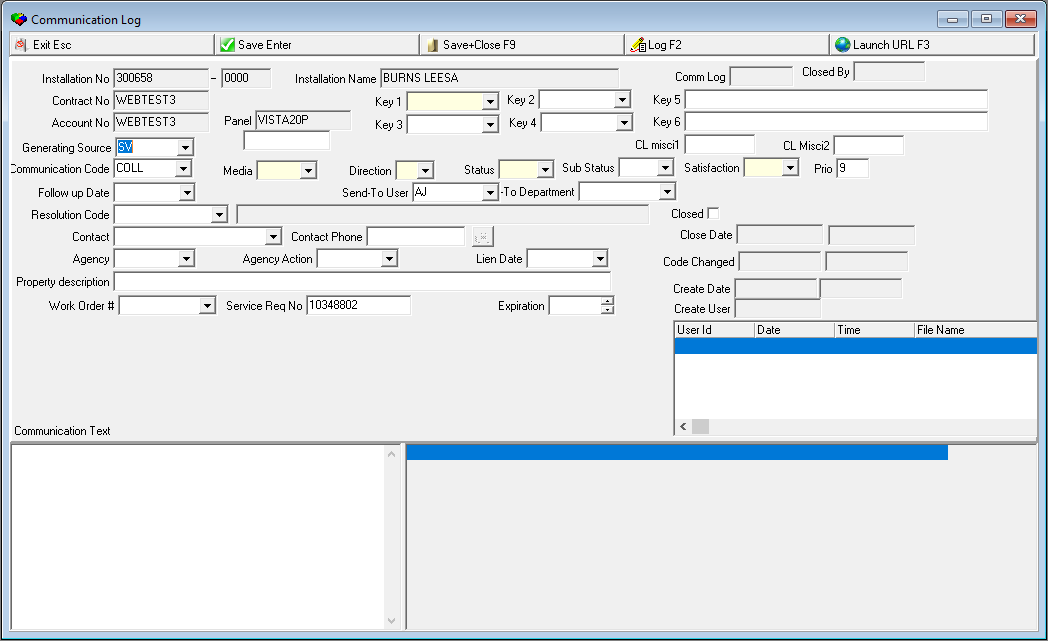
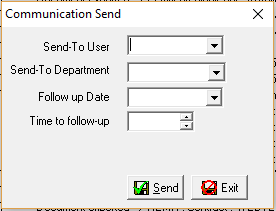
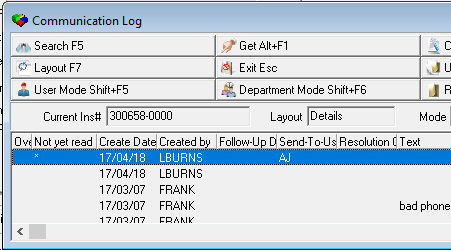
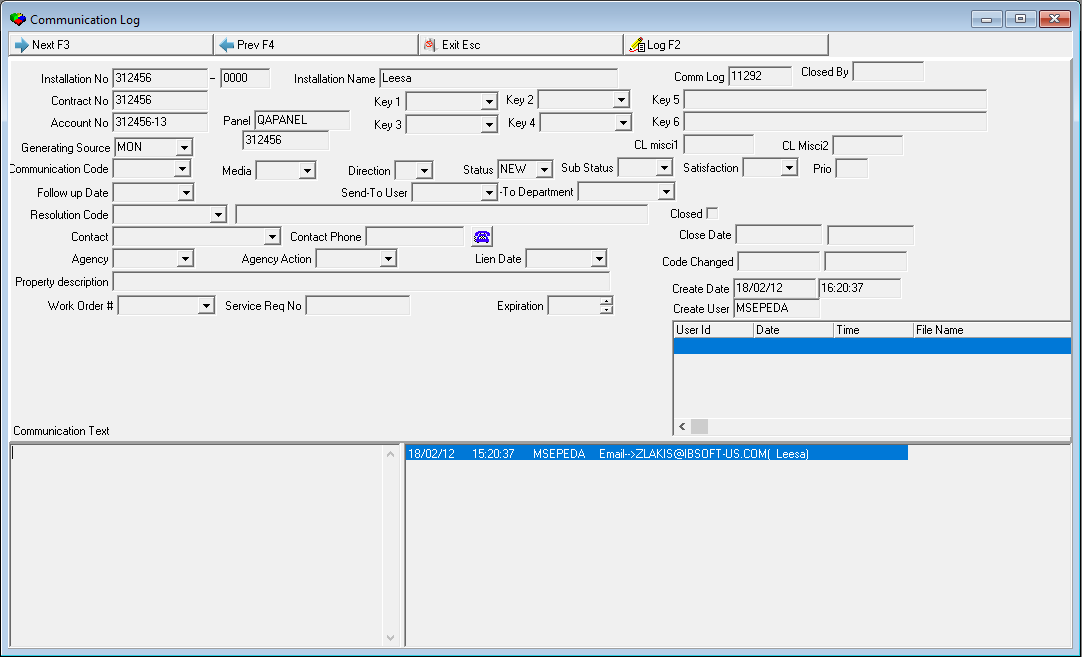
Next [F3] to read the next message in your User mode.
Prev [F4] to read the previous message in your User mode.
Exit [ESC] to return to your User mode display.
If Communication Log entries have been sent to you while you were logged out of SBN, when you log in you will see the following message:
Adding Resolution Codes to an Entry
You must be in User mode to add resolution codes to an entry in the Communication Log. Once you enter and save a resolution code, SBN clears the entry from your User mode. (The entry remains visible in all other modes.)
To enter a resolution code in an entry:
1. In Communication Log (#1888), select the entry to which you want to add a resolution code.
2. Choose Show Resolution [F8].
The Communication Resolution dialog box opens.
3. Select a resolution code from the menu.
4. Choose Save [ENTER].
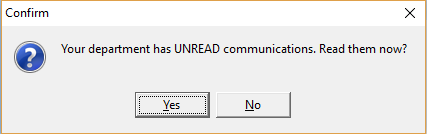
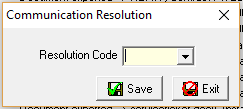
Using the Communication Log Queue
Use Communication Log Queue (program #535) to view and edit entries in the Communication Log or to perform a more extensive search for finding log entries than found in the Communication Log (program #1888).
Note: You cannot create new entries in the Communication Log Queue.
To access this program, select Communication Log Queue (program #535) from the main menu of SBN. The window of the Communication Log Queue contains five panes:
Search fields
Search results
Communication details
Communication text
Communication history
The following graphic shows the Communication Log Queue with information displayed. For descriptions of the columns and fields in this window, see the full Communication Log Queue documentation.
An Inquiries Only check box was added. When selected, this check box limits the search results to those log entries that are associated with a Marketing inquiry only, not an installation.
Searching for Entries
Before you can view or edit entries in the Communication Log, you must perform a search of the entries in
SBN.
To search for entries:
1. In Communication Log Queue (program #535) select your search parameters to narrow the search.
Note: You must select a range of Create Dates.
2. Choose Begin Search [F5]. Results that match your search criteria appear in the search results section.
Note: SBN displays search results sorted by the Create Date, with the oldest appearing at the top of the list.
3. To perform another search, choose Clear Search Screen [F6].
4. Repeat Steps 1-2.
Viewing Details of an Entry
You can view details, including the communication history for any entry that appears in the results list.
To view details of an entry:
1. From the results list, select the entry you want to view.
2. Choose Get [ALT+F1] or double-click on the entry.
Details of the selected entry appear in the detail and history sections.
Note: All times for each entry correspond to the user’s time zone.
Changing an Entry
In the Communication Log Queue, you can edit certain fields and change a log entry without using the
Communication Log (program #1888).
To change an entry:
1. From the results list, select the entry you want to change.
2. Choose Get [ALT+F1] or double-click on the entry.
3. Choose Change [F2].
4. Complete changes to the following fields, as needed:
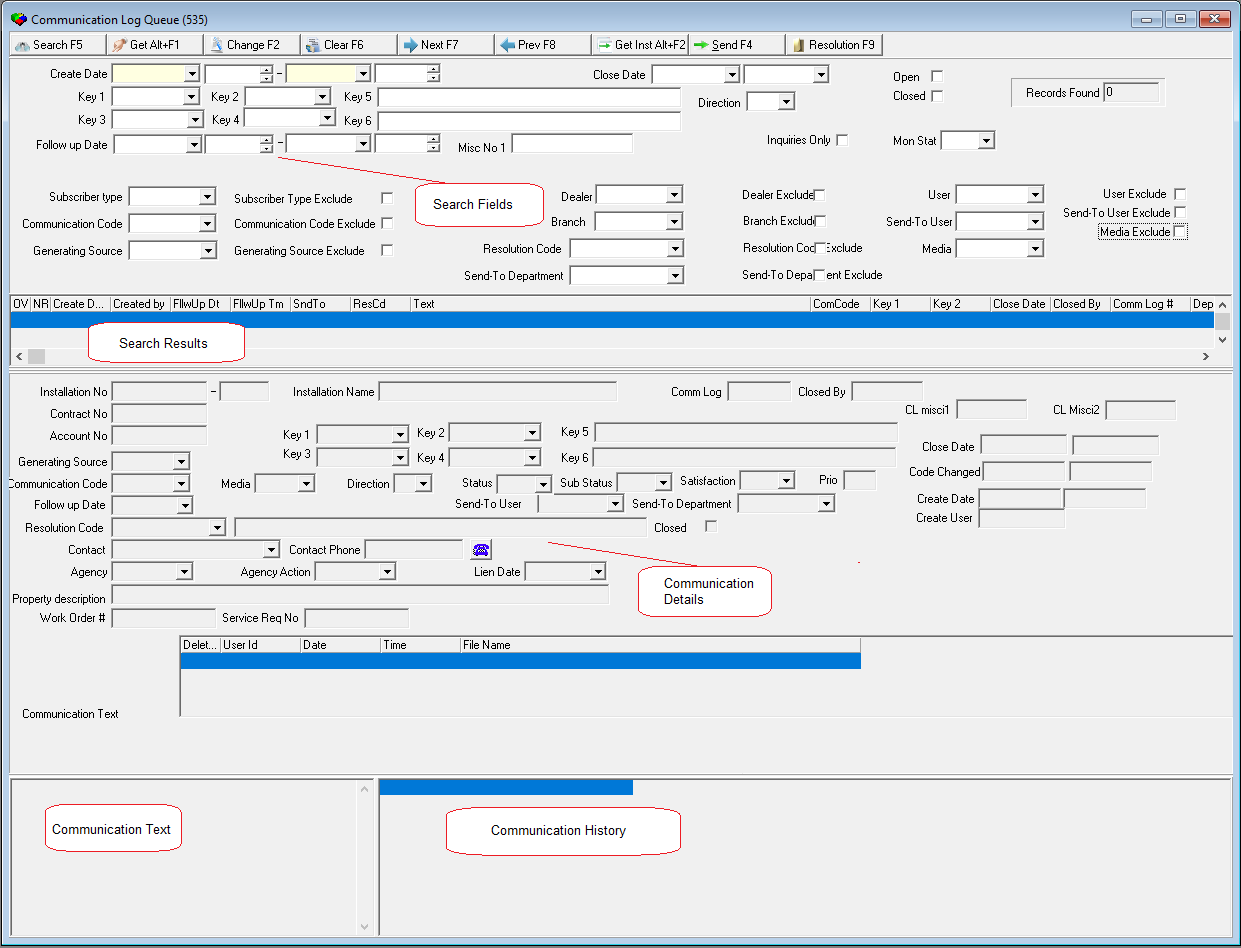
In Code —- select code for communication type.
In Key 1 and Key 2 —- select company defined variables.
In Follow up Date —- select date for resolution deadline.
In Media —- select code for media type.
In Direction —- select Incoming or Outgoing.
5. Add free-form text in the Communication text pane, as needed.
6. Choose Save [ENTER].
SBN saves your changes and adds any new communication text to the communication history for the selected entry.
SKILLS
Module topics
In this module you will learn about the following:
Setting up Skills
Using Skill Monitor
Setting up Skills
Use Skills (program #1862) to define and maintain skill levels that you can attach to users, terminals, and customers for the routing of signals in Monitoring. You can define specific language skills needed, the ability to dispatch alarms, or the ability to handle incoming alarms. Use Zoom In/Out of Sublevel to display details for skill level definitions. This opens the Details tab for defining the skills associated with the selected skill level.
To access this program, select Skills (program #1862) from the main menu of SBN.
The Skills Window
The following graphic shows Skills as the program opens. The upper pane displays all previously defined skill levels.
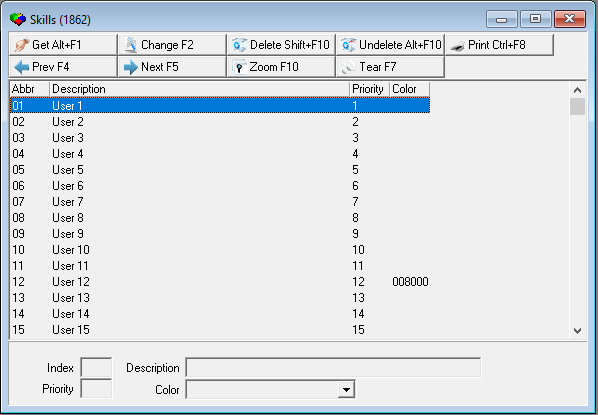
|
|
|---|---|
|
|
|
|
|
|
|
|
To define a skill
Highlight the user number you would like to define.
Select Zoom.
? The Skill Details screen appears filled with details of the selected User.
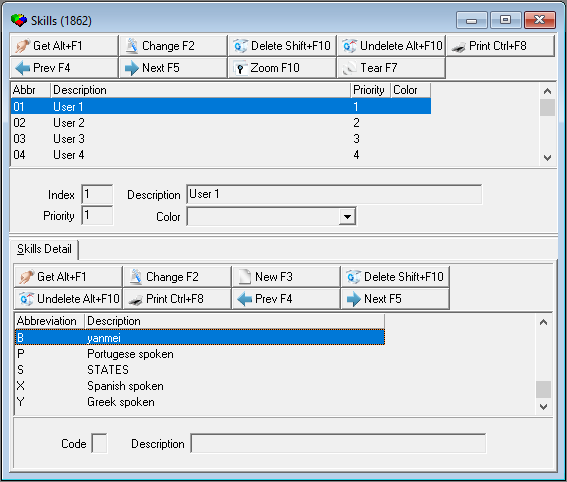
Select New to enter a new code.
? The Skill Details screen appears asking for new Code and Description.
To define a skill at the Personnel level:
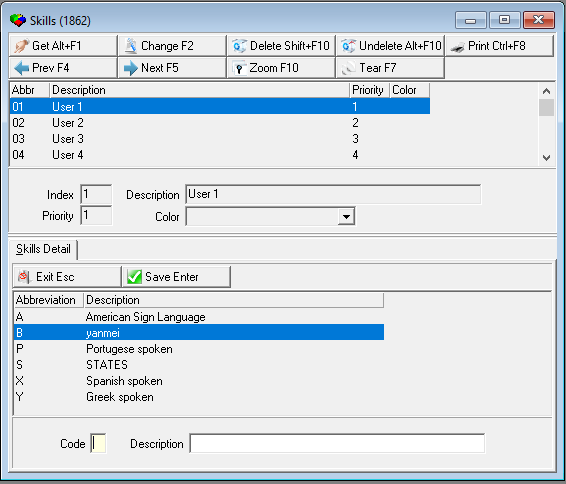
In program #1811 (Personnel) select the Personnel ID to which you want to assign the skill and select Zoom.
In the Users tab, highlight the User ID to which you want to assign the skill and select Change. From the drop-down menu, select the skill defined in program #1862 (Skills).
? SBN updates the user’s skills.
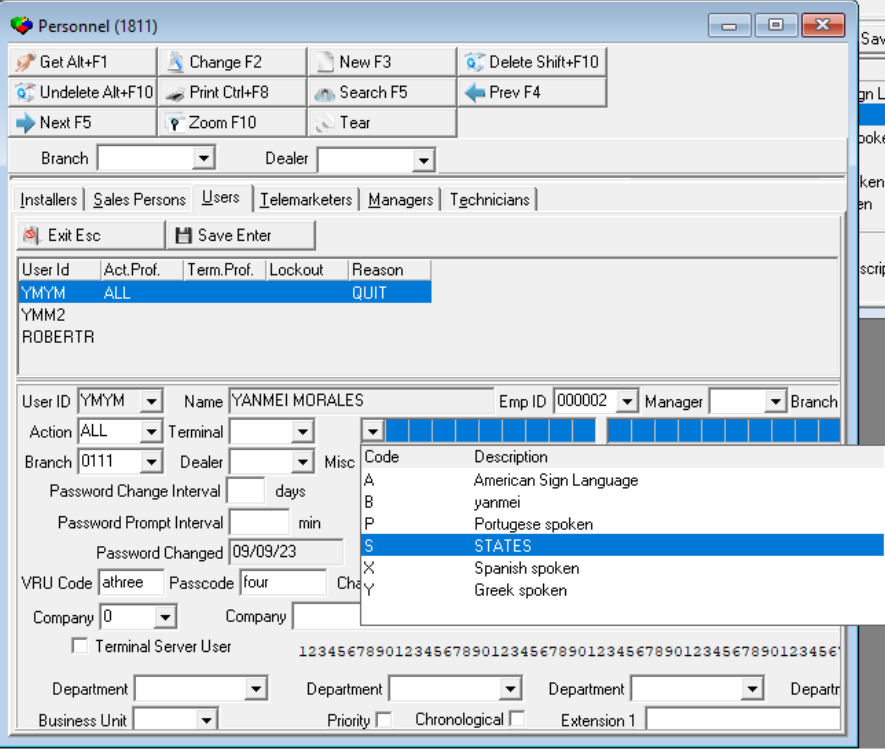
Using Skill Monitor
Use Skill Monitor (program #1890) to set parameters for removing skill limitations assigned to the customer, operators, or terminals until a skilled operator is available to handle the alarm. Thus, if an alarm comes in with specific skill routing, but all operators with those skills are unavailable, the Skill Monitor determines how long the alarm waits for the skill before moving on to an operator without the skill.
Note: The skill monitor ONLY applies to Alarm Queues 1, 2, and 15.
To define a skill monitor:
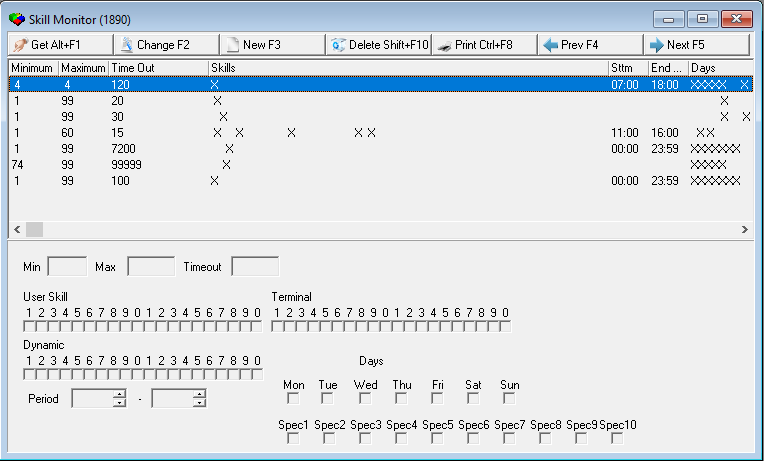
Select New
Enter data in the Minumum, Maximum, and Timeout fields as required.
Note: Minumum and Maximum fields refer to the priority level of the incoming signal.
Note: The Timeout field is for the time in seconds that the signals stay in the queue with skills before having the skill designation removed.
Fill in other fields as needed.
OPTIONS
Module topics
In this module you will learn about the following:
Options
Options
Use Options (program #1887) to view all SBN options and their settings.
SBN supports two types of options: conditional options and value options. Conditional options must be set to either on or off with a + or - in the Active column of this program. Value options apply limits based on the value entered, such as a number of days or an amount of money.
Dynamic options contain a sublevel tab in which can you attach dealer IDs or translations. Translations will appear in the language defined in the user’s profile. You may attach both translations and dealer IDs to value options. However, you may attach only dealer IDs to conditional options.
Changing Dynamic Options
Both conditional and value options may be dynamic — options that you can change. If an option does not contain a + in the Dynamic column, you must enter an SR to have Innovative make changes to the option.
Use the following steps to change a dynamic option:
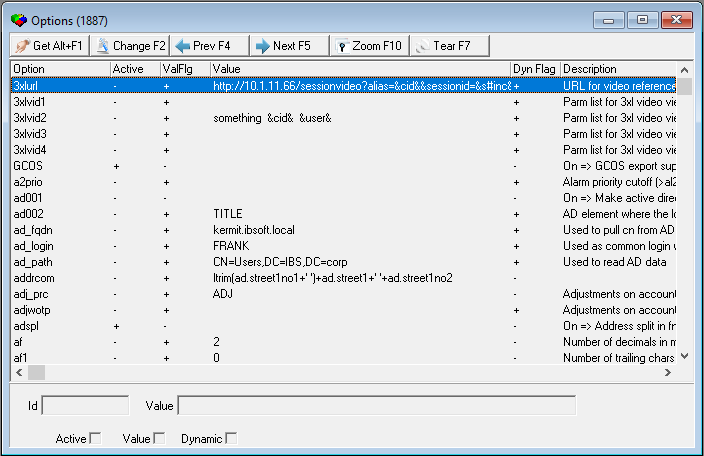
In Options, select the option you want to change.
Double-click your selection or choose Get Record.
Choose Change Record.
??Fields in the lower pane open for changes. On a Conditional option, the Active check box opens.
On a Value option, the Value text field opens.


Enter changes.
Choose Save.
Zooming into the Sublevel
Dynamic options contain a sublevel tab in which can you attach dealer IDs or translations. Translations will appear in the language defined in the user’s profile. You may attach both translations and dealer IDs to value options. However, you may attach only dealer IDs to conditional options.
Note: Not all dynamic options will pick up translations automatically. Some options require SQL updates to utilize translations. If an option does not display the correct translation, please contact Innovative for support.
Note: Actions 1887/10-14 control access to the sublevel tab and functions.
The Dealer / Translations Tab
The following graphic shows the Dealer / Translation tab. The tab displays previously defined translations and previously associated dealers.
Changing the Details of a Dynamic Option
After you add details to a dynamic option, you may change
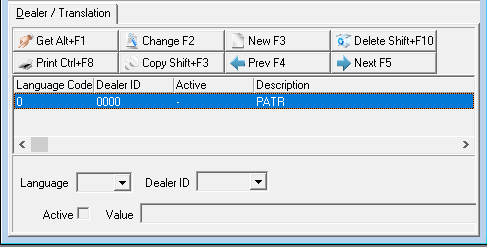
The translation of a value
The status of an active option
Use the following steps to change the details of a dynamic option:
1. In the Dealer / Translations tab, select the option for which you want to change the details.
2. Double-click your selection or choose Get Record.
3. Choose Change Record.
?Fields in the lower pane open for changes. On a Conditional option, the Active check box opens.
On a Value option, the Value text field opens.
Enter changes.
Choose Save.
Adding Details to a Dynamic Option
You can add details to a dynamic option.
Use the following steps to add details to a dynamic option:
1. In Options (program #1887), select the dynamic option to which you want to add details.
2. Choose Zoom in/out of Sublevel.
The Dealer / Translations tab appears.
3. In the Dealer / Translations tab, choose New Record.
If the dynamic option is a Value option, the Language, Dealer ID, and Value fields open in the lower pane of the window.
On a Value option, the Value text field opens.
4. Complete fields.
Choose Save. SBN adds the details to the selected dynamic option.
5. Repeat steps 3-5 for each dealer ID, translation, or Active status you want to attach to the selected dynamic option.

ZONES
Module topics
In this module you will learn about the following:
Setting up Zone Types
Setting Up Zone Types
Use Zone Types (program #1733) to define and maintain zone types used by SBN, and to specify information on alarm processing for each zone type. The zone types defined in this program are used in the Zones tab of Data Entry.
The following table describes the fields and columns used in the main window of Zone Types.
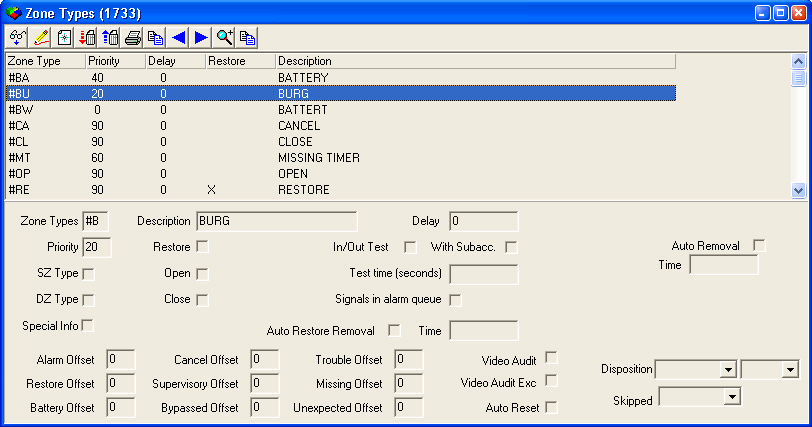
| Field/Column | Description |
|---|---|
| Zone Type | Unique identifier. |
| Description | Text description of the zone type. |
| Delay | Time, in seconds, before a signal generates an alarm. |
| Priority | Priority of alarm signal. Lower numbers are the highest priority. |
| Restore | Enter a check mark in this box to require a restore for this zone. |
| In/Out Test | Enter a check mark in this box if the selected zone type represents an auto test zone. When you receive an alarm signal, SBN places the account in test; when you receive a restore signal, SBN removes the account from test. |
| With Subacc. | Enter a check mark in this box to place all sub-accounts test and remove all sub-accounts from test
|
| Auto Removal | Enter a check mark in this box to automatically remove a signal on the selected zone type from the Alarm Queue. SBN removes the signal from the Alarm Queue when it is received alone, and when a signal from a designated zone type/subscriber type combination (defined in the Details tab) is received within the time defined in the Time (Auto Removal) field. Note: SBN does not remove a signal on the selected zone type from the Alarm Queue if the signal is assigned to an operator/terminal, or if signals from zone types other than those in the Details tab are received within the time defined in the Time (Auto Removal) field. |
| SZ Type | Enter a check mark in this box if the zone type handles SZ openings. If you receive an open signal for a zone with a zone type that has the SZ flag set, SBN interprets the Zone ID as the User ID. (Zone = User ID). |
| Open | Enter a check mark in this box to treat any signal received for this zone as an Open. |
| Test Time | Time, in seconds, the signal should remain in test if you do not receive a restore. |
| Time (Auto Removal) | Time, in seconds, within which a designated signal (defined in the Details tab) must be received after a signal on the selected zone type in order for SBN to remove the signal on the selected zone type from the Alarm Queue. Note: The Auto Removal check box must be selected to activate this feature. |
| DZ Type | Enter a check mark in this box if the zone type handles DZ openings. If you receive an open signal that has no Zone ID but has a User ID, SBN searches the account for a zone that matches the User ID number. If the zone exists and has a zone type with the DZ zone flag set, SBN routes the signal to this zone. If this zone has a sub-zone, SBN routes the signal to the sub-zone account. (User ID = Zone). |
| Close | Enter a check mark in this box to treat any signal received for this zone as a Close. |
| Signals in Alarm Queue | If the zone is an In/Out of Test zone, enter a check mark in this box to display a signal from this zone in the Alarm Queue. If blank, the initial signal displays in the Test Queue. |
| Special Info | Enter a check mark in this box to display the alarm translation text (instead of the Zone Type Text) in Dispatch and in the Alarm Queue. When this box displays a check mark, the Zone Type Text is read-only in the zoom window of the Zones tab. |
| Auto Restore Removal | Enter a check mark in this box to remove the alarm from the Alarm Queue when you receive a restore signal in the time specified (in the Time field) before an operator has taken any action on the alarm. Note: The actual zone must be set for Exceptions for this feature to work. |
| Time (Auto Restore Removal) | Time, in seconds, allowed for a restore signal to remove an alarm from the alarm queue. This field now supports values greater than 32000. |
| Alarm Offset | Number to add to the priority when the alarm type Alarm occurs on the zone. Note: For example, if the zone type priority is 2 and the Alarm offset is 2, and an ’r;Alarm’ signal is received on that zone, the priority changes to 4. |
| Cancel Offset | Number to add to the priority when the alarm type Cancel occurs on the zone. |
| Trouble Offset | Number to add to the priority when the alarm type Trouble occurs on the zone. |
| Video Audit | A check in this box indicates installations with the selected zone type display in the Video Audit window of the program #559 Dispatch tab. |
| Disposition | Monitoring event to record in the Alarm Log when SBN removes signals on the selected zone type from the Alarm Queue. (This menu originates from program #1621 and only includes events flagged as Alarm Resolutions.) Note: The Auto Removal check box must be selected to automatically remove a signal on the selected zone from the Alarm Queue. |
| Disposition Extension (No label) |
Monitoring event extension to record in the Alarm Log when SBN removes signals on the selected zone type from the Alarm Queue. (This menu originates from program #1751.) Note: The Auto Removal check box must be selected to automatically remove a signal on the selected zone from the Alarm Queue. |
| Restore Offset | Number to add to the priority when the alarm type Restore occurs on the zone. |
| Supervisory Offset | Number to add to the priority when the alarm type Supervisory occurs on the zone. |
| Missing Offset | Number to add to the priority when the alarm type Missing occurs on the zone. |
| Video Audit Exc | A check in this box indicates installations with the selected zone type generate incidents in the Alarm Log if they fail a video audit. |
| Battery Offset | Number to add to the priority when the alarm type Battery occurs on the zone. |
| Bypassed Offset | Number to add to the priority when the alarm type Bypassed occurs on the zone. |
| Unexpected Offset | Number to add to the priority when the alarm type Unexpected occurs on the zone. |
| Skipped | Monitoring event to record in the Alarm Log when SBN does not remove a signal on the selected zone type from the Alarm Queue because the signal is assigned to an operator/terminal. (This menu originates from program #1621.) Note: The Auto Removal check box must be selected to activate this feature. |
| Skills | Set of up to 20 skills a user should have to handle alarms on zones of this type, such as fluency in a specific language. (These menus originate from program #1862.) Define user skill sets in program #1501, program #531, or in the Users tab of program #1811. |
| Terminal Skills | Set of up to 20 skills a terminal should have to handle alarms on zones of this type, such as access to two-way voice equipment. (These menus originate from program #1862.) Define terminal skill sets in program #1861. |
| Dynamic Skills | 20 fields to define a dynamic skill level for the zone type. When a dynamic skill level is defined for a monitoring session in the Session Skills fields of the Alarm Queue tab of program #559, only alarms on zone types with a matching skill level appear in the Alarm Queue. (These menus originate from program #1862.) Note: When option mo238 is on, SBN automatically assigns dynamic skill level 1 to new alarms in the Alarm Queue tab of program #559 that do not have dynamic skills defined for their zone type. |
| Multiple Trip Priority Offset | This field can contain a numerical value which determines the priority level for an alarm with multiple signals. The priority level decreases by this value in the Alarm Queue of program #559 for alarms with multiple signals for the same incident. |
| Mobile Agency | Select this check box to allow SBN to insert GPS latitude and longitude coordinates received in an alarm signal on the selected zone type into the PSAP Queue automatically. The PSAP web service then updates the police agency information on the action plan for the zone. Note: The value of option psapgq determines whether SBN sends latitude/longitude updates or address updates to the PSAP Queue. Installations with a GeoCode Quality (entered in program #559) greater than or equal to the value of option psapgq send latitude/longitude updates to the PSAP Queue. Installations with a GeoCode Quality less than the value of option psapgq send address updates to the PSAP Queue. |
| eDispatch | Select a code from the drop-down menu to make the zone type eligible for eDispatch alarm handling by a PSAP (Public Safety Answering Point) outside of SBN. When SBN receives an alarm on a zone of a type with an entry in this field, after the installation address has been verified in program #1675, you may choose to send the incident to a PSAP to be handled outside of SBN in the Agency Details window of Dispatch (program #537). Current available codes in this menu are: Burglary Duress Fire Fire - Heat Fire - Keypad Fire - Pull Station Fire - Smoke Fire - Sprink Gas Gas - CarDiox Gas - CarMono Gas - Natural Gas - Propane Holdup Med – Alarm Med - Defib Open/Close Panic Phoneline Receiver Reset/Cancel Restore Supervisory Tamper Trouble Trouble - Fire |
| Allow SMS | SBN allows a user to select a zone type and check the Allow SMS checkbox. When a signal is received SBN will search for a qualifying match. |
| Enable IVR | Select this check box to indicate that the automatic IVR process is used for this zone type. |
IVR Auto Insert The fields in this section only appear when the Enable IVR check box is selected |
|
| Queues Allowed | Select a check box for each of the alarm queues where alarms on the selected zone type are automatically processed by the IVR. |
| VDN Type | The number in this field determines the VDN type to use in the IVR activity table. Note: Depending on the type of IVR your company uses, an entry in this field may not be necessary. |
| Call Type | Determines the IVR call flow that SBN uses for the selected zone type. (The call flows in this menu are those with the Call Type check box selected in the IVR tab of program #559.) |
| Even Param | Along with the contact type in an action plan, the Event Parameter determines the call type that SBN uses for each contact in an action plan. For example, if the event_param is 'CAN' and the cont_type = 'P' (premise), then the call_type = 'CAN'. If the event_param = 'CAN' and cont_type = 'C' (contact person), then call_type = 'ICL'. Note: Use option ivr019 to define a field position in program #1590 that defines the drop-down menu for this field. |
| Initial Date Threshold | Number of days that have passed since the alarm system installation date in order for SBN to begin automatic IVR processing. (If this number of days has not passed since the installation date, SBN does not begin IVR processing.) |
| Lone Trigger | Select this check box if an alarm on the zone type received alone triggers IVR processing. |
| IVR_REST Bypass | Select this check box to prevent IVR processing on the selected zone type. Users can begin IVR processing on any zone type in Dispatch (program #537) regardless of whether the Enable IVR check box is selected in program #1733 unless this check box is selected. The IVR will not process zone types with the IVR_REST Bypass box checked under any circumstances. |
| Max Time (Seconds) | Maximum number of seconds from incident start to process. If the incident began within the max time, then proceed with IVR processing. |
| Runaway | Determines if the triggering installation must be put in Runaway mode after the incident is created and IVR processing is started. |
| Runaway Days | Number of days to put the triggering installation in Runaway mode. |
| Two-Way Voice | This check box determines whether SBN considers the amount of time that has passed since an alarm was received by the IVR Bridge Control table to begin IVR processing. If an alarm comes in on a zone of a type with this check box selected and more time has passed than the number of minutes defined by option ivr027 since the signal was received by the IVR Bridge Control table, SBN does not activate IVR processing for the alarm. |
| SEFCO Timer 1 | Signal count timer 1 (value in days). |
| SEFCO Timer 2 | Signal count timer 2 (value in days). |
| SEFCO Count 1 | Counter. Number of signals acceptable within timer 1. |
| SEFCO Count 2 | Counter. Number of signals acceptable within timer 2. |
| SEFCO Tolerance | Signal counter time tolerance (Value in minutes). |
Zooming into the Sublevel
Zone Types contains two sublevel tabs:
The Translations tab - in which you add translations to zone types. The zone types then appear in SBN in the user’s language.
The Details tab - in which you may attach zone type/subscriber type combinations that SBN uses for the Auto Removal feature. If the Auto Removal check box is selected for the selected zone type, SBN automatically removes a signal on the selected zone type from the Alarm Queue. SBN removes the signal from the Alarm Queue when it is received alone, and when a signal from a designated zone type on an installation of the designated subscriber type is received within the time defined in the Time (Auto Removal) field.
The Translations Tab
The following graphic shows the Translations tab. The tab displays previously defined translations.
The Details Tab
The following graphic shows the Details tab. The tab displays previously defined zone type/subscriber type combinations that SBN uses for the Auto Removal feature.
The Branches Tab
The following graphic shows the Branches tab. The tab displays a list of branches that are excluded from automatic IVR processing for the selected zone type.
The Dealers Tab
The following graphic shows the Dealer tab. The tab displays a list of dealers that are excluded from
automatic IVR processing for the selected zone type.
The Sub Type Tab
The following graphic shows the Sub Type tab. The tab displays a list of zone type/subscriber type combinations that SBN allows within the incident and before an alarm on the selected zone type to proceed with IVR processing.
The Call Type Tab
The following graphic shows the Call Type tab. The tab displays combinations of branch, dealer, and subscriber type that can override the call type defined for the selected zone type.
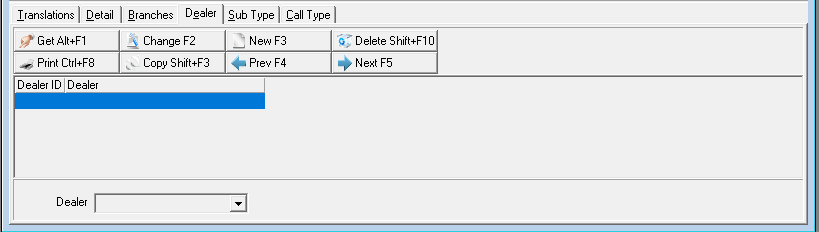
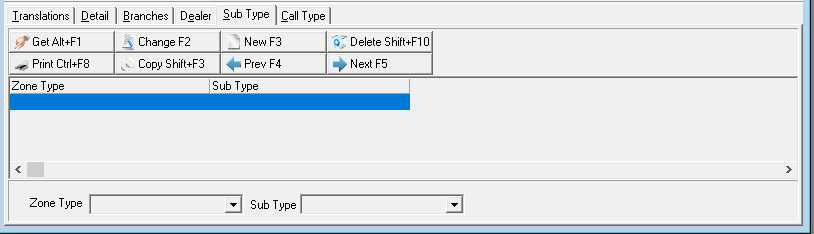
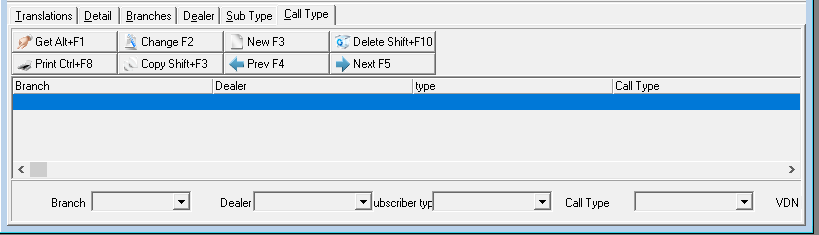
ALARM TRANSLATION TABLES
Module topics
In this module, you will learn about:
Setting up Alarm Translation
Simulating Alarms
Setting Up Alarm Translation Tables
The Alarm Translation Table (program #1876) translates incoming signals from SBN GUI Concentrators. Incoming signals may originate as alarms from installations, error signals, test signals, or other types of signals. Additionally, incoming signals originate from many different protocols. Some protocols have fixed definitions (e.g., SIA) and others have flexible definitions (e.g., ADEMCO High Speed).
After an alarm receiver receives an incoming signal, the alarm receiver sends a message to an SBN GUI Concentrator. SBN GUI Concentrators collect and concentrate signals from multiple receivers and pass
these signals to SBN in formats that allow companies to interpret these signals in a customizable manner.
The messages sent from alarm receivers to SBN GUI Concentrators consist of several parts:
• Date and time
• Receiver and Line Card Identifier
• Customer ID
• Zone
• User
• Area
• Event
• Status
Note: Different protocols may send more or less information.
The Alarm Translation Table (program #1876) translates each receiver and protocol type message so that the SBN database can match the originating signal with a customer’s record and determine the appropriate action, such as:
• Create an alarm
• Log only
• Discard
Translation Example
The following example displays:
• An original receiver message
• The protocol definition of the message
• The SBN GUI Concentrator format of the message
• The check of customer and/or panel for a special translation ID
• The check with a “closest match” algorithm
Example receiver message
An ADEMCO Receiver sends a high-speed message in the format:
rl<sp>cccc<sp>zzzz<sp>zzzz<sp>s example: 12 7777 5555 5155 7
Protocol Definition of the Message
The following table describes the ADEMCO protocol definition of this message.
|
|
|
|
|
|
|
|
|
|
|
|
|
|
|
|
|
|
|
|
|
The SBN GUI Concentrator Format of the Message
The SBN GUI Concentrator forwards the signal to SBN in the following format.
|
|
|
|
|
|
|
|
|
|
|
|
|
|
|
|
|
|
|
|
|
|
|
|
|
|
|
|
The SBN GUI Concentrator has added
• the date
• the time
• the protocol definition with the zone #, zone code, and zone status
• Prefix on CID
The following information has passed through:
• Receiver and line card numbers
• Receiver Type
• Customer ID with prefix
Translation ID
SBN checks the customer record (CID 7777 in this example) in Service/Data Entry (program #559) for a special translation ID.
If the translation field is blank or 0, SBN checks the Panel type (A-4120 in this example) in Panel Types (program #1742) for a special translation ID.
Closest Match Algorithm
SBN searches the Alarm Translation Table for the closest match, if any, based on the available information. The following graphic displays the results of the search for the closest match in the Alarm Translation Table.
Note: The order of information in the table has no significance.
The following table describes the translation.
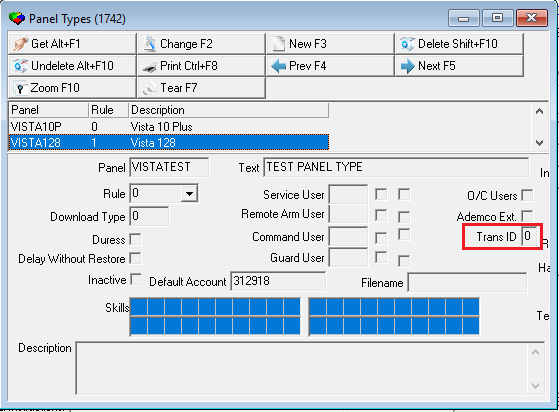
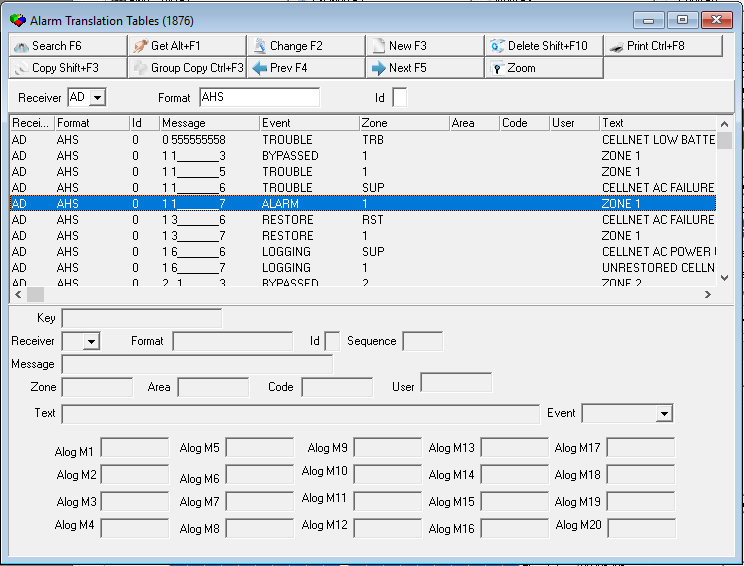
|
|
|
|
|
|
|
|
|
|
|
|
|
|
|
|
|
|
|
|
|
|
|
|
HELPFUL HINT: OPTION FE015
When you have an issue with an alarm and cannot find out its signal, turn on option fe015. When option fe015 is on, it makes backup copies of every signal that enters the Immediate Queue in a special queue, Queue 17. Now, you can look at the alarms to figure out what type of signal is coming in.
Use the following steps to determine why a signal is not interpreted correctly:
1. In Options (program #1887), activate option fe015.
2. Wait for the bad signal to occur.
3. Deactivate option fe015.
4. Look in Queue 17 for the bad signal.
5. Choose the signal and copy it to IMMQ2 by choosing Copy.
The Copy dialog box appears.
6. Choose Yes.
The signal appears in IMMQ2.
7. Run a test in debug mode and try to see why the signal is acting differently.
Note: If you forget to turn off option fe015, Queue 17 will remain full. You need to turn off the option to
remove alarms from this queue.
If you want to test alarm translation tables, accumulate a full day's worth of signals in Queue 17. Then, you can move them over to a test server and play back real signals to see the signals in
the alarm translation tables.
Receivers
Currently, the Concentrator supports the following receivers/format types: ADEMCO (Ademco 685, Contact ID)
ALARM FORCE
ALARM NET ARITEC TAC-90 MODIF AUDIOLITE CARE NET CELLULARM COMPUTEC
DCX DEBUGGER RX DERIVED CHANNEL 1 DM8 DOMITECH DMP SCS-q ELEKTROLUX ETM EMERSON FBI
FRANKLIN FUTURE 56
FUTURE 57 HSL1
HSL PRN READER IBS GSM IEI E6800 INFRANET ITI KELTRON
MC II MORSE POLLING MULTICOM OSBORNE HOFFMAN
OZVISION POLLING MACHINE (Datavision) PRO-COM EXTENDED RADIONICS 6500/6000
RC-4000 RECEIVER TEST ROBOFON RBM-600
SAFECOM SCANCOM SDN SMS SDS SEABOARD RF SECOM
Note: Signals with Event 28 and a
zone like HEARTBEAT will now be acknowledged and not sent to ALGEN.
SECURITEL SESCOA 3000
SIA SILENT KNIGHT 9000
SPC-5000 MORSE POLLING SURGARD MLR 2000
SURGARD SIA (Contact ID) TAR-200 AUDIOLITE VERITECH V300 VIGILANTE FIRE PANEL WESTEC
Simulating Alarms
You can test signal translations from Alarm Translation Tables (program #1876) by simulating an alarm in the Dispatch tab.
The Dispatch Tab
The following graphic shows the Dispatch tab.
Simulating an Alarm
Use the following steps to simulate an alarm:
1. In Service/Data Entry (program #559), select the Dispatch tab.
2. Choose Monitoring Commands [F2].
3. Select SIM Alarm (CTRL+S).
? The Simulate Alarm window opens.
4. Complete the fields as desired.
Note: For testing signal translations for program #1876, use the following format in the following fields:
In Comment —
• The first three characters match the “Format” from program #1876.
• The fourth character can be anything.
• Characters five+ must match the Message ID.
In Orig Field —
• The first two characters must match the receiver ID.
• The last four characters must be ##RW
5. Choose Save.
6. Select the Alarm Log tab to view the simulated alarm.
If you want to test alarm translation tables, accumulate a full day's worth of signals in Queue 17. Then, you can move them over to a test server and play back real signals to see the signals in the alarm translation tables.
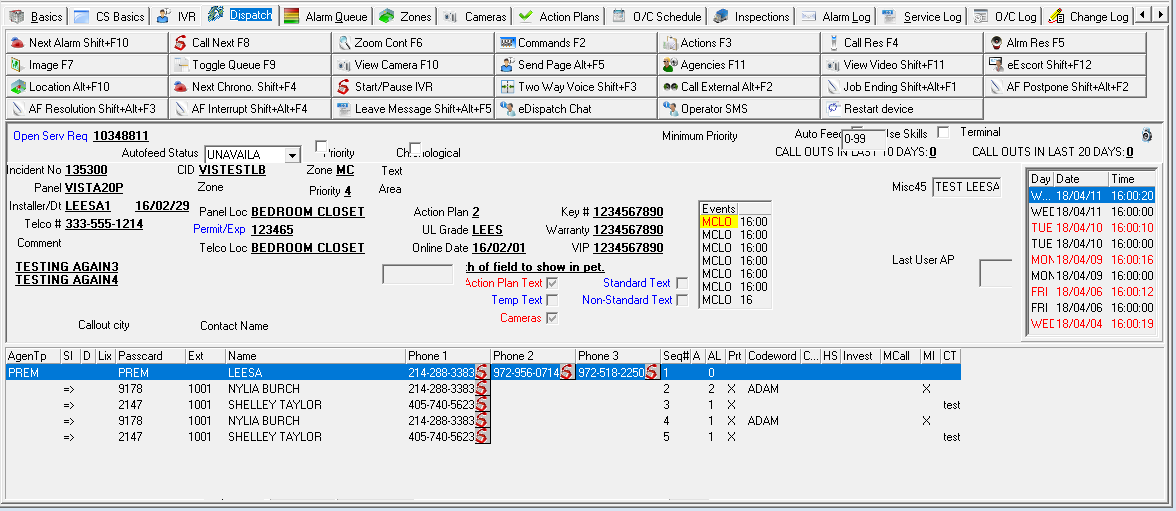
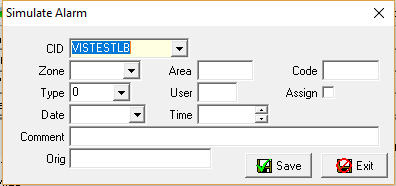
ALARM QUEUE UTILITIES
Module topics
In this module, you will learn about:
Immediate Queue Utility
Clear Queue
Queue Routing
Immediate Queue Utility
Only system administrators should use Immediate Queue Utility (program #557). In Immediate Queue Utility, system administrators delete signals used in testing, or copy signals that stuck from one immediate queue to another immediate queue.
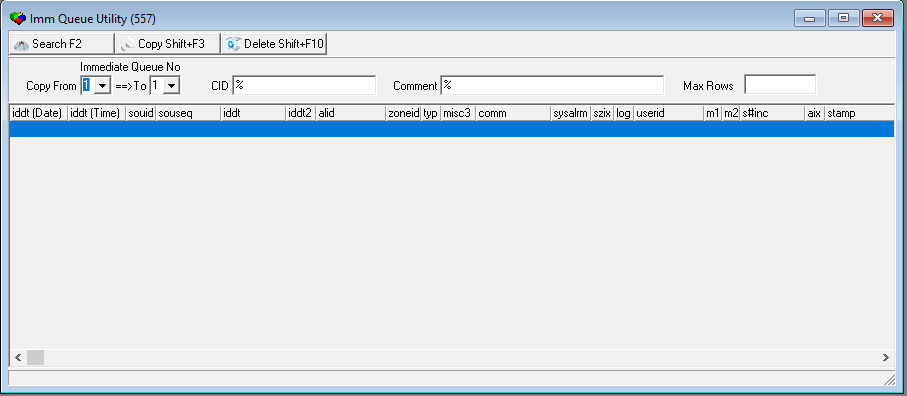
|
|
|---|---|
|
|
|
|
|
|
|
|
|
|
|
|
|
|
|
|
|
|
|
|
|
|
|
|
|
|
|
|
|
|
|
|
|
|
|
|
|
|
|
|
|
|
|
|
|
|
|
|
Searching for Signals to Delete or Copy
Use the following steps to search for Immediate Queue signals to delete or copy:
1. Select and/ or type search parameters in the applicable fields.
2. Choose Search.
?SBN displays all signals that match the search parameters.
Copying a Signal from One Immediate Queue
Use the following steps to copy a signal from one Immediate Queue to another Immediate Queue:
1. Select a signal to copy.
2. Choose Copy Current Record.
?SBN asks you to confirm the copy.
3. Choose Yes.
?SBN copies the signal from one Immediate Queue to another Immediate Queue.
Deleting a Signal from an Immediate Queue
Use the following steps to delete a signal from an Immediate Queue:
1. Select a signal to delete.
2. Choose Delete record.
?SBN asks you to confirm your choice.
3. Choose Yes.
?SBN deletes the signal from the Immediate Queue.
Clear Queues
In Clear Queues, users with necessary authorization can move alarms from one queue to another queue or can remove alarms from a selected queue.
To access this program, select Clear Queues (program #567) from the main menu of SBN.
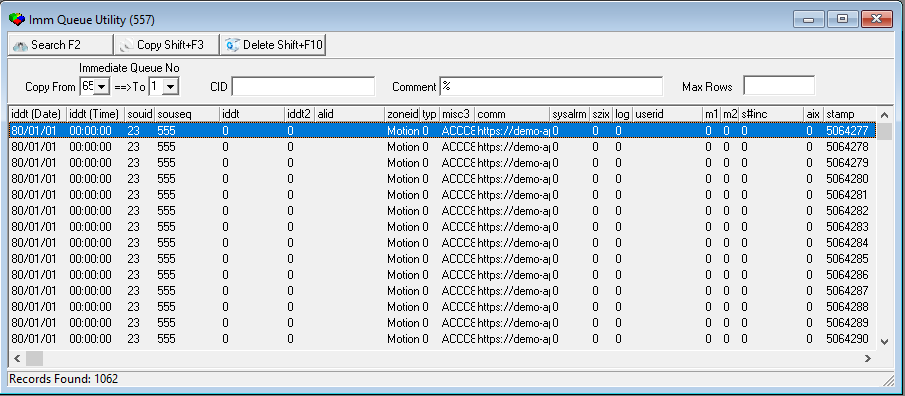
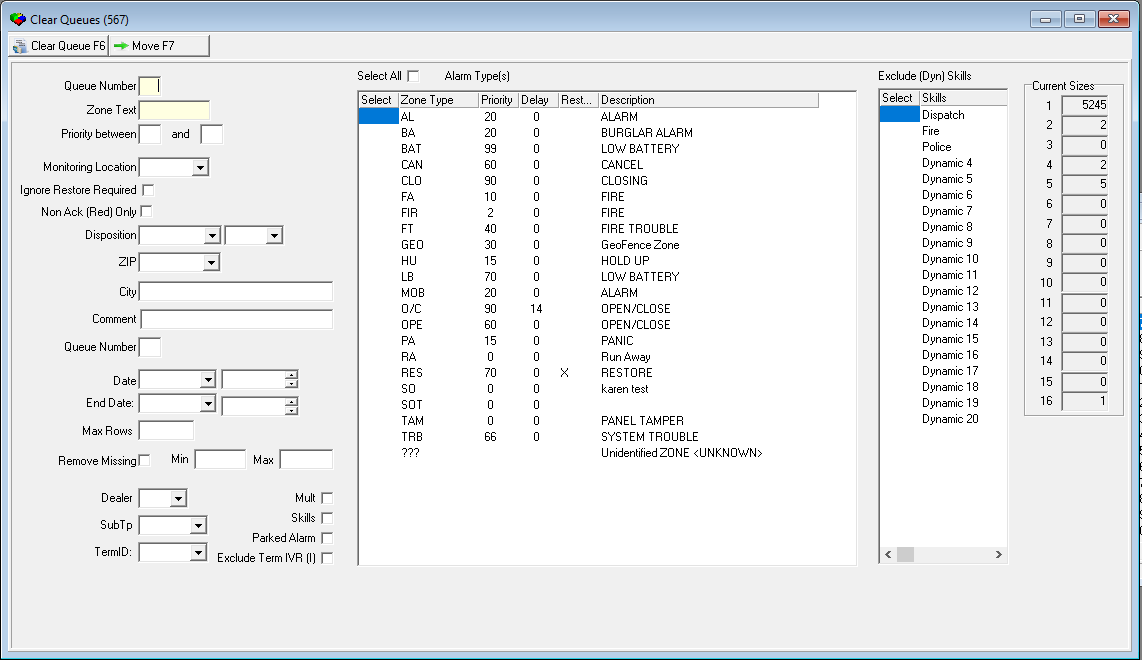
|
|
|---|---|
|
|
|
|
|
|
|
|
|
|
|
|
|
|
|
|
|
|
|
|
|
|
|
|
|
|
|
|
|
|
|
|
|
|
|
|
|
|
|
|
|
|
|
|
|
|
|
|
|
|
|
|
|
|
|
|
|
|
|
|
Moving Alarms to Another Queue
Use the following steps to move alarms from one queue to another queue:
1. In Clear Queues, fill in the fields.
Note: The first Queue Number field is the queue from which you want to move alarms. The second Queue Number field is the queue to which you want to move alarms.
2. Choose Move Alarms.
SBN moves the alarms that match your selected parameters.
Removing Alarms from a Queue
Use the following steps to remove alarms from a queue without moving them to another queue:
1. In Clear Queues, fill in the fields except the second Queue Number field.
2. Choose Clear Queue.
SBN removes alarms from the selected queue.
Clear Button
The Disposition and Event Extension fields are now mandatory only when you choose the Clear button in program #567.
An Alarm Type(s) grid was added to allow you to select one or more Zone Types to be moved or cleared.
An Exclude Term IVR (I) check box was added to exclude alarms assigned to Interactive Voice Response (IVR) terminals from being moved or cleared.
An Exclude (Dyn) Skills grid was added to allow you to select one or more check boxes to exclude all alarms with the specified dynamic skill(s) (as defined on the Dispatch tab of #559) from being moved or cleared.
Queue Routing
System administrators use Queue Routing to define which alarm types, at specified times, go to which alarm queues. This ultimately gives system administrators powerful options for managing alarm activity. After a signal reaches the Immediate Queue, it goes through queue routing.
SBN provides sixteen separate alarm queues, numbered 1 through 16. By default, alarms go to Queue 1. If system administrators define routing requests, alarms go to specific queues.
System administrators can use Queue Routing to relieve alarm overloads. If a specific area is suffering from excessive alarms, the system administrator may choose to route all calls from that area to a specific queue while directing the rest of the incoming alarms equally between the remaining queues.
System administrators can also use Queue Routing to reroute incoming alarms by geographic location or by dealer ID so that specific operators can respond to the calls.
How SBN Routes Alarms
When an alarm is received, SBN first accesses the customer record to determine the monitoring location and zone type. Then, SBN uses the routing requests to determine in which queue to place an alarm from this location/zone type. If SBN cannot find a match in the routing requests for the location/zone type, SBN attempts to place the alarm using only the monitoring location. If this attempt fails, SBN places the alarm in Queue 1.
Each monitoring location (Branch) can be routed to a queue, but only to one queue at a time. (Access to queue number 16 may be restricted by Action 268 in a user’s action profile.
Note: A monitoring operator’s profile determines whether the operator has access to specific queues or to alarms from a specific branch. If the monitoring operator has no defined profile, or the queue number in the profile is blank, the operator sees alarms in Queue 1 only. If the monitoring operator has no profile, or the branch field in the profile is blank, the operator sees all branches.
When the customer’s file does not specify a specific monitoring location, SBN defaults to the customer’s branch. An advantage of having a separate monitoring location is the ability to split up alarms for optimal handling.
Helpful Hint
Queue Routing is all about balance. Sending all video monitoring alarms to a specific queue is a good idea. However, do not inadvertently send alarms to Queue 3 if no one ever checks Queue 3. Make sure that operators are accessing all Queues in use. You could also run into trouble if you end up routing real live signals.
Specific alarm types or zone types can be sent to a specific queue. For example, you can temporarily take all signals from Monitoring Branch 0111 that are zone type FIRE and send them to Queue 16. However, it is easy to forget that you have routed specific zone types to a Queue. Be careful to document any temporary changes you make in case of emergencies.
How the Queue Routing Table Works
SBN controls the queue routing table in two ways. The first is through defined branch/queue/alarm type combinations. Any branch may be represented in any number of ways in any of the queues. See the following examples.
Queue Routing by Branch/Queue/Alarm Information
Monitoring Location Branch has no entry in the queue routing table.
In this case, SBN routes all alarms that originate from this branch through the default routing instruction, which sends them to Queue 1.
Monitoring Location Branch has a queue assignment, but no alarm type defined.
In this case, SBN routes all alarms (of any type) to the assigned queue.
Monitoring Location Branch has one queue assignment, and one specific defined alarm type.
In this case, SBN routes all alarms of a type exactly matching the defined type to the assigned queue. SBN sends all other alarm types to the default queue (Queue 1).
Monitoring Location Branch has one queue assignment with a specific defined alarm type, and a different queue assignment with no defined alarm type.
In this case, SBN routes all alarms of the defined type to the first assigned queue, while routing all other alarms to a second assigned queue.
Queue Routing by Individual User Profiles
SBN also controls the queue routing table through the user’s profile. The user’s profile defines both default monitoring location branches and default queues. If a user’s profile has specific definitions for these two settings, when the user logs into SBN, the profile determines which queue(s) from which branches the user can view. The user’s profile may also define which queue(s) from which dealers the user can view. If the user’s profile does not define settings, the user sees alarms from all branches and/or alarms from Queue 1.
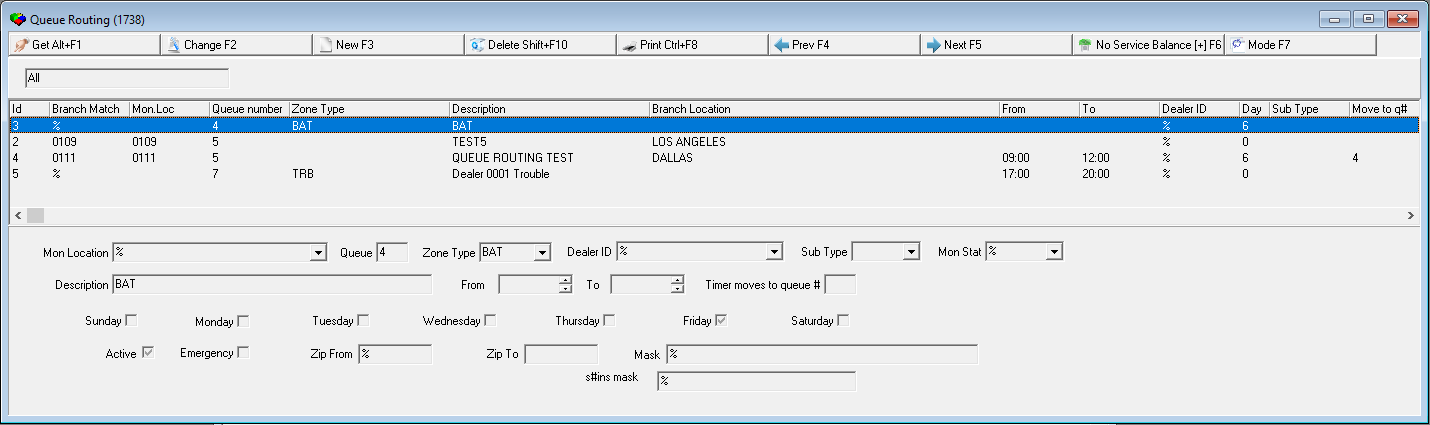
|
|
|---|---|
|
|
|
|
|
|
|
|
|
|
|
|
|
|
|
|
|
|
Adding a Routing Request
You can define a few requests, or you can specify an extensive list of routing instructions. Any requests that you create remain in effect until you delete them.
Warning: When you add or delete a routing request, related alarms that are already assigned to a queue are reassigned, and thus disappear from the monitoring operators’ screens.
A request to reroute alarms associated with a specific dealer ID does not dynamically move alarms already in the queue. The routing request affects only those alarms that arrive after the change to the routing table.
Use the following steps to add a routing request:
1. Choose New Record.
?Fields in the lower pane of the window open.
2. Complete the following fields:
? In Mon Location — select a branch name and number from the list.
? In Queue — type a number for the queue (1-16).
? In Zone Type — select a zone from the list.
? In Dealer ID — select the ID of the dealer whose associated alarms you want to reroute.
? In Description — type a descriptive name for the routing request, such as its purpose.
? In From — select a beginning time of a range of times during which the routing request is in effect.
? In To — select an ending time of range of times during which the routing request is in effect.
? In a Day of the Week box — check what day (or days) the routing request will take place. (If you do not check any boxes, the request will occur every day.)
? In Sub Type — select a subscriber type associated with installations whose alarms you want to route.
3. Choose Save.
?Your routing request appears in the routing table.
Note: There is no warning message if an alarm is routed to multiple queues at the same time or on the same day. When rerouting an alarm, note to which queue the alarm is currently routed.
Note: When option ma023 is on and the Timer Move to Queue Number field in program #1738 indicates that the alarm should be moved to another queue, SBN transfers the alarm to the selected queue when a timer is set on it. The Timer Move to Queue Number field has no function when the option is off.
MONITORING EVENTS
Module topics
In this module, you will learn about:
Monitoring Events
Monitoring Event Extensions
Monitoring Events
Use Monitoring Events (program #1621) to define and maintain dealer and language definitions for all events that SBN posts in the Alarm Log.
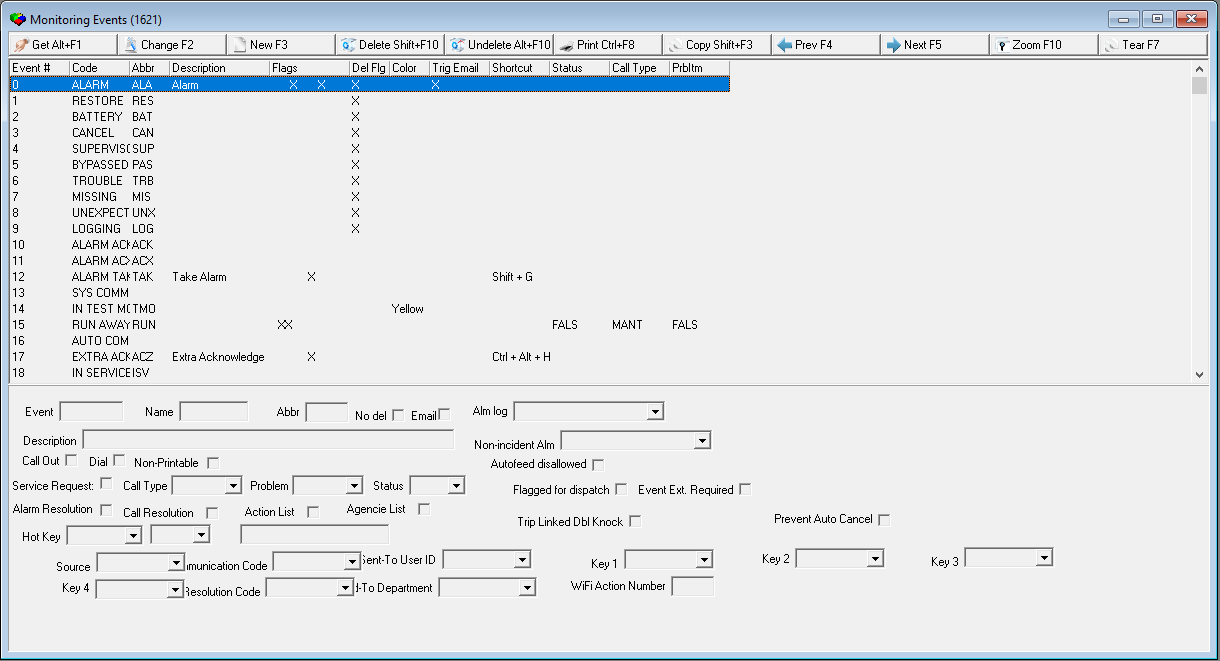
|
|
|---|---|
|
|
|
|
|
|
|
|
|
|
|
|
|
|
|
|
|
|
|
|
|
|
|
|
|
|
|
|
|
|
|
|
|
|
|
|
|
|
|
|
|
|
|
|
|
|
|
|
|
|
|
|
|
|
|
|
|
|
|
|
|
|
|
|
|
|
|
|
|
|
|
|
|
|
|
|
|
|
|
|
|
|
|
|
Assigning Alarm Resolutions and Shortcut Keys
You can designate any event in Monitoring Events (program #1621) as an alarm resolution; all alarm resolution events appear in the Alarm Resolution menu in Dispatch (program #537). You can also assign any shortcut key to an alarm resolution to make handling an alarm in Dispatch easier for operators.
Note: Assign shortcut keys carefully. SBN only checks for duplicate shortcut keys on alarm resolution events.
Use the following steps to designate an alarm resolution:
1. Select the event you want to designate as an alarm resolution.
2. Double-click your selection or choose Get.
The fields in the lower pane fill with the details of the selected event.
3. Choose Change.
Some fields in the lower pane open for changes.
4. Complete the following fields:
Select the Alarm Resolution check box.
In Hot Key, select the first part of the shortcut key from the drop-down menu.
In Hot Key 2 (no label), select the end of the shortcut key from the drop-down menu.
5. Choose Save.
SBN adds the selected event to the Alarm Resolution menu in Dispatch.
The read-only field displays the assigned shortcut key.
Setting Up Service Requests
You can have SBN automatically generate service requests when an operator chooses specified events in Dispatch. To set up service requests for an event, you must designate the event as an alarm resolution by selecting the Alarm Resolution check box. The service request fields are initially grey.
Use the following steps to auto-generate service requests:
1. Select the event for which you want to generate service requests.
2. Double-click your selection or choose Get.
The fields in the lower pane fill with the details of the selected event.
3. Choose Change.
Some fields in the lower pane open for changes.
4. Complete the following fields:
Select the Service Request check box.
In Call Type select the default call type for generated service requests.
In Problem select the default problem code for generated service requests.
In Status select the default status code for generated service requests.
5. Choose Save.
When an operator chooses this event, SBN creates a service request in the Service Log.
Zooming into the Sublevel
Monitoring Events contains a sublevel tab in which you may attach dealer definitions and multiple translations to the events. Those events then appear according to the user's dealer profile and language.
Note: Actions 1621/10-14 control access to the Translations tab and functions.
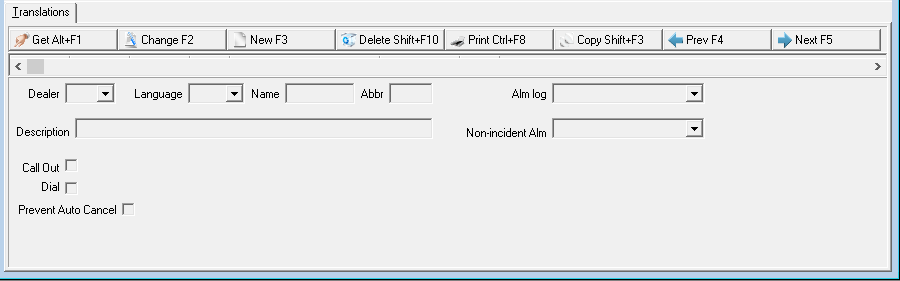
| Field/Column | Description |
|---|---|
| Dealer ID | Dealer ID attached to the entry. Note: If you leave this field blank, the translation defined for the selected event displays for any installation that has the same language defined, regardless of the installation's assigned Dealer ID. |
| Language Code | Code that identifies the language of the associated translation. |
| Name | Alarm code that appears in the Alarm Log. |
| Abbr | Abbreviation of the Alarm Code that appears in the Alarm Log. |
| Alm Log | Defines the color used for the event in the Alarm Log. |
| Description | Text description, in the associated language, of the selected monitoring event. |
| Call Out | When selected, the Dispatch tab treats this event as a call out event. |
| Dial | When checked, the Dispatch tab will activate the auto-dialer for this event. When the translation meets either the dealer or language, this definition will override the Dial flag in the main tab. |
Monitoring Event Extensions
Use Monitoring Event Extensions (program #1751) to define and maintain links for monitoring event extensions so that Monitoring operators can select an extension code that explains each event that SBN posts in the Alarm Log.
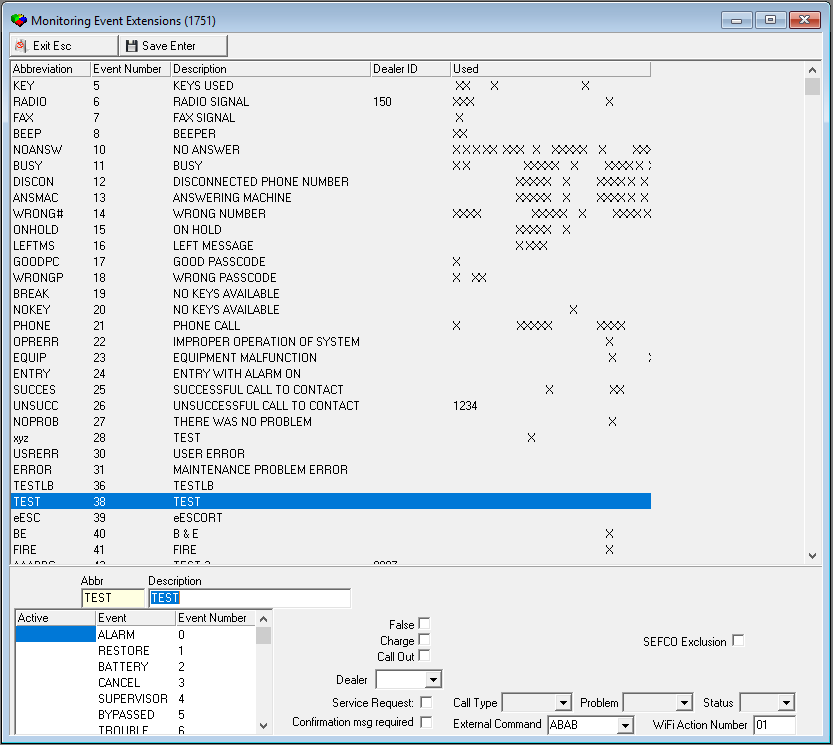
|
|
|---|---|
|
|
|
|
|
|
|
|
|
|
|
|
|
|
|
|
|
|
|
|
|
|
|
|
|
|
Attaching an Event Extension to a Monitoring Event
Use the following steps to attach a monitoring event extension to a monitoring event:
1. Select the event extension you want to attach to an event.
2. Double-click your selection or choose Get.
The fields in the lower pane of the window fill with the details of the selected event extension.
3. Choose Change.
The fields in the lower pane of the window open for changes.
4. In the table, select the Active column heading.
5. On the line of the event to which you want to attach a monitoring event extension, double-click in the Active column.
An empty check box opens in the Active column on that line.
6. Enter a check mark in the check box.
7. Choose Save.
SBN displays an X next to the monitoring event to which the extension is attached.
Setting Up Service Requests
You can have SBN automatically generate service requests when an operator chooses specified event extensions when disposing of an alarm in Dispatch.
Use the following steps to auto-generate service requests:
1. Select the event extension for which you want to generate service requests.
2. Double-click your selection or choose Get.
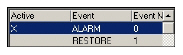
The fields in the lower pane fill with the details of the selected event extension.
3. Choose Change.
The fields in the lower pane open for changes.
4. Complete the following fields:
Select the Service Request check box.
In Call Type select the default call type for generated service requests.
In Problem select the default problem code for generated service requests.
In Status select the default status code for generated service requests.
5. Choose Save.
When an operator chooses this event extension, SBN creates a service request in the Service Log.
Zooming into the Sublevel
Monitoring Event Extensions contains a sublevel tab in which you may attach multiple translations to event extensions. Those event extensions then appear in the user’s language.
Note: Actions 1751/10-14 control access to the Translations tab and functions.
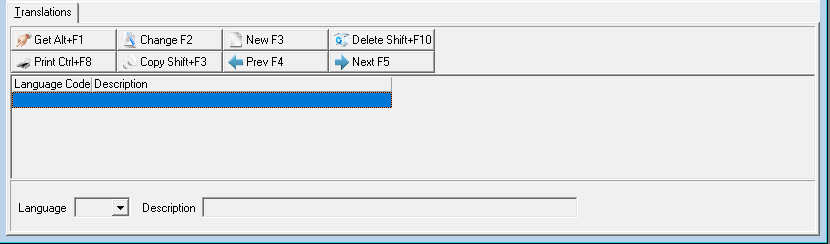
PANEL TYPES
Module topics
In this module you will learn about the following:
Panel Types
Panel Types
Use Panel Types (program #1742) to maintain a menu of panel types in SBN. This menu appears in various programs in SBN, such as Data Entry Master (program #559), so users can select a panel from a predefined list.
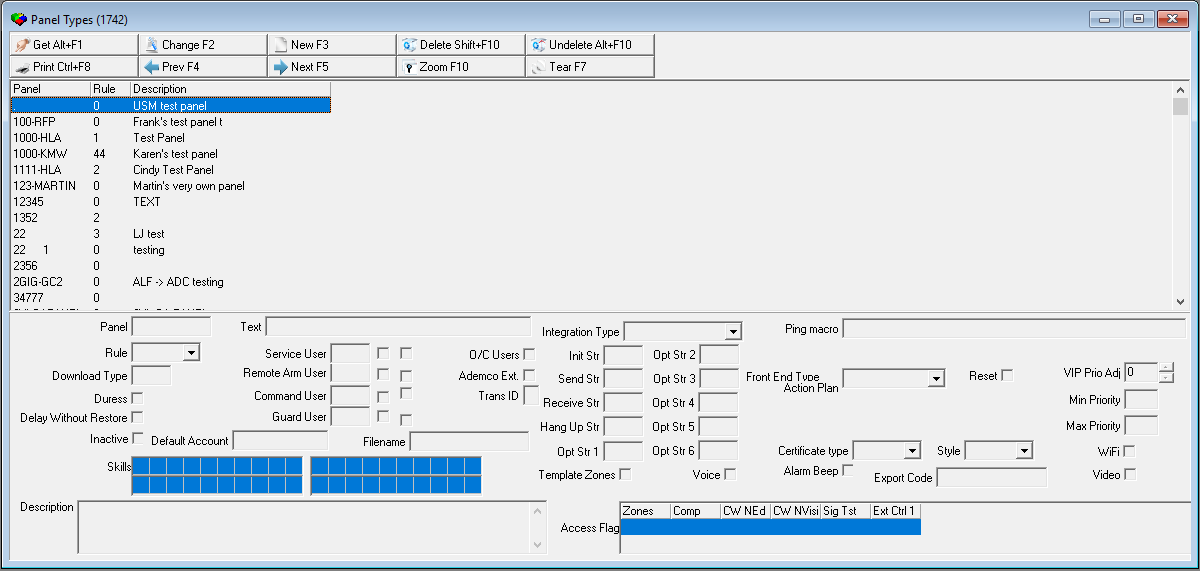
|
|
|---|---|
|
|
|
|
|
|
|
|
|
|
|
|
|
|
|
|
|
|
|
|
|
|
|
|
|
|
|
|
|
|
|
|
|
|
|
|
|
|
|
|
|
|
|
|
|
|
|
|
|
|
|
|
|
|
|
|
|
|
|
|
|
|
|
|
|
|
|
|
|
|
|
|
|
|
|
|
|
|
|
|
|
|
|
|
|
|
|
|
|
|
|
|
|
|
|
|
|
|
|
|
|
|
|
|
|
|
|
|
|
|
Rules for Passcard Generation
The following table describes the rules for passcard generation. Create passcards for contacts in the Action Plans tab of Data Entry Master (program #559). The rule assigned to the primary installation panel determines passcard length and other passcard generation requirements for the installation. (The CID with the Primary check box selected in program #559 determines the primary installation panel. If no CID on an installation has the Primary check box selected, SBN considers the first CID in the CID grid the primary panel.)
You may assign a panel rule number to a panel type in the Rule field of program #1742. Assign a panel to a CID in Data Entry Master and Basics (program #559), then create an action plan for the installation in the Action Plans tab, where the panel rule determines the passcard format requirements. The line index you enter for an action plan contact (displayed in the Lines column of the chart below) determines the details of the required passcard format (such as the prefix). Create open/close schedules in the Open/Close Schedule tab, then assign a schedule and action plan to each zone for the installation in the Zones tab.
Passcard generation follows the rules defined for panels if the passcard is to be downloaded. Passcards that may be downloaded are indicated by an X in the Downloadable column of the Action Plan Details grid. If the passcard is not to be downloaded, no rules apply. Rule 0 is the default.
Each line number may have a different authority level. All passcards for this group must have the same authority level as determined at installation time.
Rules are added on a regular basis as part of downloader software integration. Panel rules are client specific. To request a new panel rule, please contact Innovative.
Known Issue for Ademco Extended Format Panel
There is a known issue with the Ademco Extended Format panel. This was discovered when a concentrator received an Ademco extended format signal (such as the example below) and then received another signal with a triple digit suffix which was the same as an existing system account. The panel format was defined as extended and the result was that the second signal and all subsequent signals were sent into a looping process. The looping occurred because SBN was unsure if the second signal belonged to a separate, existing account or to the initial extended format signal, as the second part of the extended format signal.
Example
The problem can occur when the first extended format signal received is 1230123, and then another signal is received, such as 1230XXX, where 1230XXX is an existing CID in the system with a defined panel as extended format.
SBN cannot be sure if 1230XXX is the second part of the extended format signal or a signal on the existing CID 1230XXX.
Manual Solutions
Two manual solutions are:
Change the CID number to remove the triple digits for the CID.
Change the panel format to anything other than extended format.
Linking a Graphic File to the Panel Type
Use the Filename field to link a graphic file to a panel type that you can view in the Panel Description window in Data Entry Master (program #559). Use option sv030 to define the default directory location for storing graphic files.
Use the following steps to link a graphic file to the panel type:
1. Choose Change Record.
Fields in the lower pane open for changes.
2. Choose Select Image File.
The Open File window opens mapped to the folder defined in option sv030.
3. Select the filename.
4. Choose Open.
The filename appears in Filename in the lower pane.
Defining Special Users
Use the following special user fields in Panel Types to define special user codes to match special user codes embedded in incoming open/close signals:
Service User
Remote Arm User
Command User
Guard User
You may further define the special user fields by entering check marks in the Active and/or Invalid User Exception boxes.
When an open/close signal arrives, SBN checks the signal against the line index of contacts in the associated action plan for a match of the special user code. If SBN finds a match between the special user code embedded in the signal and the line index of a contact in the action plan, SBN logs the signal in the Open / Close Log with the contact name in the Name column. When SBN does not find a match in the action plan, SBN then looks in program #1742 at the definition of the panel that is generating the signal for a matching special user code.
Specifically, SBN looks at
Service User
Remote Arm User
Command User
Guard User
If any of these special users’ fields contain a number that matches the special user code embedded in the signal and the associated Active box contains a check mark, SBN logs the signal in the Open /Close Log with the default text (defined by the option for that special user) in the Name column.
If any of these special users’ fields contain a number that matches the special user code embedded in the signal and both the associated Active and Invalid User Exception boxes contain check marks, SBN generates an ALARM and logs the signal in the Alarm Log and in the Open /Close Log with the default text (defined by the option for that special user) in the Name column.
Note: See the field descriptions for the options that define the default text for each special user field.
If SBN does not find a match for the special user code in the panel definition
or...
If SBN finds a match for the special user code in the panel definition, but the associated Active box is blank, it logs the signal in the Open / Close Log, but leaves the Name column blank
Zooming into the Sublevel
Panel Types contains a sublevel with five tabs:
The Translations tab - in which you may attach multiple translations to a selected panel type. Panel types then appear in SBN in the user’s language.
Note: Actions 1742/20-24 control access to the Translations tab and functions.
The Items Tab - in which you may attach items to a selected panel type.
Note: Actions 1742/30-32 control access to the Items tab and functions.
The Price List Tab - in which you may attach price lists to a selected panel type.
Note: Actions 1742/40-42 control access to the Price List tab and functions.
The Revision Tab - in which you make revisions.
Note: Actions 1742/50-54 control access to the Revision tab and functions.
The Dealers Tab - in which you may attach a Dealer ID to a selected panel type.
Note: Actions 1742/60-65 control access to the Dealers tab and functions.
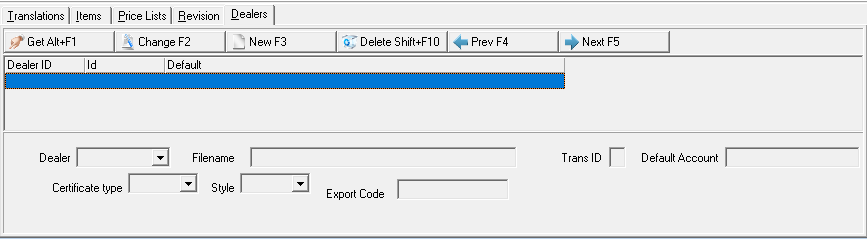
TERMINALS
Module topics
In this module you will learn about the following:
Terminals
Panel Types
Use Panel Types (program #1742) to maintain a menu of panel types in SBN. This menu appears in various programs in SBN, such as Data Entry Master (program #559), so users can select a panel from a predefined list.
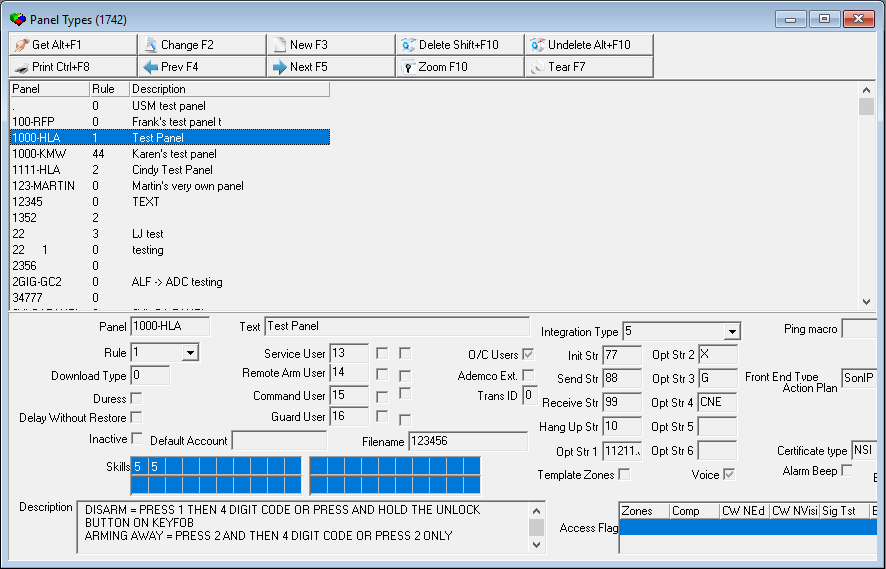
|
|
|---|---|
|
|
|
|
|
|
|
|
|
|
|
|
|
|
|
|
|
|
|
|
|
|
|
|
|
|
|
|
|
|
|
|
|
|
|
|
|
|
|
|
|
|
|
|
|
|
|
|
|
|
|
|
|
|
|
|
|
|
|
|
|
|
|
|
|
|
|
|
|
|
|
|
|
|
|
|
|
|
|
|
|
|
|
|
|
|
|
|
|
|
|
|
|
|
|
|
|
|
|
|
|
|
|
|
|
|
|
|
|
|
Rules for Passcard Generation
The following table describes the rules for passcard generation. Create passcards for contacts in the Action Plans tab of Data Entry Master (program #559). The rule assigned to the primary installation panel determines passcard length and other passcard generation requirements for the installation. (The CID with the Primary check box selected in program #559 determines the primary installation panel. If no CID on an installation has the Primary check box selected, SBN considers the first CID in the CID grid the primary panel.)
You may assign a panel rule number to a panel type in the Rule field of program #1742. Assign a panel to a CID in Data Entry Master and Basics (program #559), then create an action plan for the installation in the Action Plans tab, where the panel rule determines the passcard format requirements. The line index you enter for an action plan contact (displayed in the Lines column of the chart below) determines the details of the required passcard format (such as the prefix). Create open/close schedules in the Open/Close Schedule tab, then assign a schedule and action plan to each zone for the installation in the Zones tab.
Passcard generation follows the rules defined for panels if the passcard is to be downloaded. Passcards that may be downloaded are indicated by an X in the Downloadable column of the Action Plan Details grid. If the passcard is not to be downloaded, no rules apply. Rule 0 is the default.
Each line number may have a different authority level. All passcards for this group must have the same authority level as determined at installation time.
Rules are added on a regular basis as part of downloader software integration. Panel rules are client specific. To request a new panel rule, please contact Innovative.
Known Issue for Ademco Extended Format Panel
There is a known issue with the Ademco Extended Format panel. This was discovered when a concentrator received an Ademco extended format signal (such as the example below) and then received another signal with a triple digit suffix which was the same as an existing system account. The panel format was defined as extended and the result was that the second signal and all subsequent signals were sent into a looping process. The looping occurred because SBN was unsure if the second signal belonged to a separate, existing account or to the initial extended format signal, as the second part of the extended format signal.
Example
The problem can occur when the first extended format signal received is 1230123, and then another signal is received, such as 1230XXX, where 1230XXX is an existing CID in the system with a defined panel as extended format.
SBN cannot be sure if 1230XXX is the second part of the extended format signal or a signal on the existing CID 1230XXX.
Manual Solutions
Two manual solutions are:
Change the CID number to remove the triple digits for the CID.
Change the panel format to anything other than extended format.
Linking a Graphic File to the Panel Type
Use the Filename field to link a graphic file to a panel type that you can view in the Panel Description window in Data Entry Master (program #559). Use option sv030 to define the default directory location for storing graphic files.
Use the following steps to link a graphic file to the panel type:
1. Choose Change Record.
Fields in the lower pane open for changes.
2. Choose Select Image File.
The Open File window opens mapped to the folder defined in option sv030.
3. Select the filename.
4. Choose Open.
The filename appears in Filename in the lower pane.
Defining Special Users
Use the following special user fields in Panel Types to define special user codes to match special user codes embedded in incoming open/close signals:
Service User
Remote Arm User
Command User
Guard User
You may further define the special user fields by entering check marks in the Active and/or Invalid User Exception boxes.
When an open/close signal arrives, SBN checks the signal against the line index of contacts in the associated action plan for a match of the special user code. If SBN finds a match between the special user code embedded in the signal and the line index of a contact in the action plan, SBN logs the signal in the Open / Close Log with the contact name in the Name column. When SBN does not find a match in the action plan, SBN then looks in program #1742 at the definition of the panel that is generating the signal for a matching special user code.
Specifically, SBN looks at
Service User
Remote Arm User
Command User
Guard User
If any of these special user fields contain a number that matches the special user code embedded in the signal and the associated Active box contains a check mark, SBN logs the signal in the Open /Close Log with the default text (defined by the option for that special user) in the Name column.
If any of these special user fields contain a number that matches the special user code embedded in the signal and both the associated Active and Invalid User Exception boxes contain check marks, SBN generates an ALARM and logs the signal in the Alarm Log and in the Open /Close Log with the default text (defined by the option for that special user) in the Name column.
Note: See the field descriptions for the options that define the default text for each special user field.
If SBN does not find a match for the special user code in the panel definition
or...
If SBN finds a match for the special user code in the panel definition, but the associated Active box is blank, it logs the signal in the Open / Close Log, but leaves the Name column blank
Zooming into the Sublevel
Panel Types contains a sublevel with five tabs:
The Translations tab - in which you may attach multiple translations to a selected panel type. Panel types then appear in SBN in the user’s language.
Note: Actions 1742/20-24 control access to the Translations tab and functions.
The Items Tab - in which you may attach items to a selected panel type.
Note: Actions 1742/30-32 control access to the Items tab and functions.
The Price List Tab - in which you may attach price lists to a selected panel type.
Note: Actions 1742/40-42 control access to the Price List tab and functions.
The Revision Tab - in which you make revisions.
Note: Actions 1742/50-54 control access to the Revision tab and functions.
The Dealers Tab - in which you may attach a Dealer ID to a selected panel type.
Note: Actions 1742/60-65 control access to the Dealers tab and functions.
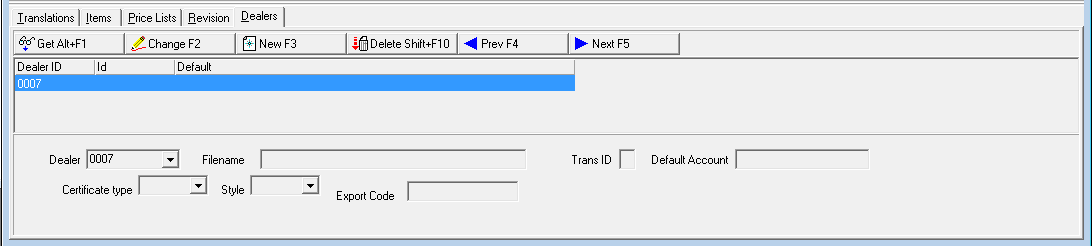
GENERAL CHANGE LOG
Module topics
In this module you will learn about the following:
General Change Log
General Change Log
Use the General Change Log (program #1749) to communicate (track and log) changes not handled by SBN. This program provides free text lines used to enter the specific program and reference numbers plus the date that changes occurred in order to search for specific system changes. In addition, the General Change Log allows modifications to existing changes and creation of new entries.
Note: The General Change Log is not tied to SBN.
The settings of options gclog1-gclog14 determine whether SBN records changes in the General Change Log.
Option gclog1 - When on, SBN logs new entries and changes to the Installers, Sales Persons, Users, Managers, and Technicians tabs of Personnel (program #1811) in the General Change Log.
Option gclog2 - When on, SBN logs changes to GUI Messages (program #1606) in the General Change Log.
Option gclog3 - When on, SBN logs changes to the New User ID field in the Users tab of Personnel (program #1811) in the General Change Log.
Option gclog4 - When on, SBN logs changes to Alarm Translation Tables (program #1876) in the General Change Log.
Option gclog5 - When on, SBN logs changes to Queue Routing (program #1738) in the General Change Log.
Option gclog6 - When on, SBN logs changes to option settings in Options (program #1887) in the General Change Log.
Option gclog7 - When on, SBN logs new entries and changes to the Item Kit and Item Vendor tabs of Items (program #1535) in the General Change Log.
Option gclog8 - When on, SBN logs changes to the option settings of program #1887, along with the dealer and language of each changed option, in the General Change Log.
Option gclog9 - When on, SBN logs changes to Required Fields (program #1843) in the General Change Log.
Option gclog13 - When on, SBN logs new entries in the Commission Type field of the Installers, Sales Persons, Users, Managers, and Technicians tabs of Personnel (program #1811) in the General Change Log.
Note: SBN logs only new entries in the Commission Type field; it does not log changes from one type to another.
Option gclog14 - When on, SBN logs changes to the VRU Code field of the Installers, Sales Persons, Users, Managers, and Technicians tabs of Personnel (program #1811) in the General Change Log.
The General Change Log records changes to several fields in the Installers, Sales Persons, Users, Managers, and Technicians tabs of Personnel (program #1811). The user profile that was changed appears as a line item in the General Change Log with a list of field IDs for certain fields in the tabs. (The Users tab fields for which the General Change Log records changes are listed in a table in the Personnel document with the field IDs that appear in the General Change Log.) The Old Value and New Value columns and the From and To fields display the data that users changed in each field. You may expand the Old Value and New Value columns to view all the field changes or click on the From and To fields and use the scroll buttons on your keyboard to view all changes.
Note: If a system administrator makes changes to the Users tab or Sales Persons tab of program #1811, the General Change Log displays a blank user ID for the entry.
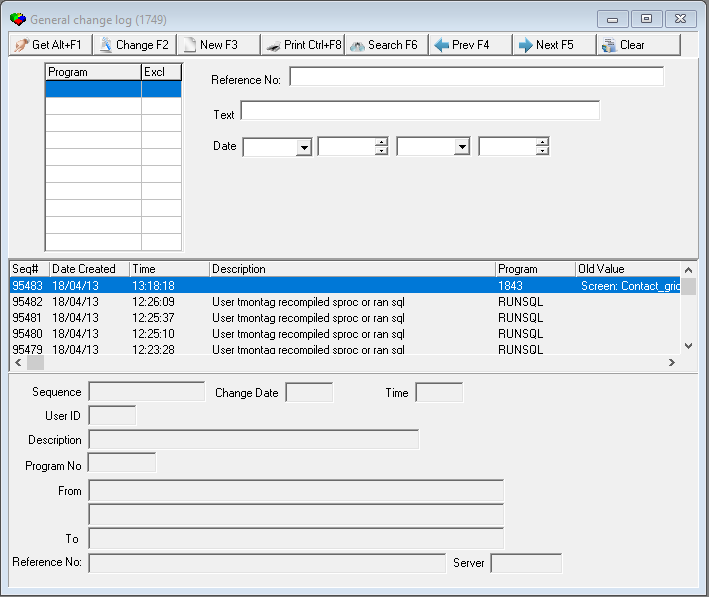
|
|
|---|---|
|
|
|
|
|
|
|
|
|
|
|
|
|
|
|
|
|
|
|
|
|
|
|
|
|
|
ACTION PROFILES
Module topics
In this module you will learn about the following:
Action Profiles
Action Profiles
Use Action Profiles to create profiles that restrict or allow users to access specific programs and functions. Usually, you define these profiles by job responsibilities, such as Monitoring Operators, Data Entry Supervisors, Collectors, or Telemarketers, and then attach the job responsibilities to each user profile.
Every SBN menu and menu item has an associated action number that you can disable or enable for a user’s action profile. SBN dynamically updates the main menu available to users when they log in based on the actions included in the user’s action profile. To access specific programs, users must also have access to the menus leading to the program, or the use of the Get Program function. You can also control access within each program. To see the details for the profile, choose Zoom.
SBN has two predefined action profiles - ALL and CSSA. The ALL profile provides access to every function in SBN, so you should assign the ALL profile to the person who sets up SBN. Because the ALL profile provides global access to SBN, assign it to users very carefully. (The name ALL is controlled through option allact.)
The CSSA (Central Station System Administrator) profile is the initial login profile for first access SBN. This profile provides access to the main features, including setting up profiles.
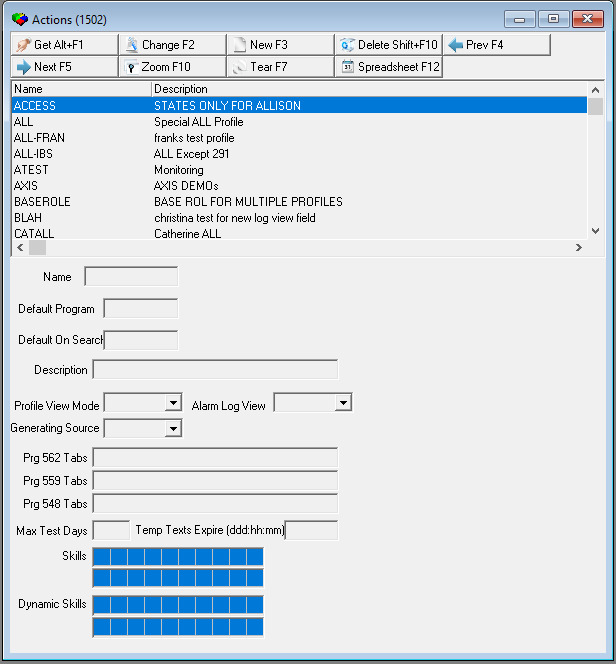
|
|
|---|---|
|
|
|
|
|
|
|
|
|
|
|
|
|
|
|
|
|
|
|
|
|
|
|
|
|
|
|
|
Viewing Details of a Profile
Use the following steps to view profile details:
1. Choose the profile you want to view.
2. Choose Zoom.
The details appear in the Detail View tab to the right. The default view shows:
The expandable Main Menu items grouped into sublevels, which you can expand to the function key level
The Other Actions list, which provides a complete list of all actions by number
Note: You can use standard Windows functionality to expand or collapse the tree view.
3. In Action/Menu - choose Action if you want to view every available action by number.
Viewing Details in a Separate Window
You may find it easier to work with a profile if you open the Details tab in a full-sized separate window.
Use the following steps to view details in a separate window:
1. In Action Profiles, choose Tear.
The Details tab opens in its own window.
Searching Actions
To search actions, highlight the expandable menu in the Sublevel section of the Action screen. To search by name or number, press [ALT+F2]. The search expands the tree as it searches. To locate the next instance of the search in the list, press [ALT+F3].
Creating New Action Profiles
You can use an existing profile as a template for a new one. When you use a template, most of the settings are already selected.
To create a new profile, first choose a name and template, then edit the profile to include the new settings.
Use the following steps to add a profile:
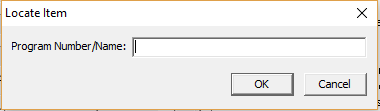
Choose New.
2. Complete the following fields:
? ?In Name - type a name for the new profile.
? ?In Default Program - type the program number to use as the default when SBN starts.
? ?In Description - type a descriptive definition of the profile.
? ?In Default on Search - type the program number to automatically open after performing a search.
Note: User profile must be allowed access to the program in this field.
? ?In Template (1) - either choose the existing profile that most closely matches the new profile you are creating or clear the contents to leave the field blank.
? ?In Template (2) - choose an additional template to merge actions into this profile.
? ?In Template (3) - choose an additional template to merge actions into this profile.
3. Choose Save.
SBN adds the profile name to the list of profiles.
Changing Multiple Profiles
Use Spreadsheet to view and edit sets of options for all profiles at once.
Use the following steps to edit multiple profiles:
1. Choose Zoom.
2. Use the + signs to expand the menu system.
3. Select a specific category of actions.
4. Choose Spreadsheet.
The Maintenance window appears with the selected actions group and all profiles listed alphabetically, left to right.
Note: You may change the order of the profile columns while in Spreadsheet mode.
5. Choose Change.
The grid opens for editing.
6. To clear the Spreadsheet selections for all profiles, choose Clear.
SBN clears the X from every selected column.
7. To change only a single column, double-click on column you want to update.
8. Enter changes, as needed.
9. Choose Save.
SBN saves your changes to the data in the columns but does not save a changed order of profile columns.
Deleting Action Profiles
Use the following steps to delete profiles:
1. Choose the profile you want to delete.
2. Choose Delete.
SBN asks you to confirm your selection.
3. Choose Yes.
SBN deletes the selected profile.
4. When finished, choose File > Close.
The focus returns to a tab in Action Profiles Update.
Notices
Trademark Notice
All products and services mentioned in this publication may be trademarks or service marks of their respective companies or organizations. Instead of listing all the names and companies that own these trademarks or inserting a trademark symbol with each occurrence of the trademarked name, Innovative affirms that they are using the names only for editorial purposes, with no intent to infringe upon that trademark.
Feedback
Innovative welcomes your comments and reserves the right to use any information you supply in any way it believes appropriate without incurring any obligations whatsoever. Please address your comments to documentation@innovative247.com
Support
For technical support, please contact Innovative on +1 (972) 518-2250 or via support.innovative247.com
Citations
This publication was prepared by Innovative. The information in this publication has been carefully checked and is considered reliable. No responsibility is assumed for inaccuracies. Innovative does not assume any liability arising from the application or use of any product described herein.
All data displayed in SBN documentation is fictional test data. Any names, addresses, phone numbers or other personal information that relate to any real person are strictly coincidental.
Publication date: June 2020
| About innovative. | Corporate Office | |
|---|---|---|
We are innovating for a safer world. Through simple, flexible, integrated and scalable software our clients keep over 4.5 million people, homes, businesses, and public facilities safe. Our diverse suite of products provides the full range of software to manage an alarm company. We operate globally from offices in Europe and USA. |
1320 Greenway Dr, Suite 850 Irving, TX 75038, USA +1 800 839 2424 |
|
| innovative247.com | ||
This document has been prepared by Innovative. The contents of this document do not constitute any form of commitment or recommendation on the part of Innovative at the date of their preparation © Innovative Business Software, Inc 2020. All rights reserved. No part of this documentation may be reproduced, stored in a retrieval system, or transmitted in any form or by any means, electronic, mechanical, photocopying or otherwise without the written permission of Innovative. |
F1 Help
| Delphi Forms | autofeedconsoleform, baagreementsform, babranchesform, bacommlogqueform, bacommunicationsourcesform, bafldvali1form, blitemsform, blpayrejectcodesform, cscommlogform, maalarmqclrform, maalarmqueueprioform, macertificatesform, macertificatestandardsform, maeventextsform, maimmqutilform, maqueueroutingform, maskillmonitorform, svcalltypesform, svproblemsform, userstempskillform, zipsform |
| Program Numbers | 535, 557, 567, 1518, 1522, 1524, 1530, 1535, 1590, 1653, 1718, 1725, 1738, 1751, 1888, 1890 |