
Dispatch
Program #: 537
Module: Account Management
Overview
Use the Dispatch tab in Data Entry (program #559) to view and treat incoming alarms. Dispatch includes tools to log specific details of each alarm event and its resolution, provide maps to installations that generate alarm signals, page patrol personnel, and view video footage related to alarm incidents. The Dispatch tab, combined with the following programs, provides operators with a complete system for receiving and treating alarms:
Alarm Log
Alarm Queue
Open/Close Log
Test Queue
Texts
By using all of these resources effectively, operators get a clear, comprehensive picture of the incidents and actions taken on every account.
This document includes the following topics:
Understanding Available Options and Alarm Messages
Understanding the Alarm Indicators
Zooming in on an Agency or Contact
Wrong Number Auto-Generated Comments
Using Alarm Resolutions and Event Extensions
Starting the IVR (Interactive Voice Response)
Navigating to Dispatch
Access Dispatch from the SBN main menu or from Data Entry Master and Basics (program #559) by choosing the Dispatch tab.
Use the following steps to access Dispatch from the main menu:
1. From the main SBN toolbar, select Menu.
2. From the drop-down menu, select Go To.
3. In the Go To Program dialog box, type in "537" and press Enter.
w Data Entry Master opens with the Dispatch tab displayed.
Note: If you select the Use Skills check box in both this tab and the Alarm Queue tab, new users only see alarms that match their skills. This prevents operators from handling alarms that they are not qualified to handle. When a new user navigates to the Dispatch tab, SBN unassigns all alarms currently assigned to the terminal that do not match the user's skills and sends them back to the general alarm pool.
Understanding Available Options and Alarm Messages
The following section outlines all options and alarm messages available in Dispatch.
Options
Option alatyp - Signal types generated for positions 1 – 20.
Position 1 |
Alarm |
Position 2 |
Restore |
Position 3 |
Battery |
Position 4 |
Cancel |
Position 5 |
Supervisor |
Position 6 |
Bypass |
Positions 7-20 |
Used for various other signal types and should not be changed from the default. |
For example, an X in the first position tells SBN to generate an alarm when it receives an alarm signal type. A space in the first position tells SBN not to generate an alarm when it receives an alarm signal type.
So, if you set option alatyp to X_X_X_XXXXXXXXXXXXXX SBN generates Alarms for Alarm, Battery, and Supervisor signals, but does not generate alarms for Restore, Cancel, or Bypass signals.
Option algtyp - This option functions in much the same way as option alatyp, except the settings tell SBN to generate alarms or create a log only if that signal is currently in the Master Queue for the CID.
An X in the specific position tells SBN to generate an alarm for that signal type when an alarm of this type, for this CID, appears in the Master Queue. A space tells SBN to only log the event if this type of signal, for this CID, currently appears in the Master Queue.
For example, if you set option alatyp to <<XXXXX_XXXXXXXXXXXXXX>> and option algtyp to << X_X_XXXXXXXXXXXXXXXX>>, SBN generates exceptions for Alarm, Restore, Battery, Cancel, and Supervisor. If there is a signal in the queue, SBN generates another alarm for Alarm, Battery, and Supervisor. The system does not generate another alarm for Restore or Cancel, but rather only creates a log.
SBN looks to option alatyp first. This means if you set option alatyp to not generate an alarm for a specific type, SBN never checks option algtyp for this signal type.
Other monitoring options that rely on abbreviations are:
alaabr - identifies the event type abbreviation. <<ARBcSYTMUL P Q>>
alaabs - identifies physical status indicators. <<ARBcSYTOCL P io>>
alaabc - identifies status that can be set manually. <<R OC >>
alares - identifies status that can be considered restored. <<RNOCP>>
alareo - identifies restored status for restored zones. <<RN>>
A |
Alarm |
R |
Restore |
B |
Battery |
c |
Cancel |
S |
Supervisor |
Y |
Bypass |
T |
Trouble |
M |
Missing (open/close) |
U |
Unscheduled/Unexpected (open/close) |
L |
Late (open/close) |
P |
Previously reported events. (Position 13 was the indicator in prior releases.) |
O |
Open |
C |
Close |
L |
Late |
Q |
Previously reported events. (Position 21 is the indicator for current releases.) |
io |
In/Out of Service. Special HSL commands for HWUSA |
Option asap - This option must be on in order to use the ASAP Address Verification Queue (program #1675) and eDispatch to send alarm incidents to a PSAP in Dispatch (program #537).
Option asapadri - Use this option to define the event extension that SBN records in the Alarm Log when SBN has sent an installation address to an agency to be verified (in program #1675) and the agency determines that the address is invalid.
Option asapadrs - Use this option to define the event extension that SBN records in the Alarm Log when SBN submits an installation address to an agency to be verified in program #1675.
Option asapadrv - Use this option to define the event extension that SBN records in the Alarm Log when SBN has sent an installation address to an agency to be verified (in program #1675) and the agency determines that the address is valid.
Option asapalma - Use this option to define the event extension that SBN records in the Alarm Log to indicate that the PSAP accepted the incident when you send an alarm incident to a PSAP to be handled outside of SBN.
Option asapalmr - Use this option to define the event extension that SBN records in the Alarm Log to indicate that the PSAP rejected the incident when you send an alarm incident to a PSAP to be handled outside of SBN.
Option asapalms - Use this option to define the event extension that SBN records in the Alarm Log when you submit an alarm incident to a PSAP to be handled outside of SBN.
Option asaparrv - Use this option to define the event extension that SBN records in the Alarm Log to indicate that the agency arrived at the installation when you send an alarm incident to a PSAP to be handled outside of SBN.
Option asapclos - Use this option to define the event extension that SBN records in the Alarm Log to indicate that the agency closed the alarm incident when you send an incident to a PSAP to be handled outside of SBN.
Option asapdisp - Use this option to define the event extension that SBN records in the Alarm Log to indicate that the agency has been dispatched to the installation when you send an alarm incident to a PSAP to be handled outside of SBN.
Option asapevt - Use this option to define the monitoring event that SBN records in the Alarm Log when you send an alarm incident to a PSAP to be handled outside of SBN. This is the same monitoring event that SBN records in the Alarm Log when a PSAP sends alarm incident updates to SBN, and when installation addresses are sent to agencies to be verified in program #1675.
Option asapmsgi - Use this option to define the event extension that SBN records in the Alarm Log to indicate that SBN received an eDispatch Chat message from an agency.
Option asapmsgo - Use this option to define the event extension that SBN records in the Alarm Log to indicate that a monitoring operator sent an eDispatch Chat message to an agency.
Option asapmsgr - Use this option to define the event extension that SBN records in the Alarm Log to indicate that an agency rejected an eDispatch Chat message that a monitoring operator sent to the agency.
Option asaptmot - Use this option to define the event extension that SBN records in the Alarm Log to indicate that an agency did not respond to an eDispatch alarm incident that an SBN operator sent to the agency and the request has timed out.
Option ba108 - When on, SBN enters monitoring status changes and temporary comments in the Alarm Log.
Option ba125 - When on, SBN computes the number of dispatches for the agency defined in program #1892 and attaches the number to the installation.
Note: IBS does not recommend using this option unless you specifically need it.
Options ba171 and ba172 - When on, option ba171 displays the number of call out incidents in the last set number of days in the Dispatch tab, and ba172 determines the number of days to include in the calculation. In order for SBN to calculate this number, you must specify events as �Call Out� events in Monitoring Event Extensions (program #1751).
Option ba201 - When on, SBN considers accounts with identical member/dealer numbers as related. When you place one related account in the Test Queue, any related account that a user accesses in Monitoring displays the message "Related Installation In Test Queue" on the command line of the Dispatch tab.
Option ba395 - When on, SBN prompts you to confirm adding a timer to an alarm with a priority of 1, 2, or 3.
Option ba451 - When on, SBN toggle time defaults to premise time, and SBN sends a confirmation message. When off, the system resumes normal toggle time behavior and provides no prompts or defaults.
Option ba468 - Defines the name of the GPS application that SBN launches when a user chooses the Location button, as well as a list of the parameters SBN passes to the application from the selected alarm event.
Option ba520 - Set days in past to search all new alarms identified with a daily Cust Event number which resets to 1 at midnight server time.
Option escortco - Defines the comment that appears in the Alarm Log when you choose the eEscort button.
Option escortev - Defines the Monitoring Event that appears in the Alarm Log when you choose the eEscort button. (Enter an event number from Monitoring Events (program #1621) for the value of this option.)
Option escortex - Defines the Monitoring Event Extension that appears in the Alarm Log when you choose the eEscort button. (Enter an event number from Monitoring Event Extensions (program #1751) for the value of this option.)
Option fe010 - When on, Dispatch (Park) (SECURICOM Dispatch) bypasses guard functions Guard Cancel, Guard Report, Guard Arrived, and Guard Out.
Option fe046 - The option is off by default. When turned on file ./fe/pro_fe_sms_find_recipients.sql must then be recompiled.
Option grd_auto - Defines an external application that SBN sends details from alarm incidents to when users choose the Guard Auto Dispatch, Guard Cancel, and Guard Out monitoring actions.
Option hseccol - Defines the color that contact names flagged as High Security (in Action Plans) appear in Dispatch.
Option ma006 - When on, this option combines the Guard Dispatch monitoring action [ALT+CTRL+D] with the Call Guard [ALT+CTRL+O] and Dispatch (Park) [ALT+CTRL+X] monitoring actions, so that when you choose Guard Dispatch all three actions take place.
Option ma024 - The value of option ma024 defines the external application that is called when you choose the Call External button.
Option ma025 - When this option is on, SBN automatically calls the external application defined by option ma024 and sends the following parameters from the alarm incident after you resolve the incident and enter an event extension: Alarm Resolution, Operator ID, Incident Number, Dealer ID, Installation Number, Resolution Event, Resolution Event Extension, and Alarm Queue Number.
Option ma026 - When this option is on, SBN records monitoring event 44 (Dispatch - Park) as Guard Dispatch in the Alarm Log.
Option ma027 - When this option is on, SBN automatically attaches a timer to the selected alarm when you select the Guard Auto Dispatch monitoring action. The alarm turns bright green and SBN displays the text TM2 in the Operator Action column on the Alarm Queue tab. When the timer expires, the alarm turns back to red, and SBN displays the text T20 in the Operator Action column. When this option is off, SBN does not attach a timer to the selected alarm.
Option ma029 - When this option is off, the alarm notification beep in Dispatch is disabled and cannot be turned on using the Alarm Beep icon or the Beep On/Off monitoring command. When this option is on, the alarm notification beep functions as usual.
Option ma043 - When this option is on, the user number and name of the schedule event will display in the Alarm Log. When option is turned off the user number and name of the schedule event doesn't display in the Alarm Log.
Option mapurl - Defines the URL that opens and to which SBN passes the installation latitude and longitude when you choose the Display Image button to view a map.
Option maxolb - Defines the maximum number of hours that SBN recognizes an operator as being logged into the system; used to identify operators who rebooted rather than logged out. Use this option in conjunction with option minope.
Option minope - Defines the minimum number of operators that must be logged into Monitoring. If you set the option to (0) zero, SBN allows all operators to log off the system. If you set the option to (1) one, SBN prevents the last operator from logging off. (Set Option to (1) one preventing last operator from logging off is a UL requirement.)
Option mo002 - When on, this option removes ownership of a parked or timed alarm from an operator when SBN receives a second alarm by removing the terminal ID from the alarm. To actually treat the alarm, an operator (even the original operator) must take the alarm using the Alarm Take monitoring action.
Note: IBS does not recommend that you use option mo002 because the original operator could lose ownership of the original alarm while treating it.
Option mo006 - When this option is on, SBN logs signals even if they do not produce the exceptions caused by delay handling.
Option mo009 - If this option is off and SBN receives an ALARM and RESTORE from Zone 1 and an ALARM and RESTORE from Zone 2, the SYS REMO function timer is set to the longer delay of the two zones. So, if Zone 1 has a delay of 60 seconds, and Zone 2 has a delay of 120 seconds, the function waits 120 seconds for the OPEN signal. If this option is on and SBN receives an ALARM and RESTORE from Zone 1 and an ALARM and RESTORE from Zone 2, the SYS REMO function timer is the individual delay for each zone. So, if Zone 1 has a delay of 60 seconds and Zone 2 has a delay of 120 seconds, the function waits 60 seconds for the OPEN on Zone 1 and 120 seconds for the OPEN on Zone 2.
Option mo011 - When this option is on, SBN allows operators to transfer alarms to blank terminals without checking to see if the terminals are logged in. When off, SBN does not allow operators to transfer alarms to blank terminals, and checks to see if the terminals are logged in.
Option mo103 - When this option is on, SBN removes alarm and cancel pairs as long as an operator has not taken the signal in Dispatch.
w When SBN removes an alarm/cancel, alarm/restore, or trouble/cancel pair, the message SYS REMO displays in the Alarm Log for the account.
w If an alarm currently appears in the queue, SBN does not remove a new alarm for this monitoring group/account with a cancel or restore.
Option mo104 - When on, SBN removes alarm and restore pairs as long as an operator has not taken the signal in Dispatch.
w When SBN removes an alarm/cancel, alarm/restore, or trouble/cancel pair, the message SYS REMO displays in the Alarm Log for the account.
w If an alarm currently appears the queue, SBN does not remove a new alarm for this monitoring group/account with a cancel or restore.
Option mo110 - When on, if a missed open or close occurs, SBN checks to see if the next signal that this zone receives is the expected signal. If so, SBN removes this event from the alarm queue if no operator has taken it and enters SYS REMO into the Alarm Log. When off, SBN handles the signal in the normal manner.
Option mo111 - When on, the Events list displays the time of the alarm event in addition to the event abbreviation.
Option mo126 - When on, the Extra Acknowledge monitoring action refreshes the action plan and contacts according to the newest incident.
Option mo128 - When on, SBN logs user names that simulate alarms in Dispatch in the Alarm Log.
Option mo133 - When on and there are no alarms in the queue within your selected priority range, SBN gets the next alarm with the highest priority when you choose Get Next Alarm. When option mo133 is off and there are no alarms in the queue within your selected priority range, SBN stops getting alarms when you choose Get Next Alarm.
Option mo135 - When on, guard monitoring actions can occur out of sequence.
Option mo136 - When on, the Call Next button calls phone numbers 2 and 3 of the current contact before moving on to the next contact. When option mo136 is off, SBN calls the first number of each contact and proceeds down the list in the contact order.
Option mo150 - When on, an alarm that you transfer to another terminal behaves like a new alarm; the color changes from cyan to purple, or from yellow/green to red.
Option mo152 - When off, if you toggle the Alarm Queue to appear in Dispatch, SBN displays only those alarms the terminal owns and those not yet assigned. If option mo152 is on, SBN displays the master queue, regardless of terminal ID.
Option mo153 - When on, users can override the sequence of guard actions with a yes/no dialog instead of an error dialog.
Option mo159 - When on, the Event List does not indicate when you type a wrong passcode.
Option mo160 - When on, the Dispatch tab displays a small Alarm Log grid. The small Alarm Log grid displays the seven (7) most recent lines from the Alarm Log of the installation.
Option mo163 - If option mo163 is on, the UL Grade field displays the UL Grade (Misc 42) selected in the Data Entry (program #559) Basics tab.
Option mo169 - When on, several customer-specific fields appear in the Dispatch tab that are populated by alog_ovf.
Option mo172 - When on, only a codeword registers as valid when a user handles an alarm. If a user enters a passcard, it registers as invalid. When this option is off, SBN accepts both codewords and passcards.
Option mo173 - When on, SBN logs each use of the Dispatch auto-dial function in the Alarm Log.
Option mo179 - When on, the Video Validation window lists zones that have the same schedule number as the missed open/close that triggers the alarm and have the Video Audit box selected in program #1733.
Option mo180 - When on, this option combines an installation's action plan call list displayed in Dispatch (program #537) with the call list of the account entered in the Call List Account field of the Data Entry (program #559) Basics tab and the call list of the account entered in the Default Account field of Dealer Profiles (program #1537) for the installation dealer. When off, no call list merging takes place, and SBN displays only the installation's action plan contacts in Dispatch.
Option mo183 - When on, you can navigate to other tabs in Data Entry (program #559) while the Event Extensions window in the Dispatch tab is open. When off, you cannot access any other Data Entry tabs while the Event Extensions window is open.
Option mo197 - When on, if you enter the Guard Cancel monitoring action the following message appears: "Are you sure you want to cancel call out?"
Option mo201 - Defines the maximum number of action plan contacts displayed in the call list pane of Dispatch. A negative value or 0 (zero) defaults to 300. The maximum value for this option is 1000 due to GUI restrictions.
Option mo207 - When on, SBN automatically uses the Clear Screen monitoring command (ALT+CTRL+Z) to clear an alarm when you attach a timer to it in Dispatch.
Option mo219 - When on, if a zone has action plan 0 assigned, and the installation panel has a Default Account with the same zone type and the Template Zones check box selected in program #1742, then the action plan from the Default Account zone of the same zone type appears in Dispatch rather than action plan 0. (Option mo157 must be on to use this option.)
Option mo223 - This option activates automatic logoff for inactivity in SBN.
Option mo224 - This option provides a value in minutes for automatic logoff for inactivity in SBN. Inactivity in Dispatch for more than the set time will open a window reading "You are being logged off due to inactivity. To return to SBN, click the Cancel button."
Option mo225 - When on, a balloon message appears in the notification area on the right side of your Windows taskbar when another user takes an alarm you are handling in Dispatch.
Option mo235 - This value option, blank by default, stores a comma-delimited list of event extensions that enable an automatic Guard Dispatch monitoring action if the Allow Auto Dispatch check box is selected in Patrol Agencies (program #1717). If you choose the automatic dial button for a patrol agency and select one of the event extensions specified by this option, SBN automatically executes the Guard Dispatch action. If this option is blank, SBN does not execute the automatic Guard Dispatch action even if the patrol agency has the Allow Auto Dispatch check box selected in program #1717.
Option mo239 - When on, SBN only autofeeds alarms to a user on installations with the same dealer that is assigned to the user in program #1811 when alarm autofeed is enabled in Dispatch.
Option mo240 - With this option on and the "Allow Auto Dispatch" flag unchecked for the assigned guard agency in the Patrol Agencies program (program #1717), if the guard has been dispatched, the other guard commands (arrived, out, etc.) are not required to resolve the alarm.
Option mo241 - This option must be on in order to use alarm autofeed in Dispatch. When this option is off and action 537/146 is off in your action profile, the Autofeed Status field and the Priority and Chronological check boxes do not appear in Dispatch.
Option mo242 - Defines how often, in seconds, SBN applies changes to alarm autofeed status and alarm priority sorting from Temporary User Skills (program #531) to Dispatch.
Option msmp - Defines the country SBN uses when implementing the Microsoft Map Point Integration.
Option premabbr - Defines the 4-character abbreviation for premises SBN uses when you add a phone number to the call list that appears in the Dispatch tab.
Option runper - Sets the period (in seconds) to check for a signal count for runaway parameters. If you set the option to (0) zero, the check does not occur. The default is 0.
Option runcnt - Determines the number of signals (within the time period defined in option runper) required before SBN displays a runaway warning in Monitoring. The default is 0; SBN displays no warning. If you access an account in monitoring that meets the parameters defined in options runper and runcnt, the message 'RUNAWAY!' displays in the upper pane of the Dispatch tab.
Option tm2val - Defines the default number of minutes SBN uses for the patrol timer (Timer 2) that SBN attaches to an incident when you use the Guard Auto Dispatch monitoring action.
Option undfapl - Use to define the default action plan SBN applies if the action plan attached to the zone for the incoming alarm does not exist.
Option undfgrp - Use to define the default Monitoring Group SBN assigns if the action plan attached to the zone for the incoming alarm does not exist.
Alarm Messages
The following messages appear on the top line of the Dispatch tab if the conditions or options controlling them are met:
The message 'FALSE LIMIT EXCEEDED!' displays on the Dispatch tab if you define a false alarm limit for this account.
Accounts that exceed the limits defined by options runcnt and runper display an icon in the fourth slot of the status bar
 or the message
'RUNAWAY!'
or the message
'RUNAWAY!'Accounts with related installations in the test queue (when option ba201 is on) display an icon in the third slot of the status bar
 or the message 'RELATED IN
QUEUE!'
or the message 'RELATED IN
QUEUE!'
Note: SBN considers accounts related when they have the same data entered in the Member field of Data Entry Master (program #559).
The Dispatch Tab
The following graphic shows the Dispatch tab with alarm information displayed.
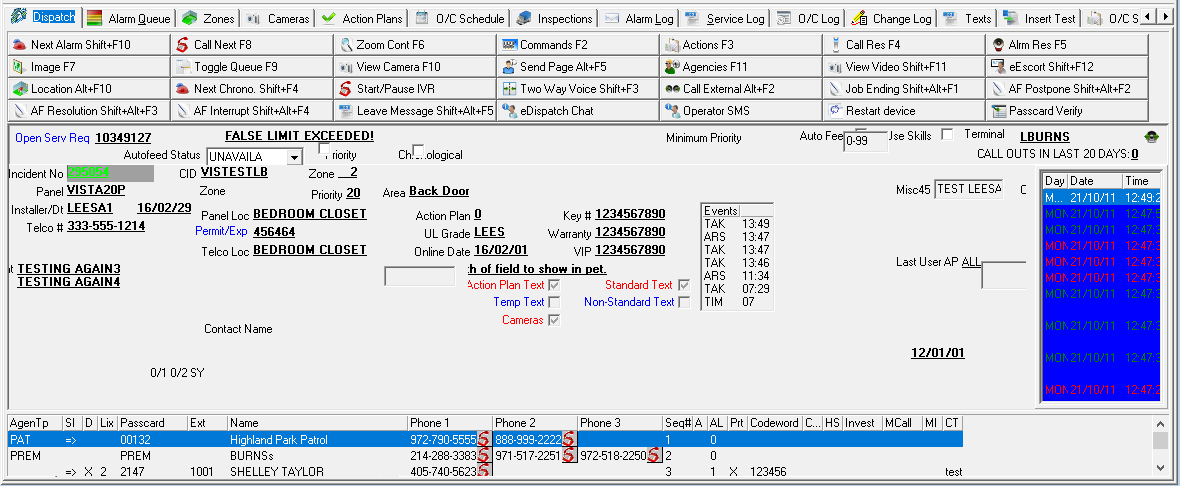
Field Descriptions - Dispatch
The following table describes the fields in the upper pane of the Dispatch tab.
Field |
Description |
Open Service Request |
If this CID has an open service request, the service request number flashes red. You can right-click the number, then choose Service Log, and SBN jumps to the Service Log tab. If Open Service Request is blinking, you can also jump to the Service Log by pressing [SHIFT+F5]. |
Related Incidents |
Flashing text that indicates another alarm signal exists for this customer. |
Minimum Priority |
This read-only field displays the minimum and maximum priorities for the Get Next Alarm button entered using the Set Priority monitoring command. |
Auto Feed |
If you select this check box, SBN automatically gets the next alarm one second after an operator resolves the current alarm, when additional alarms are waiting in the queue. When autofeed is started, the first alarm will appear in Dispatch without a delay. When no alarms wait in the queue, SBN looks for an alarm every second for ten seconds and then changes to a ten second cycle until a signal arrives in the queue. Note: This check box only appears when your action profile includes action 537/125. Warning: This feature could cause an unmanned terminal to accept an alarm. |
Use Skills |
If you select this box, dynamic skills are active. Note: When you select this check box, new users only see alarms that match their skills. This prevents operators from handling alarms that they are not qualified to handle. When a new user navigates to the Dispatch tab, SBN unassigns all alarms currently assigned to the terminal that do not match the user's skills and sends them back to the general alarm pool. |
Terminal |
Terminal number of the user treating the alarm. If you are treating the alarm, your terminal number displays. If another user’s terminal is attached to the alarm, it flashes red. Note: In order to perform any actions on this signal, you must take the alarm from the other user. |
Call Out Total |
This message displays the number of call out incidents in the last set number of days. Note: Option ba171 turns on this feature, and ba172 determines the number of days to include in the calculation. In order for SBN to calculate this number, you must specify events as Call Out events in Monitoring Event Extensions (program #1751). |
Autofeed Status |
You may select an autofeed status that determines whether SBN automatically takes the next alarm from the Alarm Queue and displays it in Dispatch. If you select a status that has the Autofeed Enabled check box selected in program #1668, SBN activates autofeed. (This menu originates from program #1668.) This field appears when action 537/146 is enabled in your action profile. Option mo241 must be on in order to use alarm autofeed. When you initially log into SBN and open the Dispatch tab, this field displays status UNAVAILABLE by default; (alarm autofeed is inactive). If you close program #559 or log out of SBN, this field returns to UNAVAILABLE status automatically. Note: When option mo239 is on, SBN only autofeeds alarms to a user on installations with the same dealer that is assigned to the user in program #1811. Option mo242 defines how often, in seconds, SBN applies changes to alarm autofeed status and alarm priority sorting from Temporary User Skills (program #531) to Dispatch. |
Priority |
Select this check box to automatically get the oldest alarm with the highest priority from the Alarm Queue when you select a status in the Autofeed Status field that has the Autofeed Enabled check box selected in program #1668. This check box appears when action 537/146 is enabled in your action profile. Option mo241 must be on in order to use alarm autofeed. Note: When alarm autofeed assigns an alarm to your terminal and this check box is selected, SBN records monitoring event 158 AFACK PRIO in the Alarm Log. Option mo242 defines how often, in seconds, SBN applies changes to alarm autofeed status and alarm priority sorting from Temporary User Skills (program #531) to Dispatch. |
Chronological |
Select this check box to automatically get the newest alarm with the highest priority from the Alarm Queue when you select a status in the Autofeed Status field that has the Autofeed Enabled check box selected in program #1668. This check box appears when action 537/146 is enabled in your action profile. Option mo241 must be on in order to use alarm autofeed. Note: When alarm autofeed assigns an alarm to your terminal and this check box is selected, SBN records monitoring event 159 AFACK CHRO in the Alarm Log. Option mo242 defines how often, in seconds, SBN applies changes to alarm autofeed status and alarm priority sorting from Temporary User Skills (program #531) to Dispatch. |
Incident Number |
SBN-generated incident number for the alarm. The incident number is the same color as it appears in the Alarm Queue. |
CID |
Customer ID for the signal. |
Zone |
Zone that generated the signal. Note: While an operator handles an alarm for an installation, SBN does not display Template zones in the list of zones for that installation. See Zones. |
Protected Area |
Name of the area protected by the zone where the signal was generated. Note: If more characters exist than can display, a "<<<" flashing warning appears. |
Zone Description |
Text description for the Zone from which the signal was generated. Note: If more characters exist than can display, a "<<<" flashing warning appears. |
Priority |
Priority from the zone type attached to the activated zone. |
Events |
List of system and operator actions taken to treat the alarm, with the most current action listed first. The most current action appears at the top of the list. If a new signal arrives on an account that already has an alarm, SBN highlights the top action. Note: If option mo111 is on, the Events list displays the time of the event in addition to the event abbreviation. Note: Abbreviation for Event will appear translated into Dealer language defined in program #1621. |
Panel |
Panel type generating the signal. |
Zone |
Reference zone associated with the zone from which the signal was generated. |
Panel Loc |
Panel location for the installation. |
Action Plan |
Action Plan attached to the zone generating the signal. Note: When option mo219 is on, if a zone has action plan 0 assigned, and the installation panel has a Default Account with the same zone type and the Template Zones check box selected in program #1742, then the action plan from the Default Account zone of the same zone type appears in Dispatch rather than action plan 0. (Option mo157 must be on to use this option.) |
Key Number |
Identification number for the key held at the monitoring station. |
Installer ID |
Installer ID. |
Installation Date |
Date the alarm system was installed. |
Permit/Permit Expiration |
Permit number, if applicable, with the permit expiration date. Note: This field displays a maximum of 12 alphanumeric characters. |
UL Grade |
UL grade, selected in the Zones tab, for the action plan in effect for the signal. Note: If option mo163 is on, this field displays the UL Grade (Misc 42) selected in Data Entry Basics. |
Warranty |
Text in the warranty field for this installation. |
Telco Number |
Phone number or leased line connected to the panel. |
Telco Location |
Location of the telephone company termination block. |
Online Date |
Date monitoring began for this installation. |
VIP |
Displays any VIP code or text defined for this installation. |
Comment |
Two line comment from the Data Entry Basics tab. |
Callout City |
Displays company-defined field from Data Entry Basics tab. |
Contact Name |
Displays the contact name, authority level, and authority for a verified passcard. |
ALog M1-20 |
Customer-specific fields set by static option mo169. Field information populated by alog_ovf. Note: Option mo169 must be on for these fields to display. |
Last User AP |
Displays the action profile of the last operator that acknowledged or took the alarm before the current operator. |
Misc45 |
Displays data from the Misc45 field in the Data Entry Basics tab. No functionality in SBN. |
Cust Event # |
Allows the user to see the new number when alarm is retrieved from alarm queue. |
Alarm Log Display |
The Alarm Log color display only appears when option mo160 is turned on. The selection in the Alarm Log tab dictates the background color. |
Date |
Date of the first incident received in SBN for a specific CID. (This field comes from Compressed Log). |
Time |
Time of the first incident received in SBN for a specific CID. (This field comes from Compressed Log). |
Zone Type |
Unique identifier for the type of alarm type generated for a specific signal. |
Text Indicators |
|
Action Plan Text |
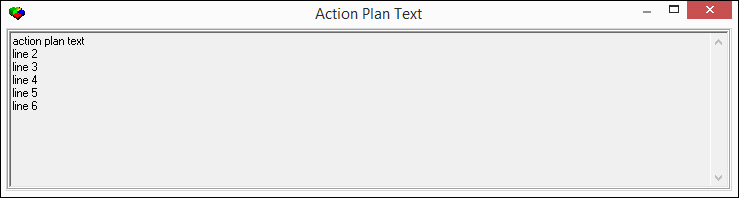
If this box displays a check mark, the action plan attached to the zone from which the signal was received displays additional text information. You can view the action plan by right-clicking on the field label. Note: If this box displays a check mark, the label blinks red. Note: If your action profile includes action 537/120 and text is available, the box automatically opens. Double-click on the flashing indicator to view the text. |
Standard Text |
If your action profile includes action 537/122 and text is available, the text box automatically opens. At any time you can right-click the flashing label and choose Standard Text to view the text box. Note: This window displays 11 rows of text. |
Temporary Text |
If your action profile includes action 537/121 and text is available, the text box automatically opens. At any time you can right-click the flashing label and choose Temporary Text to view the text box. |
Non-Standard Text |
If your action profile includes action 537/123 and text is available, the text box automatically opens. At any time you can right-click the flashing label and choose Non-Standard Text to view the text box. |
Cameras |
This check box is selected if there are cameras defined for the installation in the Cameras tab of program #559. |
Comment Text Field
The Comment field in Dispatch allowed you to add comments that will display in the Comment field of the Action Plans detail subwindow. This appears only for individuals contact in Action Plans, and not for agencies.
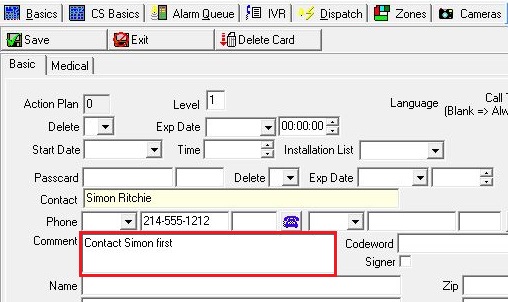
The Action Plans detail subwidow.
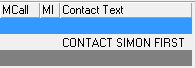
Column Descriptions - Call List
The following table describes the columns that appear in the Call List (the lower pane of the Dispatch tab). You can create and update call lists for each installation in the Action Plans tab of Data Entry (program #559).
Note: When a contact has a sequence number of 0, or if the contact is only available during certain days and times and the alarm occurs outside the designated window, SBN displays the contact line item in gray. Use the arrow buttons on your keyboard to scroll through the list of contacts. Option mo201 defines the maximum number of action plan contacts displayed in the call list.
When option mo219 is on, if a zone has action plan 0 assigned, and the installation panel has a Default Account with the same zone type and the Template Zones check box selected in program #1742, then the action plan from the Default Account zone of the same zone type appears in Dispatch rather than action plan 0. (Option mo157 must be on to use this option.)
Column |
Description |
Agency Type |
Agency type, if applicable, or the code defined by option premabbr that indicates the premises. |
Special Info |
If this column displays =>, additional information for the agency is available. Selecting the Special Info check box in the corresponding agency details program (such as Police Agencies - program #1546, Patrol Agencies - program #1717, and so on) activates this field. |
Downloadable |
If this column displays an X, you can download this passcard information to the panel. |
Line Index |
Number used to identify the contact, which you type into the keypad. |
Passcard |
Contact person’s passcard number, if applicable. If the contact is a response agency, SBN displays the agency ID. Note: If you set a future expiration date for the passcard, SBN highlights the passcard in yellow. If the expiration date has passed, SBN highlights the passcard in red. |
Extension |
Passcard extension number. |
Name |
Contact person or agency name. Note: If an alarm occurs outside of the time this contact is available to be called, SBN displays the contact line item in gray. For more information, see Column Descriptions - Zone Details. Note: If a contact is a High Security contact, the contact name appears highlighted in the color defined by option hseccol and the High Security column for that contact displays an X. Define a contact as a High Security contact in Action Plans. Note: When you call a High Security contact in association with an event, the Alarm Log displays H.Sec.Co in the Event column. |
Phone 1 |
Primary phone number for the passcard holder or agency. Note: If you have called this phone number for the selected event, the phone number appears highlighted in blue. Note: If option mo173 is on, selecting the auto-dial functions in Dispatch for Phone 1-3 fields logs the action in the Alarm Log. |
Phone 2 |
Secondary phone number for the passcard holder or agency. Note: If you have called this phone number for the selected event, the phone number appears highlighted in blue. Note: If option mo173 is on, selecting the auto-dial functions in Dispatch for Phone 1-3 fields logs the action in the Alarm Log. |
Phone 3 |
Third phone number for the passcard holder or agency. Note: If you have called this phone number for the selected event, the phone number appears highlighted in blue. Note: If option mo173 is on, selecting the auto-dial functions in Dispatch for Phone 1-3 fields logs the action in the Alarm Log. |
Sequence Number |
Call sequence number. Contacts shown without a call sequence number are for inbound calls, but you can call them manually. SBN force the index to order by sequence number when scanning ma_actplan_call in Sybase 15. This ensure that the sequence of contacts in Dispatch reflects what is entered in the Action Plans tab of Data Entry (Program #559). |
Authority |
Reference field to identify the authority of the contact.
|
Authority Level |
Authority level of the contact.
|
If this column displays an X, you need to print this passcard. |
|
Codeword |
Codeword for the contact on this line. |
Call Time Restrictions |
If this column displays an X, the contact is available only during certain days and times. (To view contact availability details, select the contact line item in the Call List and choose Zoom Agency or Contact.) |
High Security |
If this column displays an X, the contact is defined as a High Security contact in the action plan associated with the selected event. |
Investigator |
If this column displays an X, the contact is defined as an Investigator on the action plan associated with the selected event. If a zone has a UL Grade attached that has the Spec Tick check box or the Spec Tick 2 check box selected in program #1732, an operator may contact an Investigator on the action plan to satisfy UL requirements. (See Handling a UL Alarm for more information.) |
Must Call |
If this column displays an X, the contact is defined as a contact that must be called in order to resolve an alarm on the action plan. An operator must call all contacts in the Call List with an X in this column before resolving an alarm. If any Must Call contacts have not been called when the operator attempts to select an alarm resolution, SBN displays a message listing all Must Call contacts that the operator has not yet called. |
Medical Info |
This column displays an X if any of the text fields in the Medical tab of the Action Plan Contact Details window contain any information. |
Text |
This field displays Standard Text from the Action Plan if action 537/122 is on. Note: If action 537/122 is off, Standard Text does not appear in this field. If action 537/116 is on, the information in this field will also appear in a popup window. |
Plan |
This field displays Action Plan Text if action 537/120 is on. Note: If action 537/120 is off, Action Plan Text will not appear in this field. If action 537/116 is on, the information in this field will also appear in a popup window. |
Contact Text |
This field displays the contents of the Comment field in the Basic tab of the Action Plans tab subwindow. Note: This field will be blank if the contact in the action plan is an agency. |
Getting an Alarm
You may use one of two ways to take control of an alarm:
You can choose Get Next Alarm in the Dispatch tab
Note: We recommend that you use Get Next Alarm in the Dispatch tab because SBN distributes alarms based on your pre-defined settings through this function.
You can bring the alarm over from the Alarm Queue tab. For more information on how to bring an alarm over from Alarm Queue, see Alarm Queue.
Selection of the Hidden or Visible check box in the Alarm Queue affects the Get Next Alarm function. For example, if the Visible check box is selected, Get Next Alarm gets the next alarm displayed in the Alarm Queue that matches your pre-defined settings and disregards hidden alarms. (For more information on visible and hidden alarms, see the Priority View Selection field descriptions in the Alarm Queue document.)
Option mo133 also affects the Get Next Alarm function. Regardless of this option setting, SBN gets the next alarm in the queue within the range of priorities you enter using the Set Priority monitoring command. When option mo133 is on and there are no alarms in the queue within your selected priority range, SBN gets the next alarm with the highest priority. When option mo133 is off and there are no alarms in the queue within your selected priority range, SBN stops getting alarms when you choose Get Next Alarm.
When option mo225 is on, a balloon message appears in the notification area on the right side of your Windows taskbar when another user takes an alarm you are handling in Dispatch.
Use the following steps to get an alarm in Dispatch:
1. In the Dispatch tab, choose Get Next Alarm.
w The alarm displays in the Dispatch tab. After the alarm displays, a pop-up text window may open. (For more information on pop-up windows, see Understanding Pop-Up Text Windows below.)
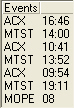
Note: The event ACX appears in the Event Log in the right of the window to show that you now have active control of this alarm.
2. Treat the alarm, as needed.
Note: A confirmation message box appears if you attempt to take an alarm that does not match your current skill set. You must choose Yes or No in order to proceed with working the alarm.
Understanding Pop-Up Text Windows
The Dispatch pane contains four boxes to activate pop-up text windows:
Action Plan Text
Temporary Text
Standard Text
Non-Standard Text
If any of these boxes contain a check mark, pop-up text windows may automatically open upon initial receipt of an alarm in Dispatch or after an operator takes an alarm.
Several actions control whether these pop-up windows open:
Action 537/120 (Action Plan)
Action 537/121 (Temporary)
Action 537/122 (Standard)
Action 537/123 (Non-Standard)
If your action profile includes these actions, SBN displays the text windows when you first receive an alarm. If your action profile does not include these actions, you can manually open the text windows by right-clicking the flashing labels. You can also open the text windows using shortcut keys:
Action Plan Text [SHIFT+F6]
Temporary Text [SHIFT+F7]
Standard Text [SHift+F8]
Non-Standard Text [SHift+F9]
An additional pop-up text window may appear that displays a message defined in Monitoring Status (program #1540). Dispatch does not include a function to re-display the message once an operator closes it.
The following graphic shows an example of a pop-up text window.
Calling Next Contact
Use Call Next Contact to automatically call contacts in the correct order. Option mo136 controls the order in which SBN places the calls. When the option is on, Call Next calls phone numbers 2 and 3 of the current contact before moving on to the next contact. When the option is off, SBN calls the first number of each contact and then proceeds down the list in the contact order.
Once SBN calls the contact, the contact number turns blue; you can easily determine which contacts you have called.
Use the following steps to call the next contact:
1. Choose Call Next Contact.
w The Event Extensions dialog box opens.
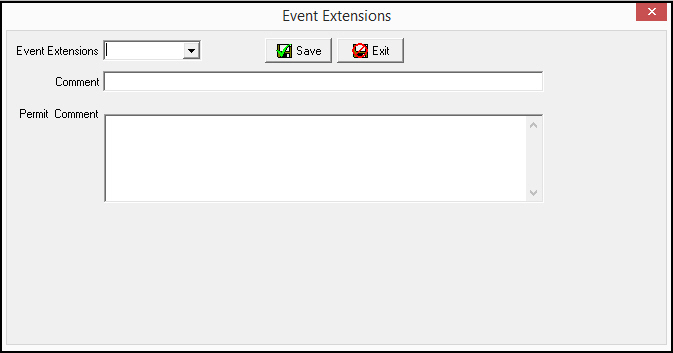
Note: SBN restricts the Event Extension menu to those associated with the same dealer ID as is associated with the account.
When you call an agency with a permit comment entered in Permit Profiles (program #1716), the comment text displays in the Event Extensions dialog box.
2. Select the event extension for the call you just made.
3. Type a comment, if needed.
Note: When option mo183 is on, you can navigate to other tabs in Data Entry (program #559) while the Event Extensions window in the Dispatch tab is open. When this option is off, you cannot access any other Data Entry tabs while the Event Extensions window is open.
4. Choose Save.
w The line for the contact called turns blue. SBN creates a log entry.
Note: If you choose Esc or Exit without Saving, SBN does not change the color of the contact line and does not create a log entry.
Must Call Contacts
If the Must Call column for a contact is marked with an X on the Action Plans tab, it means that you must call that contact before resolving the call. When you choose Alarm Resolutions button, the Must Call dialog box appears, displaying the Must Call Contacts. However, if the Seq# column displays 0 for a contact with an X in the Must Call column, this contact will not appear in the Must Call dialog box.
Handling an Alarm
The following steps outline an example of how to handle an alarm. Your company’s policies may dictate that your actual procedure may vary from the example.
Generally, details like service tickets, date online, alarm history, etc. do not affect the alarm monitoring process. However, in special situations (such as when police are onsite and need more information, or when someone claims to be a technician but does not know the proper code), you may be able to assist by considering the details of the account.
Note: You should NOT change standard alarm response procedures set by your company, and should NOT delay initial alarm response because you are trying to note every detail.
Use the following steps to handle an alarm:
1. Choose Get Next Alarm.
w SBN chooses the most important alarm based on priority and age.
2. Review subscriber information and event type in order to determine an appropriate action. Also review any comments for the account in the following check boxes:
Action Plan Text
Standard Text
Non-Standard Text
Temporary Text
3. Choose Verify Phone 1 [alt+ctrl+v] from the Monitoring Actions menu to place the first verification call to the premises.
w SBN dials the number and logs the call in the Alarm Log. (The Operator must note the verification call properly for the tape logs.)
4. If someone answers the call and provides the proper codeword or passcard, dispose of the call and skip to Step 9.
5. If no one answers the call or you reach an answering machine, etc., log the call resolution properly.
6. Choose Call Police [alt+ctrl+p] from the Monitoring Actions menu to dispatch the police to the premises, as the call was not resolved satisfactorily.
w This causes SBN to log the event and dial the appropriate police station.
7. Inform the police agency of the alarm according to the script your company uses.
For example, your company may require you to identify:
Yourself and your operator ID
Your security company
The alarm type (including zone details)
The premise type (business or residential)
The address, name and phone number of the premises
The call back number
At this point, having completed the initial response to the alarm, you may need to move on to new alarms or handle other alarms that you previously set aside. Whether you should continue treating the current alarm, get a new alarm, or continue treating older alarms depends on your company’s policy.
8. Call the first contact and deal with them as stated in your company script.
w SBN logs the event and dials the correct number.
9. Choose Call Resolutions to note the result of the call.
10. Dispose of the alarm appropriately. (For example, if the customer responds correctly to the verification call and states that the alarm was false, choose False Alarm [ALT+F1] from the Call Resolutions menu.)
w SBN asks you to confirm the selection with a random function key.
11. Choose the function key or button to confirm.
w The Event Extension dialog box appears.
Note: When option mo183 is on, you can navigate to other tabs in Data Entry (program #559) while the Event Extensions window in the Dispatch tab is open. When this option is off, you cannot access any other Data Entry tabs while the Event Extensions window is open.
Note: The Comment column in the Alarm Log displays a maximum of 4 lines with 63 characters per line. Any text you type above this maximum does not appear in the Alarm Log.
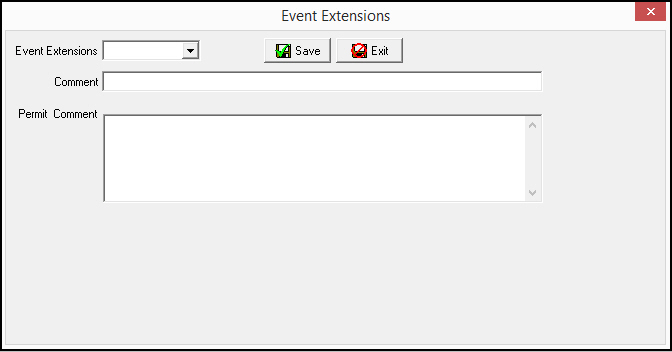
12. Select an event extension from the menu and type a comment, if needed.
Note: For more information on specific event extensions see Using Alarm Resolutions and Event Extensions.
13. Choose Save.
w The Call List line of the contact you called turns blue. SBN creates a log entry.
Note: If you choose Esc or Exit without Saving, SBN does not change the color of the contact line and does not create a log entry.
Handling a UL Alarm
Once you acknowledge the alarm and dispatch the agency, in order to satisfy Underwriters Laboratories requirements, the following functions must occur:
ALT+CTRL+K |
Keys Used |
ALT+CTRL+U |
Communication Type |
ALT+CTRL+D |
Guard Dispatch |
ALT+CTRL+I |
Dispatch Information |
ALT+CTRL+A |
Guard Arrived |
Disposing of a UL Alarm
If any of the previous steps do not occur, SBN displays �Information required by UL has not been given!� and the alarm is still ACTIVE.
This functionality is only active if the Spec. Tick check box or the Spec. Tick 2 check box in UL Security Grades (program #1732) is selected for the UL grade attached to the zone that triggered the alarm event. Each of these check boxes corresponds to a different UL Rule.
If the Spec. Tick check box is selected in UL Security Grades, UL Rule 1 requirements must be met before an alarm can be disposed of. UL Rule 1 requires that an operator call two of the following Action Plan contacts before disposing of an alarm event in Dispatch: a police agency, patrol agency, or an Action Plan contact (or contacts) flagged as Investigator(s).
If the Spec. Tick 2 check box is selected in UL Security Grades, UL Rule 2 requirements must be met before an alarm can be disposed of. UL Rule 2 requires that an operator call either a police agency, patrol agency, or an Action Plan contact flagged as Investigator before disposing of an alarm event in Dispatch.
Understanding the Alarm Indicators
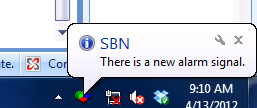
If action 537/136 is enabled in your user action profile and you are working in a program outside of SBN, a balloon message appears in the notification area on the right side of your Windows taskbar when there is a new signal that has not been acknowledged in the Alarm Queue. You may click on the balloon message to access SBN. (Define the text for this message in GUI BASMES 14230.) NOTE: This is a UL requirement. Turning this option off will take you out of UL compliance.
The following graphic displays the notification balloon message:
A lightning bolt symbol  appears
in the SBN status bar and a tone sounds when an operator is handling an
alarm for an account and another alarm for that account comes in. This
tone, which has a frequency of 2300 hz, directly follows the normal beep
in Monitoring, which has a frequency of 1150 hz.
appears
in the SBN status bar and a tone sounds when an operator is handling an
alarm for an account and another alarm for that account comes in. This
tone, which has a frequency of 2300 hz, directly follows the normal beep
in Monitoring, which has a frequency of 1150 hz.
Zooming in on an Agency or Contact
Zoom in on an agency or contact to bring up an additional window that shows detailed information for each contact or agency. This is a read-only window. For contacts, this information includes the call times and days from the Action Plans tab when you may call a contact, as well as pertinent medical information for the contact. You can call a contact by selecting the icon next to the corresponding field in the Contact Basic tab.
You can update agency and contact details in the Action Plans tab of Data Entry (program #559).
Agency Detail Window
If the selected Police Agency has Address Type UN defined and the Special Info check box selected in program #1546, a Dispatch Agency button and a Cancel Dispatch button appear in the Agency Detail window. If your company uses Webservices integration, choosing the Dispatch Agency button transmits a signal from SBN to Webservices to dispatch the police agency. Choosing the Cancel Dispatch button transmits a signal to Webservices to cancel the police dispatch.
If the selected Police Agency does not have an Address Type defined or the Special Info check box selected in program #1546, these buttons do not appear.
The following graphic shows the Agency Detail window.
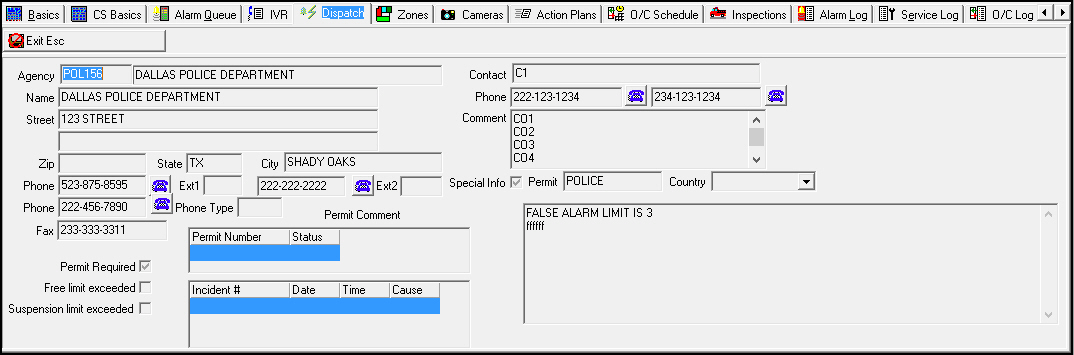
Field Descriptions - Agency Detail
The following table describes the fields in this window.
Field |
Description |
Agency |
Response agency code. |
Action
Plan Agency |
Response agency. |
Name |
Response agency name. |
Street |
Response agency street addresses. |
Additional Street (No label) |
Response agency additional street address. |
Zip |
Zip code where this response agency is located. |
State |
State where this response agency is located. (This field holds a maximum of 60 characters.) |
City |
City where this response agency is located. |
Phone |
Response agency phone number. |
Phone 2 |
Second response agency phone number. |
Fax |
Response agency fax number. |
Phone 3 |
Alternative response agency phone number. |
Phone Type |
Response agency phone type. |
Contact |
Contact name for this agency. |
Phone |
Contact phone number. |
Phone 2 |
Alternative contact phone number. |
Comment |
Response agency comments. |
Special Info |
If this box displays a check mark, additional information concerning this agency is available. When you call this agency from Monitoring, the agency record displays after you place the call but before the Event Extension dialog box opens. This enables the monitoring operators to read any additional information while they are online with the agency. Note: If this box displays a check mark and you take an alarm, the Agency Detail window opens when you auto-dial an agency contact. You can auto-dial any telephone number from the Agency Detail window. |
Permit |
Permit type if the agency requires permits for monitored accounts. Note: If an agency has a permit and you take an alarm, the Agency Detail window opens when you auto-dial an agency contact. You can auto-dial any telephone number from the Agency Detail window. |
Country |
Country where this response agency is located. |
Permit Required |
This check box displays a check mark if the agency requires permits for monitored accounts. Note: SBN displays a warning message when you zoom into Agency Details if the agency requires a permit but does not have one assigned in Patrol Agencies (program #1717), Police Agencies (program #1546), Fire Agencies (program #1547), or Medical Agencies (program #1552). When action 537/126 is active, this warning does not appear. When action 537/127 is active, the 'Permit Expired' warning does not appear. |
Free Limit Exceeded |
This check box displays a check mark if the number of free dispatches for the agency has been exceeded for the customer. Note: SBN displays a warning message when you zoom into Agency Details if the free dispatch limit has been exceeded. When action 537/129 is active, this warning does not appear. |
Suspension Limit Exceeded |
This check box displays a check mark if the customer account has exceeded the false alarm limit and been suspended; the agency will no longer be dispatched to the installation premises. Note: SBN displays a warning message when you zoom into Agency Details if the false alarm suspension limit has been exceeded. When action 537/128 is active, this warning does not appear. |
Permit Grid |
|
Permit Number |
Displays the permit number of each permit assigned to the agency in Patrol Agencies (program #1717), Police Agencies (program #1546), Fire Agencies (program #1547), or Medical Agencies (program #1552). |
Status |
Displays the status of each permit assigned to the agency. |
Expiration Date |
Displays the expiration date of each permit assigned to the agency. |
Expired |
Indicates if any permits assigned to the agency have expired. |
Incident Grid |
|
Incident # |
Displays the incident number of each alarm incident to which the agency has been dispatched. |
Date |
Displays the date of each alarm incident to which the agency has been dispatched. |
Time |
Displays the time of each alarm incident to which the agency has been dispatched. |
Cause |
Displays the cause (alarm resolution code) of each incident to which the agency has been dispatched. |
Permit Comment |
Permit comments that display in the Comment field when dialing an agency contact. (This field holds a maximum of 60 characters and only appears when an agency has a permit assigned.) |
Contact Details Window - Basic Tab
The following graphic shows the Contact Details window with the Basic tab displayed.
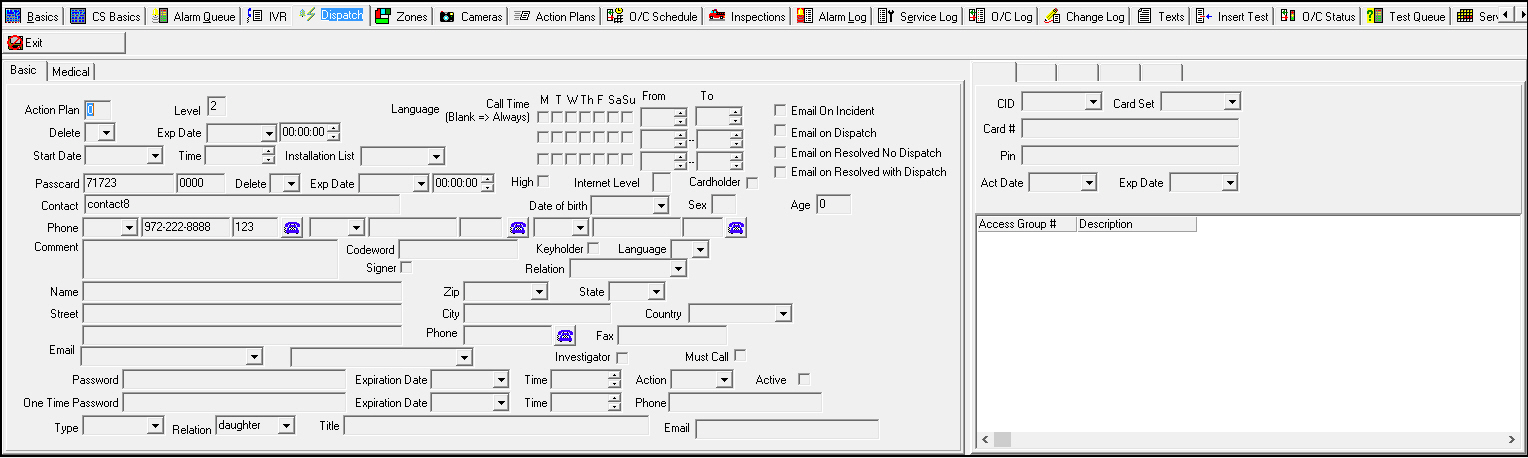
Field Descriptions - Contact Details Window - Basic Tab
The following table describes the fields in the Contact Details Basic tab.
Field |
Description |
Action Plan |
Contact action plan number. |
Level |
Passcard holder authority level. |
Call Time - Contact Active Days (No label) |
A check mark in any box indicates the day the call times are in effect. |
Contact
Start Time |
The starting time when you may call this contact (during the days marked). Note: When any days are marked in the previous boxes, you may only call the contact between the start and end times indicated. If no days are marked, you may call the contact at any time. |
Contact
End Time |
The ending time when you may call this contact (during the days marked). Note: When any days are marked in the previous boxes, you may only call the contact between the start and end times indicated. If no days are marked, you may call the contact at any time. |
Contact
Active Days 2 |
A check mark in any box indicates the day the call times are in effect. |
Contact
2 Start Time |
The starting time when you may call this contact (during the days marked). Note: When any days are marked in the previous boxes, you may only call the contact between the start and end times indicated. If no days are marked, you may call the contact at any time. |
Contact
2 End Time |
The ending time when you may call this contact (during the days marked). Note: When any days are marked in the previous boxes, you may only call the contact between the start and end times indicated. If no days are marked, you may call the contact at any time. |
Contact
Active Days 3 |
A check mark in any box indicates the day the call times are in effect. |
Contact
3 Start Time |
The starting time when you may call this contact (during the days marked). Note: When any days are marked in the previous boxes, you may only call the contact between the start and end times indicated. If no days are marked, you may call the contact at any time. |
Contact
3 End Time |
The ending time when you may call this contact (during the days marked). Note: When any days are marked in the previous boxes, you may only call the contact between the start and end times indicated. If no days are marked, you may call the contact at any time. |
Delete (No label) |
Indicates whether this passcard was deleted from this action plan. l If this field is blank, this passcard is still active on this plan. l If this field displays a -, this passcard is inactive on this plan, but not deleted. l If this field displays an X, this passcard is deleted from this plan. It can still be active on other plans. |
Expiration Date |
Date when SBN deletes this passcard holder from the action plan shown. |
Expiration
Time |
Time this passcard expires from this plan. When the Delete field displays an X, this field defaults to the current date and time. SBN does not accept a date and time more than one year in advance for this field. |
Passcard |
Passcard number for this contact. |
Passcard
Extension |
Passcard extension, which defaults to the Branch ID. |
Delete |
Choices for deleting this passcard from SBN and removing it from all installations and action plans. l If the field is blank, this passcard is still active on this plan. l If this field displays a -, this passcard is inactive on this plan, but not deleted. l If this field displays an X, SBN deletes this passcard from all action plans. |
Expiration Date |
Date when the passcard holder was deleted from SBN and when SBN removed the contact from all installations and action plans. |
Expiration
Time |
Time this passcard expires from SBN, removing it from all installations and action plans. When the Delete field displays an X, this field defaults to the current date and time. SBN does not accept a date and time more than one year in advance for this field. |
High |
Reference box that accepts X as a valid entry; no functionality in SBN. |
Internet Level |
Passcard holders may access account information online based on their level of Internet access. Levels of Internet access are customer-defined. |
Cardholder |
Customer-defined check box; no functionality in SBN. |
Contact |
Contact name. |
Date of birth |
Contact date of birth. |
Sex |
Contact gender. |
Phone |
Phone number type. For example, Pager, Work, etc. |
Phone
Number |
Contact phone number. |
Phone
Extension |
Contact phone number extension. Note: You cannot use auto-dial for this number. |
Phone Type 2 |
Phone number type 2. For example, Pager, Work, etc. |
Phone
Number 2 |
Contact phone number 2. |
Phone Extension 2 |
Extension for the phone 2 field. Note: You cannot use auto-dial for this number. |
Phone Type 3 |
Phone number type 3. For example: Pager; Work; etc. |
Phone Number 3 |
Contact phone number 3. |
Phone Extension 3 |
Extension for the phone 3 field. Note: You cannot use auto-dial for this number. |
Comment |
Comment about the contact. |
Codeword |
Code word, if needed, for this contact. |
Keyholder |
If this box displays a check mark, this contact holds a key for the alarm location. |
Language |
Contact language. |
Signer |
Customer-defined check box; no functionality in SBN. |
Relation |
Contact relation to primary installation contact. |
Name |
Full name of contact. |
Zip |
Zip code (part of the contact’s address). |
State |
State in which the contact is located. (This field holds a maximum of 60 characters.) |
Street |
Street address for the contact. |
City |
City in which the contact is located.. |
Additional
Street |
Additional street address information. |
Phone |
Additional phone number for the contact. |
Fax |
Additional fax number for the contact. |
Email address for the contact. |
|
Email 2 (No label) |
Secondary email address for the contact. |
Password |
Contact password. |
Expiration Date |
Date the contact password expires. |
Time |
Time the contact password expires. |
Action |
Action profile. |
Active |
Check box indicates if the contact is active. |
One Time Password |
Contact one-time password. |
Expiration Date |
Date the one-time password expires. |
Time |
Time the one-time password expires. |
Phone |
Phone number to authenticate password. |
Type |
Contact type. |
Relation |
Contact relation to primary installation contact. |
Title |
Customer-defined field; no functionality in SBN. |
Access Card Pane |
|
CID |
CID attached to the access card. |
Card Set |
Set the card belongs to. |
Card # |
Card number assigned to this passcard holder. |
Pin |
PIN number attached to the card, if required. |
Act Date |
Card activation date. |
Exp Date |
Card expiration date. |
Access Group # |
Access groups attached to this card. |
Contact Details Window - Medical Tab
The following graphic shows the Contact Details window with the Medical tab displayed.
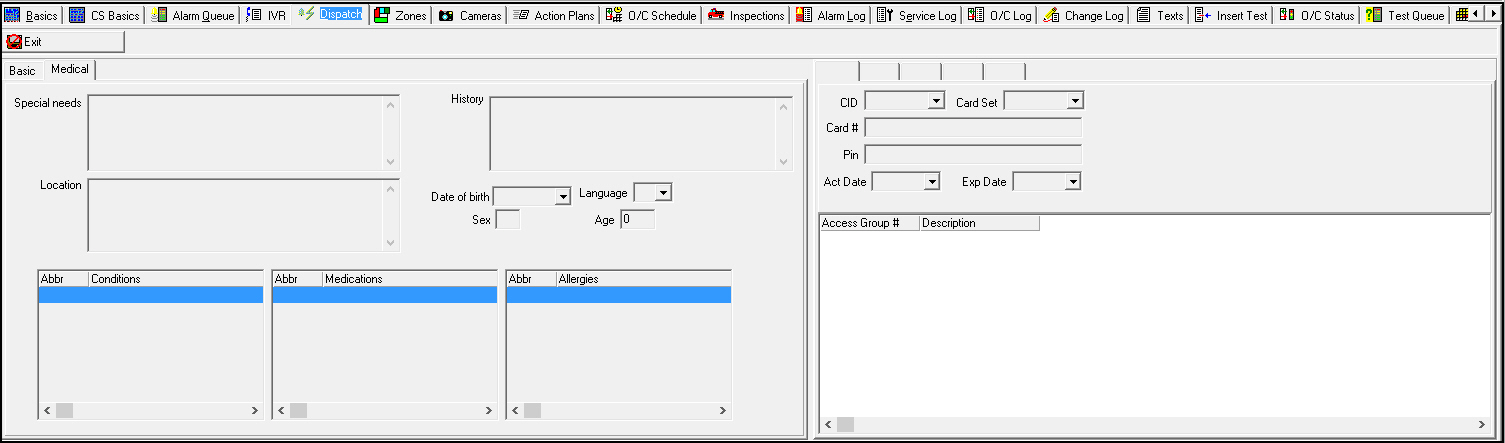
Field Descriptions - Contact Details Window - Medical Tab
The following table describes the fields used in the Contact Details Medical Tab.
Field |
Description |
Special Needs |
Description of any special needs the contact has. |
History |
Description of the contact's medical history. |
Location |
Description of where the contact is located. |
Date of birth |
Contact's date of birth. |
Language |
Contact's language preference. |
Sex |
Contact's gender. |
Conditions |
List of contact's medical conditions, if any. |
Medications |
List of contact's medications, if any. |
Allergies |
List of contact's allergies, if any. |
Using Monitoring Commands
Operators use Monitoring Commands [F2] to take actions in the Dispatch window that do not directly affect the current alarm.
The following table describes the monitoring commands and their shortcuts.
Command |
Description |
Shortcut Keys |
ACNTS ACC |
View Accounts Accessed |
CTRL+A |
BEEP |
Beep On/Off |
CTRL+Q |
CLR SCRN |
Clear Screen |
ALT+CTRL+Z |
FREND CMD |
Front End Commands |
CTRL+F |
OCLOG INS |
Open/Close Log Insert |
ALT+CTRL+S |
PERMIT |
View Permits |
CTRL+J |
SET PRIO |
Set Minimum and Maximum Priority for Get Next Alarm |
|
SIM ALRM |
Simulate Alarm |
CTRL+S |
SKILL +/- |
Toggle Skills On/Off |
CTRL+K |
SKILL FILTER |
Set Skill Filter for Current Session |
CTRL+Y |
SKILL REQ |
Set Skill Requirements for Current Alarm |
CTRL+U |
SWITCH PLAN |
Switch Plan |
CTRL+I |
TIMER |
Attach Timer 1 (Operator Timer) |
CTRL+N |
TIMER 2 |
Attach Timer 2 (Patrol Timer) |
|
TRAN ALA |
Transfer Alarms |
CTRL+R |
VIDEO VALIDATION |
Video Validation |
CTRL+H |
View Accounts Accessed
ACNTS ACC [Ctrl+A]
Use this command to open a window that displays information on all the accounts you have viewed in Service/Data Entry. The window displays the Customer ID, Operator Action, Customer Name, Date, and Time for each account accessed.
Use the following steps to view all accounts accessed:
1. Choose Monitoring Commands.
w The Monitoring Commands menu opens.
2. Choose ACNTS ACC from the menu.
w The Accounts Accessed window opens.
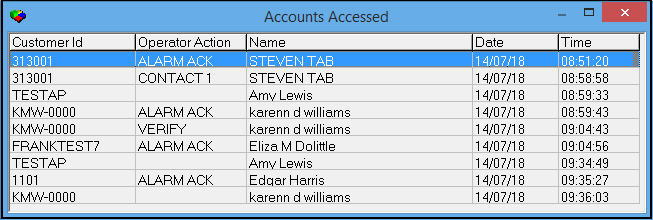
Beep On/Off
Beep [Ctrl+Q]
Use this command to turn the Alarm Beep on or off. Another way to turn the beep on or off is by double-clicking the speaker icon in the upper right of the Dispatch tab (based on your miscellaneous profile).
Beep - on

Beep - off

Note: If no panel types have the Alarm Beep check box selected in program #1742, then SBN functions as usual; any alarm in the Alarm Queue will cause a beep. If at least one panel type has the Alarm Beep check box selected, the system only produces a beep if an alarm with this panel type is in the Alarm Queue. In addition, the user will not be allowed to turn the Alarm Beep in Dispatch off or on.
If option ma029 is off, the alarm notification beep in Dispatch is disabled and cannot be turned on using the Alarm Beep icon or the Beep On/Off monitoring command. When option ma029 is on, the alarm notification beep functions as usual.
Clear Screen
CLR SCRN [Alt+Ctrl+Z]
Use this command to clear the Dispatch tab.
Front End Commands
FREND CMD [Ctrl+F]
Use this command to open HSL Commands (program #1572) or DCC Commands (program #1788). See HSL Commands or DCC Commands for more information.
Open/Close Log Insert
OCLOG INS [Alt+Ctrl+S]
Use this command to add the selected contact to the Open/Close Log.
Use the following steps to add to the Open/Close Log:
1. In the Call List pane, select the contact you want to add to the log.
2. Choose Monitoring Commands.
w The Monitoring Commands menu opens.
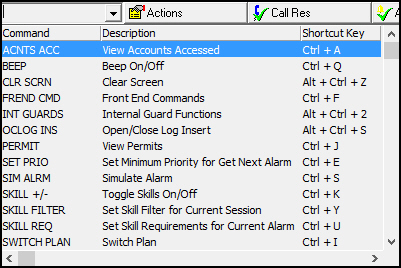
3. Choose OCLOG INS from the menu.
w SBN asks if you want to insert that contact.
4. Choose Yes.
w SBN inserts the date, time, and contact name into the Open/Close Log.
Set Priority
SET PRIO
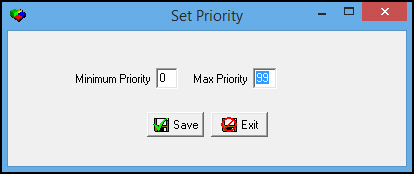
Use Set Priority to set the minimum and maximum priorities for the Get Next Alarm button.
Note: This setting also applies to the Alarm Queue. For example, if you set the minimum priority to 10 and the maximum priority to 50, you will only see alarms in the Alarm Queue that have priorities 11-50. (The priority setting has no effect on Customer or Merged modes of the Alarm Queue.)
Simulate Alarm
SIM ALRM [Ctrl+S]
Use Simulate Alarm to create a signal on an account.
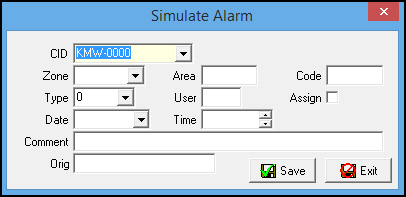
Field Descriptions - Simulate Alarm
The following table describes the fields in this dialog box.
Field |
Description |
CID |
Installation CID on which you want to simulate the alarm. SBN auto-fills this field with the CID for the current customer. |
Zone |
Zone on which to simulate the alarm. A blank field specifies a service alarm. |
Area |
Area within a zone. |
Code |
Code that identifies the type of signal the zone generates. |
Type |
Type of alarm to simulate. Note: Alarm Types 0,1, 2, 4, and 6 can use Restore Delay. |
User |
ID of the user handling the alarm. When option mo128 is on, the name of the person who created the alarm appears in the Alarm Log. |
Assign |
If you select this check box, SBN assigns this simulated alarm to the user. This prevents other users from getting simulated alarms. Note: The alarm does not appear in anyone else’s Master queue. SBN only assigns the alarm; it does not acknowledge the alarm. |
Date |
Date of the alarm. Note: If you select only the date and time, the log shows the alarm as a manually entered, log-only alarm. If you simulate the alarm with no date and/or time, the alarm appears in the log as if it were system-generated. Note: In some company configurations, if you do not select the date and time, SBN asks if you are sure. If you answer Yes, you may simulate alarms for testing. |
Time |
Time of the Alarm. Note: If you select the date and time, the log shows the alarm as a manually entered, log only alarm. If you simulate the alarm with no date and/or time, the alarm appears in the log as if it were system-generated. Note: In some company configurations, if you do not select the date and time, SBN asks if you are sure. If you answer Yes, you may simulate alarms for testing. |
Comment |
Additional comments about the alarm, which appear in the Alarm Log. Note: You can also use this field to enter alarms into receiver format for translations as defined in Alarm Translation Tables (program #1876). |
Orig |
Data string type for testing receiver data translations. Note: Testing Format: XX_____##RW, where XX is the Receiver abbreviation, mask, and ##RW (raw format). |
Testing Signal Translations
To test signal translations for Alarm Translation Tables (program #1876) using the Simulate Alarm command, you must use the following format:
In Comment
q The first three characters match the �Format� from program #1876.
q The fourth character can be anything.
q Characters five+ must match the Message ID.
In Orig
q The first two characters must match the receiver ID.
q The last four characters must be ##RW
Switch Plan
SWITCH PLAN [Ctrl+I]
Use this command to switch the action plan viewed in Dispatch. The Switch Plan dialog box appears.
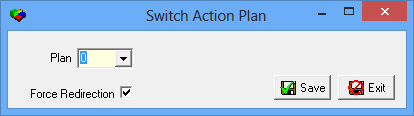
Note: Users can manually override a redirected action plan by using this function.
Choose from the menu of action plans available on the account. Action 537/112 controls access to this function.
Select the Force Redirection check box to replace the current plan with the temporary replacement plan or permanent substitute plan set up for the selected action plan in the Action Plans tab. For example, if Action Plan 0 has a temporary replacement plan 1 in place for Monday and Tuesday every week, if you attempt to switch the action plan to 0 on a Monday or Tuesday, the action plan will be switched to 1 if the Force Redirection check box is selected.
Note: When option mo236 is on, the Force Redirection check box is selected automatically when the Switch Action Plan dialog box opens. When the option is off, the Force Redirection check box is not selected.
Toggle Skills On/Off
SKILL +/- [Ctrl+K]
Use Toggle Skills to select and clear the Use Skills check box in Dispatch and the Alarm Queue. This function controls whether you use skills to filter the alarms in the queue and for Get Next Alarm.
Set Skill Filter
SKILL FILTER [Ctrl+Y]
Use Set Skill Filter to set the skill requirements for the current monitoring session.
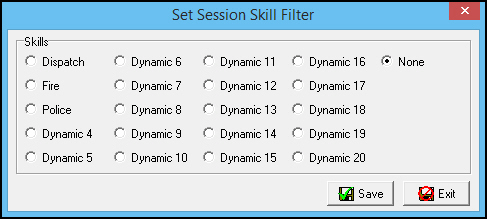
When you mark a selection, only those alarms matching the selected skills display and are available for treatment. You can only set skills that a user defines in SBN -- blank skills are not valid. Define skills in Skills (program #1862).
Set Skill Requirements for Current Alarm
SKILL REQ [Ctrl+U]
Operators use Set Skill Requirements for Current Alarm to set the skills for the current signal. The command opens a window in which company-specific parameters send alarms to the operator with skills set for those specific parameters.
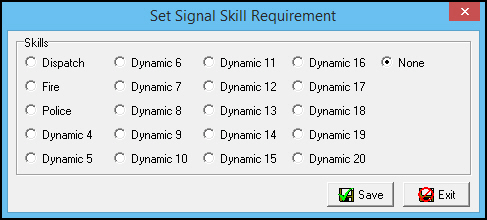
When you select a skill, only those operators with matching skills can view/select the alarm. When you set a skill requirement, SBN logs the action in the Alarm Log.
Attach Timer
TIMER [Ctrl+N]
Use Attach Timer to attach an operator timer to an alarm. Action 537/104 controls access to this command.
In the Attach Timer dialog box, type the duration of the timer or select the date and time that the timer expires. You can also type the priority you want the signal to have when the timer expires. You can attach a separate timer to each incident.
The timer enters a line in the Alarm Log and displays the duration and the priority in the comment field. If a user Comment is defined in the Comment field. It will then display the duration, priority, and the defined user comment in the Alarm Log. The log only displays hours and minutes unless days have been specified.
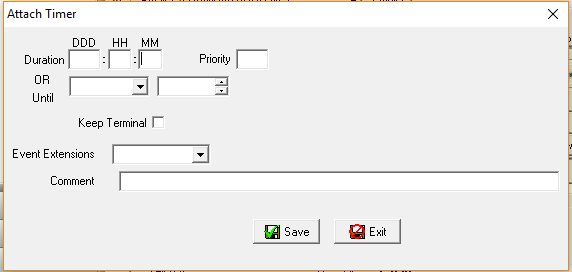
Note: If an Event Extension has a duration time set within Monitoring Event Extensions (#1751), and a user selects that event in the Attach Timer screen, the Duration field will automatically populate with the defined time from #1751. Users can change what is populated in the Duration field if needed.
Once you set the timer parameters, if option ba395 is on and the alarm is priority 1, 2, or 3, SBN asks you to confirm your selections in a dialog box. Option ba395 is off by default.
When option mo207 is on, SBN automatically uses the Clear Screen monitoring command (ALT+CTRL+Z) to clear an alarm when you attach a timer to it. If the Auto Feed check box is selected, the next alarm appears.
Note: If you set an operator timer (TIMER) or a patrol timer (TIMER 2) on an alarm with any existing timer, the second timer cancels the first timer and resets it for the duration of the second timer.
Use the following steps to attach a timer:
1. Choose Monitoring Commands.
w The Monitoring Commands menu opens.
2. Choose TIMER from the menu.
w The Attach Timer dialog box opens.
3. Complete the fields, as needed.
4. Choose Save.
Attach Timer 2
TIMER 2
Use Attach Timer 2 to attach a patrol timer to an alarm.
In the Attach Timer dialog box, type the duration of the timer or select the date and time that the timer expires. You can also type the priority you want the signal to have when the timer expires. You can attach a separate patrol timer to each incident.
The timer enters a line in the Alarm Log and displays the duration and the priority in the comment field. If a user Comment is defined in the Comment field. It will then display the duration, priority, and the defined user comment in the Alarm Log. The log only displays hours and minutes unless days have been specified.
Note: If you set an operator timer (TIMER) or a patrol timer (TIMER 2) on an alarm with any existing timer, the second timer cancels the first timer and resets it for the duration of the second timer.
Use the same steps to attach a patrol timer to an alarm as you use to attach an operator timer, but choose TIMER 2 from the Monitoring Commands menu instead of TIMER.
Transfer Alarms
TRAN ALA [Ctrl+R]
Use Transfer Alarms to move alarms from the current terminal to a specified terminal. SBN displays a dialog box for you to specify whether you want to transfer all alarms or only one alarm to the terminal number you enter in the Terminal ID field.
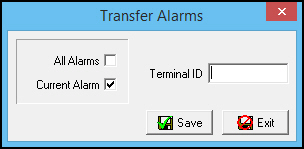
If option mo150 is on, an alarm that you transfer to another terminal behaves like a new alarm. The alarm color changes from cyan to purple, or from yellow/green to red.
Note: When action 537/137 is on, the All Alarms check box is available in the Transfer Alarms dialog box (CTRL + R). When the action is off, the All Alarms check box is inactive and you cannot select it.
If you leave Terminal ID blank, the alarm returns to the queue without any terminal number attached to it. If option mo011 is off, the operator cannot transfer alarm(s) to a blank terminal, and SBN verifies the destination terminal is logged on. Once you transfer the alarm, SBN adds an entry in the Alarm Log indicating that you transferred an alarm and displays the terminal number to which you transferred it.
Note: Set up terminals in Terminals (program #1861).
Video Validation
VIDEO VALIDATION [Ctrl+H]
This command is active if the current alarm contains zones that have the Video Audit check box selected in Zone Types (program #1733).
Note: If option mo179 is on, the Video Validation window lists zones that have the same schedule number as the missed open/close that triggered the alarm and have the Video Audit check box selected in program #1733.
Use Video Validation to bring up a window with list of zones flagged for auditing. The tabs at the bottom of the window display action plan texts for the highlighted zone.
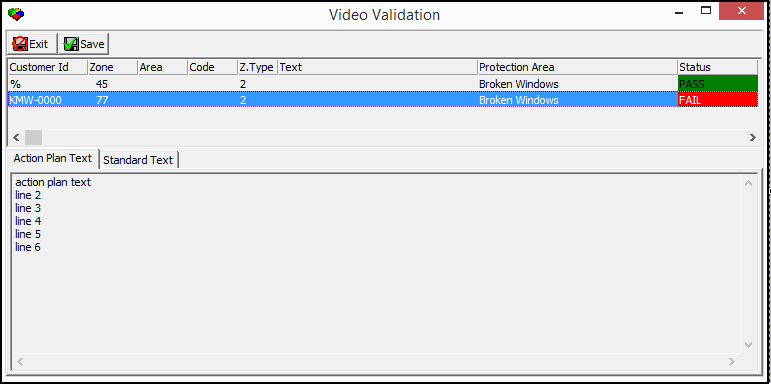
View each zone listed in the Video Audit window and assign status Pass, Fail, Cannot Test, or you can leave the status blank (meaning the zone has not been audited). Double-click a zone to change its status and toggle between the different statuses.
The status you assign to each zone appears as an event in the Alarm Log. (Event Vi.Val Pa indicates Video Validation passed; event Vi. Val Fa indicates Video Validation failed.)
If the current alarm contains a zone that has the Video Audit Exc check box selected in program #1733, SBN generates an incident in the Alarm Log if the zone fails the audit.
Using Monitoring Actions
Operators use Monitoring Actions to perform actions that lead to the disposal of an alarm and to log the results of such actions.
Select the Action List check box in Monitoring Events (program #1621) for each event you want to appear in the Dispatch Monitoring Actions drop-down menu, or do not select the Action List check box for any events to use the default monitoring actions list below.
Note: Actions 195/1-195/255 correspond to monitoring events in program #1621. (For example, action 195/12 is for monitoring event 12 Alarm Take.) In order to use a monitoring event in Dispatch, you must enable its action in your action profile in program #1502.
The following table describes the monitoring actions and their shortcuts.
Event |
Description |
Shortcut Keys |
ALARM TAKE |
Take Alarm |
ALT+CTRL+G |
CALL GSM |
Call GSM Phone Number |
ctrl+shift+g |
CALL IN |
Call In |
ALT+CTRL+J |
CALL RES |
Call Resolution |
ALT+CTRL+Y |
COMMENT |
Comment |
ALT+CTRL+L |
COMMUNIC. |
Communication Type |
ALT+CTRL+U |
CON. REACH |
Contact Reach |
ALT+CTRL+C |
CONT. REAC |
Contact Reach (Cancel) |
ALT+CTRL+4 |
CONT. TIMER |
Contact Timer |
ALT+CTRL+7 |
CONTACT 1 |
Call Contact 1 |
ALT+CTRL+Q |
CONTACT 2 |
Call Contact 2 |
ALT+CTRL+W |
CONTACT 3 |
Call Contact 3 |
ALT+CTRL+E |
CONTACT 4 |
Call Contact 4 |
ALT+CTRL+R |
CONTACT 5 |
Call Contact 5 |
ALT+CTRL+5 |
CONTACT 6 |
Call Contact 6 |
ALT+CTRL+6 |
CONTACTX |
Call Contact >6 |
|
CUST. CALL |
Customer Called In |
ALT+CTRL+1 |
DIS MANUAL |
Dispatch Comments |
ALT+CTRL+0 |
DISP. INFO |
Dispatch Information |
ALT+CTRL+I |
DISPATCH |
Dispatch (Park) |
ALT+CTRL+X |
EV112 |
Redial Last Number |
ctrl+Shift+c |
EV122 |
Patrol Comments |
CTRL+SHIFT+M |
EXTRA ACK |
Extra Acknowledge |
ALT+CTRL+H |
FIRE |
Call Fire |
ALT+CTRL+F |
GUARD |
Call Guard |
ALT+CTRL+O |
GUARD ARR. |
Guard Arrived |
ALT+CTRL+A |
GUARD CAN |
Guard Cancel |
ALT+CTRL+9 |
GUARD DIS. |
Guard Dispatched When option ma026 is on, SBN records monitoring event 44 (Dispatch - Park) as Guard Dispatch in the Alarm Log. |
ALT+CTRL+D |
GUARD OUT |
Guard Out |
CTRL+F10 |
GUARD REP |
Guard Report |
ALT+CTRL+8 |
KEYS USED |
Keys Used |
ALT+CTRL+K |
MEDICAL |
Call Medical |
ALT+CTRL+M |
NO CONTACT |
No Contact |
ALT+CTRL+N |
PASS VER. |
Passcard Verification |
CTRL+F9 |
POLICE |
Call Police |
ALT+CTRL+P |
VERIFY |
Verify Phone 1 |
ALT+CTRL+V |
VERIFY 2 |
Verify Phone 2 |
ALT+CTRL+B |
VERIFY 3 |
Verify Phone 3 |
ALT+CTRL+3 |
GUARD AUTO |
Guard Auto Dispatch |
|
Alarm Take
ALARM TAKE [Alt+Ctrl+G]
Use Alarm Take to take control of an alarm being treated by another operator. When you take the alarm, SBN associates your terminal number with this alarm, and TAK appears in the Events List.
You can call agency contacts after you take an alarm by selecting the auto-dial icon next to the contact's telephone number. If you dial an agency contact with a Permit and Permit Comment assigned to it (or if the Special Info check box is selected in Action Plans), the Agency Detail window opens. You can dial any number for the agency contact from the Agency Detail window.
Note: To use this Monitoring Action, you must display an active incident in the Dispatch tab.
Note: When you use the Alarm Take action, SBN compares your user skill set and your action profile skill set to the alarm skills (not your temporary skill set defined in program #531), to determine whether you are qualified to handle the alarm.
Call GSM
CALL GSM [Ctrl+shift+g]
Use Call GSM to:
Activate the auto-dialer.
Record in the Alarm Log that you placed a call to the GSM phone number in the call list.
When you perform this action, Call GSM appears in the Events List.
Call In
CALL IN [Alt+Ctrl+J]
Use Call In to create an entry in the Alarm Log for a contact that calls in to the monitoring station. Select Call In from the Monitoring Actions menu. The Call In window appears.
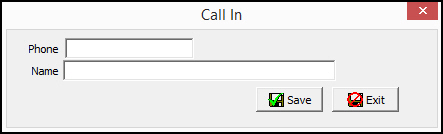
The following table describes the fields in this dialog box.
Field |
Description |
Phone |
The contact phone number of the person calling in. |
Name |
The name of the person calling in an alarm. |
Once you have completed the Call In fields, press Save. The new information appears in the Alarm Log tab.
Call Resolution
CALL RES [Alt+Ctrl+Y]
Use Call Resolution to attach an event extension to a contact indicating how you resolved the incident.
Note: When option mo183 is on, you can navigate to other tabs in Data Entry (program #559) while the Event Extensions window in the Dispatch tab is open. When this option is off, you cannot access any other Data Entry tabs while the Event Extensions window is open.
Note: The Comment column in the Alarm Log displays a maximum of 4 lines with 63 characters per line. Any text you type above this maximum does not appear in the Alarm Log.
When you perform this action, CAR appears in the Events List.
You can set up custom call resolutions in Monitoring Events (program #1621). Call resolutions 140 - 144 and 230 - 239 are available to customize. No Event Extensions are assigned at this time. You can rename or remove these resolutions from the system via Monitoring Events. Select the Call Resolution check box in program #1621 for each event you want to appear in the Dispatch Call Resolutions drop-down menu, or do not select the Call Resolution check box for any events to use the default call resolution list. (See Using Call Resolutions for the default call resolution list.)
Comment
COMMENT [Alt+Ctrl+L]
Use Comment to attach a comment to an incident in the Alarm Log. The Comment column in the Alarm Log displays a maximum of 4 lines with 63 characters per line. Any text you type above this maximum does not appear in the Alarm Log.
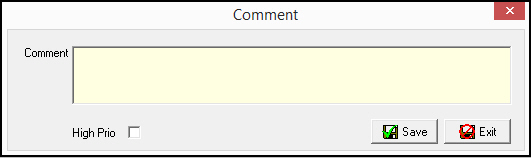
You may add a comment to an incident that another operator is currently handling. When you perform this action, COM appears in the Events List.
You may also flag a comment as high priority by selecting the High Priority check box.
Note: You may not add a high priority comment to a resolved event. High priority comments display in the Alarm Log with the event title, H.COMM, in blue text and the comment text in green.
Note: After you enter a comment for an alarm incident and choose Save, the Event Extensions dialog box does not appear.
Communication Type
COMMUNIC [Alt+Ctrl+U]
Communication Type is a UL-required field. For a UL account, you must log how you contacted the guard. The event extensions are Phone or Radio. A comment appears in the Alarm Log with the specific communication type. When you perform this action, COM appears in the Events List.
Contact Reach
CON REACH [Alt+Ctrl+C]
Use Contact Reach to record in the Alarm Log when you reach a contact. When you perform this action, CO+ or COR appears in the Events List.
Contact Reach (Cancel)
CONT REACH [Alt+Ctrl+4]
Use Contact Reach (Cancel) when you enter the Contact Reach action in error and need to remove it. When you perform this action, COR appears in the Events List.
Contact Timer
CONT TIMER [alt+ctrl+7]
Use Contact Timer as a timer for when you expect the contact to call back.
When you perform this action, COT appears in the Events List.
Call Contact 1-6
CONTACT 1-6
Use Call Contact 1-6 to:
Activate the auto-dialer.
Record in the Alarm Log that you placed a call to a specific contact number.
When you perform this action, CO1, CO2, CO3, CO4, CO5, or CO6 appears in the Events List depending on which contact was called. If you called an agency, the agency type appears in the Events List.
Call Contact >6
CONTACTX
Use Call Contact >6 to:
Activate the auto-dialer.
Record in the Alarm Log that you placed a call for a contact greater than 6.
Customer Called In
CUS. CALL [alt+ctrl+1]
Use Customer Called In to record the CUS event in the Alarm Log. SBN logs the name of the contact you select in the Call List pane of the Dispatch tab.
Dispatch Comments
DIS MANUAL [Alt+Ctrl+0]
Use Dispatch Comments to type information about a patrol response. SBN logs all information entered about the response in the Alarm Log as a comment. When you perform this action, AVS appears in the Events List.
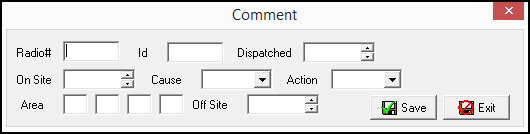
Dispatch Information
DISP INFO [alt+ctrl+I]
Use Dispatch Information to enter information the patrol or police agencies give you. SBN logs this information in the Alarm Log.
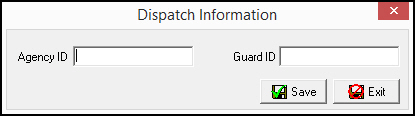
When you use this action, you must use:
The Agency ID - which can be the agency’s incident number
The Guard ID - which can be the ID of the user treating the alarm
When you use this action, DPI appears in the Events List.
Dispatch (Park)
DISPATCH [alt+ctrl+X]
You can use Dispatch (Park) after dispatching an alarm, but prior to the final disposition of the alarm. Once you place an alarm in Park mode, you must dispose of it to remove it from Park. After you dispose of the alarm, SBN removes it from park, which is not affected by the timer. Option mo012 controls this action.
Note: If option fe010 is on, Dispatch (Park) (SECURICOM Dispatch) bypasses guard functions Guard Cancel, Guard Report, Guard Arrived, and Guard Out.
Note: The code that SBN actually enters in the log is company-specific. You may use Park once an agency is on the scene during an incident, but cannot reset the system. The dispatch has occurred and no more can be done, but the signals are still being sent and received. The Park command allows the operator to monitor continuing incoming signals (new signals move the alarm back to the top of the queue and then back to the bottom) without having to respond to each one. A new signal turns the color from ice blue to purple and moves the alarm up in the queue below new alarms. Getting the alarm returns the color to ice blue.
Company option mo002, if on, removes ownership of a parked or timed alarm from an operator when SBN receives a second alarm by removing the terminal ID from the alarm. To actually treat the alarm, an operator (even the original operator) must take the alarm using the Alarm Take command.
Note: IBS does not recommend that you use option mo002 because the original operator could lose ownership of the original alarm while treating it.
When you perform this action, DIS appears in the Events List and the line for this incident in the Alarm Queue turns ice blue.
Redial Last Number
EV112 [CTRL+SHIFT+c]
Use Redial Last Number to redial the last contact or agency phone number. This action prompts the auto-dialer again, and SBN logs the call in the Alarm Log.
Patrol Comments
EV122 [CTRL+SHIFT+M]
This action opens the Patrol Comments dialog box. Use this action to associate a patrol assignment with a particular user. Upon choosing OK, SBN logs the information you enter as a line item in the Alarm Log.
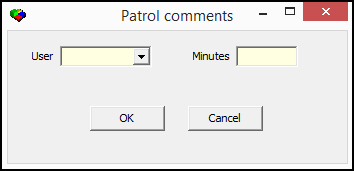
Extra Acknowledge
EXTRA ACK [alt+ctrl+h]
Use Extra Acknowledge to acknowledge an incident for the same installation.
Note: When option mo126 is on, the extra acknowledge refreshes the action plan and contacts according to the newest incident.
Call Fire
FIRE [alt+ctrl+F]
Use Call Fire to:
Select the fire agency listed in the contacts.
Dial the agency to dispatch firefighters to the premises. This only works if the installation has a defined agency. If the installation lists no agency, SBN takes no action.
When you perform this action, FIR appears in the Events List.
Call Guard
GUARD [alt+ctrl+O]
Use Call Guard to:
Create a patrol ticket for the alarm.
Automatically call the patrol agency defined for the installation.
When you perform this action, GUD appears in the Events List, and SBN requires the following guard actions in the following order before you can resolve the alarm: Guard Dispatch, Guard Arrived, and Guard Out.
Note: When option mo153 is on, it allows users to override the sequence of guard actions with a yes/no dialog. SBN uses GUI message 3160 (defined in program #1606) for this dialog.
Guard Arrived
GUARD ARR [alt+ctrl+A]
Use Guard Arrived to record when the patrol agency arrives on the premises. If option mo135 is off, you can only use this function after you use the Call Guard or Guard Dispatch functions. When on, this option allows Guard Dispatch events to occur out of sequence.
A timer starts when you use Guard Arrived. The timer expires when any of the following actions occur:
Guard Dispatch (Resets the timer)
Guard Arrived
Guard Out
New Alarm (Alarms ALWAYS cancel pending timers)
When you perform this action, GUA appears in the Events List.
Note: When option temp150 is on, and you select the Guard Arrived action, you cannot set the On Site time to a time in the Patrol Ticket window that is earlier than the time recorded in the Time Issued field (the time you selected the Guard Dispatch action). If you attempt to enter an earlier time, SBN does not save the change and sends an error message. (SBN interprets an earlier time as a future time for the following day.) When option temp150 is off, SBN allows you to enter and save an earlier time in the On Site field.
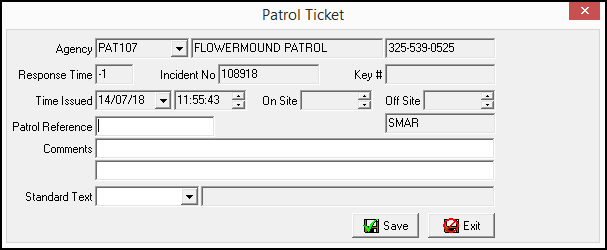
Note: Pressing the Esc key does not close the Patrol Ticket window.
Guard Cancel
GUARD CAN [alt+ctrl+9]
Use Guard Cancel to cancel a Guard Dispatch in process. All actions that are normally required when a Guard Dispatch is part of a ticket are not required when you use Guard Cancel. When you perform this action, GUC and TIO appear in the Events List for Guard Cancel and Time Out.
Note: When option mo197 is on, if you enter the Guard Cancel monitoring action the following message appears: "Are you sure you want to cancel call out?"
When a value is entered for option grd_auto, the Guard Cancel action performs additional functions related to the Guard Auto Dispatch action.
A confirm dialog box appears
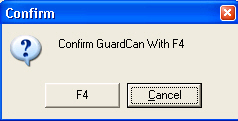
When you choose the specified function key, SBN sends the following details of the alarm incident to an external application defined by option grd_auto:
'GuardCan'
CID
Country
Installation number (ins_no)
Incident number
Operator ID (SBN user ID)
Guard Dispatch
GUARD DIS [alt+ctrl+D]
Use Guard Dispatch to:
Create a patrol ticket for the alarm.
Automatically call the patrol agency defined for the installation (the same actions as Call Guard).
The Event Extensions dialog box appears first, followed by the Patrol Ticket dialog in which you may add comments.
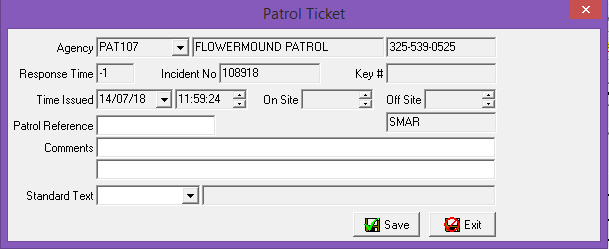
When you perform this action, GSE and TIO appear in the Events List for Guard Dispatch and Time Out.
Note: When on, option ma006 combines the Guard Dispatch monitoring action with the Call Guard [ALT+CTRL+O] and Dispatch (Park) [ALT+CTRL+X] monitoring actions, so that when you choose Guard Dispatch all three actions take place.
Note: Pressing the Esc key does not close the Patrol Ticket window.
Guard Out
GUARD OUT [Ctrl+F10]
Use Guard Out to note that the guard has left the premises. This action stops the timer started with the Guard Arrived function. SBN notes the time out on the patrol ticket window that appears. You can also note any comments on the patrol ticket. When you cancel a timer using Guard Out, the incident color in the Alarm Queue turns back to green. When you perform this action, GUO appears in the Events List.
When a value is entered for option grd_auto, the Guard Out action performs additional functions related to the Guard Auto Dispatch action.
A confirm dialog box appears
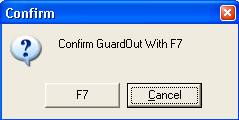
When you choose the specified function key, SBN sends the following details of the alarm incident to an external application defined by option grd_auto:
'GuardOut'
CID
Country
Installation number (ins_no)
Incident number
Operator ID (SBN user ID)
Note: When option temp150 is on, and you select the Guard Out action, you cannot set the Off Site time to a time in the Patrol Ticket window that is earlier than the time recorded in the Time Issued field (the time you selected the Guard Dispatch action) or the On Site field. If you attempt to enter an earlier time, SBN does not save the change and sends an error message. (SBN interprets an earlier time as a future time for the following day.) When option temp150 is off, SBN allows you to enter and save an earlier time in the Off Site field.
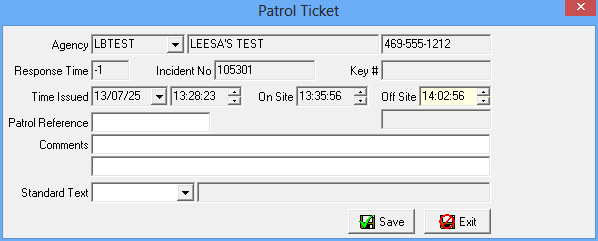
Note: Pressing the Esc key does not close the Patrol Ticket window.
Guard Report
GUARD REP [alt+ctrl+8]
Use Guard Report to open a patrol ticket to record the onsite/offsite times. When you perform this action, GUR appears in the Events List.
Keys Used
KEYS USED [alt+ctrl+K]
Use Keys Used to specify if keys were needed or were used at the premises. The event extensions for the Keys Used function are:
Keys used
No keys available
Central station has key
Branch has key
Guard has key
When you perform this action, KEY appears in the Events List.
Call Medical
MEDICAL [alt+ctrl+M]
Use Call Medical to call the appropriate agency in order to dispatch an ambulance to the premises. SBN dials the number and logs the event. When you perform this action, MED appears in the Events List.
No Contact
NO CONTACT [alt+ctrl+N]
Use No Contact to log in the Alarm Log that you did not reach a contact. When you perform this action, CO- appears in the Events List.
Passcard Verification
PASS VER [Ctrl+F9]
Use the Passcard Verification dialog box to verify a passcard number and extension for a contact or a user-selected Action Plan, or to verify a VRU code and its passcode for an installer or technician.
Passcard Verification for a Contact
The following graphic displays the Passcard Verification dialog box as it appears when handling an alarm.
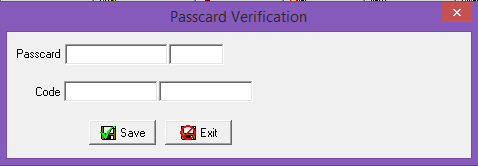
Use the following steps to verify a contact's passcard/ext:
1. Select a contact.
2. Press [ALT+CTRL+G] to take the alarm.
3. Press [CTRL+F9].
w The Passcard Verification box appears.
4. Enter the passcard/extension for the contact (entered in the Action Plans tab) to be verified in the Passcard fields.
Note: the Passcard field allows a maximum of ten characters.
Note: If option mo172 is on, only a VRU code registers as valid when an operator handles an alarm. If a passcard is entered, it registers as invalid. If this option is off, SBN accepts both VRU codes and passcards. (See VRU Code Verification for an Installer ID or Technician ID below.)
5. Choose Save.
If SBN verifies the passcard, the contact name, authority level, and authority will populate the Contact Name field. This information remains displayed until an operator enters another passcard or an invalid code. In case of the latter, the Contact Name field will blank.
When you perform this action, GPC appears in the Events List. If you type the wrong passcard, WPC appears in the Events List.
Note: If option mo159 is on, the event list does not indicate when you type a wrong passcard.
VRU Code Verification for an Installer ID or Technician ID
Use the following steps to validate an Installer ID or Technician ID:
1. Press [CTRL+F9].
w The Passcard Verification box appears.
2. Enter the VRU code and passcode for the Installer or Technician in the Code fields.
Note: the Passcard field allows a maximum of ten characters.
Note: If the passcode for the VRU code is not defined in the Users tab of Personnel (program #1811), then you can enter the VRU code alone in the first Code field. If option mo172 is on, only a VRU Code registers as valid when an operator handles an alarm. If a contact passcard is entered, it registers as invalid. If this option is off, SBN accepts both VRU codes and contact passcards.
3. Choose Save.
Note: The Installer or Technician Branch and the Installation Branch must match in order to verify a VRU code and its passcode.
Passcard Verification for a User-Selected Action Plan
An operator can also validate the passcard for a user-selected Action Plan on an installation that does not have an active incident.
The following graphic displays the Passcard Verification box as it appears when there is no alarm for the installation.
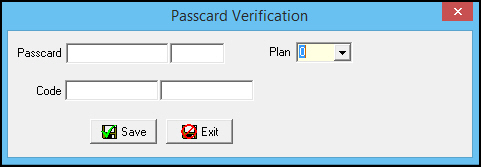
Use the following steps to verify a passcard:
1. Press [CTRL+F9].
w The Passcard Verification box appears.
2. Enter the passcard/extension to be verified in the Passcard fields.
Note: the Passcard field is limited to ten characters.
3. Select an action plan from the Plan menu.
4. Choose Save.
If SBN verifies the passcard, the contact name, authority level, and authority will populate the Contact Name field. This information will remain displayed until an operator enters another passcard or an invalid code. In case of the latter, the Contact Name field will blank.
Call Police
POLICE [alt+ctrl+P]
Use Call Police to contact the Police agency defined for the installation. SBN dials the number and logs the event. The comment in the Alarm Log lists the Police agency number, name, and phone number. When you perform this action, POL appears in the Events List.
Verify Phone 1, Phone 2, and Phone 3
[ALT+CTRL+V], [ALT+CTRL+B], [ALT+CTRL+3]
Use Verify Phone 1, 2, and 3 to log in the Alarm Log that you placed a verification call. When you perform these actions, VC appears in the Events List.
Note: To use these Monitoring Actions, you must have an active incident on your screen.
Guard Auto Dispatch
GUARD AUTO
Use Guard Auto Dispatch to attach a patrol timer (Timer 2) to an alarm incident and send incident details to an external application.
Use the following steps to execute the Guard Auto Dispatch functions:
1. Press the Monitoring Actions button.
2. Choose GUARD AUTO from the drop-down menu.
w If the call list for the selected alarm incident includes a Patrol contact, the Guard Call Auto dialog box opens, displaying Patrol phone numbers 1, 2, and 3. (If the call list does not include a Patrol contact, SBN displays an error message.)
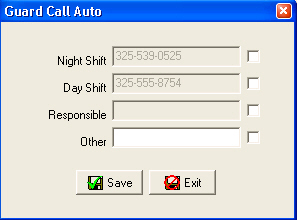
3. Select a check box for one of the displayed phone numbers, or enter a phone number in the Other field and select the check box beside it.
w SBN does the following:
Attaches a patrol timer (Timer 2) to the alarm incident for the number of minutes defined by option tm2val
Note: SBN only attaches Timer 2 to the alarm incident when option ma027 is on.
Records event Timer 2 in the Alarm Log
Applies event TM2 to the incident in the Alarm Queue (indicating it has a patrol timer attached)
Sends the following details of the alarm incident to an external application defined by option grd_auto:
'GuardCallAuto'
CID
Country
Installation number (ins_no)
Incident number
Operator ID (SBN user ID)
Phone number selected in the Guard Call Auto dialog box
Check box number of the phone number selected in the Guard Call Auto dialog box (1, 2, 3, or 4)
Using Call Resolutions
Use Call Resolutions to select a resolution to record in the Alarm Log for each call placed on the installation.
Select the Call Resolution check box in Monitoring Events (program #1621) for each event you want to appear in the Dispatch Call Resolutions drop-down menu, or do not select the Call Resolution check box for any events to use the default call resolution list below.
Note: Actions 195/1-195/255 correspond to monitoring events in program #1621. (For example, action 195/12 is for monitoring event 12 Alarm Take.) In order to use a monitoring event in Dispatch, you must enable its action in your action profile in program #1502.
The following table describes the default call resolutions and their shortcuts.
Call Disposition |
Description |
Shortcut Keys |
# DISCONTD |
Number Disconnected |
CTRL+F2 |
ANS MACHIN |
Answering Machine |
CTRL+F3 |
GOOD PCODE |
Good Passcode |
CTRL+F8 |
LEFT MSG |
Left Message |
CTRL+F7 |
LINE BUSY |
Line Busy |
CTRL+F12 |
NO ANSWER |
No Answer |
CTRL+F5 |
ON HOLD |
On Hold |
ALT+CTRL+F6 |
WRG PCODE |
Wrong Passcode |
ALT+CTRL+F9 |
WRONG # |
Wrong Number |
CTRL+F11 |
140 CRESS |
Call Resolution 140 |
ALT+1 |
141 CRESS |
Call Resolution 141 |
ALT+2 |
142 CRESS |
Call Resolution 142 |
ALT+3 |
143 CRESS |
Call Resolution 143 |
ALT+4 |
144 CRESS |
Call Resolution 144 |
ALT+5 |
Wrong Number Auto-Generated Comments
In Program #1887, new options mo255 and mo256 were added. Option mo255 lists the monitoring events in Program #1621 that are tied to event extension 14 (Wrong#) in Program #1751. The monitoring events that are listed in option mo255 will create communication log entries when submitted.
Option mo256 is used to trigger the auto-generated comment that includes the incorrect phone number when WRONG# is selected in the event extension drop down. The CMS can modify the text in the Event Extension Comment field if needed, the new option will record the text in the Communication Log text column.


In Dispatch, when a signal is taken and the CMS calls a contact number, if the contact number is wrong the CMS can click the “Call Res� button and select Wrong #.
The user can also click
the phone icon  and the Event Extension pop-up window will display to select the Wrong
#.
and the Event Extension pop-up window will display to select the Wrong
#.
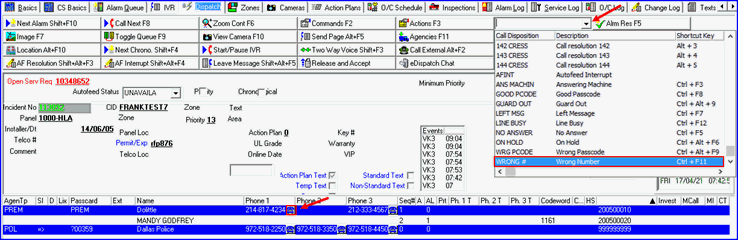
When Wrong # is selected, the comment field will auto-generate the contact’s information. The comment text that is generated can be modified if needed.

When the CMS enters a text in the Event Extension Comment field, the new option will record the text in the Communication Log text column.
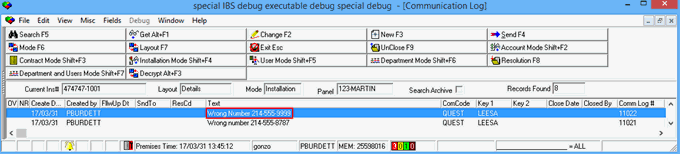
Double click the text and the details of the text will display in the Comment field along with the user’s name, time and date the comment was entered.
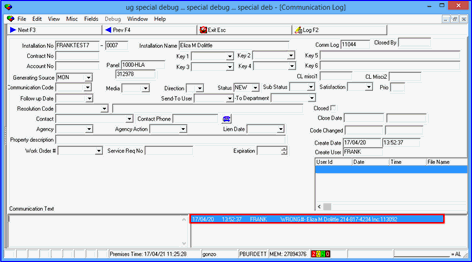
Using Alarm Resolutions and Event Extensions
Use Alarm Resolutions to dispose of an alarm signal. If a zone requires a restore, you are not able to resolve the alarm until the zone receives a restore. SBN logs the event in the Alarm Log and removes the alarm from the alarm queue. After you select a resolution, SBN asks the operator to choose a specific function key to confirm the selection. SBN chooses this function key randomly to minimize incorrect resolutions for alarms.
If event extensions exist for the selected alarm resolution, SBN then displays an Event Extension window. From the Event Extension window, you can select a more specific event extension to go with the alarm resolution and type a comment, if needed. (See each Alarm Resolution for more information.) The Event Extensions field in the Event Extension window is required if the Event Ext. Required check box is checked for the selected alarm resolution in program #1621.
Note: Actions 195/1-195/255 correspond to monitoring events in program #1621. (For example, action 195/12 is for monitoring event 12 Alarm Take.) In order to use a monitoring event in Dispatch, you must enable its action in your action profile in program #1502.
If you want SBN to automatically generate a service ticket when you select an event extension, select the Service Request check box for the extension in Monitoring Event Extensions (program #1751).
Once you dispose of the alarm, you can begin treating another alarm signal.
You can designate any event in Monitoring Events (program #1621) as an alarm resolution; all alarm resolutions appear in the Alarm Resolution menu. You can also assign any shortcut key to an alarm resolution to make disposing of an alarm easier for operators.
Note: If you want SBN to automatically generate a service ticket when you select an alarm resolution, select the Service Request check box for the event in Monitoring Events (program #1621).
The following table describes the default alarm resolutions and their shortcuts.
Alarm Resolution |
Description |
Shortcut Keys |
CANCELLED |
Cancelled Alarm |
ALT+F3 |
DOWN CMPLT |
Download Completed |
ALT+F5 |
FALSE |
False Alarm |
ALT+F1 |
OPEN CLOSE |
Open / Close |
ALT+F8 |
OUT OF RUN |
Out of run-away |
ALT+F9 |
OUT OF TEST |
Out of Test |
ALT+F11 |
REAL |
Real Alarm |
ALT+F2 |
SERVICE |
Service |
ALT+F7 |
UNDETERMIN |
Undetermined |
ALT+F10 |
USER ERROR |
User Error |
ALT+F6 |
Cancelled
CANCELLED [alt+F3]
Use Cancelled to:
Mark the event as Cancelled.
Clear the event from the tab.
Record in the Alarm Log that you cancelled the alarm.
Download Complete
DOWN CMPLT [ALT+F5]
Use Download Complete to resolve alarm signals that occur when panels are installed/activated. SBN logs in the Alarm Log that you removed the alarm from the queue.
False Alarm
FALSE [alt+F1]
Use False Alarm to:
Close the event from the tab.
Record the event as a false alarm in the Alarm Log.
Tag the alarm as false.
Open Close
OPEN CLOSE [alt+F8]
Use Open Close to:
Indicate that you removed the alarm.
Record in the Alarm Log that Open/Close was the reason for removal.
Out of Runaway
OUT OF RUN [alt+F9]
Use Out of Run to record in the Alarm Log that you took the installation out of the Runaway Queue.
Out of Test
OUT OF TEST [alt+F11]
Use Out of Test to record in the Alarm Log that you took the installation out of the Test Queue.
Real
REAL [alt+F2]
Use Real to log an extension indicating how you treated the real alarm.
Service
SERVICE [alt+F7]
Use Service to log that a service on the system caused the signal on the installation.
Note: There are no event extensions for the Service alarm resolution.
Undetermined
UNDETERMIN [alt+F10]
Use Undetermined to record an unknown event in the Alarm Log.
User Error
USER ERROR [alt+F6]
Use User Error to note that the signal was a result of an error at the premises.
Displaying an Image
Use Display Image to integrate SBN with Microsoft MapPoint mapping software. Option msmp determines the country default used with the software. Option mapurl defines the URL that opens and to which SBN passes the installation latitude and longitude when you choose the Display Image button.
You may also use this button to view video associated with a selected event.
MapPoint opens on the specific latitude and longitude of the installation if a user defined the latitude and longitude in Data Entry Master.
Toggling the Alarm Queue
Use Toggle Queue to display the Alarm Queue in the upper right of the Dispatch tab. If option mo152 is off, SBN displays only those alarms the terminal owns and those not yet assigned. If option mo152 is on, SBN displays the master queue, regardless of terminal ID.
Use the following steps to toggle the Alarm Queue:
1. Choose Toggle Queue.
w The Alarm Queue opens in the upper right of the tab.
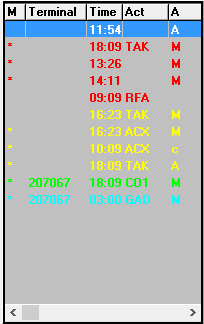
2. To remove the Alarm Queue, choose Toggle Queue again.
Viewing Video
Choose the View Camera button or the Display Image button to view video associated with the selected alarm event. For more information, see Integrated Video Viewers.
Note: Action 537/15 controls access to the video events you may view:
If your user profile includes this action you may view video from any incident.
If your user profile does not include this action you may only view test and log events with an incident number that matches the dispatch incident number.
Note: If you select the Override Checks for Video Viewer check box in the Video tab of SBN Client Options, SBN performs no checks to panel types or alarm log lines and sends the current (or top, if none selected) alarm log line to the video viewer.
Choose the eEscort button to view video associated with the selected alarm event and to record information defined by options escortco, escortev, and escortex in the Alarm Log.
Option escortco defines the comment that appears in the Alarm Log when you choose the eEscort button.
Option escortev defines the Monitoring Event that appears in the Alarm Log when you choose the eEscort button. (Enter an event number from Monitoring Events (program #1621) for the value of this option.)
Option escortex defines the Monitoring Event Extension that appears in the Alarm Log when you choose the eEscort button. (Enter an event number from Monitoring Event Extensions (program #1751) for the value of this option.)
Sending a Page
Use Send Page to send a message of up to 250 characters to personnel, sales people, technicians, installers, or an entire paging group. The paging window defaults with a system-entered message that includes the last name, street, city, and customer ID of the current customer and your user ID. When you send a page from Dispatch, SBN logs the paging information in the Alarm Log.
Use the following steps to send a page:
1. Choose Send Page.
w The Paging dialog box opens.
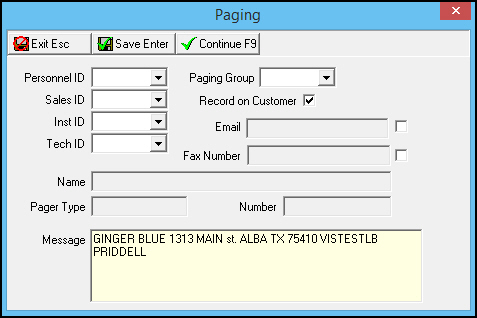
2. Complete one of the following fields to select the person or group to whom you want to send the page:
In Personnel ID - select a Personnel ID (This menu originates from program #1811.)
In Sales ID - select a Sales ID (This menu originates from program #1539.)
In Inst ID - select an Installer ID (This menu originates from program #1543.)
In Tech ID - select a Technician ID (This menu originates from program #1864.)
In Paging Group - select a Paging Group if you want to page an entire group of people (This menu originates from program #1841.)
Note: For more information on the fields in this window, see Field Descriptions - Paging Dialog Box of the Paging Queue document.
w SBN fills in the information available for the person selected.
3. Select the check boxes for email or fax if you want to send this message to an additional destination.
4. Add any additional text to the message.
5. Choose one of two methods to send the page:
Choose Save to send the page and close the paging window.
Choose Continue to send the page and keep the window open for another paging message.
w SBN confirms that it sent the page.
6. Choose OK.
Using Agency Functions
Use the Agencies Functions button to call, dispatch, cancel, and mark agencies onsite or offsite. In order to access the Agencies Functions menu, you must take the alarm (using the Alarm Take action in the Monitoring Actions menu). The Agencies Functions menu includes Agencies 6-9.
Select the Agencies List check box in Monitoring Events (program #1621) for each event you want to appear in the Dispatch Agencies Functions drop-down menu, or do not select the Agencies List check box for any events to use the default agency functions list below.
Note: Actions 195/1-195/255 correspond to monitoring events in program #1621. (For example, action 195/12 is for monitoring event 12 Alarm Take.) In order to use a monitoring event in Dispatch, you must enable its action in your action profile in program #1502.
When you dispatch the PAT type agency, a patrol ticket appears. When you dispatch Agencies 6-9, SBN creates the patrol ticket in the background; the patrol ticket is available in the Call Out Log (program #705) when you search by the agency type. You can create work orders from patrol tickets in the Call Out Log.
The following table lists the actions available in the Agencies Functions menu and their shortcut keys, if available.
Note: Some shortcuts are the same as those available in the Monitoring Actions section.
Action |
Description |
Shortcut Keys |
POLICE |
Call Police |
ALT+CTRL+P |
GUARD |
Call Guard |
ALT+CTRL+O |
FIRE |
Call Fire |
ALT+CTRL+F |
MEDICAL |
Call Medical |
ALT+CTRL+M |
GUARD CAN |
Guard Cancel |
ALT+CTRL+9 |
GUARD OUT |
Guard Out |
CTRL+F10 |
GUARD DIS. |
Guard Dispatched |
ALT+CTRL+D |
GUARD ARR. |
Guard Arrived |
ALT+CTRL+A |
POLICE DIS |
Dispatch Police Info (Enter an Agency Reference Number for the incident in the Alarm Log) |
|
AGENCY6 |
Agency 6 Called |
|
AGENCY7 |
Agency 7 Called |
|
AGENCY8 |
Agency 8 Called |
|
AGENCY9 |
Agency 9 Called |
|
POLICE DIS |
Police Dispatched (Transmits a signal from SBN to Webservices to dispatch the police agency) |
|
POLICE CAN |
Police Canceled (Transmits a signal from SBN to Webservices to cancel a police dispatch.) |
|
AG6 DISP |
Agency 6 Dispatched |
ALT+CTRL+T |
AG7 DISP |
Agency 7 Dispatched |
|
AG8 DISP |
Agency 8 Dispatched |
|
AG9 DISP |
Agency 9 Dispatched |
|
AG6 ONSITE |
Agency 6 On Site |
|
AG7 ONSITE |
Agency 7 On Site |
|
AG8 ONSITE |
Agency 8 On Site |
|
AG9 ONSITE |
Agency 9 On Site |
|
AG6 OFF SI |
Agency 6 Off Site |
|
AG6 OFF SI |
Agency 7 Off Site |
|
AG6 OFF SI |
Agency 8 Off Site |
|
AG6 OFF SI |
Agency 9 Off Site |
|
AG6 CANCEL |
Agency 6 Cancel |
|
AG7 CANCEL |
Agency 7 Cancel |
|
AG8 CANCEL |
Agency 8 Cancel |
|
AG9 CANCEL |
Agency 9 Cancel |
|
Use the following steps to perform agency functions:
1. When handling an alarm, choose Agencies Functions.
w The Agencies Functions menu drops down.
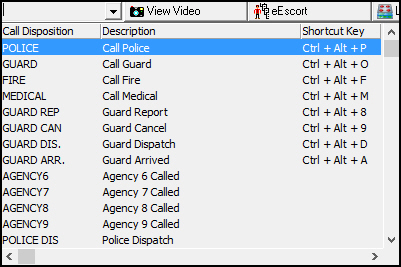
2. Choose the appropriate action or use the shortcut key.
w SBN performs the action and logs it in the Alarm Log.
Note: Not all actions are mapped to a shortcut key.
Starting the IVR (Interactive Voice Response)
Users may manually start IVR processing on alarms in Dispatch using the Start/Pause IVR button. Users may also pause IVR processing on an alarm using this button. (For more information about setting up installations for IVR processing, see the Interactive Voice Response document.)
The Dispatch window contains a field that displays whether the installation has an IVR setup configured in the IVR tab of program #559. If the None radio button is selected in the IVR tab, this field displays "No IVR Config". If an IVR setup is configured in the IVR tab, this field displays "IVR Ready" as shown in the graphic below. If you attempt to start the IVR on an installation with no IVR configuration, SBN displays the error message, "No IVR configuration found."
If you attempt to start the IVR on an installation that is IVR restricted in the IVR_REST field of the Data Entry Basics tab, SBN displays the error message, "This installation is IVR restricted."
After you take an alarm in Dispatch, choose the Start/Pause IVR button to start IVR processing.

When you select the Start/Pause IVR button for an installation with an IVR setup configured in the IVR tab, the IVR Call List window opens. Make changes to open fields in the IVR Call List window as necessary and press the Update button to submit the changes. Press the Start button to allow the IVR to begin processing the alarm.
The following graphic displays the IVR Call List window.
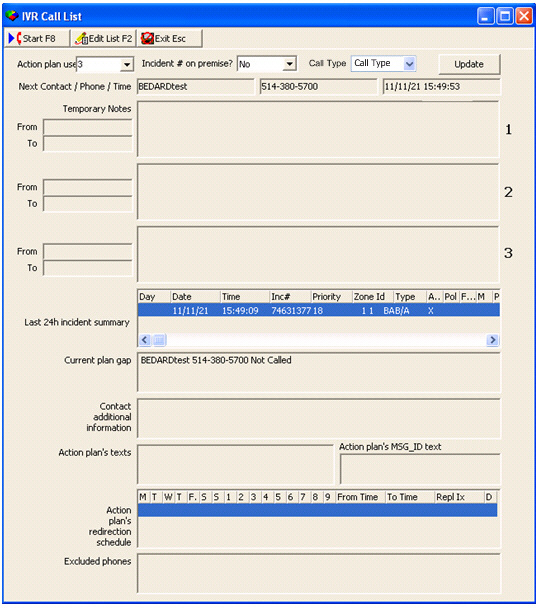
Field Descriptions - IVR Call List
The following table describes the fields in the IVR Call List window.
Field |
Description |
Action Plan Used |
Select the action plan you want the IVR to use for the alarm. Note: If you do not select an action plan in this field, the IVR uses the action plan currently selected in Dispatch. |
Incident # on Premise? |
Select Yes or No to determine whether the IVR includes the incident number in the voice message played for the Premise Phone Number. |
Call Type |
Select the IVR call flow settings to use for the alarm. This drop-down menu includes:
|
Next Contact/Phone/Time |
Displays the next contact and phone number the IVR will call, and the time that the call is scheduled. |
Temporary Notes (1) |
Temporary text entered for the action plan in the Texts tab of program #559. |
From (1) |
Date on which the text in the Temporary Notes (1) field becomes effective. |
To (1) |
Date on which the text in the Temporary Notes (1) field expires. |
Temporary Notes (2) |
Temporary text entered for the action plan in the Texts tab of program #559. |
From (2) |
Date on which the text in the Temporary Notes (2) field becomes effective. |
To (2) |
Date on which the text in the Temporary Notes (2) field expires. |
Temporary Notes (3) |
Temporary text entered for the action plan in the Texts tab of program #559. |
From (3) |
Date on which the text in the Temporary Notes (3) field becomes effective. |
To (3) |
Date on which the text in the Temporary Notes (3) field expires. |
Last 24h Incident Summary |
Displays details of incidents on the installation in the last 24 hours. |
Current Plan Gap |
Indicates action plan contacts the IVR did not call. |
Contact Additional Information |
Comment text entered for each contact on the action plan. (This information comes from the Contact Details window of the Action Plans tab in program #559.) |
Action Plan's Texts |
Regular (not temporary) text entered for the action plan in the Texts tab of program #559. |
Action Plan's MSG_ID Text |
Standard Message ID text attached to the action plan in the Texts tab of program #559. |
Action Plan's Redirection Schedule |
Indicates days and times that a permanent substitute action plan is in place. (This information comes from the Action Plans tab in program #559.) |
Excluded Phones |
Indicates which contact phone numbers will be excluded from the IVR call flow. |
Leaving a Message Via IVR
When going through the Incident Call List, operators may get an answering machine or voice mail instead of a live caller. Instead of waiting for the answering machine to finish its message, the operator can select the Leave Message button( if SBN is configured for IVR in this installation), and IVR will leave a message when the answering machine is finished.

Two Way Voice
Choose the Two Way Voice button for two-way voice communication with installations that have two-way voice panels. Using this button signals the SBN-Avaya Connector to initiate a transfer of a parked call to the operator's phone extension.
Note: Use of this button requires access to an Avaya server and installation of the SBN-Avaya Connector software on a machine with connectivity between your SBN data server and the Avaya server.
The following graphic shows the Two Way Voice window that opens when you choose the Two Way Voice button.
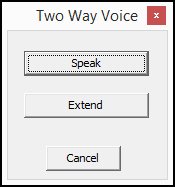
Button Descriptions - Two Way Voice Window
The following table describes the buttons in the Two Way Voice window.
Button |
Shortcut Key |
Description |
Get Bridge |
ALT+G |
If monitoring event 240 (2 Way Voice) appears in the Alarm Log in the past 60 minutes, SBN uses the data in the Misc 1 field of the Alarm Log entry as the bridge (call extension) to connect to the two-way call. |
Connect |
ALT+C |
Connect with the two-way call. This button is only active when the Get Bridge field contains the extension from the Misc 1 field of the Alarm Log for the most recent 2 Way Voice monitoring event. |
Initiate |
|
Uses the DTMF signaling string tone in the Init Str field of program #1742 for the panel type of the selected CID. |
Speak |
ALT+S |
Uses the DTMF signaling string tone in the Send Str field of program #1742 for the panel type of the selected CID. |
Listen |
ALT+L |
Uses the DTMF signaling string tone in the Receive Str field of program #1742 for the panel type of the selected CID. |
Speak/Listen |
ALT+P |
Uses the DTMF signaling string tone in the Opt Str 1 field of program #1742 for the panel type of the selected CID. |
Extend |
ALT+E |
Uses the DTMF signaling string tone in the Opt Str 2 field of program #1742 for the panel type of the selected CID. |
Disconnect/Callback |
ALT+I |
Uses the DTMF signaling string tone in the Opt Str 4 field of program #1742 for the panel type of the selected CID. |
Disconnect |
ALT+D |
Uses the DTMF signaling string tone in the Hang Up Str field of program #1742 for the panel type of the selected CID. |
Voice Test On |
|
Activates two-way voice testing and puts the installation into Test mode for the number of minutes defined by option ivr026. When you choose this button, SBN records monitoring event 244 (Voice Test On) in the Alarm Log. |
Voice Test Off |
|
Deactivates two-way voice testing. When you choose this button, SBN records monitoring event 245 (Voice Test Off) in the Alarm Log. |
Autofeed Job Ending
Choose the Job Ending button to open the Autofeed Job Ending window. Use this window to change the alarm autofeed status in Dispatch by making a selection in the Autofeed Status field of the Job Ending window.
Note: Option mo241 and action 537/146 must both be on in order to use alarm autofeed in Dispatch (program #537). When option mo241 is off and action 537/146 is off in your action profile, the Autofeed Status field and the Priority and Chronological check boxes do not appear in Dispatch.
The Job Ending window contains three tabs:
The Postpone tab - in which you can select a reason for postponing alarm autofeed
The Resolution tab - in which you can dispose of alarm signals
The Interrupt tab - in which you can select a reason for interrupting alarm autofeed
The Postpone Tab
Choose the AF Postpone button to open the Job Ending window with the Postpone tab displayed.
When you save changes to the Postpone tab, SBN records monitoring event 146 AFPOST in the Alarm Log tab of program #559.
When you select a postpone reason that changes the alarm incident dynamic skill level and choose Save, SBN records the new and original skill levels in the Alog Misc 14 and Alog Misc 15 columns of the Alarm Log
When you select a postpone reason that changes the alarm incident priority and choose Save, SBN records the new and original priority levels in the Alog Misc 18 and Alog Misc 19 columns of the Alarm Log
When you start a timer in the Postpone tab, SBN records monitoring event 148 TIMER 3 in the Alarm Log with the total length of the timer including the extra time entered in program #1671 for the selected postpone reason
When a timer with extra time on it started in the Postpone tab expires, SBN records monitoring event 149 TIMER3 OUT in the Alarm Log
Note: When option temp106 is on, any actions that an operator takes on an alarm will cancel an outstanding timer on that alarm.
The following graphic shows the Postpone tab of the Job Ending window.
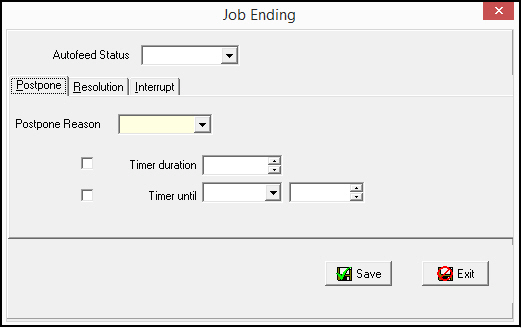
Field Descriptions - Postpone Tab
The following table describes the fields in the Postpone tab of the Job Ending window.
Field |
Description |
Postpone Reason |
Select a reason for postponing autofeed. (This menu originates from program #1671, and displays only those postpone reasons defined for the selected Alarm Queue and the installation dealer and country.) |
Timer Duration (No label) |
Select this check box to set a timer for the incident with a duration specified in the Timer Duration field. Note: This check box is read-only when you select a postpone reason that does not have the Editable check box selected in program #1671. SBN selects this check box by default when you choose a postpone reason that has the Start Timer check box selected in program #1671. |
Timer Duration |
Enter the number of hours, minutes, and seconds for the incident timer when you select the Timer Duration check box. Note: This field is read-only when you select a postpone reason that does not have the Editable check box selected in program #1671. SBN populates this field with the time entered in the Duration field of program #1671 when you choose a postpone reason that has the Start Timer check box selected in program #1671. |
Timer Until (No label) |
Select this check box to set a timer for the incident with an end date and time specified in the Timer Until fields. Note: This check box is read-only when you select a postpone reason that does not have the Editable check box selected in program #1671. |
Timer Until |
Enter the date and time for the incident timer to end when you select the Timer Until check box. Note: These fields are read-only when you select a postpone reason that does not have the Editable check box selected in program #1671. |
The Resolution Tab
Choose the AF Resolution button to open the Job Ending window with the Resolution tab displayed.
The following graphic shows the Resolution tab of the Job Ending window.
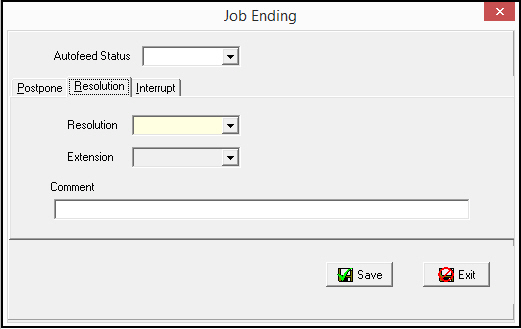
Field Descriptions - Resolution Tab
The following table describes the fields in the Resolution tab of the Job Ending window.
Field |
Description |
Resolution |
Select an alarm resolution for the incident. (This menu originates from program #1621, and displays only those alarm events that have the Alarm Resolution check box selected.) |
Extension |
You may select an event extension for the alarm resolution. (This menu originates from program #1751, and displays only those event extensions associated with the selected alarm resolution.) |
Comment |
You may enter comment text that appears in the Comment column of the Alarm Log. |
The Interrupt Tab
Choose the AF Interrupt button to open the Job Ending window with the Interrupt tab displayed.
When you save changes to the Interrupt tab, SBN records monitoring event 147 AFINT in the Alarm Log tab of program #559 and immediately removes your terminal number from the current alarm incident, returning the unassigned incident to the Alarm Queue.
The following graphic shows the Interrupt tab of the Job Ending window.
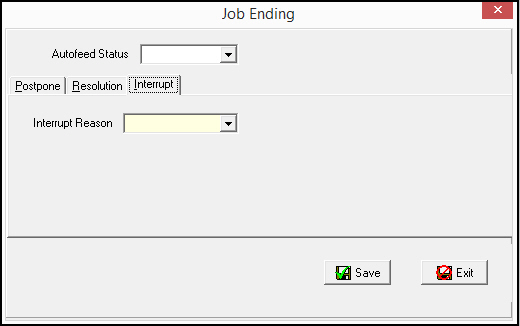
Field Descriptions - Interrupt Tab
The following table describes the field in the Interrupt tab of the Job Ending window.
Field |
Description |
Interrupt Reason |
Select an autofeed interrupt reason. (This menu originates from program #1669, and displays only those interrupt reasons defined for the installation dealer and country.) Note: SBN automatically populates the Autofeed Status field in the main Job Ending window with the autofeed status selected for the interrupt reason in program #1669. When you select an interrupt reason that is associated with an autofeed status code that deactivates alarm autofeed, the Autofeed Status field in the main Job Ending window is protected and you cannot edit it. |
Using eDispatch
If the alarm incident you are handling comes from a zone type with an eDispatch event defined in program #1733, and the installation address has been verified in program #1675, a message appears when the Agency Detail window opens in Dispatch asking if you want to send the alarm to a PSAP to be handled outside of SBN. (A PSAP is a Public Safety Answering Point.)
If you choose Yes when this message appears, then you do not need to call the police or choose the Dispatch Agency button in the Agency Detail window.
If you choose No, then the incident follows normal business processes and is no longer eligible for eDispatch.
If you choose Yes but later choose the Cancel Dispatch button in the Agency Detail window, then the incident is no longer eligible for eDispatch.
If you choose Yes but the PSAP fails to return a positive response, then the incident is no longer eligible for eDispatch.
Option asap must be on and the Dispatch Service in the SBN Service Manager must be running in order to use the ASAP Address Verification Queue (program #1675) and eDispatch in program #537. The Dispatch Service sends eDispatch alarm incidents to PSAPs.
You may send chat messages to a PSAP using the eDispatch Chat button in the Dispatch tab. (See Sending eDispatch Chat Messages to a PSAP.)
When you use eDispatch to send alarm incidents to be handled by a PSAP outside of SBN, SBN records the following entries in the Alarm Log:
eDispatch starts (alarm is sent to PSAP)
eDispatch is rejected by PSAP
eDispatch is accepted by PSAP
eDispatch times out due to no response from PSAP
Call to Message Broker URL fails or returns 'Reject' code for any reason
PSAP sends incident updates to SBN, (such as Agency Dispatched, Agency Arrived, or Alarm Disposition). The PSAP's incident number is also sent to SBN.
eDispatch Alarm Options
Use the following options to define the event extensions that SBN records in the Alarm Log for eDispatch alarm incidents:
Option asapalma - Use this option to define the event extension that SBN records in the Alarm Log to indicate that the PSAP accepted the incident when you send an alarm incident to a PSAP to be handled outside of SBN.
Option asapalmr - Use this option to define the event extension that SBN records in the Alarm Log to indicate that the PSAP rejected the incident when you send an alarm incident to a PSAP to be handled outside of SBN.
Option asapalms - Use this option to define the event extension that SBN records in the Alarm Log when you submit an alarm incident to a PSAP to be handled outside of SBN.
Option asaparrv - Use this option to define the event extension that SBN records in the Alarm Log to indicate that the agency arrived at the installation when you send an alarm incident to a PSAP to be handled outside of SBN.
Option asapclos - Use this option to define the event extension that SBN records in the Alarm Log to indicate that the agency closed the alarm incident when you send an alarm incident to a PSAP to be handled outside of SBN.
Option asapdisp - Use this option to define the event extension that SBN records in the Alarm Log to indicate that the agency has been dispatched to the installation when you send an alarm incident to a PSAP to be handled outside of SBN.
Option asapevt - Use this option to define the monitoring event that SBN records in the Alarm Log when you send an alarm incident to a PSAP to be handled outside of SBN. This is the same monitoring event that SBN records in the Alarm Log when a PSAP sends alarm incident updates to SBN, and when installation addresses are sent to agencies to be verified in program #1675.
Option asaptmot - Use this option to define the event extension that SBN records in the Alarm Log to indicate that an agency did not respond to an eDispatch alarm incident that an SBN operator sent to the agency and the request has timed out.
Sending eDispatch Chat Messages to a PSAP
When you send an alarm incident that is eligible for eDispatch to a PSAP to be handled outside of SBN, you may choose the eDispatch Chat button in the Dispatch tab to send a chat message to the PSAP.
Use the following steps to send a chat message to a PSAP:
1. While handling an alarm in Dispatch, choose eDispatch Chat.
w The eDispatch Chat window opens.
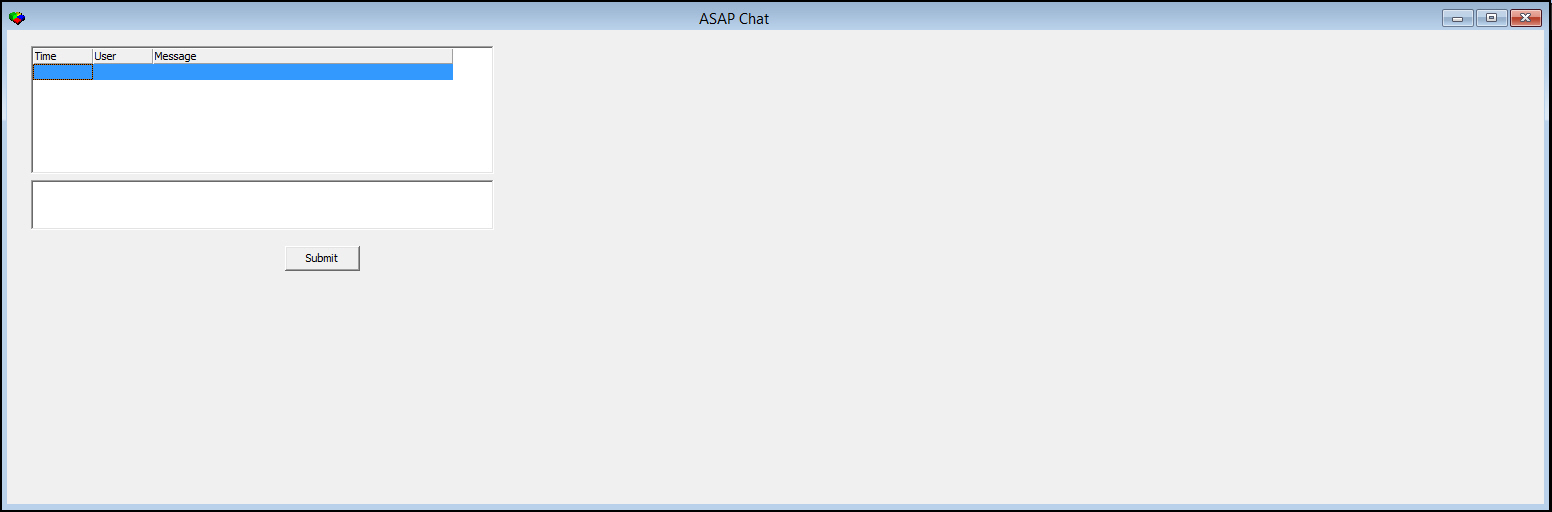
2. Type the text of your message in the field at the bottom of the eDispatch Chat window.
3. Choose the Submit button.
w SBN sends the chat message to the appropriate PSAP for the installation, and records the chat message, including the text you sent, in the Alarm Log tab of Data Entry (program #559).

w When the PSAP accepts your chat message, the message text turns green in the eDispatch Chat window. If the PSAP rejects your chat message, the message text turns red in the eDispatch Chat window.
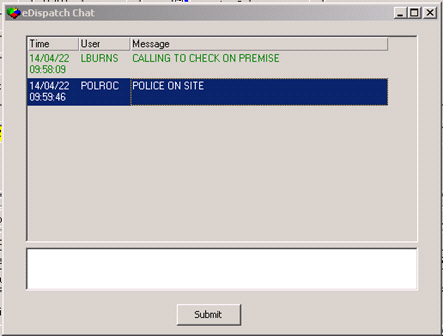
w The PSAP may respond to your message with a new message.
Messages from the PSAP appear in the eDispatch Chat window along with messages you send to the PSAP. All eDispatch Chat messages both from and to a PSAP appear in the Alarm Log tab of program #559 as well.
Use the following options to define the event extensions that SBN records in the Alarm Log for eDispatch Chat messages:
Option asapmsgi - Use this option to define the event extension that SBN records in the Alarm Log to indicate that SBN received an eDispatch Chat message from an agency.
Option asapmsgo - Use this option to define the event extension that SBN records in the Alarm Log to indicate that a monitoring operator sent an eDispatch Chat message to an agency.
Option asapmsgr - Use this option to define the event extension that SBN records in the Alarm Log to indicate that an agency rejected an eDispatch Chat message that a monitoring operator sent to the agency.
Operator SMS
The following graphic shows the Dispatch tab with alarm information displayed.
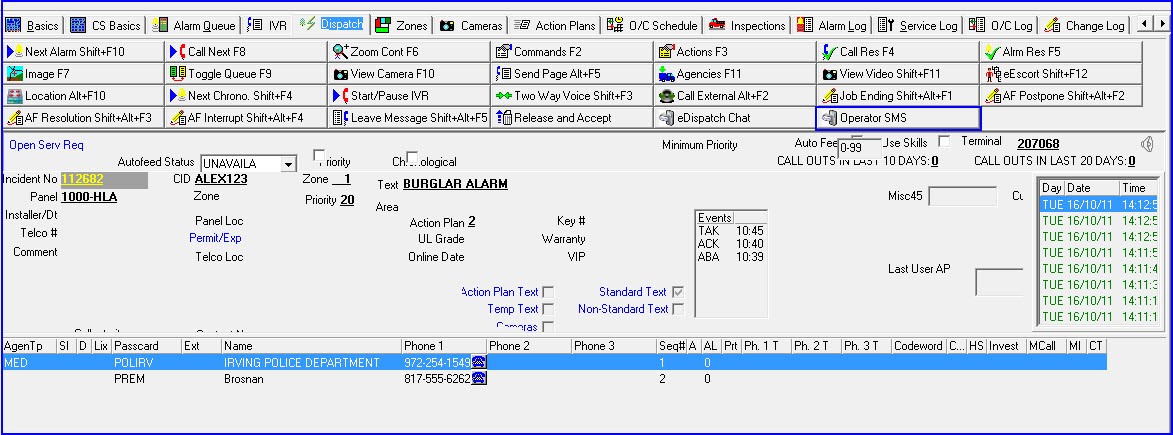
“Operator SMS� button was added in SBN Program# 537 Dispatch (new action will be created for this button) to “Send SMS�. This allows an Operator to initiate SMS messages to Contacts. This button will only work if the operator has an unresolved incident loaded in the Dispatch tab of 559.There is an entry made in the alarm log when an operator selects “Operator SMS� User action profile must have 537/151 on to use this function.
Clicking the button will open a new screen and offer a list of “canned� messages.
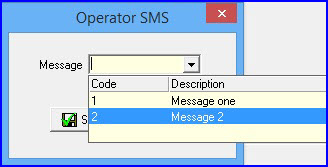
A list of these messages will be defined in SBN Program# 1590 Installation Misc.
Note: There is no ability for an Operator to type their own message.
Section “Find SMS Recipients� describes all conditions used to identify which Contacts receive the SMS. Records created in this process will have the Operator’s Terminal ID, a message type equal to the selected canned message, and no message. The 3rd party will translate the message type into an actual message.
Related Programs
The following table lists programs related to Dispatch.
Program |
Number |
Document Link |
Description |
Data Entry Master and Basics |
559 |
View installation details for alarms received. Access the Dispatch tab from this program. |
|
Alarm Log Tab |
N/A |
View information about all actions taken on alarm incidents for the selected installation. |
|
Alarm Queue Tab |
538 |
View all incoming alarms that have not yet been resolved. You can bring an alarm over from the Alarm Queue tab to handle it in Dispatch. |
|
Open/Close Log Tab |
N/A |
View all Open/Close alarm events on an installation. |
|
Test Queue Tab |
N/A |
View all signal activity in the Test and Runaway alarm queues. |
|
Texts Tab |
N/A |
View action plan text; enter and edit temporary comments. |
|
Insert Test Tab |
N/A |
Insert installations into Test or Runaway mode; change the monitoring status of installations. |
|
Action Plans Tab |
N/A |
Create and maintain customer-defined plans for handling alarm events. |
|
Zones Tab |
N/A |
Define groups of areas or devices at installation sites to generate real or test alarm signals. |
|
Monitoring Events |
1621 |
Define and maintain dealer and language definitions for alarm events. Designate alarm events as alarm resolutions. Assign shortcut keys to alarm resolutions. |
|
Monitoring Event Extensions |
1751 |
Define and maintain event extensions for alarm events that operators use when disposing of an alarm. |
|
Call Out Log |
705 |
View alarm events closed in Dispatch as call out events; maintain quality control details. |
|
GUI Messages |
1606 |
Define GUI message 3160 for the dialog box that appears when you use the Call Guard monitoring action in Dispatch. |
Button Functions
The following table displays the buttons, describes the shortcut keys, actions, and functionality.
Button |
Name |
Shortcut Key |
Action |
Description |
|
Get Next Alarm |
shift+f10 |
537/ 1 |
View the oldest alarm with the highest priority in the Alarm Queue. Parked alarms and alarms with timers attached to them will be skipped. |
|
Call Next Contact |
f8 |
537/ 8 |
Automatically call contacts in the correct order. |
|
Zoom Agency or Contact |
f6 |
537/ 2 |
View details of the selected agency or contact. |
|
Monitoring Commands |
f2 |
537/ 3 |
Open the Monitoring Commands menu. |
|
Monitoring Actions |
f3 |
537/ 4 |
Perform actions that lead to the disposal of an alarm and log the results of these actions. |
|
Call Resolutions |
f4 |
537/ 5 |
Note the result of a call. |
|
Alarm Resolutions |
f5 |
537/ 6 |
Dispose of alarm signals and indicate the reason for disposal. |
|
Display Image |
f7 |
537/ 7 |
MapPoint opens on the installation's specific latitude and longitude if defined in the Data Entry Master (program #559). You may also use this button to view video associated with a selected event. |
|
Toggle Queue |
f9 |
537/13 |
Display the Alarm Queue in the upper right of the Dispatch tab. |
|
View Camera |
f10 |
537/15 |
View video associated with a selected event. |
|
Send Page |
Alt+J |
537/12 |
Send a page directly from the Dispatch tab to personnel, sales people, technicians, installers, or an entire paging group. |
|
Agencies Functions |
f11 |
537/14 |
Call, dispatch, cancel, and mark agencies onsite or offsite. |
|
View Video |
SHIFT+f11 |
537/16 |
Opens an external video application. Note: The program SDEBROVIDON.exe must be installed in order to access this feature. SBN records each use of this button in the Alarm Log as the event "Video Live". |
|
eEscort |
SHIFT+f12 |
537/17 |
View video associated with a selected event and record information defined by options escortco, escortev, and escortex in the Alarm Log. |
|
Location |
Alt+F10 |
537/18 |
Opens an external GPS application. Note: To use this feature, the value of option ba468 must contain the name of the application and a list of the parameters for SBN to pass from the alarm event to the application. |
|
Get Alarm Chronological |
SHIFT+F4 |
537/131 |
View the newest alarm in the Alarm Queue with the highest priority. |
|
Start/Pause IVR |
SHIFT+F5 |
537/19 |
Open the IVR Call List window and start or pause IVR processing on the selected alarm event. |
|
Two Way Voice |
SHIFT+F3 |
537/134 |
Open the Two Way Voice window for communication with installations that have two-way voice panels. |
|
Call External |
SHIFT+F8 |
537/138 |
Call the external application defined by option ma024. |
|
Job Ending |
SHIFT+ALT+F1 |
537/141 |
Open the Autofeed Job Ending window. |
|
AF Postpone |
SHIFT+ALT+F2 |
537/142 |
Open the Autofeed Job Ending window with the Postpone tab displayed. |
|
AF Resolution |
SHIFT+ALT+F3 |
537/143 |
Open the Autofeed Job Ending window with the Resolution tab displayed. |
|
AF Interrupt |
SHIFT+ALT+F4 |
537/144 |
Open the Autofeed Job Ending window with the Interrupt tab displayed. |
|
Leave Message |
SHIFT+ALT+F5 |
537/145 |
When you reach an answering machine or voice mail, select this button to transfer the call to IVR, which will then leave a message. |
|
Restart Device |
N/A |
537/153 |
When CMS operator clicks the button, a confirmation window will pop up for the operator to confirm the trigger signal was received. When the button is clicked all action will be recorded in the Alarm log. This is Action driven and require Action 537/153 to be active for button to be visible. |
|
Passcard Verify |
N/A |
537/155 |
This button is used to open the Passcard Verification dialog box. When the dialog box appears, a user may verify a passcard number and extension for a contact or a user-select Action Plan, or to verify a VRU code and its passcode for an installer or technician. (Note: For additional information, please see "Passcard Verification" under Dispatch.) |
|
eDispatch Chat |
N/A |
537/148 |
Send a chat message to PSAP (if the current alarm incident is eligible for eDispatch). |
|
Operator SMS |
N/A |
537/151 |
Allows an operator to initiate SMS message to contacts |
|
Continue |
f9 |
|
Send a paging message and keep the dialog box open for another paging message. |
|
Save record |
Enter |
|
Save existing record. |
|
Exit |
Esc |
|
Exit without saving. |































Dispatch Comment Length
The dispatch comment field accepts up to 2,500 characters, giving operators room to record detailed notes while handling an alarm.
Action Plan Text on the Dispatch Tab
Action plan text can be displayed directly on the Dispatch tab in program 559, so operators see the plan's instructions inline while handling an alarm. Inactive ("ghost") action-plan lines no longer appear on the tab.
Modifications and Updates to Dispatch
The following table lists modifications and updates to the Dispatch document.
Mod Number |
Date |
Description |
N/A |
12/03/08 |
document rewritten |
08.03.06523 |
03/09/09 |
Permit Comment holds a maximum of 60 characters |
07.02.18218, 08.03.06597 |
04/04/09 |
Select the Service Request check box to automatically generate service requests for event extensions. |
08.03.06580, 07.02.18181 |
04/06/09 |
Designate any event as an alarm resolution. Assign shortcut keys to alarm resolutions in program #1621. |
08.03.06619, 07.02.18204 |
04/07/09 |
Select the Service Request check box to automatically generate service requests for alarm resolution events. |
07.02.18286 |
04/16/09 |
Option undfapl |
08.03.06514, 07.02.18084 |
04/17/09 |
Added the Redial Last Number monitoring action. |
07.02.18716 |
06/24/09 |
Option undfgrp |
07.02.18830, 08.03.06974 |
07/29/09 |
Expanded Permit field to 12 alphanumeric characters. |
07.02.18832, 08.03.06964 |
09/24/09 |
Added option mo183 to allow users to navigate to other Data Entry tabs while the Event Extensions window is open. |
08.03.07621 |
06/10/10 |
Added Misc45 field from Data Entry Basics tab. |
07.02.19828, 08.03.07630 |
06/10/10 |
Added option mo197 for Guard Cancel action confirmation message. |
08.03.07537 |
06/23/10 |
The Event Extensions dialog box no longer opens after using the Comment Monitoring Action. |
07.02.19808, 08.03.07604 |
06/29/10 |
Added Call GSM monitoring action. |
07.02.19824, 08.03.07622 |
07/22/10 |
Added Dispatch Agency and Cancel Dispatch buttons to Agency Details window. Added Police Dispatch and Police Cancel Agency Functions. |
08.03.07687 |
07/27/10 |
Added an Investigator column to the Dispatch Call List. |
07.02.19989, 08.03.07730 |
08/05/10 |
Added an eEscort button and options escortco, escortev, and escortex. |
07.02.20017, 08.03.07767 |
08/26/10 |
Option mo201 |
08.03.07884 |
10/19/10 |
Added Allow Redirect check box to Switch Plan dialog box. |
07.02.20242 |
11/01/10 |
Added three permit check boxes and two permit grids to the Agency Details window. |
07.02.20324, 08.03.07964 |
12/02/10 |
Added a Location button and option ba468. |
07.02.20439, 08.03.08031 |
01/13/11 |
Set Priority command applies to the Alarm Queue as well. |
07.02.20527, 08.03.08089 |
01/19/11 |
Added option mo207. |
07.02.20403, 08.03.08010 |
02/07/11 |
Added actions 537/126-129 for Permit warning messages. |
07.02.20674, 07.02.20683, 08.03.08191 |
03/14/11 |
Added Get Alarm Chronological button. |
08.03.08233 |
04/04/11 |
Make Event Extension field required for some alarm resolutions in program #1621. |
07.02.21135, 08.03.08432 |
09/07/11 |
Alarm Beep on/off disabled depending on settings in program #1742. |
08.03.08709 |
04/14/12 |
Added read-only Minimum Priority field. |
07.02.21683, 08.03.08721 |
04/16/12 |
Added action 537/136 and alarm notification balloon message. |
07.02.21679 |
04/17/12 |
Added actions 195/1-195/255. |
07.02.21690 |
05/31/12 |
Added Timer 2 monitoring command and Guard Auto Dispatch monitoring action. Updated Guard Cancel and Guard Out monitoring actions. Added options tm2val and grd_auto. |
07.02.21716, 08.03.08741 |
06/01/12 |
Added a Must Call column to the Call List pane. |
07.02.21785, 08.03.08775 |
06/14/12 |
Added Dispatch Police Info agency function. |
08.03.08605 |
09/07/12 |
Added Call Type field to the IVR Call List window. |
07.02.21763, 08.03.08767 |
09/26/12 |
Added Max Priority field to the Set Priority dialog box. |
07.02.21954, 08.03.08861 |
10/11/12 |
Added option mo225. |
07.02.22153, 08.03.08966 |
02/27/13 |
Added a Medical Info column. |
08.78.09065, 08.78.09064 08.78.09001, 07.78.22229 08.78.08995, 07.78.22211 |
04/04/13 |
Added options ma024 and ma025 and Call External button. |
07.78.22363, 07.78.22362 |
04/04/13 |
Added option ma026. |
07.78.22294, 07.78.22293 |
04/29/13 |
Changed hot key combination for Two Way Voice button to SHIFT+F3. |
07.78.22384, 08.78.09115 |
04/30/13 |
Added option ivr026 and updated function of Voice Test On and Voice Test Off buttons in Two Way Voice window. |
08.79.09223, 07.79.22612 08.79.09203, 08.78.22542 |
06/19/13 |
Added option ma027. |
07.79.22686 |
06/20/13 |
Added option ma029. |
08.79.09237, 07.79.22648 08.79.09225, 07.79.22621 |
07/03/13 |
Added Last User AP field to Dispatch tab. |
07.79.22810, 07.79.22799 |
07/25/13 |
Added temp150 to display error message for a future time stamp. |
07.79.22642, 07.79.22639 |
07/31/13 |
Setting a Timer now cancels an existing Timer 2 on an alarm, and setting a Timer 2 now cancels an existing Timer. |
08.79.09368 |
08/28/13 |
Updated option mapurl. |
08.79.09370, 07.79.22898 08.79.09326, 07.79.22843 |
09/04/13 |
Added option mo235 to enable automatic Guard Dispatch monitoring action. |
07.80.23179, 08.80.09539 |
10/07/13 |
Added option mo236, which causes the Force Redirection check box to be selected when the Switch Action Plan dialog box opens. |
08.79.09423, 07.79.22983 08.79.09416, 07.79.22975 08.79.09415, 07.79.22974 08.79.09413, 07.79.22972 08.79.09443, 07.79.23013 08.79.09465, 07.79.23050 |
11/07/13 |
Added Job Ending, AF Postpone, AF Resolution, and AF Interrupt buttons. Added Autofeed Status field, Priority and Chronological check boxes, and option mo239. |
08.79.09433 |
11/15/13 |
If you do not select an action plan in the IVR Call List window, the IVR uses the action plan currently selected in Dispatch. |
07.79.23037, 08.79.09459 |
11/25/13 |
Added Release and Accept button |
07.79.23075, 07.79.23071, 07.79.23094 |
11/26/13 |
Added option mo241 and monitoring events 146, 147, 158, and 159 for alarm autofeed. Enhanced alarm autofeed. |
07.80.23116, 08.80.09498, 07.80.23129 |
12/19/13 |
Added option mo242 and monitoring events 148 and 149 for alarm autofeed |
07.80.23174, 07.80.23148 |
3/21/14 |
Noted in Simulate Alarm that Alarm Types 0, 1, 2, 4, and 6 can use Restore Delay. |
08.80.09510, 08.03.08832, 07.02.21913 |
3/25/14 |
Added Options mo223 and mo224. |
08.79.09476, 07.79.23077, 08.79.09473, 07.79.23073 |
3/25/14 |
Added Option mo240. |
07.80.23291, 08.80.09601, 07.80.23282, 08.80.09592 |
3/28/14 |
Added Text and Plan fields. |
08.80.09591, 08.80.09589 |
4/07/14 |
Added notice that hitting the Esc key would not close the Patrol Ticket window. |
07.80.23293, 07.80.23290 |
4/08/14 |
The Medical Info column now displays an X if any information is in the text fields in the Medical tab of the Action Plans Contact Details window. |
07.79.22986, 08.79.09426 |
04/14/14 |
Added eDispatch message to Agency Detail window, eDispatch Chat button to main Dispatch window, and 15 ASAP options |
07.80.23235, 07.80.23228, 07.80.23227, 07.80.23186, 07.80.23185, 07.80.23154, 08.79.09458, 07.79.22994, 07.79.22909, 08.79.09384 |
4/15/14 |
Added Leave Message button. |
08.80.09512, 07.80.23142, 08.80.09505, 07.80.23135 |
4/23/14 |
Added notice in Two Way Voice concerning use of the button to initiate a transfer of a parked call to the operator's phone extension. |
n/a |
7/18/14 |
Images updated. |
08.81.09810, 08.81.09807 |
9/11/14 |
Added note about the lack of delay in Autofeed when first opening Dispatch. |
07.82.23758 |
11/18/14 |
Added new Contact Text column. |
07.82.23841 |
2/25/14 |
Added notes to Password Verification section that the Password field only accepts up to ten characters. |
08.85.10732, 07.85.24994 |
10/14/16 |
Process for delivering SMS data from SBN to a 3rd party, allowing confirmations of sent SMS back into SBN, and disposing of an incident via SMS. |
07.87.25385, 07.87.25380 |
06/09/17 |
Any event attaching to an existing event will produce SMS message #10 after the first initial #0 instead of additional message #0's. |
n/a |
11//16/17 |
Updated image. |
08.89.11370 |
05/29/18 |
Enable toggle edit for Std/Plan text panel. |
08.90.11662, 07.90.26159, 08.90.11666, 07.90.26161 |
04/01/19 |
Event Extension and Comment field added to Timer 1 and Timer 2 screens. Images updated. |
07.91.26197, 08.91.11709 |
12/26/19 |
Event Extension Timer note added below Attach Timer image. |
07.93.26780, 08.93.12062, 07.93.26785, 08.93.12069, 08.93.12158, 08.93.12157 |
10/11/21 |
New Passcard Verify button added in Dispatch tab. Images updated. |
07.93.26940 |
06/15/22 |
Added note for parked alarm and alarms with timers attached to them within the Next Alarm button description. |
07.93.26938, 08.93.12179 |
06/17/22 |
Added Date and Time fields for first new incident in Dispatch. |
08.93.12164 |
07/05/22 |
Added Zone Type field within Dispatch screen when an alarm is taken. |