
PSAP Interface Queue
PSAP Interface Queue
PSAP Interface Queue
Module: Utilities
Overview
Use the PSAP Interface Queue (program #1659) to view
A list of installations waiting to be inserted into the PSAP Queue
A list of installations in the PSAP Queue that have been processed or are waiting to be processed by the PSAP Lookup Service
In program #1659, you may insert installations into the PSAP Queue and remove installations from the PSAP Queue.
Note: Option psap must be on to activate the PSAP interface. When option psap is off, the PSAP interface is not active and SBN does not insert installations into the PSAP Queue.
When options psap and psapauto are both on, SBN automatically inserts an installation into the PSAP Queue when the installation address changes in program #559, (if the monitoring status of the installation has the Include In PSAP check box selected in program #1540). The value of option psapgq determines whether SBN sends latitude/longitude updates or address updates to the PSAP Queue. Installations with a GeoCode Quality (entered in program #559) greater than or equal to the value of option psapgq send latitude/longitude updates to the PSAP Queue. Installations with a GeoCode Quality less than the value of option psapgq send address updates to the PSAP Queue.
The PSAP Lookup Service pulls installation records from the PSAP Queue and sends queries either to the Pitney Bowes PSAP web service or to the Intrado web service (depending on how the PSAP Lookup Service is set up in the SBN Service Manager). The web service looks up the nearest Public Safety Answering Point for each installation, then updates police agency information on the installation action plan call lists accordingly. (For more information about the PSAP Lookup Service, see the PSAP Lookup Service section of the SBN Service Manager document.)
Note: Contact Pitney Bowes or Intrado to set up a contract to use a PSAP web service.
This document covers the following topics:
Navigating to the PSAP Interface Queue
The PSAP Interface Queue Window
Inserting Installations Into the PSAP Queue
Deleting Installations From the PSAP Queue
PSAP Interface Options
Options control many of the functions of the PSAP Interface program. The following list describes the options related to the PSAP Interface. For detailed information on each option and its default setting, see SBN Options.
Option psap - When on, the PSAP interface is active and SBN can insert installations into the PSAP Queue.
Option psapagcy - When on and creating a new police agency for an Action Plan through the PSAP Interface, PSAP Lookup creates an agency passcard with the POL prefix.
Option psapagfr - When on and creating a new fire agency for an Action Plan through the PSAP Interface, PSAP Lookup creates an agency passcard with the FIR prefix.
Option psapagmd - When on and creating a new medical agency for an Action Plan through the PSAP Interface, PSAP Lookup creates an agency passcard with the MED prefix.
Option psapauto - When on, entries are entered automatically into the PSAP Queue when clicking the PSAP Insert button in Data Entry (program #559). When off, a prompt appears when selecting agencies in an Action Plan.
Option psapclog - Use this option to define the Communication Log Default ID in program #1673 that SBN uses to create an entry in the Communication Log (program #1888) each time SBN performs a successful PSAP lookup in the PSAP Interface Queue (program #1659).
Option psapdays - Use this option to define the number of days that SBN adds to the current date to determine the Next Processing Date in the PSAP Interface Queue (program #1659).
Option psapgps - When on, SBN uses Latitude and Longitude entries instead of the installation address for PSAP lookups of an installation in program #1659. This is dependent upon the GeoCode Quality entered in #559 being greater than or equal to the value entered for option psapgq.
Option psappgq -When on, a GeoCode Quality entry in Data Entry (#559) of -1 or greater will cause PSAP to confirm the address based on the information in the Latitude and Longitude fields.
Navigating to the PSAP Interface Queue
Use the following steps to access the PSAP Interface Queue program:
1. From the main SBN toolbar, select Menu.
2. From the drop-down menu, select Go To.
3. In the Go To Program dialog box, type in "1659" and press ENTER.
w The PSAP Interface Queue window opens.
The PSAP Interface Queue Window
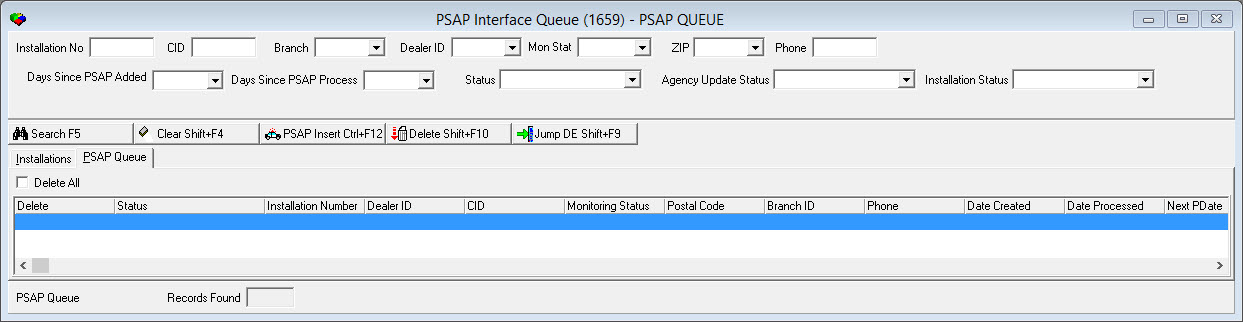
When the PSAP Interface Queue program opens, the display is blank. To view information in the PSAP Interface Queue window, you must perform a search in the tab you are currently viewing.
The PSAP Interface Queue program has two tabs:
Installations - in which you can search for installations waiting to be inserted into the PSAP Queue
PSAP Queue - in which you can search for installations in the PSAP Queue that have been processed or are waiting to be processed by the PSAP Lookup Service
The following graphic shows the PSAP Interface Queue.
The Installations Tab
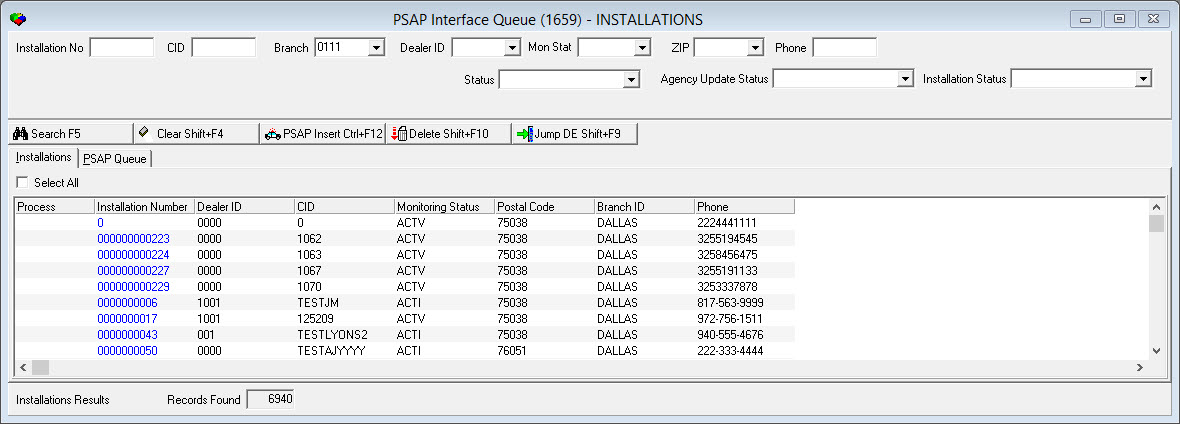
SBN only displays an installation in this tab if it has a monitoring status that has the Include in PSAP check box selected in program #1540, and if the installation has either a latitude and longitude defined or a street address and zip code defined in program #559.
The following graphic shows the Installations tab after a search.
Field/Column Descriptions
The following table describes the fields and columns in the Installations tab.
Field/Column |
Description |
Search Parameters Pane |
|
Installation No |
Installation number you want to search for. This field accepts wildcard characters. |
CID |
Customer ID you want to search for. This field accepts wildcard characters. |
Branch |
Branch ID you wan to search for. This field accepts wildcard characters. (This menu originates from program #1530.) |
Dealer ID |
Dealer ID you want to search for. This field accepts wildcard characters. (This menu originates from program #1537.) |
Mon Stat |
Monitoring status you want to search for. This field accepts wildcard characters. (This menu originates from program #1540.) Note: This drop-down menu only displays monitoring statuses that have the Include in PSAP check box selected in program #1540. |
ZIP |
Zip code you want to search for. This field accepts wildcard characters. (This menu originates from program #1718.) |
Phone |
Phone number you want to search for. This field accepts wildcard characters. Note: The phone number you search for must be entered in the exact format that is entered in program #559. For example, a search for 5555555555 would not return an installation with a phone number that is entered as 555-555-5555 in program #559. |
Days Since PSAP Added |
You may search for installations that were added to the PSAP Queue after a particular date. |
Days Since PSAP Process |
You may search for installations that were processed by the PSAP Lookup Service after a particular date. |
Status |
Monitoring status for which you want to search, from the PSAP Interface Queue. (This menu originates from Program #1590.) |
Agency Update Status |
Police/Fire/Medical Status drop down menus in the PSAP Queue. (This menu originates from Program #1590.) |
Installation Status |
Installation Status drop down menu in the PSAP Queue. (This menu originates from Program #1590.) |
Search Results Pane |
|
Select All |
Select this check box to place an X in the Process column for all installations currently displayed in the Installations tab. |
Process |
Place an X in this column for each installation you want to insert in the PSAP Queue. You may select records to be processed individually, or use the Select All check box to flag all displayed records for processing. |
Installation Number |
Installation number of each record that matches the search parameters. |
Dealer ID |
Dealer ID of each installation that matches the search parameters. |
CID |
Customer ID of each installation that matches the search parameters. |
Monitoring Status |
Monitoring status of each installation that matches the search parameters. |
Postal Code |
Zip code of each installation that matches the search parameters. |
Branch ID |
Branch ID of each installation that matches the search parameters. |
Phone |
Phone number of each installation that matches the search parameters. |
Records Found |
Number of records that match the search parameters. |
The PSAP Queue Tab
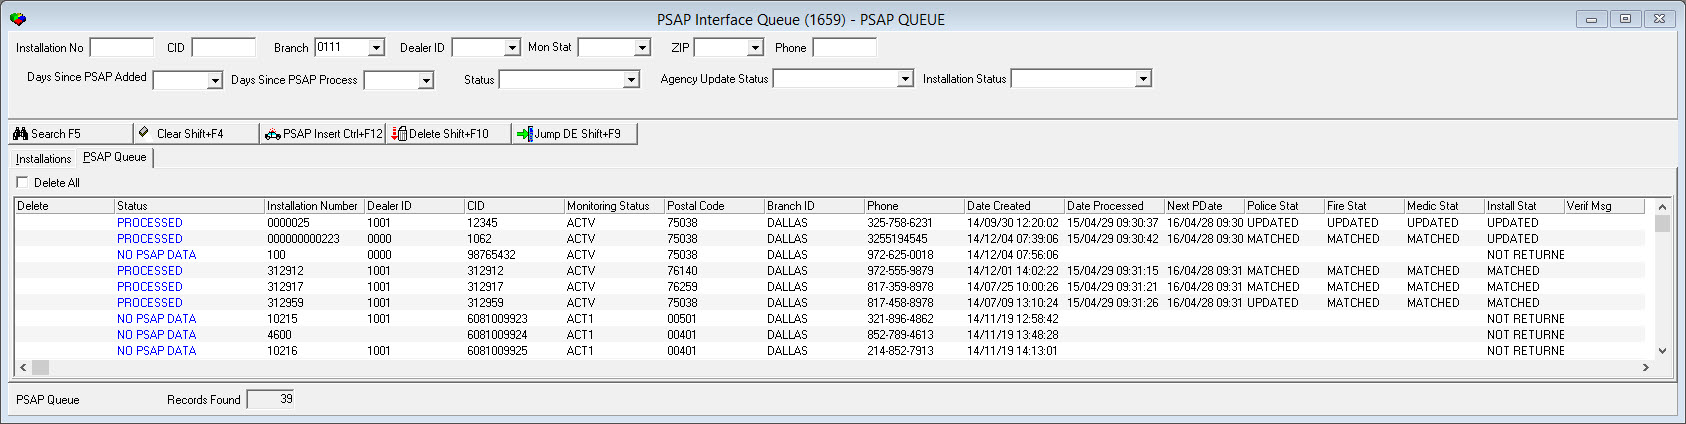
Installations that appear in the PSAP Queue tab have been inserted in the PSAP Queue in the Installations tab or in Data Entry (program #559) using the PSAP Insert button.
The following graphic shows the PSAP Queue tab after a search.
Field/Column Descriptions
The following table describes the fields and columns in the PSAP Queue tab.
Field/Column |
Description |
Search Parameters Pane |
|
Installation No |
Installation number you want to search for. This field accepts wildcard characters. |
CID |
Customer ID you want to search for. This field accepts wildcard characters. |
Branch |
Branch ID you wan to search for. This field accepts wildcard characters. (This menu originates from program #1530.) |
Dealer ID |
Dealer ID you want to search for. This field accepts wildcard characters. (This menu originates from program #1537.) |
Mon Stat |
Monitoring status you want to search for. This field accepts wildcard characters. (This menu originates from program #1540.) Note: This drop-down menu only displays monitoring statuses that have the Include in PSAP check box selected in program #1540. |
ZIP |
Zip code you want to search for. This field accepts wildcard characters. (This menu originates from program #1718.) |
Phone |
Phone number you want to search for. This field accepts wildcard characters. Note: The phone number you search for must be entered in the exact format that is entered in program #559. For example, a search for 5555555555 would not return an installation with a phone number that is entered as 555-555-5555 in program #559. |
Days Since PSAP Added |
You may search for installations that were added to the PSAP Queue after a particular date. |
Days Since PSAP Process |
You may search for installations that were processed by the PSAP Lookup Service after a particular date. |
Status |
Monitoring status for which you want to search, from the PSAP Interface Queue. (This menu originates from Program #1590.) |
Agency Update Status |
Police/Fire/Medical Status dropdown menus in the PSAP Queue. (This menu originates from Program #1590.) |
Installation Status |
Installation Status dropdown menu in the PSAP Queue. (This menu originates from Program #1590.) |
Search Results Pane |
|
Delete All |
Select this check box to place an X in the Delete column for all installations currently displayed in the PSAP Queue tab. |
Delete |
Place an X in this column for each installation you want to delete from the PSAP Queue. You may select records to delete individually, or use the Delete All check box to flag all displayed records for deletion. |
Status |
Status of each installation that matches the search parameters. The status indicates whether an installation has been processed by the PSAP Lookup Service.
|
Installation Number |
Installation number of each record that matches the search parameters. |
Dealer ID |
Dealer ID of each installation that matches the search parameters. |
CID |
Customer ID of each installation that matches the search parameters. |
Monitoring Status |
Monitoring status of each installation that matches the search parameters. |
Postal Code |
Zip code of each installation that matches the search parameters. |
Branch ID |
Branch ID of each installation that matches the search parameters. |
Phone |
Phone number of each installation that matches the search parameters. |
Date Created |
Date and time each installation was added to the PSAP Queue. This column will automatically alpha sort when search feature is used. |
Date Processed |
Date and time each installation was processed by the PSAP Lookup Service. |
Next Processing Date |
Date of the next scheduled processing of the installation. |
Police Update Status |
Status of the selected police agency in the linked Action Plan. The status indicates whether an installation has been processed by the PSAP Lookup Service:
|
Fire Update Status |
Status of the selected fire agency in the linked Action Plan. The status indicates whether an installation has been processed by the PSAP Lookup Service:
|
Medical Update Status |
Status of the selected medical agency in the linked Action Plan. The status indicates whether an installation has been processed by the PSAP Lookup Service:
|
Installation Status |
Notes whether installation address information was updated in the SBN database. The status indicates whether the address had been found by PSAP:
|
Verification Message |
The status indicates any issues that would prevent completion of a processing request:
|
Records Found |
Number of records that match the search parameters. |
Intrado Certificate Setup
If using Intrado for PSAP, you must first set up a use certificate before it can function. This is done through the MMC program and the Certificate Import and Export Wizards.
Note: Before starting, you will need to download a .p12 certificate file from Intrado. Intrado will also supply a private key for the password for importing the certificate.
Use the following steps to set up an Intrado certificate::
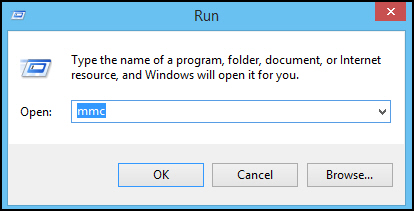
1. On your computer, open the MMC program by selecting Run, typing "mmc," and clicking OK from the Windows Start menu.
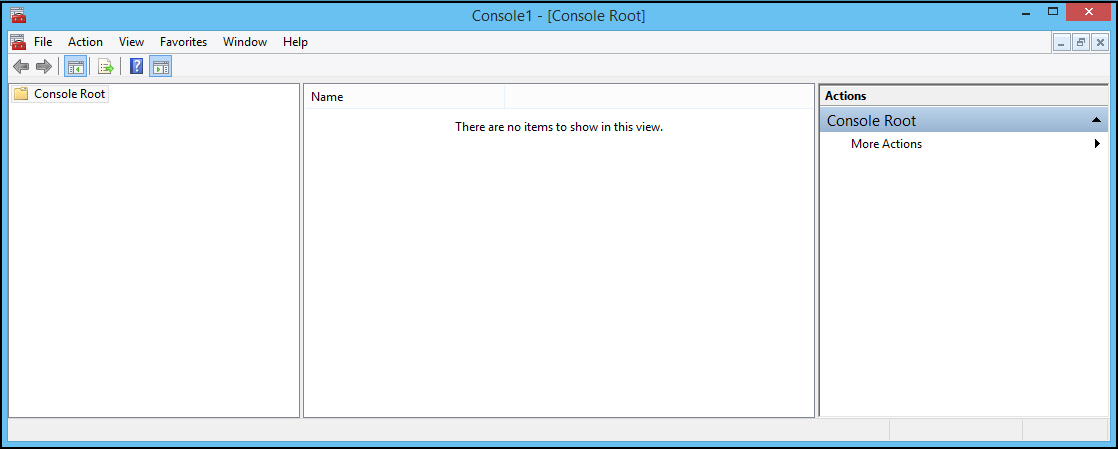
2. In the MMC Console1 window, select File->Add/Remove Snap-in… from the menu to open the Add or Remove Snap-ins window.
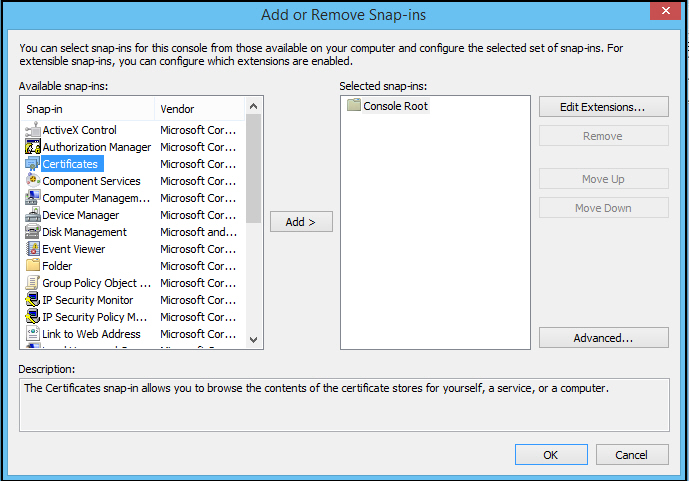
3. In the Add or Remove Snap-Ins window, select Certificates from the left pane and click the Add > button. This opens the Certificates snap-in pop-up window.
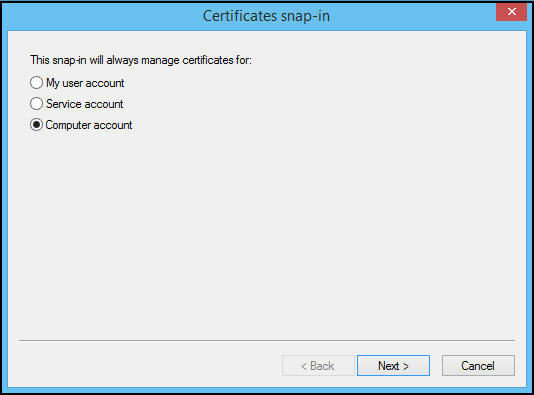
4. In the pop-up window, select the Computer account radio button and click Next to open the Select Computer window.
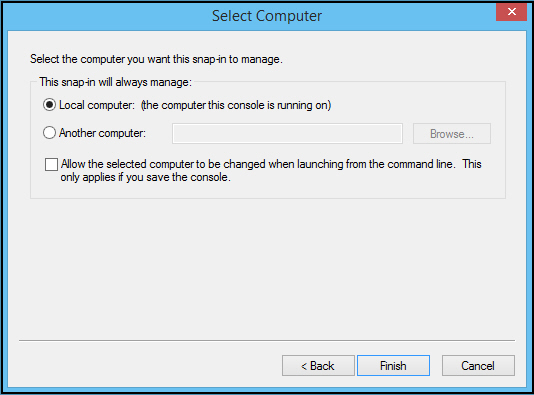
5. In the Select Computer window, leave the Local... option selected and click Finish to return to the Console1 window.
6. Click OK to close the Add or Remove screen. Certificates will now show in the left pane of the Console1 window.
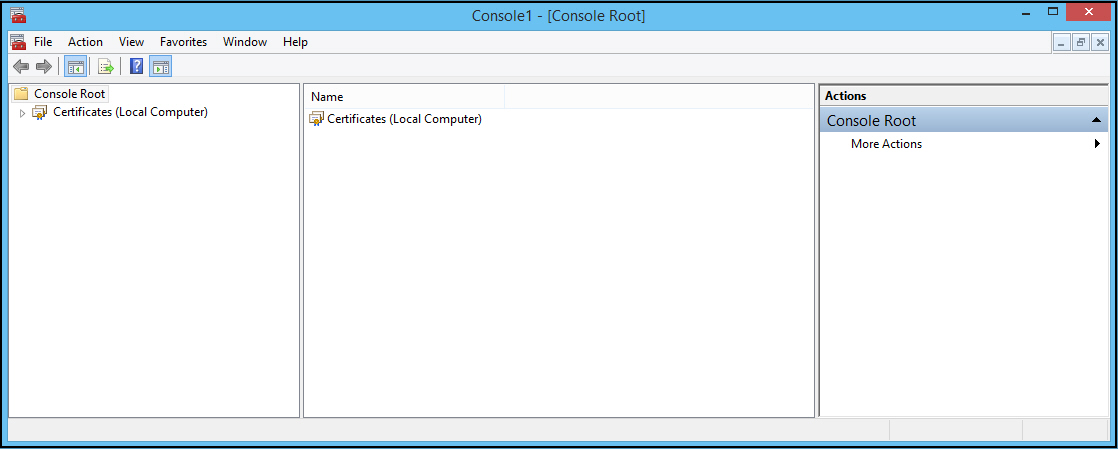
7. In the Console Root directory, expand the Certificates folder, right-click the Personal folder, and select All Tasks->Import… to start the Certificate Import Wizard.
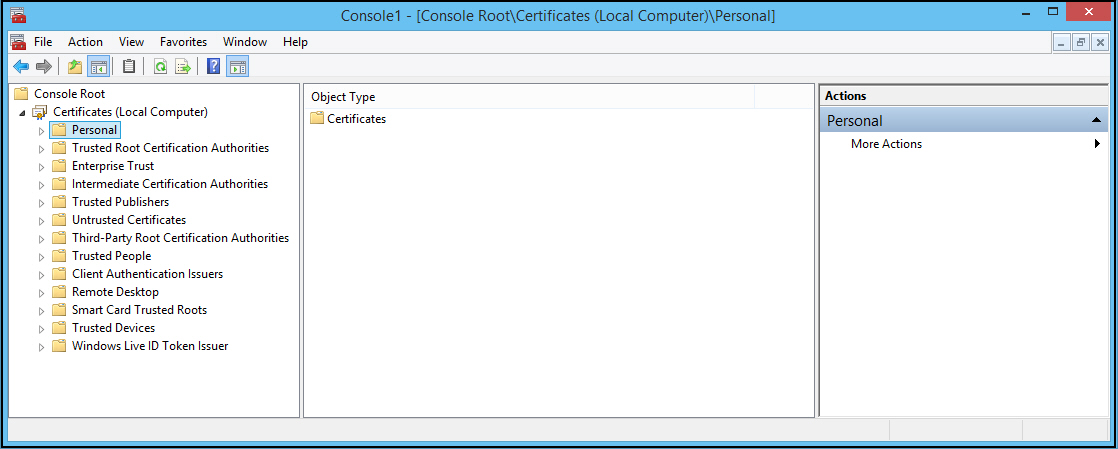
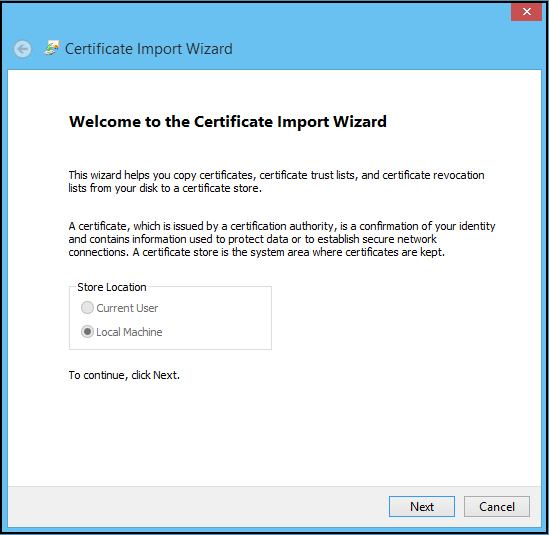
8. In the Certificate Import Wizard window, click Next.
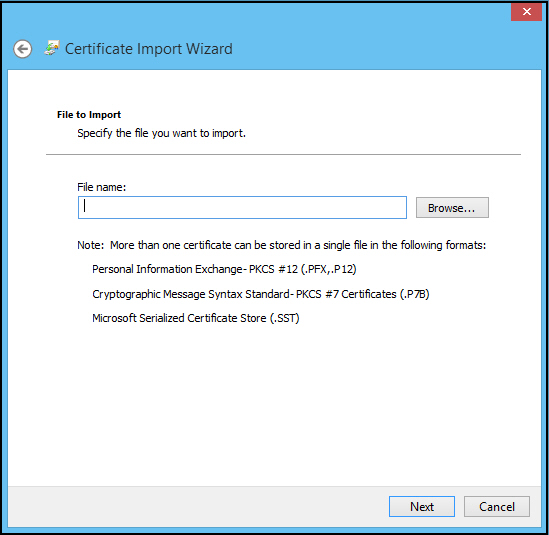
9. In the File to Import window, enter the path to the .p12 certificate file that was downloaded from Intrado in the File Name field and then click Next.
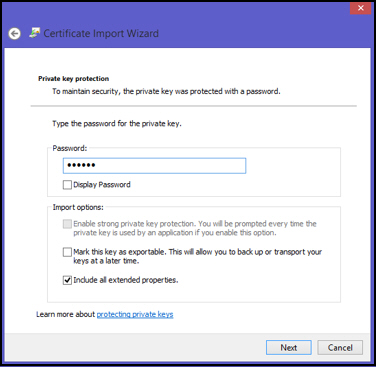
10. Enter the password for the private key and then click Next.
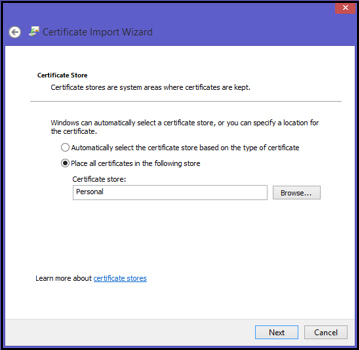
11. Leave the "Place all certificates…" option selected and click Next.
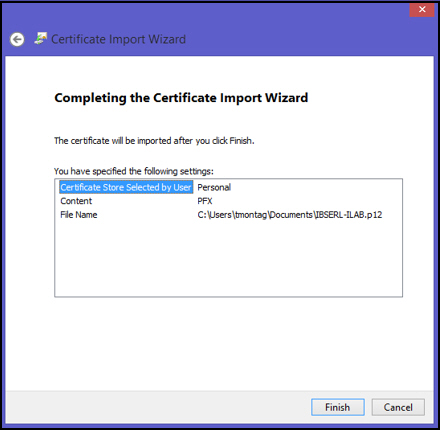
12. To complete the importation, click Finish.
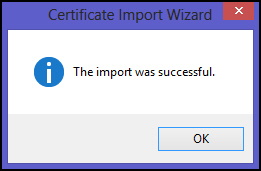
13. Click OK on the confirmation screen.
14. Now that the certificate has been imported into the local machine certificate store, expand the Personal folder in the Console1 window and select the Certificates folder. Right-click the Intrado certificate that was imported and select All Tasks->Export.
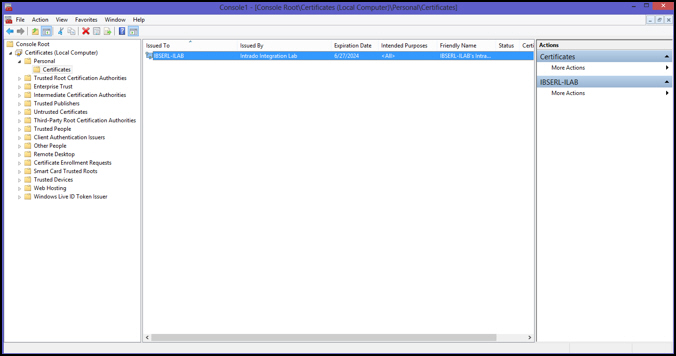
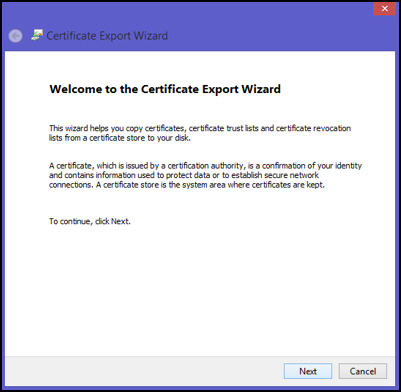
15. In the Certificate Export Wizard screen, click Next.
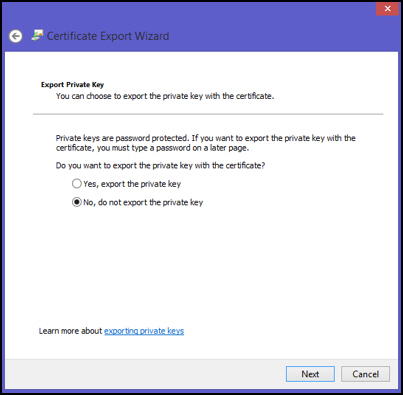
16. In the Export Private Key screen, leave the No… option selected, and click Next.
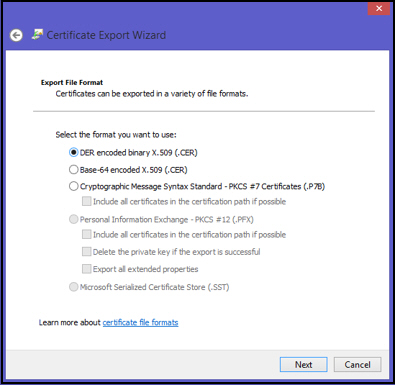
17. In the Export File Format screen, leave the DER… option selected, and click Next.
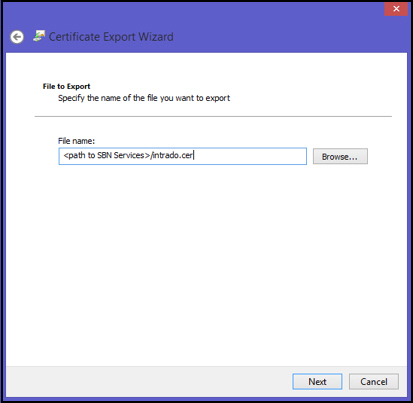
18. In the File Name field, enter a location on the SBN Services machine to save the file as intrado.cer, and then click Next.
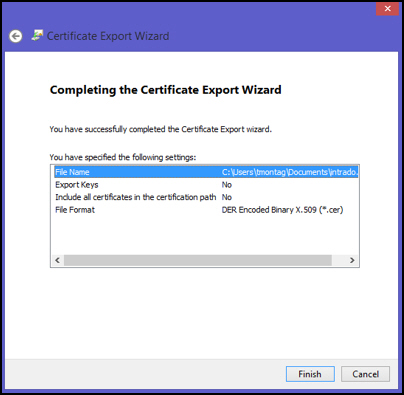
19. In the Completing the Certificate Export Wizard screen, click Finish.
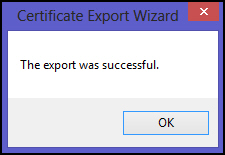
20. In the The export was successful confirmation, click OK.
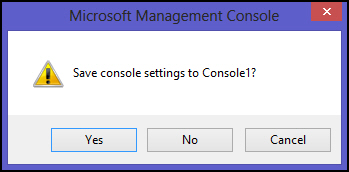
21. You can now close the mmc program. Since the Console1 settings do not need to be saved, click No.
22. In SBN Services, go to Properties on the PSAP Lookup service and enter the path to which you saved the intrados.cer file into the “Path to Certificate� field:
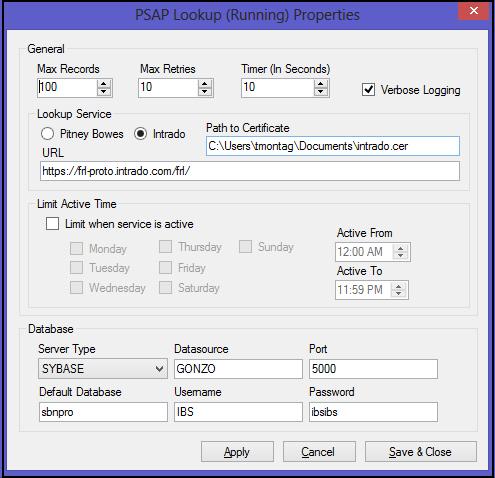
23. In the PSAP Lookup Properties window, the URL for the lookup service must be entered into the URL field. The URL must have a forward slash at the end, or the program will not function correctly.. In this example, the URL is the lab environment. The production environment will likely be a different URL menu.
23. When finished, click the Save & Close button.
Searching for Installations
When the PSAP Interface Queue program opens, the display is blank. To view information in the PSAP Interface Queue window, you must perform a search in the tab you are currently viewing.
Use the following steps to search for installations:
1. In the Installations tab or PSAP Queue tab, select your search parameters.
2. Choose Search.
w The search results appear in the lower pane of the window.
3. In the Installations tab, you may choose Clear Search Screen to begin a new search. (The Clear button does not apply to the PSAP Queue tab.)
Inserting Installations Into the PSAP Queue
In the Installations tab, you may insert installation records into the PSAP Queue where they can be processed by the PSAP Lookup Service.
Use the following steps to insert records into the PSAP Queue:
1. In the Installations tab, place an X in the Process column for each installation you want to insert in the PSAP Queue individually, or select the Select All check box to flag all displayed installations for PSAP Queue insertion.
2. Choose PSAP Insert.
w SBN inserts the flagged installations into the PSAP Queue.
Deleting Installations From the PSAP Queue
In the PSAP Queue tab, you may remove installation records from the PSAP Queue.
Use the following steps to remove records from the PSAP Queue:
1. In the PSAP Queue tab, place an X in the Delete column for each installation you want to remove from the PSAP Queue individually, or select the Delete All check box to flag all displayed installations for PSAP Queue deletion.
2. Choose Delete.
w SBN removes the flagged installations from the PSAP Queue.
Jumping to Data Entry
In the Installations tab or the PSAP Queue tab, you may double-click on an installation in the search results pane or choose Jump To Data Entry to open Data Entry (program #559) with the selected installation displayed.
Button Functions
The following table displays the buttons, describes the shortcut keys, actions and functionality.
Button |
Name |
Shortcut Key |
Action |
Description |
|
Search |
f5 |
1659/ 1 |
Search for installations in the PSAP Queue or installations waiting to be inserted in the PSAP Queue. |
|
Clear Search Screen |
SHIFT+f4 |
1659/ 4 |
Clear search results to begin a new search. (Applies to Installations tab only.) |
|
PSAP Insert |
CTRL+f12 |
1659/ 5 |
Insert installations flagged for processing into the PSAP Queue. |
|
Delete |
shift+f10 |
1659/ 6 |
Delete installations flagged for deletion from the PSAP Queue. |
|
Jump to Data Entry |
shift+f9 |
1659/ 7 |
Access the selected installation record in Data Entry (program #559). |





Modifications and Updates to the PSAP Interface Queue
The following table lists modifications and updates to the PSAP Interface Queue document.
Mod Number |
Date |
Description |
08.03.08964 |
11/26/12 |
Document created. |
07.79.22782, 08.79.09303, 08.79.09299, 07.79.22771 |
07/25/13 |
Added options psap and psapauto. |
07.79.22850, 07.79.22851, 08.79.09333 |
08/28/13 |
Added time entries to the Date Created and Date Processed columns. Added option psapgq. |
08.81.09732, 07.81.23481, 07.81.23478, 07.81.23477, 07.81.23475, 08.81.09699, 07.81.23446 |
07/25/14 |
Added new Days Since PSAP Added and Days Since PSAP Process fields and new Police Stat, Fire Stat, Medic Stat, and Install Stat columns in PSAP Queue tab. Also added Options psapclog, psapdays, and psapgps. |
n/a |
09/02/14 |
Images updated. |
n/a |
09/10/14 |
Added Intrado Certificate Setup procedures. |
F1 Help
| Delphi Forms | blmonitorstatusform |
| Program Numbers | 1540 |