
QAS Pro Address Validation
QAS Pro Address Validation
QAS Pro Address Validation
Module: Account Management
Overview
Use QAS Pro software to verify the addresses you enter in several SBN programs. The three countries currently enabled for QAS address validation are the United States, United Kingdom, and Canada. To use QAS, you must turn on option qas and define option qasPath.
If you want to override QAS validation for a specific address, you must have action 559/660 in your action profile.
This document covers the following topics:
Using QAS in Data Entry Master
Installing and Setting Up QAS
Before using address validation, you must install QAS Pro software on a server of your choice. You do not need to install software on every user's machine; however, as a result, all users who are going to enter addresses must have access to the server where QAS is installed. Follow the directions provided by QAS Pro to ensure proper installation.
Currently, address validation for the US, UK, and Canada are supported in SBN. Install the QAS data sets for one or all of these countries. Also, if you want the latitude and longitude coordinates populated in Data Entry, install QAS Pro data sets for latitude and longitude.
After software installation, you must set up QAS options and Countries (program #1865).
Setting Up Options
There are three options that pertain to QAS Pro address validation: qas, qasPath, and qasUpper.
In Options (program #1887):
Make option qas active.
Define option qasPath with the path of the server on which QAS Pro software and data sets are installed.
If you want QAS to enter all address parameters in uppercase, make option qasUpper active.
Setting Up Countries (Program #1865)
SBN uses the information you enter in Countries (program #1865) to determine when to invoke address validation and where to look for QAS Pro data sets. Select the QAS check box for the countries you want to validate. Only select countries that you have QAS data sets for; you will only be able to validate addresses for these countries.
If you do have a data set installed for a specific country but you do not want to validate address from this country, do not select the QAS check box for the country, and you can enter address in SBN as normal.
Note: You cannot add new countries to the defined countries list. Contact IBS if you want to validate address from a country not listed.
Use the following steps to set up this program for address validation:
1. In Countries (program #1865), select the country that you want to set up.
2. Double-click your selection or choose Get.
w The fields in the lower pane display the details of the country.
3. Choose Change.
w The fields in the lower pane open for changes.
4. Complete the following fields:
IBS does not recommend changing the Code and Country fields.
In Zip enter the number of digits or characters that must exist for SBN to consider a zip code valid for this country.
Select the QAS check box for the countries you have QAS data sets installed.
5. Choose Save.
Using QAS in Data Entry Master
Address validation assures that users enter correct addresses in installations and the Mailing Address form in Data Entry Master.
When entering an address, you must start in the Country field; this allows QAS to determine which data set to use. This field defaults to the country value defined for your user ID in Personnel (program #1811). You can change the default.
Note: If the Country field is screen scraped, it is not required for QAS.
Validate addresses for the following countries:
Validating US Addresses
Use the following steps to add an United States address with QAS software:
1. In Data Entry Master, you must be in New or Change mode to enter an address on an installation.
w The fields open for changes.
2. If you need to change the default in the Country field, select United States from the drop-down menu.
3. Enter a five (5) digit zip code in the ZIP field and press Tab.
w The QAS Address Validation window opens and searches for zip code matches.
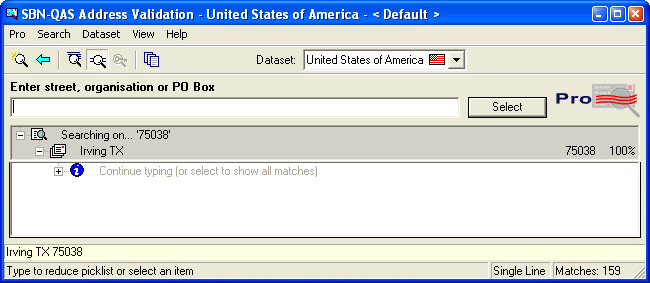
4. Type the name of the street, organization, or PO Box in the appropriate field.
w The QAS window displays the valid matches.
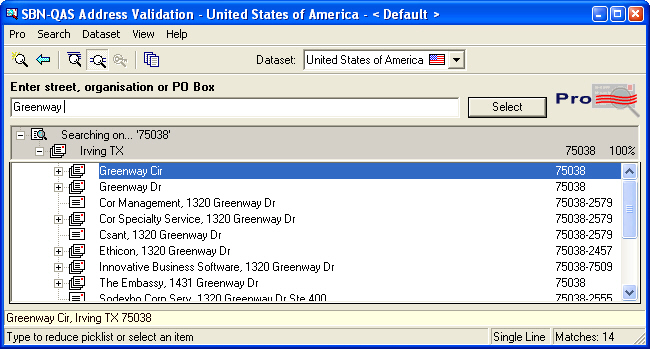
5. Double-click on the correct street name, organization, or PO Box.
6. Type the building number or the name of the organization in the appropriate field.
w The QAS window displays the valid matches.
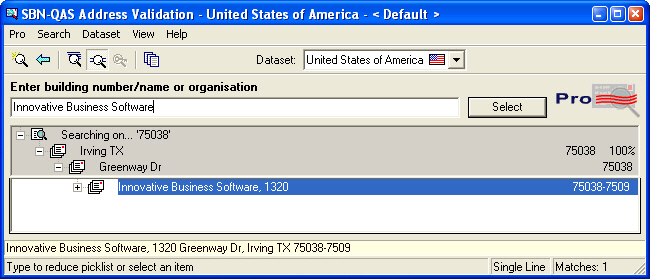
7. Double-click on the correct building or organization.
8. Type the apartment, suite, or unit number in the appropriate field.
w The QAS window displays the valid match.
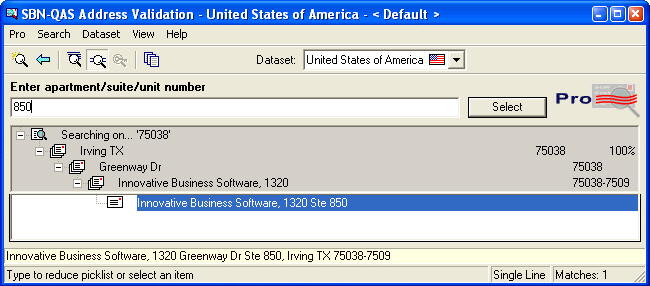
9. Double-click on the correct address.
w QAS verifies that the address is valid.
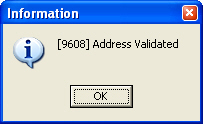
w The address appears in the form you are using.
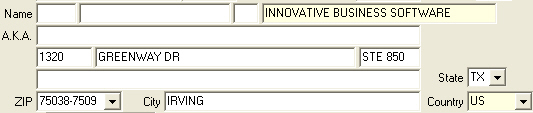
Note: If option qasUpper is on, the address appears in uppercase.
Note: The business name defaults to the Last Name field; you can override this default.
Note: If your company supports the QAS latitude and longitude databases, QAS fills in these fields as well.
10. Complete the remaining fields, as needed.
11. Choose Save.
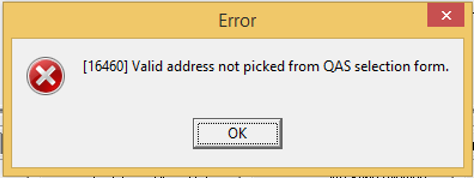
Note: If a user closes the QAS Address Verification window before selecting an address, they will be presented with an error message.
Validating UK Addresses
Use the following steps to add an United Kingdom address with QAS software:
1. In Data Entry Master, you must be in New or Change mode to enter an address on an installation.
w The fields open for changes.
2. If you need to change the default in the Country field, select United Kingdom from the drop-down menu.
w The ZIP, City, State, and County field labels change to Postal Code, Town, County, and Locality, respectively.

3. Enter a three (3) character postal code in the Postal Code field and press Tab.
w The QAS Address Validation window opens and searches for postal code matches.
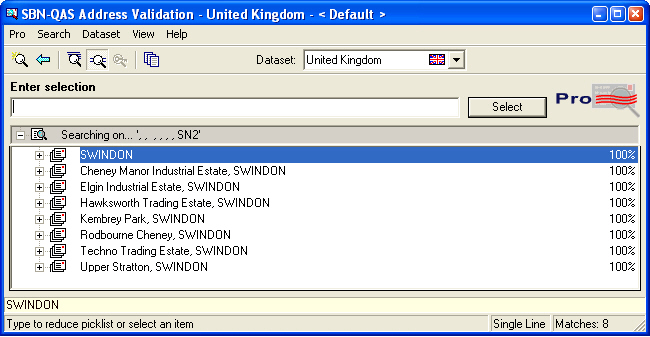
4. Double-click on the correct selection.
5. Type the name of the street, organization, or PO Box in the appropriate field.
w The QAS window displays the valid matches.
6. Double-click on the correct street name, organization, or PO Box.
7. Type the building number or the name of the organization in the appropriate field.
w The QAS window displays the valid matches.
8. Double-click on the correct building or organization.
9. Type the apartment, suite, or unit number in the appropriate field.
w The QAS window displays the valid match.
10. Double-click on the correct address.
w QAS verifies that the address is valid.
w The address appears in the form you are using.
Note: If option qasUpper is on, the address appears in uppercase.
Note: The business name defaults to the Last Name field; you can override this default.
11. Complete the remaining fields, as needed.
12. Choose Save.
Validating Canadian Addresses
Use the following steps to add a Canadian address with QAS software:
1. In Data Entry Master, you must be in New or Change mode to enter an address on an installation.
w The fields open for changes.
2. If you need to change the default in the Country field, select Canada from the drop-down menu.
w The ZIP and State field labels change to Postal Code and Province, respectively.

3. Enter a seven (7) character postal code in the Postal Code field and press Tab.
w The QAS Address Validation window opens and searches for postal code matches.
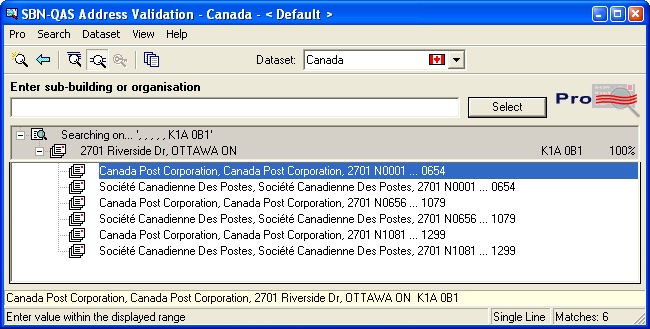
4. Double-click on the correct selection.
5. Type the building number or the name of the organization in the appropriate field.
w The QAS window displays the valid matches.
6. Double-click on the correct building number or organization.
7. Type the name of the sub-building or organization in the appropriate field.
w The QAS window displays the valid match.
8. Double-click on the correct address.
w QAS verifies that the address is valid.
w The address appears in the form you are using.
Note: If option qasUpper is on, the address appears in uppercase.
Note: The business name defaults to the Last Name field; you can override this default.
9. Complete the remaining fields, as needed.
10. Choose Save.
Using QAS in Contract Master
Address validation assures that users enter correct addresses in billing accounts, contracts, and the Mailing Address form in Contract Master.
When entering an address, you must start in the Country field; this allows QAS to determine which data set to use. If the billing account or contract you are in is linked to an installation, the Country field defaults from the installation, and you cannot change it. If the account is not linked to an installation, the Country field defaults to the country value defined for your user ID in Personnel (program #1811), and you can change the default.
Note: If the Country field is screen scraped, it is not required for QAS.
Validate addresses for the following countries:
Validating US Addresses
Use the following steps to add an United States address with QAS software:
1. In Contract Master, you must be in New or Change mode to enter an address on a billing account or contract.
w The fields open for changes.
2. If you need to change the default in the Country field, select United States from the drop-down menu.
3. Enter a five (5) digit zip code in the ZIP field and press Tab.
w The QAS Address Validation window opens and searches for zip code matches.
4. Type the name of the street, organization, or PO Box in the appropriate field.
w The QAS window displays the valid matches.
5. Double-click on the correct street name, organization, or PO Box.
6. Type the building number or the name of the organization in the appropriate field.
w The QAS window displays the valid matches.
7. Double-click on the correct building or organization.
8. Type the apartment, suite, or unit number in the appropriate field.
w The QAS window displays the valid match.
9. Double-click on the correct address.
w QAS verifies that the address is valid.
w The address appears in the form you are using.
Note: If option qasUpper is on, the address appears in uppercase.
Note: The business name defaults to the Last Name field; you can override this default.
10. Complete the remaining fields, as needed.
11. Choose Save.
Note: If a user closes the QAS Address Verification window before selecting an address, they will be presented with an error message.
Validating UK Addresses
Use the following steps to add an United Kingdom address with QAS software:
1. In Contract Master, you must be in New or Change mode to enter an address on a billing account or contract.
w The fields open for changes.
2. If you need to change the default in the Country field, select United Kingdom from the drop-down menu.
w The ZIP, City, State, and County field labels change to Postal Code, Town, County, and Locality, respectively.
3. Enter a three (3) character postal code in the Postal Code field and press Tab.
w The QAS Address Validation window opens and searches for postal code matches.
4. Double-click on the correct selection.
5. Type the name of the street, organization, or PO Box in the appropriate field.
w The QAS window displays the valid matches.
6. Double-click on the correct street name, organization, or PO Box.
7. Type the building number or the name of the organization in the appropriate field.
w The QAS window displays the valid matches.
8. Double-click on the correct building or organization.
9. Type the apartment, suite, or unit number in the appropriate field.
w The QAS window displays the valid match.
10. Double-click on the correct address.
w QAS verifies that the address is valid.
w The address appears in the form you are using.
Note: If option qasUpper is on, the address appears in uppercase.
Note: The business name defaults to the Last Name field; you can override this default.
11. Complete the remaining fields, as needed.
12. Choose Save.
Validating Canadian Addresses
Use the following steps to add a Canadian address with QAS software:
1. In Contract Master, you must be in New or Change mode to enter an address on a billing account or contract.
w The fields open for changes.
2. If you need to change the default in the Country field, select Canada from the drop-down menu.
w The ZIP and State field labels change to Postal Code and Province, respectively.
3. Enter a seven (7) character postal code in the Postal Code field and press Tab.
w The QAS Address Validation window opens and searches for postal code matches.
4. Double-click on the correct selection.
5. Type the building number or the name of the organization in the appropriate field.
w The QAS window displays the valid matches.
6. Double-click on the correct building number or organization.
7. Type the name of the sub-building or organization in the appropriate field.
w The QAS window displays the valid match.
8. Double-click on the correct address.
w QAS verifies that the address is valid.
w The address appears in the form you are using.
Note: If option qasUpper is on, the address appears in uppercase.
Note: The business name defaults to the Last Name field; you can override this default.
9. Complete the remaining fields, as needed.
10. Choose Save.
Using QAS in Marketing and Marketing Basics
Address validation assures that users enter correct addresses in Inquiries and the supporting forms from inside Marketing Basics..
When entering an address, you must start in the Country field; this allows QAS to determine which data set to use. This field defaults to the country value defined for your user ID in Personnel (program #1811). You can change the default.
Note: If the Country field is screen scraped, it is not required for QAS.
Validate addresses for the following countries:
Validating US Addresses
Use the following steps to add an United States address with QAS software:
1. In Data Entry Master, you must be in New or Change mode to enter an address on an installation.
w The fields open for changes.
2. If you need to change the default in the Country field, select United States from the drop-down menu.
3. Enter a five (5) digit zip code in the ZIP field and press Tab.
w The QAS Address Validation window opens and searches for zip code matches.
4. Type the name of the street, organization, or PO Box in the appropriate field.
w The QAS window displays the valid matches.
5. Double-click on the correct street name, organization, or PO Box.
6. Type the building number or the name of the organization in the appropriate field.
w The QAS window displays the valid matches.
7. Double-click on the correct building or organization.
8. Type the apartment, suite, or unit number in the appropriate field.
w The QAS window displays the valid match.
9. Double-click on the correct address.
w QAS verifies that the address is valid.
w The address appears in the form you are using.
Note: If option qasUpper is on, the address appears in uppercase.
Note: The business name defaults to the Last Name field; you can override this default.
Note: If your company supports the QAS latitude and longitude databases, QAS fills in these fields as well.
10. Complete the remaining fields, as needed.
11. Choose Save.
Note: If a user closes the QAS Address Verification window before selecting an address, they will be presented with an error message.
Validating UK Addresses
Use the following steps to add an United Kingdom address with QAS software:
1. In Data Entry Master, you must be in New or Change mode to enter an address on an installation.
w The fields open for changes.
2. If you need to change the default in the Country field, select United Kingdom from the drop-down menu.
w The ZIP, City, State, and County field labels change to Postal Code, Town, County, and Locality, respectively.
3. Enter a three (3) character postal code in the Postal Code field and press Tab.
w The QAS Address Validation window opens and searches for postal code matches.
4. Double-click on the correct selection.
5. Type the name of the street, organization, or PO Box in the appropriate field.
w The QAS window displays the valid matches.
6. Double-click on the correct street name, organization, or PO Box.
7. Type the building number or the name of the organization in the appropriate field.
w The QAS window displays the valid matches.
8. Double-click on the correct building or organization.
9. Type the apartment, suite, or unit number in the appropriate field.
w The QAS window displays the valid match.
10. Double-click on the correct address.
w QAS verifies that the address is valid.
w The address appears in the form you are using.
Note: If option qasUpper is on, the address appears in uppercase.
Note: The business name defaults to the Last Name field; you can override this default.
11. Complete the remaining fields, as needed.
12. Choose Save.
Validating Canadian Addresses
Use the following steps to add a Canadian address with QAS software:
1. In Data Entry Master, you must be in New or Change mode to enter an address on an installation.
w The fields open for changes.
2. If you need to change the default in the Country field, select Canada from the drop-down menu.
w The ZIP and State field labels change to Postal Code and Province, respectively.
3. Enter a seven (7) character postal code in the Postal Code field and press Tab.
w The QAS Address Validation window opens and searches for postal code matches.
4. Double-click on the correct selection.
5. Type the building number or the name of the organization in the appropriate field.
w The QAS window displays the valid matches.
6. Double-click on the correct building number or organization.
7. Type the name of the sub-building or organization in the appropriate field.
w The QAS window displays the valid match.
8. Double-click on the correct address.
w QAS verifies that the address is valid.
w The address appears in the form you are using.
Note: If option qasUpper is on, the address appears in uppercase.
Note: The business name defaults to the Last Name field; you can override this default.
9. Complete the remaining fields, as needed.
10. Choose Save.
Overriding QAS
If QAS cannot locate a specific address or you want to change a QAS address, you can override the address validation even if option qas is on. You must have action 559/660 in your action profile to override QAS.
Use the following steps to override QAS validation:
1. Close the QAS Address Validation window by clicking the X.
w The QAS window closes and a Confirm dialog box appears.
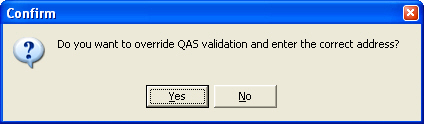
2. Choose Yes.
3. Enter the address and complete remaining fields, as needed.
4. Choose Save.
Modifications and Updates to QAS Pro
The following table lists modifications and updates to the QAS Pro Address Validation document.
Mod Number |
Date |
Description |
n/a |
04/02/09 |
Document created. |
07.88.25700, 08.88.11297, 07.88.25717, 08.88.11287 |
03/14/18 |
Updated document to reflect the implementation of QAS within program #562. Images updated accordingly as well. No changes to procedure. |