
Backup Host
Backup Host
Backup Host
Module: Utilities
Overview
Use the Backup Host Import program to import your main SBN database into the Backup Host. Then, if the main SBN system or host fails, the Backup Host interprets the signals from the Concentrator and looks up customer data to print alarm tickets.
SBN now provides an updated version of both the Backup Host and Import programs. Backup Host 2 and Import 2 include support for global and template zones. IBS designed Backup Host 2 and Import 2 to replace the previous versions. Do not run Backup Host 2 and Import 2 with previous versions. However, you may use the instructions for previous versions to install and operate Backup Host 2 and Import 2.
The following sections of this document provide a description of the Backup Host and Backup Host Import programs with instructions on how to install, configure, and operate them.
The Backup Host
The Backup Host combines several programs to enable an operator to handle alarms when the connection between the Host and the Concentrator goes down or the Host fails. If such a failure occurs, the Concentrator can be switched to Manual Host mode. When in Manual Host mode, all alarms are routed from the Concentrator to the Backup Host PC. The Backup Host contains a copy of the customer information database, and prints alarm tickets with all the information an operator needs to handle the alarm.
The following chart shows the Backup Host's role (Secondary Server) in the flow of alarm signals into SBN.
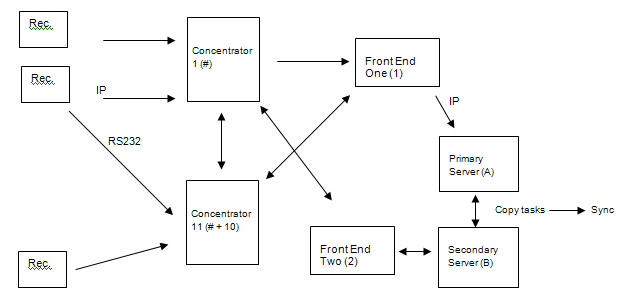
The Backup Host retains the last 1,000 signals in memory. The alarm ticket that the Backup Host prints indicates if more than one signal from the customer exists in the file.
Use the Backup Host Import program to manually import the database of customer information from SBN into the Backup Host.
For more information on importing information into the Backup Host see The Backup Host Import Program.
Note: Do NOT define two Backup Hosts. If this occurs, SBN cannot determine where to send signals in the event of a system failure.
Warning: If your Backup Host config file contains extra lines, your Backup Host will crash.
Installing the Backup Host
You must connect the Backup Host PC to the Concentrator and to the Host. After you connect the Backup Host PC to the Concentrator and Host, install
Backup Host program
Backup Host Import program
Connecting the Backup Host to the Concentrator
You must use a NULL modem cable with the following pin outs to connect the Backup Host to the Concentrator:
Pin |
Pin |
|
1 |
to |
1 |
2 |
to |
3 |
4 |
to |
5 |
5 |
to |
4 |
6 |
to |
20 |
7 |
to |
7 |
8 |
to |
20 |
20 |
to |
6 |
20 |
to |
8 |
Use the following steps to connect the Backup Host to the Concentrator:
1. Connect the NULL modem cable to the serial port on the Backup Host PC.
2. Connect the other end of the NULL modem cable to the Concentrator’s serial interface.
3. Configure the communication port of the concentrator to initialize at
l 9600 baud
l No parity
l 8 data
l 1 stop
Note: You must configure the application port in the Concentrator for this.
Connecting the Backup Host to the Host
To download the database, you must have network connectivity between the Backup Host and the Host. Depending on the type of network you use, use either a Token Ring or Ethernet connection. Connect the Backup Host PC as you would any other computer on the network. You can directly connect the Backup Host to multiple local printers.
Installing the Backup Host Program
The SBN release disk contains a Backup Host directory with an Install Shield for the Backup Host program.
Use the following steps to install the Backup Host program:
1. In the Backup Host folder, double-click the Setup.exe icon.
‰ The Install Shield prepares the Wizard.
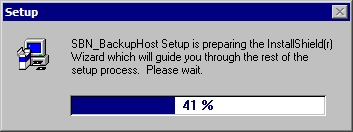
‰ The Welcome dialog box opens.
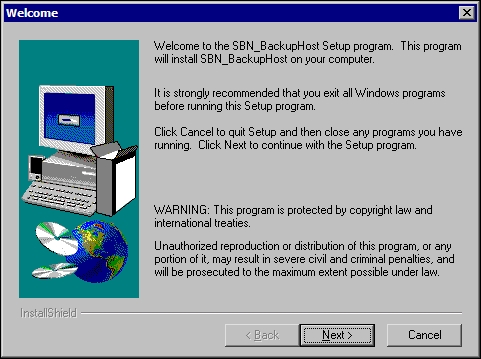
2. Choose Next.
‰ The User Information dialog box opens.
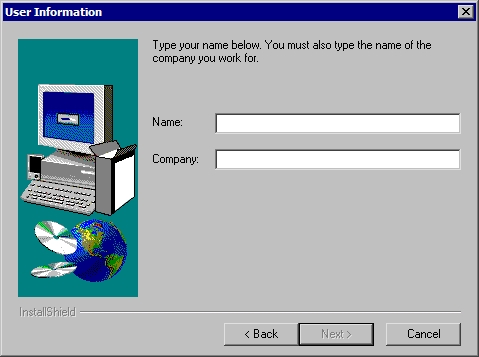
3. Type your name and company name.
4. Choose Next.
‰ The Start Copying Files dialog box opens and displays the current settings.
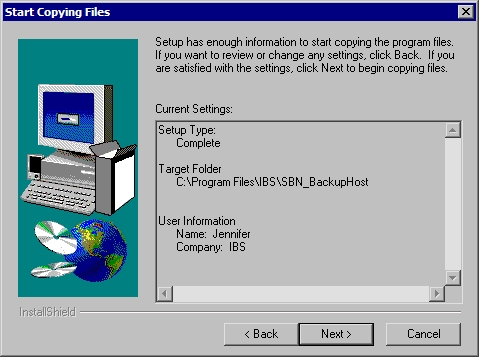
5. Confirm settings.
6. Choose Next.
‰ The Wizard creates the program file and icon and displays the Setup Complete dialog box.
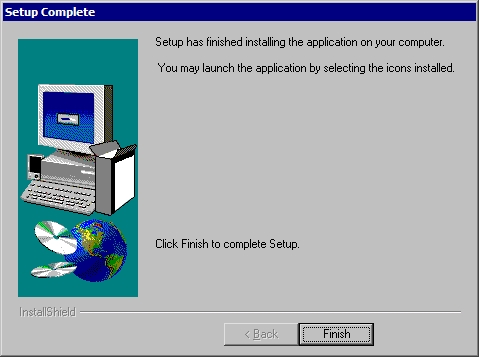
7. Choose Finish.
Operating the Backup Host
The following sections describe the operation of the Backup Host program.
The Backup Host Window
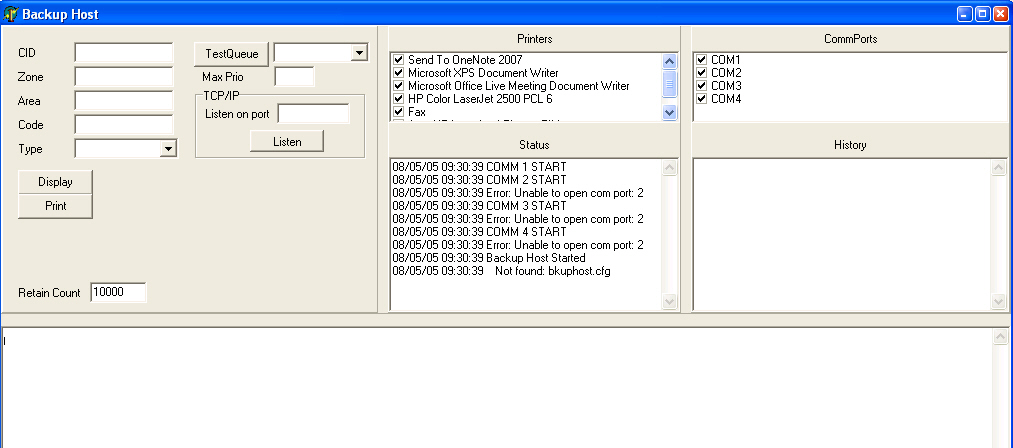
The Backup Host displays information for running and monitoring the Backup Host. The Backup Host reads CIDs directly from the Concentrator or you can type CIDs manually. When a CID comes through the Backup Host, SBN prints the ticket to the printer(s) selected. If you do not select a printer, the Backup Host displays the information.
Note: When you log into the Backup Host PC, SBN does not record the login to the Users table or update the last login date to prevent inconsistencies in the Users table. SBN does not record the login as long as option ba352 is on and the PC is set up as the secondary server.
The following graphic shows the Backup Host with information displayed.
Field/Pane Descriptions
The following table describes the fields and panes used in the Backup Host.
Field/Pane |
Description |
CID |
Customer ID associated with the alarm signal. |
Test Queue |
Button to start download of all accounts in test and runaway queue. After you download these records and an alarm arrives, the Backup Host compares the signal to the test/runaway records. If the whole account is in test/runaway the Backup Host will NOT print a ticket. If only part of the account is in test, the Backup Host prints the ticket with a note that a test is in progress. O You would choose the button, and then go to manual. |
TCP/IP |
TCP/IP represents an additional method for a computer to send and receive information. This port is what the machine uses to listen for signals; therefore, the Listen button turns the listening function off and on. |
Server |
Select the server from which you want to download test records. |
Max Priority |
Alarms with priority greater than the max will not print tickets. |
Zone |
Zone ID associated with the alarm signal. |
Area |
Area from the zone associated with the alarm signal. |
Code |
Code from the zone associated with the alarm signal. |
Type |
Alarm type associated with the alarm signal. |
Printers |
List of printers available to print tickets. Printers that display a check mark print alarm tickets. |
Comm/Ports |
List of communication ports used to import data into the Backup Host PC. |
Status |
Running log of activity of the Backup Host. |
History |
History of CIDs with alarm signals since the Backup Host was started. The characters in front of the CID number define information for the signal: l + — the Backup Host found the information to generate the alarm ticket. l - — the Backup Host did not find the information or disregarded the alarm because of an entry in the CFG file. See Bkuphost.cfg File. l * — a manual entry |
Details |
Displays the text printed on the alarm ticket. |
Bkuphost.cfg File
Use any text editor to create the bkuphost.cfg file, which contains the settings that specify
Which alarm types and zone types the Backup Host should print
Which alarm types and zone types the Backup Host should disregard
Note: When option temp156 is on, you may add specific lines in the bkuphost.cfg file to configure specific printers to only print alarms associated with specific receiver branches. (Assign receiver branches to installations in program #559.) Identify printers with an exact name match. The format for associating branches with printers is as follows: PRINTER: <printer name> | <receiver branch> For example, to associate printer 'HP Color LaserJet 2500 PCL 5' to branch 1234, the entry in bkuphost.cfg would be: PRINTER: HP Color LaserJet 2500 PCL 5|1234 If you insert multiple entries into bkuphost.cfg for the same printer, the last entry takes precedence.
When option temp156 is on and the Backup Host attempts to determine a printer to print an alarm for a receiver branch, the following order is used:
1. If a printer specific to the branch is found (and checked in the list of printers in the Backup Host window) the printer is used.
2. If there is a default printer (and that printer is checked in the list of printers in the Backup Host window) the printer is used.
3. The first checked printer in the list of printers in the Backup Host window is used.
4. Nothing is printed.
Example bkuphost.cfg file
Line 1
Line 1 contains 35 positions (one position for each alarm type):
l X — the Backup Host prints an alarm ticket for signals with this alarm type.
l space or lower-case letter — the Backup Host disregards signals with this alarm type and does not print an alarm ticket.
Note: In the example, toc represent alarm types Trouble; Open; Close. See Alarm Types.
Line 2 — &mo140&
Include this tag in the bkuphost.cfg file to activate option mo140. When this option is on, SBN converts alarm IDs that begin with 002-03 to alarm IDs that begin with 002-02.
Line 3 — &mo003&
Include this tag in the bkuphost.cfg file to activate option mo003. When this option is on, SBN generates an alarm on the first digit of the zone ID if the real zone is not found.
Lines 4+
The Backup Host disregards signals with this zone type and does not print an alarm ticket. Use one line per zone type. You may use as many lines as necessary to define zone types that the Backup Host will disregard.
Note: In the example, BAT on line 3 and GFR on line 4 represent zone types.
Alarm Types
The following table lists the alarm types to define in the bkuphost.cfg file, and their positions in the first line of that file.
Position |
Alarm Type |
1 |
Alarm |
2 |
Restore |
3 |
Battery |
4 |
Cancel |
5 |
Supervisor / Shunt / Unshunt |
6 |
Passed / Bypass |
7 |
Trouble |
8 |
Opening |
9 |
Closing |
10 |
Log Only |
11 |
Late Close Extra |
12 |
Perimeter Close |
13 |
Not currently used |
14 |
Not currently used |
15 |
Not currently used |
16 |
Duress |
17 |
Alarm Special |
18 |
Restore Special |
19 |
Missing |
20 |
Not currently used |
21 |
Not currently used |
22 |
RX-Alarm |
23 |
RX-Restore |
24 |
Not currently used |
25 |
Not currently used |
26 |
Unrestored |
27 |
Area UPD |
28 |
Con Update |
29 |
Code UPD |
30 |
Con Del |
31 |
Restore Required |
32 |
No restore / cancel within period |
33 |
Caller ID update |
34 |
No cancel within period |
35 |
Caller ID 2 update |
Testing the Backup Host
You can use an .inq file to send test data through the Backup Host.
Creating the .inq File
Use any text editor to create the file. You must save the file as bckuphost.inq.
The bkuphost.inq file must contain
CID
Zone
Area
Information on the panel signal
Note: You must follow the abbreviation for the receiver type with ##RW.
Example .inq File
The header line of the following table serves to identify the position of the characters or spaces in the example lines.
1xxxxxxxx1xxxxxxxxx2xxxxxxxxx3xxxxxxxxx4xxxxxxxxx5xxxxxxxxx6xxxxxxxxx7xxx |
05-00000036 A SO##RW06 07 20050516153055-TEL1-0 05-00000036 A SO##RW06 07 20050510210939-TEL1-50110702 |
In the example, the following positions contain the corresponding information:
Positions 1 - 11 (05-00000036) = CID
Positions 33 - 34 (SO) = Receiver Type
Positions 35 - 38 (##RW) = Abbreviation that must follow receiver type
Positions 39 - 50 (06) = Protocol
Positions 43 - 73 (07 2005016153055-TEL1-0) = Information for alarm translation (program #1876)
Running the Test
Use the following steps to run the test:
1. Create the bkuphost.inq file.
2. Put the bkuphost.inq file into the same directory as the .exe file for the Backup Host.
3. Start the Backup Host.
‰ The Backup Host
l Reads the bkuphost.inq file
l Prints tickets for the test alarms in the bkuphost.inq file
l Inserts images of the tickets into a the bkuphost.dmp file
4. Compare the .inq-generated tickets from the current start up of the Backup Host with the .inq-generated tickets of the last start up of the Backup Host.
Note: If the tickets appear significantly different, you may have a problem with the Backup Host that will require further investigation.
5. After you test the Backup Host, remove the bkuphost.inq file from the directory that contains the .exe file for the Backup Host.
Backup Host Ticket
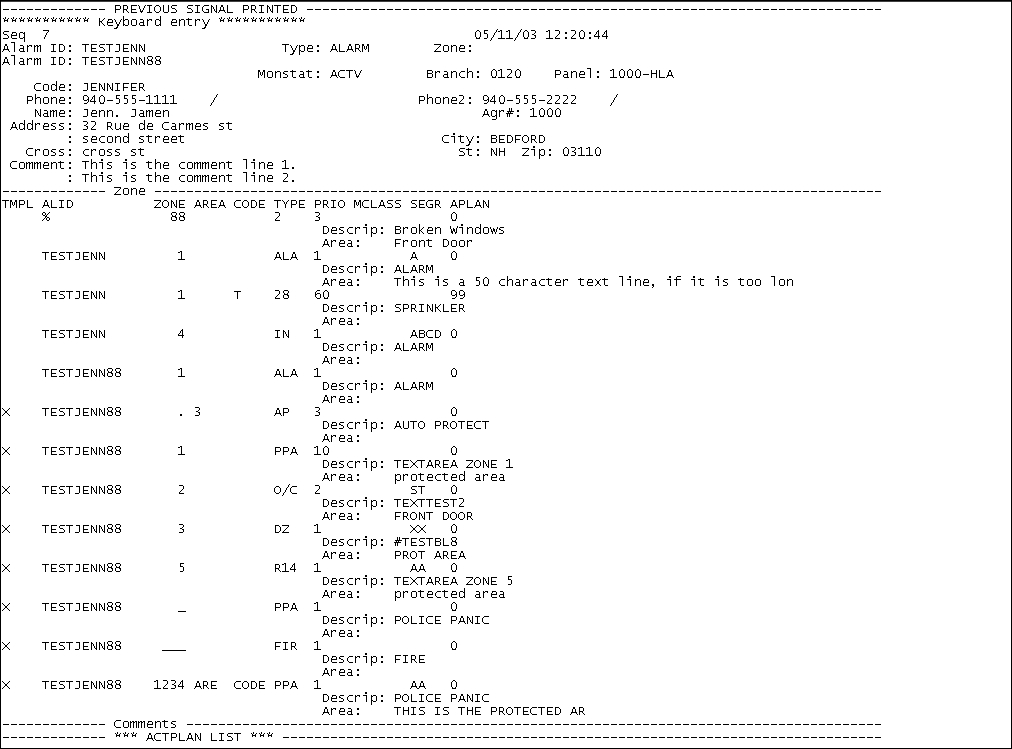
The following graphic displays an example of the ticket created by the Backup Host.
Field/Column Definitions
The following table describes the fields and columns on the Backup Host ticket.
Field/Column |
Description |
Seq |
Sequence of the signal as processed by the backup host. |
Alarm ID |
First alarm ID for the signal. |
Type |
Alarm type. |
Zone |
Zone identifier if ticket is for a specific zone. |
Alarm ID |
Additional Alarm ID if attached to the installation. |
Monstat |
Monitoring status of the installation. |
Branch |
Installation Receiver branch. |
Panel |
Panel Type of the primary alarm ID. |
Code |
Codeword for the installation. |
Phone |
Installation phone number. |
Phone2 |
Additional installation phone number. |
Name |
Installation name. |
Address |
Installation address. |
City |
Installation city. |
State |
Installation state. |
Zip |
Installation zip code. |
Cross Street |
Installation cross street. |
Comment |
Comment from Data Entry Basics tab. |
Get HTTP |
Data in the Misc40 field of the Data Entry Basics tab. |
Zone Section |
|
TMPL |
If this column displays an X the zone is a template zone.
|
ALID |
Alarm ID attached to the zone.
|
Zone |
Zone ID. |
Area |
Zone area. |
Code |
Zone code. |
Type |
Zone type. |
Prio |
Priority of the zone. |
MClass |
Monitoring class of the zone. |
SEGR |
UL grade of the zone. |
APLAN |
Action plan tied to the zone. |
Description |
Zone text. |
Area |
Protected area of the zone. |
Comments |
Temporary comments attached to the installation. |
Action Plan List |
|
Action Plan # |
Action plan number. |
Standard Text |
Standard text attached to the action plan. |
Action Plan Text |
Action plan text attached to the action plan. |
Agencies Section |
|
Agency Type (No label) |
Type of agency listed in the action plan. |
Phone (No label) |
Phone number of the agency. |
Ext (No label) |
Extention for phone 1. |
Phone 2 (No label) |
Agency phone 2. |
Ext(No label) |
Extention for phone 2. |
Phone 3 (No label) |
Agency phone 3. |
Ext (No label) |
Extension for phone 3. |
Name (No label) |
Name of the agency. |
Comment (No label) |
Comment attached to the agency. |
Permits Section |
|
Ex Date |
Expiration date of the permit. |
EXP |
If this column displays an * the permit has expired. |
Agency Type (No label) |
Agency type attached to the permit. |
Permit Type (No label) |
Permit type attached to the permit. |
Status (No Label) |
Permit status. |
Permit Number (No label) |
Permit number |
Contacts Section This pane now prints the premises information in the sequence supplied by the action plan. |
|
Seq |
Sequence number of the contact.
|
Key |
Indicates the contact is a keyholder. |
Phone 1 |
Phone 1 with extension for the contact. |
Phone 2 |
Phone 2 with extension for the contact. |
Phone 3 |
Phone 3 with extension for the contact. |
Code |
Codeword for the contact. |
Name |
Name of the contact. |
Passcard |
Passcard number attached to the contact. |
Setting Default Parameters for the Backup Host Program
If you want to run the Backup Host program with the custom default settings for the baud rate, you can create an icon that automatically runs the Backup Host with the settings specified when you launch the program.
Use the following steps to set default parameters for the Backup Host:
1. In the directory in which you installed the Backup Host Import program, find the program icon SBN_BkupHost.exe.
2. Copy the icon to your computer desktop.
3. On your desktop, right-click the icon, and select Properties.
‰ The Properties dialog box appears.
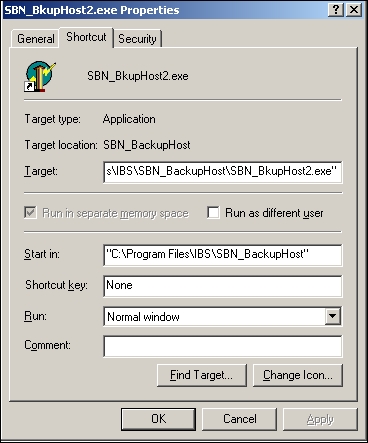
4. In the Target field, after the program name add the baud rate number.
Note: To configure up to two comports in the target field, after the program name add comX baud rate data stopbits comX_baud rate_data_stopbits with no extra spaces.
5. Choose OK to save changes to program target.
Testing the Backup Host
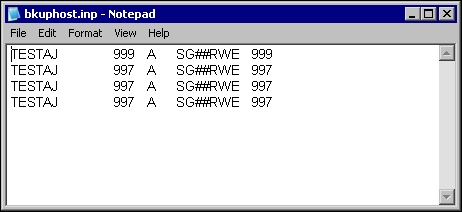
You can use an .inq file to send test data through the Backup Host. When you have an .inp file in the same directory as the Backup Host executable file, the program runs the data at startup from the .inp through the Backup Host and prints tickets. The Backup Host also sends the ticket data to a .dmp file for verification.
You can create the .inp file from a text editor and save as bckuphost.inp. The file must contain the following information:
CID
Zone
Area
Panel signal information.
The following graphic shows an example of a small.inp file.
The Backup Host Import Program
In order to import data into the Backup Host, you must install and use the Backup Host Import program.
The Backup Host Import2 now supports global/template zones.
Installing the Backup Host Import Program
The SBN release disk contains a Backup Host Import directory with an Install Shield for the Backup Host Import program.
Use the following steps to install the Backup Host Import program:
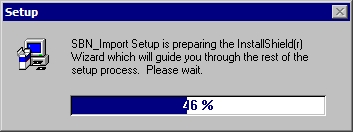
1. In the Backup Host Import folder, double-click the Setup.exe icon.
‰ The Install Shield prepares the Wizard.
‰ The Welcome dialog box opens.
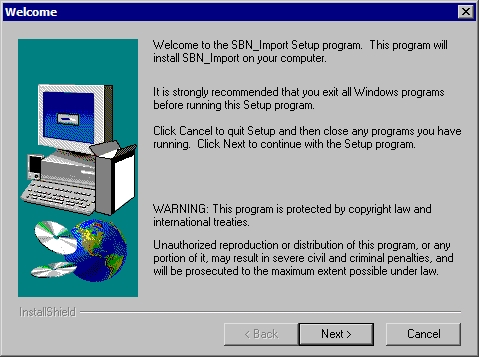
2. Choose Next.
‰ The Start Copying Files dialog box opens and displays the current settings.
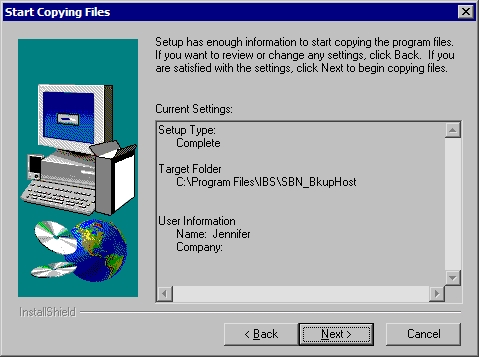
3. Confirm settings.
4. Choose Next.
‰ The Wizard creates the program file and icon and displays the Setup Complete dialog box.
5. Choose Finish.
Operating the Backup Host Import Program
The following sections describe how to operate the Backup Host Import program and how to import data into the Backup Host PC.
The Backup Host Import Window
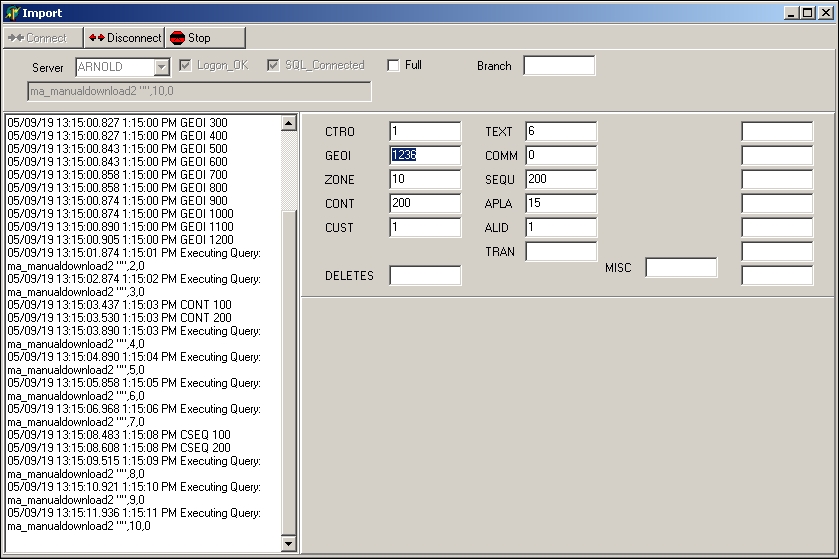
The Backup Host Import window contains fields for setting up the import and viewing the import information as it runs. You can select the options you want to use for each backup import, or you can specify settings in the program icon, so that every time you open the import program the import starts automatically with default parameters.
The following graphic shows the Backup Host Import window.
Field Descriptions
The following table describes the fields in the Backup Host Import window.
Field |
Description |
Server |
Name of the server to import data from. |
Full |
Check box to indicate a full import. When blank the program runs an incremental import. |
Branch |
Branch ID to specify branch for import. |
Procedure |
Displays the procedure being executed against the server. |
CTRO |
Number of control records imported. This field only used during incremental downloads. |
GEOI |
Displays the number of agencies imported. |
ZONE |
Displays the number of zones imported. |
CONT |
Displays the number of contracts imported. |
CUST |
Displays the number of customers imported. |
TEXT |
Displays the number of Action Plan Texts imported. |
COMM |
Displays the number of Temporary comments imported. |
SEQU |
Displays the number of Sequence Numbers from the Action Plans imported. |
APLA |
Displays the umber of Action Plans imported. |
MISC |
Displays the number of Miscellaneous fields imported. The seven unlabeled fields to the right represents the seven sub-categories of MISC. |
DELETES |
Displays the number of deleted records imported. |
Setting Default Parameters
If you want to run the Backup Host Import program with the same parameters whenever you launch the program, you can create a custom icon defined with default parameters.
Use the following steps to set default parameters for the Backup Host Import Program:
1. In the directory in which you installed the Backup Host Import program, find the program icon SBN_Import.exe.
2. Copy the icon onto your computer desktop.
3. On your desktop, right-click the icon, and select Properties.
‰ The Properties dialog box appears.
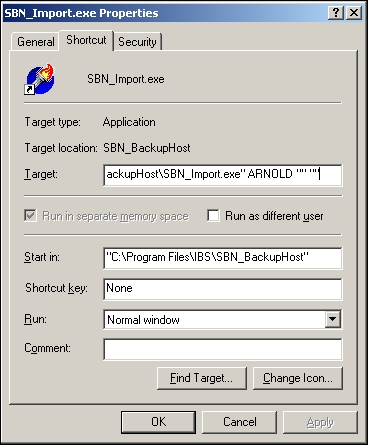
4. In the Target field, add the following text after the program name:
Server Name \ Type of Import \ �Branch�
For Example: ARNOLD 0 �0111� downloads new records from Branch 0111 located on the server ARNOLD.
Variable |
Definition |
Server Name |
Name of the server from which you want to import data. |
Type of Import |
1 — Full import 0 — Incremental import (Only imports new records added since the last import.) |
Branch |
Branch number to specify for import. O If you leave this field blank, SBN will include all branches in the import.) |
5. Choose OK to save changes to program target.
Importing Records into the Backup Host
You must first import records from the Host to the Backup Host before operating.
Note: Import2 will now reset the error file every time it runs.
Use the following steps to import records into the Backup Host:
1. Start the Backup Host Import program.
‰ The program opens with a blank window.
2. Complete the following fields:
l In Server — select the server.
l In Full — enter a check mark if you want to import all records.
l In Branch — type a specific branch, if needed.
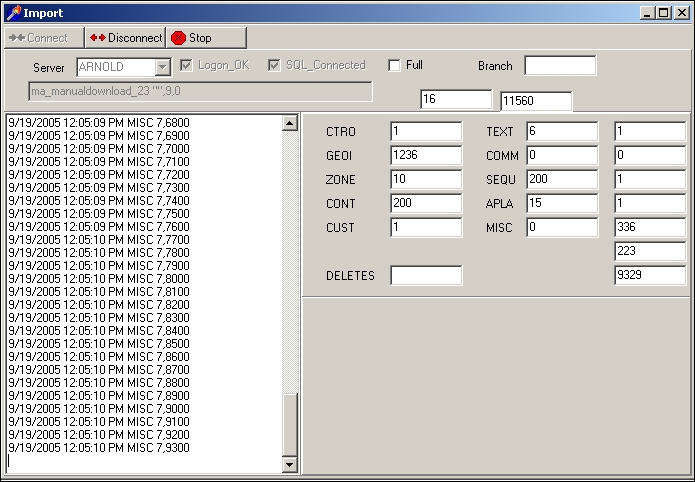
3. Choose Connect.
‰ The Backup Host Import program begins to import data.
Modifications and Updates to Backup Host
The following table lists modifications and updates to the Backup Host document.
Mod Number |
Date |
Description |
07.79.22847, 08.79.09335, 07.79.22862 |
11/14/13 |
Added Get HTTP field to Backup Host ticket |