
Start Here
innovative-nats is the one shared message broker per server. Every Innovative product on that server publishes its logs and status to this broker and reads its connection details from one file, so there is only ever one broker to run, secure and troubleshoot.
You install it once per server. Product installers find it, check that it answers, and register themselves as users of it. When it is missing, a product installer runs the innovative-nats installer for you as part of its own install.
What you get
- Service name:
innovative-natson every platform - a Windows service, or the systemd unitinnovative-nats.serviceon Linux - Client port: 4222, listening on this server only unless the server joins a cluster
- Status page: port 8222, always reachable from this server only
- Message storage (JetStream): always on, so a product that restarts does not lose what was sent while it was away
- Connection file:
broker.json, which every product reads, so no product is configured with a broker address or password by hand
How products connect
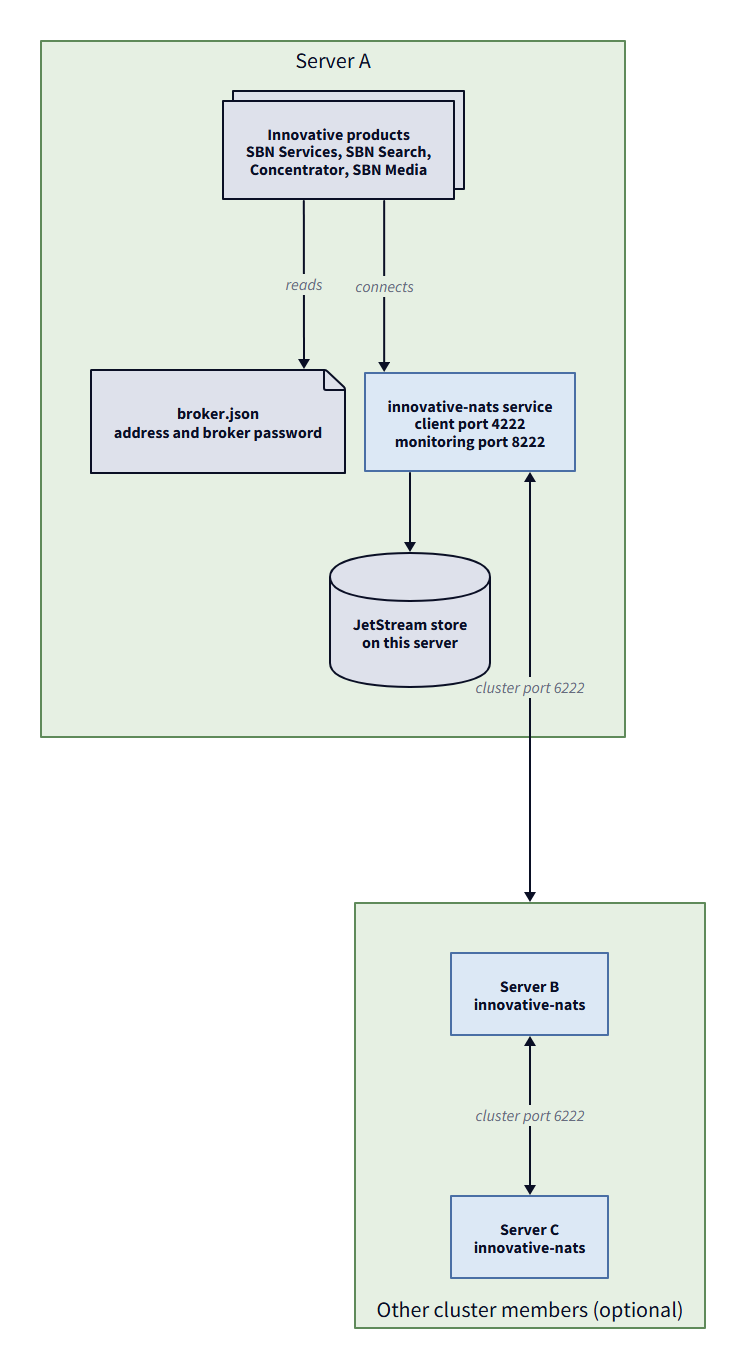
Each product reads the broker's address and password from broker.json and connects to the local innovative-nats service on the client port. The broker keeps its message storage on the same server. When servers are joined into a cluster, their brokers connect to each other on the cluster port.
Item | Windows | Linux |
|---|---|---|
Install folder | Asked during the install. The default is the Innovative folder on the drive the package runs from, for example |
|
Connection file |
|
|
Broker log |
|
|
Message storage |
|
|
Configuration |
|
|
The connection file and its folder can be read only by Administrators and SYSTEM (root on Linux).
Installing
- Download
innovative-nats.<version>.<platform>.<ext>from the Innovative NATS area of your Innovative Releases portal. - Extract it into an empty folder on the server.
- Run the installer from that folder with administrator rights.
Platform | Package | Run it with |
|---|---|---|
Windows |
|
|
Linux |
|
|
The installer first checks whether a broker is already on the server. When one is found, it is reused and the installer offers management actions only (see Checking, repairing and upgrading below). A broker from an older Innovative product that runs under a different service name is taken over only with your consent: it keeps its port and password, is re-registered as innovative-nats, and the old service is removed only after the new one checks healthy. If the takeover fails, the old broker is restored and started again.
On a fresh install the installer asks these questions, each with a default in brackets that Enter accepts:
Question | What to answer |
|---|---|
| Where the broker's program, configuration, storage and log go |
| The ports products and the status page use. A port that is already in use is refused and the question is asked again |
|
|
| A short site name that appears in the subject of every log message products send |
| Press Enter to have one generated. A generated password is shown once, in green, and is not written to the run log |
| The installer lists every change it is about to make and changes nothing until you answer yes |
When the install finishes, the installer checks the broker end to end - the service is running, the port answers, the password is accepted, a test message goes through, and message storage is enabled - and prints one line per check followed by a summary such as All <n> checks passed. On a Windows desktop it then offers to open the status page.
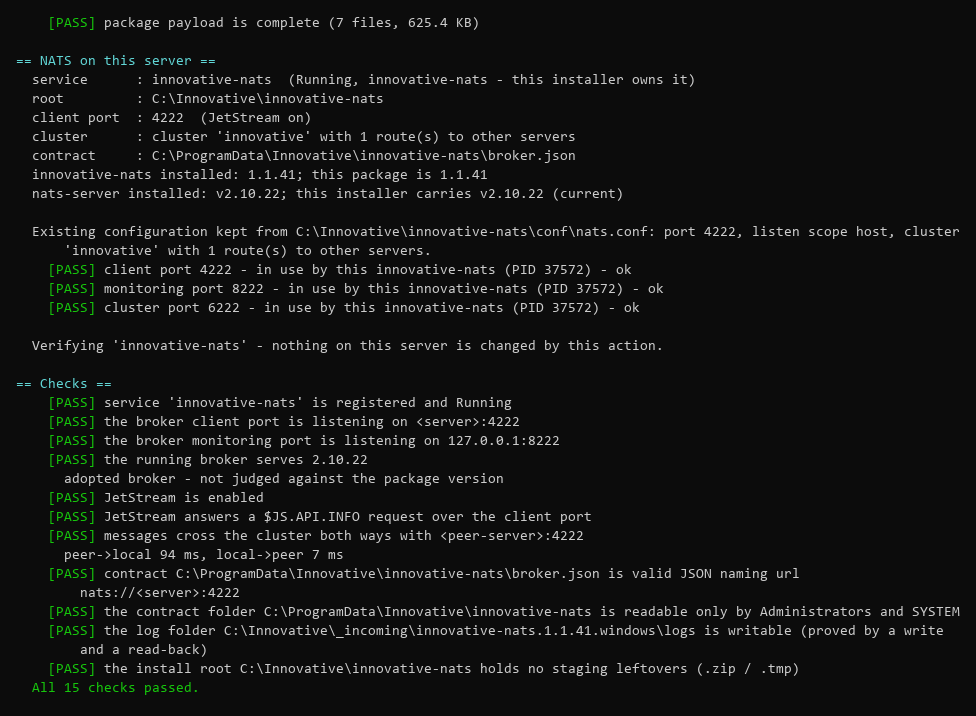
Every run writes a log to the logs folder beside the installer, named install-<date>-<time>.log, and prints its path.
Installing without internet access
The Windows package downloads the pinned nats-server release from github.com during the install and checks its SHA-256 hash before using it. On a server with no internet access, the installer asks Does this computer have internet connectivity?, then names the file and the download address. Download that file on another computer, copy it into the payload folder beside install.ps1, and press Enter to continue. A file already in that folder is used when its hash matches. The Linux package already contains nats-server.
Unattended installs
Product installers and scripts run the installer without prompts. The options most often needed:
Windows | Linux | Meaning |
|---|---|---|
|
| No prompts. An answer the installer would have asked for becomes a documented exit code |
|
| Install folder |
|
| Client port (default 4222) |
|
| Status page port (default 8222) |
|
| Accept client connections from other servers instead of this server only |
|
| Folder holding the nats-server download on a server with no internet access |
|
| Print everything a real run would do, and change nothing |
.\install.ps1 -Help (Linux ./install.sh --help) lists every option and changes nothing.
Checking, repairing and upgrading
Run the installer again on a server that already has the broker. It shows what is installed and offers a numbered menu:
Choice | What it does |
|---|---|
| Exits without changes |
| Regenerates the configuration, restarts the service, rewrites the connection file and runs the checks again |
| Runs the end-to-end checks and changes nothing |
| Prints the broker password and changes nothing |
upgrade | Offered only when the package holds a newer version than the one installed |
| Offered on a standalone server |
| Offered on a cluster member. The server runs standalone again |
The installer copies itself into the install folder, so it can be run from there after the extracted package folder is deleted. Run install.ps1 from the install folder and choose verify this instance to check the broker. From a script, .\install.ps1 -Verify (Linux sudo ./install.sh --verify) runs the same checks on the broker already on the server, changes nothing, and exits with code 0 when every check passes or 12 when a check fails.
The status page
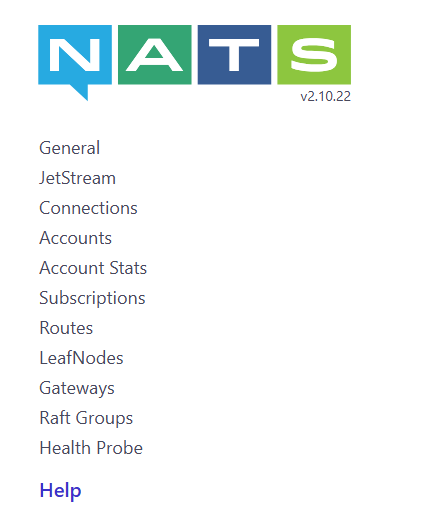
The status page is the broker's built-in monitoring page at http://127.0.0.1:8222 on the broker's own server. It lists links to the broker's general state, JetStream storage, client connections, cluster routes and a health probe. It is reachable only from that server.
Running more than one server: a cluster
A broker runs standalone unless it starts or joins a cluster. In a cluster, message storage is shared between the servers. Windows and Linux servers can be mixed in one cluster.
- First server. Run the installer. On a fresh install answer
2toHow will this server run?; on an installed standalone server choosestart a new cluster with this server as its first member. Enter a cluster name (defaultinnovative) and the cluster port (default 6222). Until a second server joins, the storage check on this server reads[SKIP] waiting for a second server to join. - Every other server. Run the installer. On a fresh install answer
3; on an installed standalone server choosejoin an existing cluster. Give the address of a server already in the cluster and that cluster's broker password. The cluster name is read from that server. Before anything is changed, the installer confirms that the server answers, that the password is accepted, the cluster name, and that the cluster port answers, printing a[PASS]line for each. - Firewall. A cluster member accepts client and cluster connections from the other members. On Windows the installer asks
Open the firewall for machines on this local network?and adds one rule for both ports. On Linux it reports an activeufworfirewalldand offers to open the cluster port.
Three servers keep message storage running when one of them stops. With two servers, storage stops answering on the remaining server while the other is down.
To make a member standalone again, run its installer and choose remove this instance from its cluster.
The broker password
The broker password is created during the install and stored in the connection file. You need it to join another server to a cluster. To read it, run the installer on the server that runs the broker and choose show the broker password. From a script, .\install.ps1 -ShowToken (Linux sudo ./install.sh --show-token) prints it and changes nothing.
Site-specific settings
The installer generates conf\nats.conf and rewrites it on every run, so edits made to it are lost. For settings the installer has no option for, such as TLS, extra routes or custom limits, put your own .conf files in the conf\site.d folder. The installer never changes those files and includes them in filename order, so a numeric prefix such as 10- controls the order. After adding a file, run the installer again and choose repair this instance so the new file is included and the service restarts.
Uninstalling
Each product registers itself with the broker when it is installed and removes its registration when it is uninstalled. The broker's uninstaller refuses to remove the broker while any product is still registered, and names those products. To remove it anyway and orphan those products, add -IgnoreConsumers (Linux --ignore-consumers).
Run the uninstaller with administrator rights from the extracted package folder:
Platform | Remove the broker | Remove one product's registration only |
|---|---|---|
Windows |
|
|
Linux |
|
|
A full removal deletes the service, the install folder, the configuration, the logs, the message storage and the connection file folder. Before it starts, it lists what it is about to delete and asks for confirmation. To keep the message storage, add -KeepData (Linux --keep-data); a later install into the same folder reuses it.
Every uninstall writes uninstall-<date>-<time>.log to the logs folder beside the uninstaller.
If something goes wrong
When a step fails, the installer says what failed, why and what to do next before it stops, and prints the path of its run log. The broker's own log, nats-server.log, records why the broker stopped or is waiting. Common failures and their fixes are on Innovative NATS Troubleshooting. Quote the run log when you contact support.