
SBN Access
SBN Access
SBN Access
Module: Utilities
Overview
SBN Access is a mobile app intended to assist administrators and dealers in viewing information on individual installations and groups of installations connected by the same CID. From this app, administrators may also insert individual CIDs into test.
To use SBN Access, you will need to install the app on the mobile device to be used. This app is available for iOS and Android devices, and may be downloaded from the appropriate app store. Your device's app manager will remind you when a new version is available. SBN Access may also be used via a Web browser.
This document covers the following topics:
Login
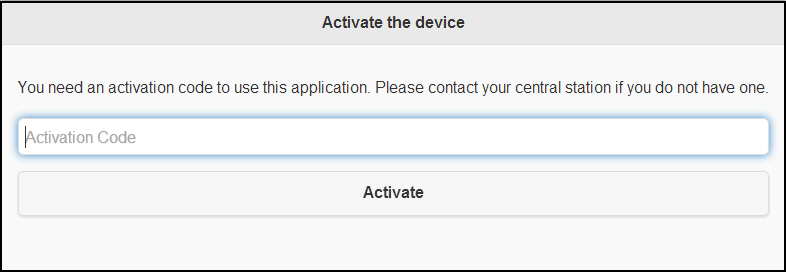
To open the SBN Access page, either enter the URL given to you by your central station into a Web browser and log in, or log in via the SBN Access mobile app. To access the SBN Access login screen, you must activate the mobile device from which you are trying to view. Once activated, you will be directed to the Login screen. Dealers should only enter their company and dealer numbers, separated by dashes (for instance, "XXX-YYYY"),
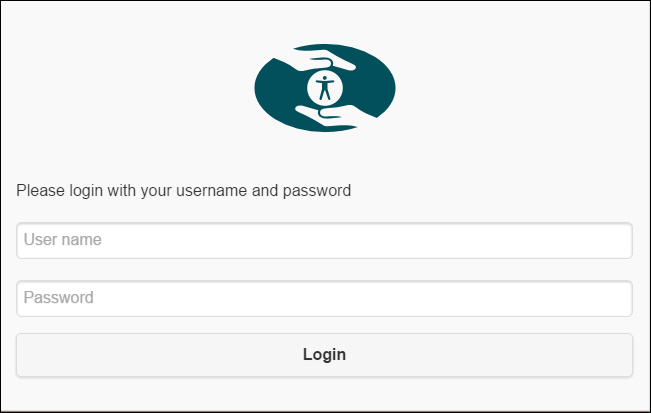
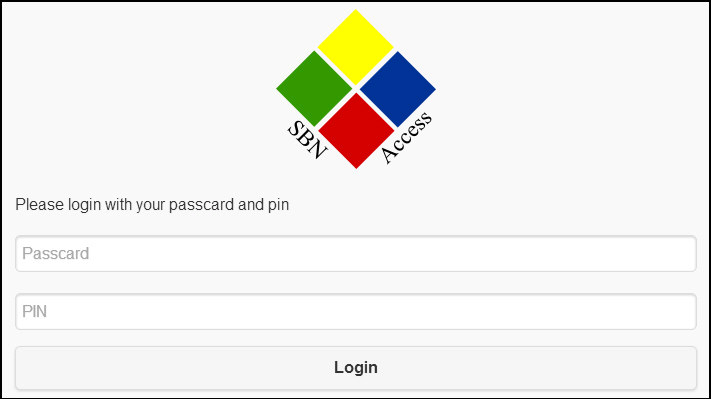
Those working on installations connected by one CID should log in with the company, dealer, and CID numbers, separated with dashes (for example, XXX-YYYY-ZZZZZZZ"). Entering the CID number now requires you to log in with a Passcard and PIN. Passcards and PINs may be generated using Personnel (program #1811) and Dealer User Access (program #1743).
Home Page
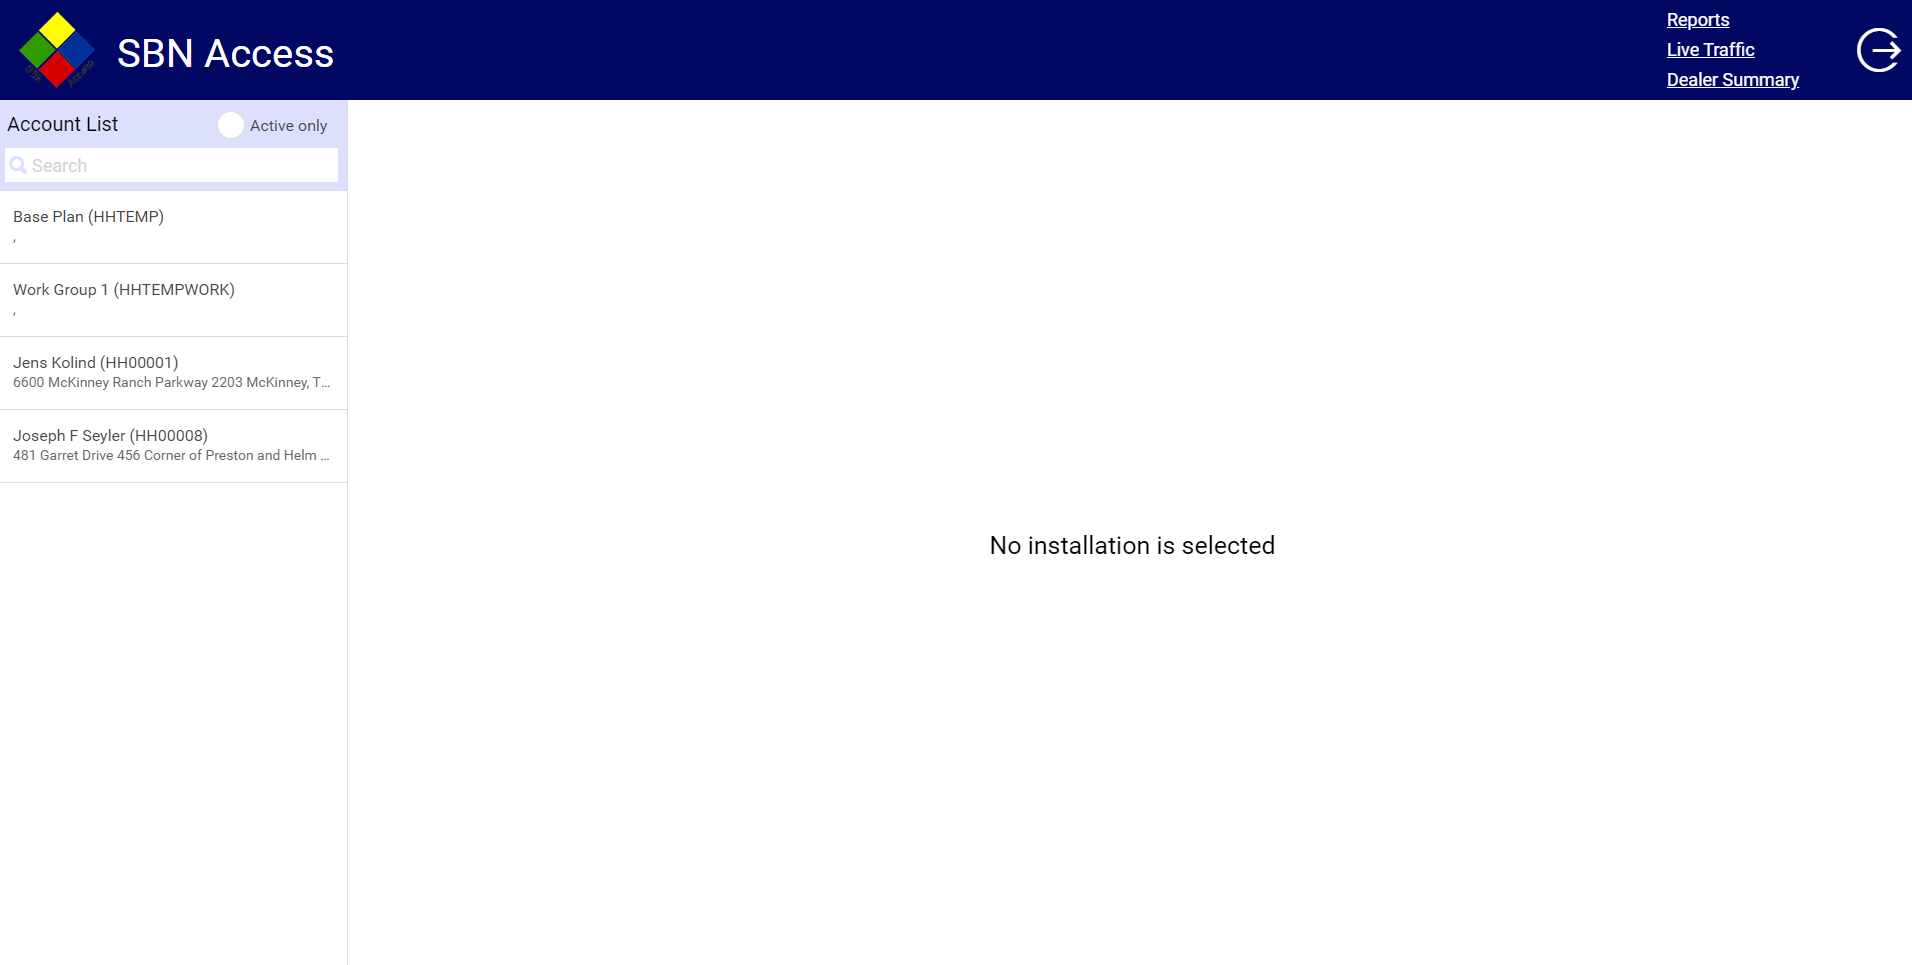
A Dealer will be brought to home page upon logging in. Once here, the Administrator may select an installation from the Account List on the left-hand side.
. 
Administrator Page
The first page appearing after logging in is the Administrator page, which lists all of the installations within the network. Click on the installation's name to open the installation's Info page.
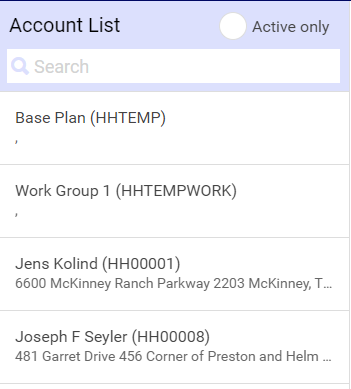
Field/Column Descriptions - Administrator Window
The following table describes the headings and functions used in the Administrator window.
Heading/Function |
Description |
Search: |
Enter a name or other information to search for a specific installation. If the information being typed does not match anything within any of the installation names in the list, the Administrator window will be blank. Clear the information by using the Backspace Key, or by highlighting the information, and deleting it. |
Installation Name: |
The name and CID of the installation, followed below with the installation's physical address, if applicable. Click the Installation Name to view the installation's info page. |
Navigation Bar
When opening any installation from the Administrator page, the subpages feature a navigation bar running along the bottom of the page. Click on any of the buttons to move to a different page listing installation functions. These pages include:

Info (Home)
The Info page contains the installation's address and basic contact information. This information cannot be edited.
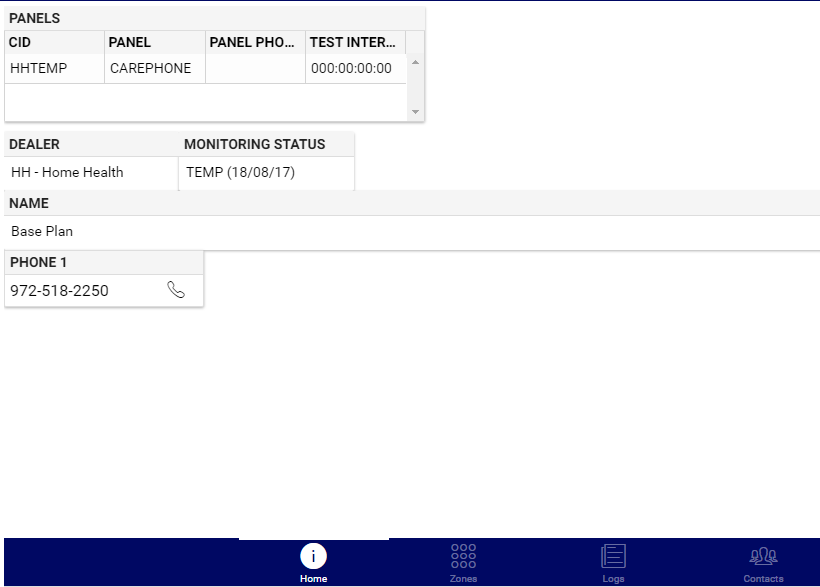
Heading/Function Descriptions - Info Page
The following table describes the headings and functions used in the Info Page. (Note: Depending on the Information that is completed, all fields may not be visible.)
Heading/Function |
Description |
| Panels | |
CID |
Customer Identification Number |
Panel |
Panel Type |
Panel Phone |
Phone number associated with panel |
Test Interval |
Test Interval for the account. |
| Permits | |
Permit |
Permit number, if applicable, with the permit expiration date. |
Type |
Abbreviation that identifies the selected permit type. |
Expires |
Date on which the permit expires. |
| Dealer | |
Dealer |
ID of the Dealer the account is associated with. |
Branch |
ID of the Branch displayed. |
Monitoring Status |
The current monitoring status of the installation. |
Sub Type |
Subscriber Type |
| Customer Information | |
Name |
Name associated with the account. |
Address |
The physical address of the installation |
Comment |
Additional information associated with the account |
Directions |
Directions on how to proceed to location of address. |
Phone 1 |
Primary Phone Number. |
Phone 2 |
Secondary Phone Number. |
Email 1 |
Primary E-mail address. |
Email 2 |
Additional E-mail address. |
Email 3 |
Additional E-mail address. |
Zones
The Zones Page contains the Zone, Area, Code, Type, Priority, Text, Action Plan, Protected Area, and if the Account is in Test.
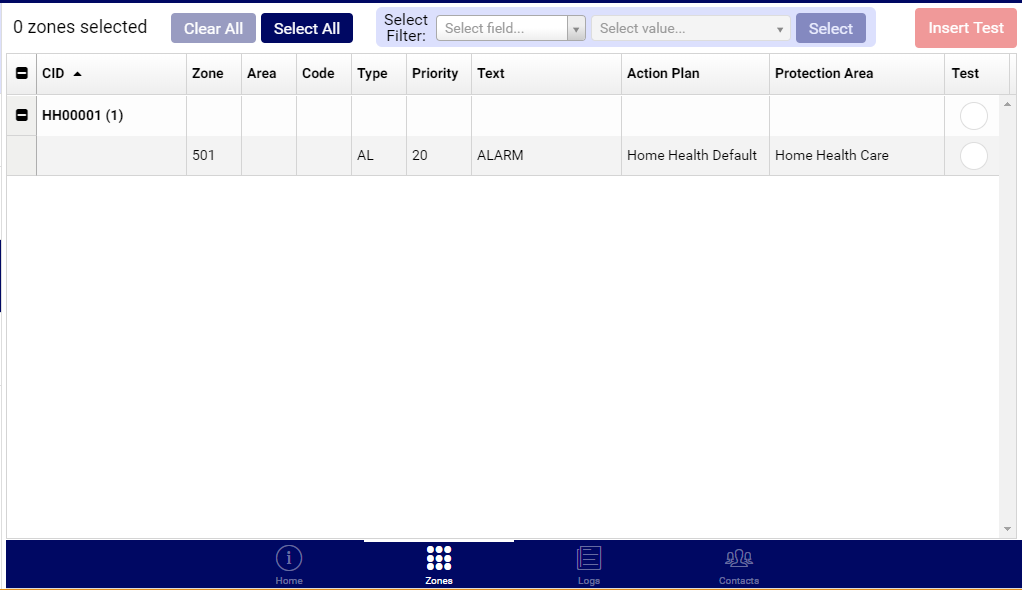
Heading/Function Descriptions - Devices Page
The following table describes the headings and functions used in the Devices page.
Heading/Function |
Description |
Clear All |
Clears all Zones selected. |
Select All |
Selects all Zones associated with a specific CID. |
Insert Test |
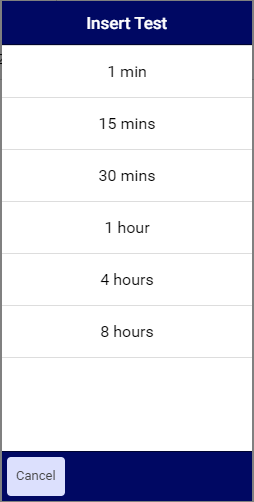
Insert Account into test for interval of 1 minutes up to 8 hours. |
| Select Filter | |
Select Field |
Search based on the columns associated with the CID. |
Select Value |
Value associated with the specific Field user selects. |
Select |
Clicking Select chooses all Zones that match your Search criteria in the Select Filter fields. |
| Zone Grid | |
CID |
Customer Identification Number |
Zones |
The zone number within the installation. |
Area |
The area in the installation in which this zone is located. |
Code |
This field defaults to the zone code defined for the reference zone. |
Type |
The two-letter type code for this zone. |
Priority |
The priority ranking on this alarm, as determined by the central station. |
Text |
The basic description of what the zone covers. |
Action Plan |
Action plan number to which the contact is assigned. |
Protection Area |
Location of the premises protected under this zone. |
Test |
Select this field to individually select which zones to insert into test. |
To put a device in test, hold down the Insert Test button on the right side of the page and select a testing duration.
Logs
The Logs page displays all tests and interactions in the installation for the previous 100 incidents. This information cannot be edited.
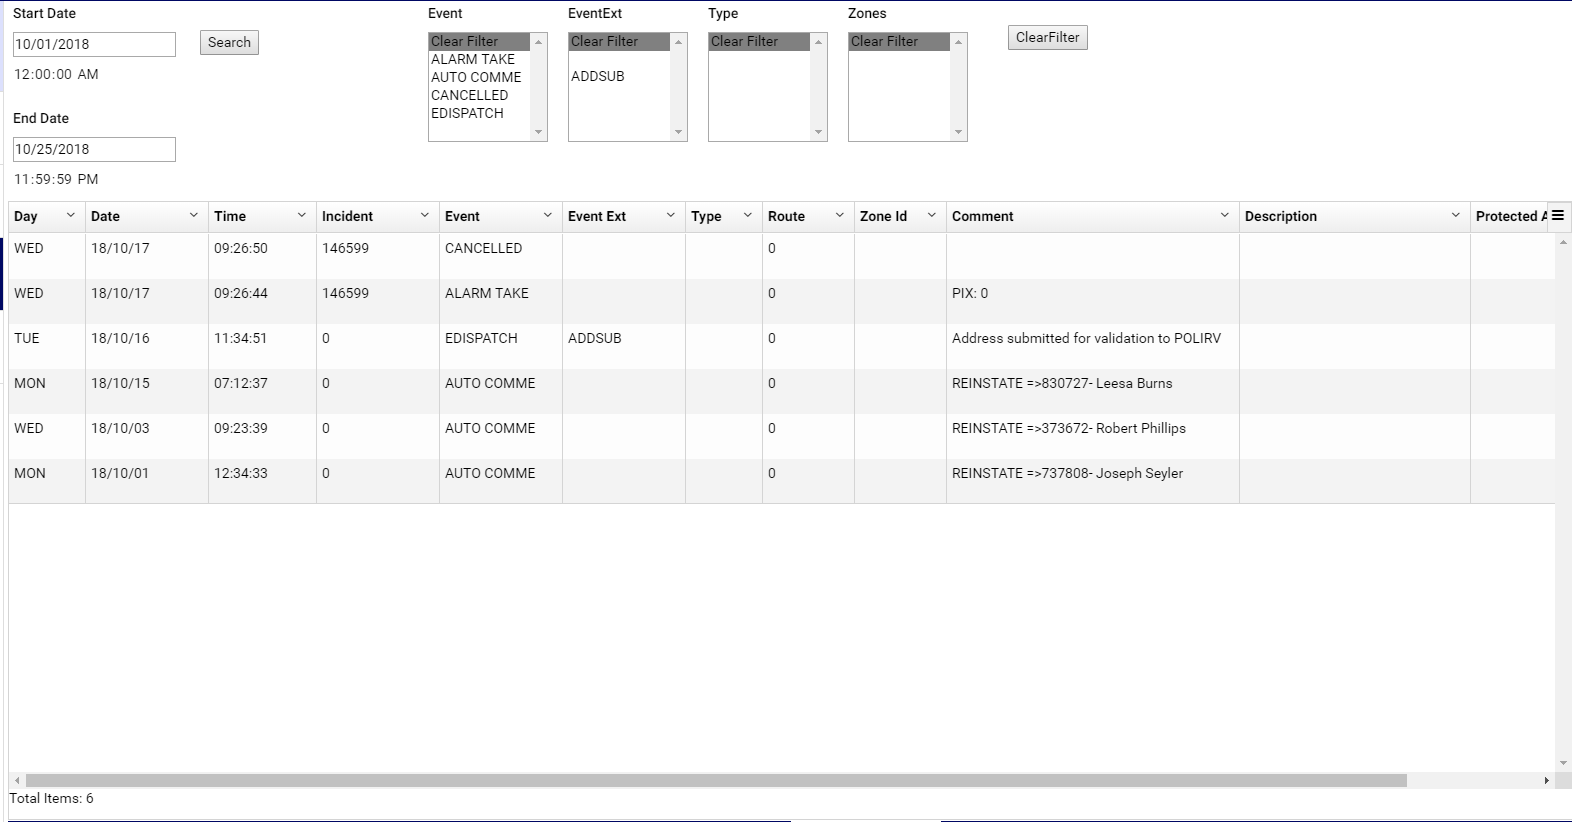
Column Descriptions - Logs Page
The following table describes the columns used in the Logs page.
Column |
Description |
Day |
Abbreviation for day of the week. |
Date |
The date of the listed incident. |
Time |
The time of the listed incident. |
Incident |
SBN-generated incident number for the alarm. |
Event |
List of system and operator actions taken to treat the alarm, with the most current action listed first. |
Event Extension |
Code for the action taken for the incident. |
Type |
The type of incident, if applicable. |
Route |
Will display either 0 or a blank. |
Zone ID |
Numerical ID of the zone. |
Comment: |
Further information on the incident. |
Description |
Additional information related to the particular incident of the installation. |
Protected Area |
Location of the premises protected under this zone. |
Contacts
The Contacts page lists all of the available contact personnel for the installation. This information cannot be edited. Click the icon under each Action on the right side of the page to open the Contact Details page.
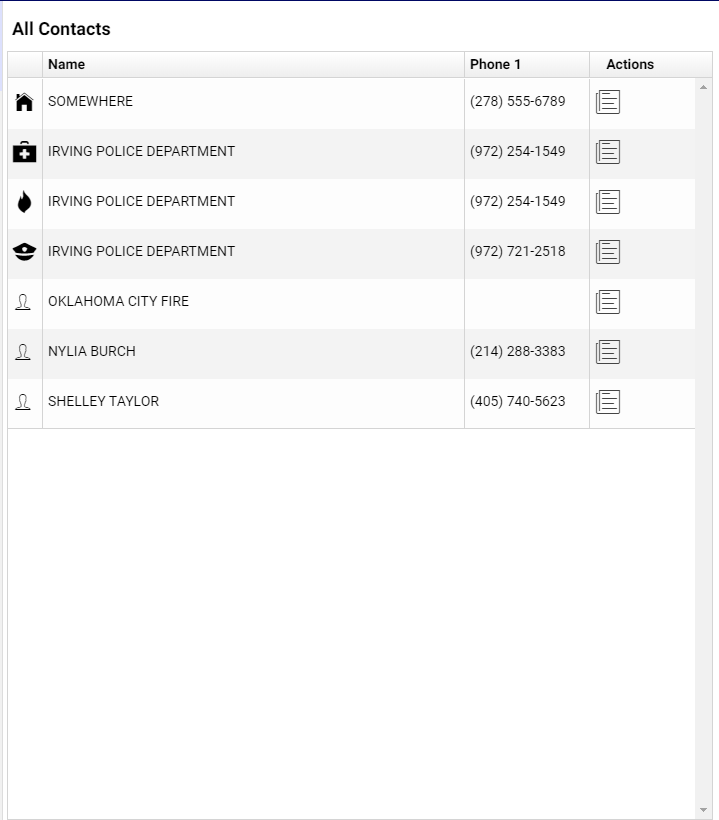
Entries Descriptions - Contacts Page
The following table describes the entries used in the Contacts page.
Entry |
Description |
Name |
The name of the contact. |
Phone 1 |
Phone number of the contact. |
Actions |
When selected, the Agency details pane appears displaying the information for the selected Contact. |
Premise Contact Details
The Contact Details page lists primary and secondary contact information on each installation contact person. This information cannot be edited.
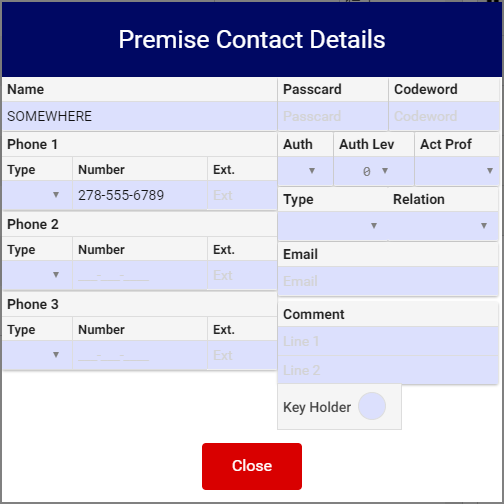
Heading/Function Descriptions - Contact Details Page
The following table describes the fields and columns used in the Contact Details page.
Heading/Function |
Description |
Phone 1: |
The primary telephone number for the contact. |
Phone 2: |
The secondary telephone number for the contact. |
Email 1: |
The primary Email address for the contact. |
Email 2: |
The secondary Email address for the contact. |
Call Lists
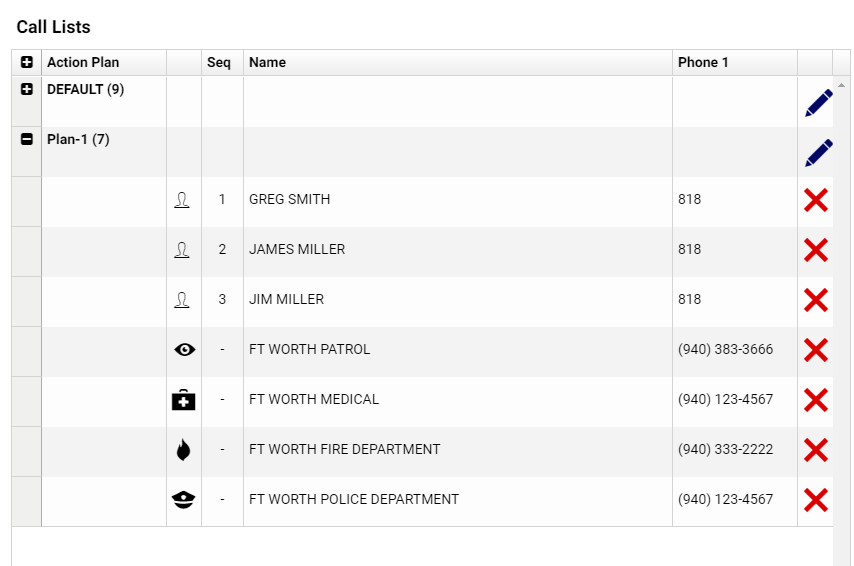
Call Lists are made up of your Contacts in the middle of the page. To create a Call List, drag the selected contact you would like to be in your plan and drop them in the appropriate Action Plan.
Note: Call Lists can be made up of multiple plans.
Note: The same contact may be placed in multiple plans.
Users may reorder the sequence of who gets called first by clicking and holding the name of the contact and dragging the name up or down. If you drag the person's name up, contact will be called higher in the order. If you drag the person's name down, contact will be called later in the order.
To remove a contact from the selected Action Plan, select the red "X" by their name and select "Save" at the top. Select "Cancel" to avoid making changes.
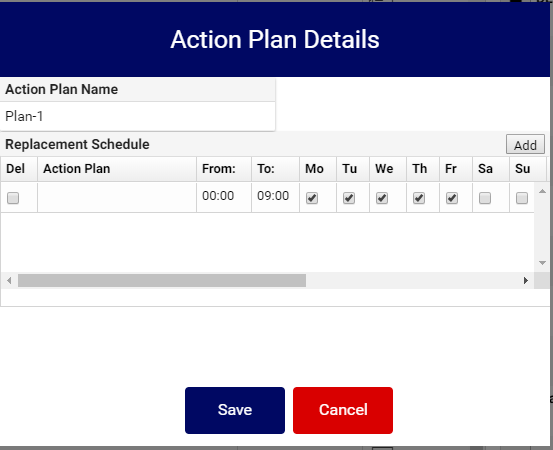
Replacement Schedules
Users may set replacement plans that take priority over the default plan during set days and times. For example, if a user sets Action Plan "X" to be in affect from Midnight. 00:00 to 09:00 in the morning, Monday-Friday, they would select the From and To time's, as well as select each day the plan takes priority. The selected Action plan would then be followed during those selected days and times automatically. When outside of that set schedule, the default Action Plan would take effect, or other Action Plans that a user may have set up.
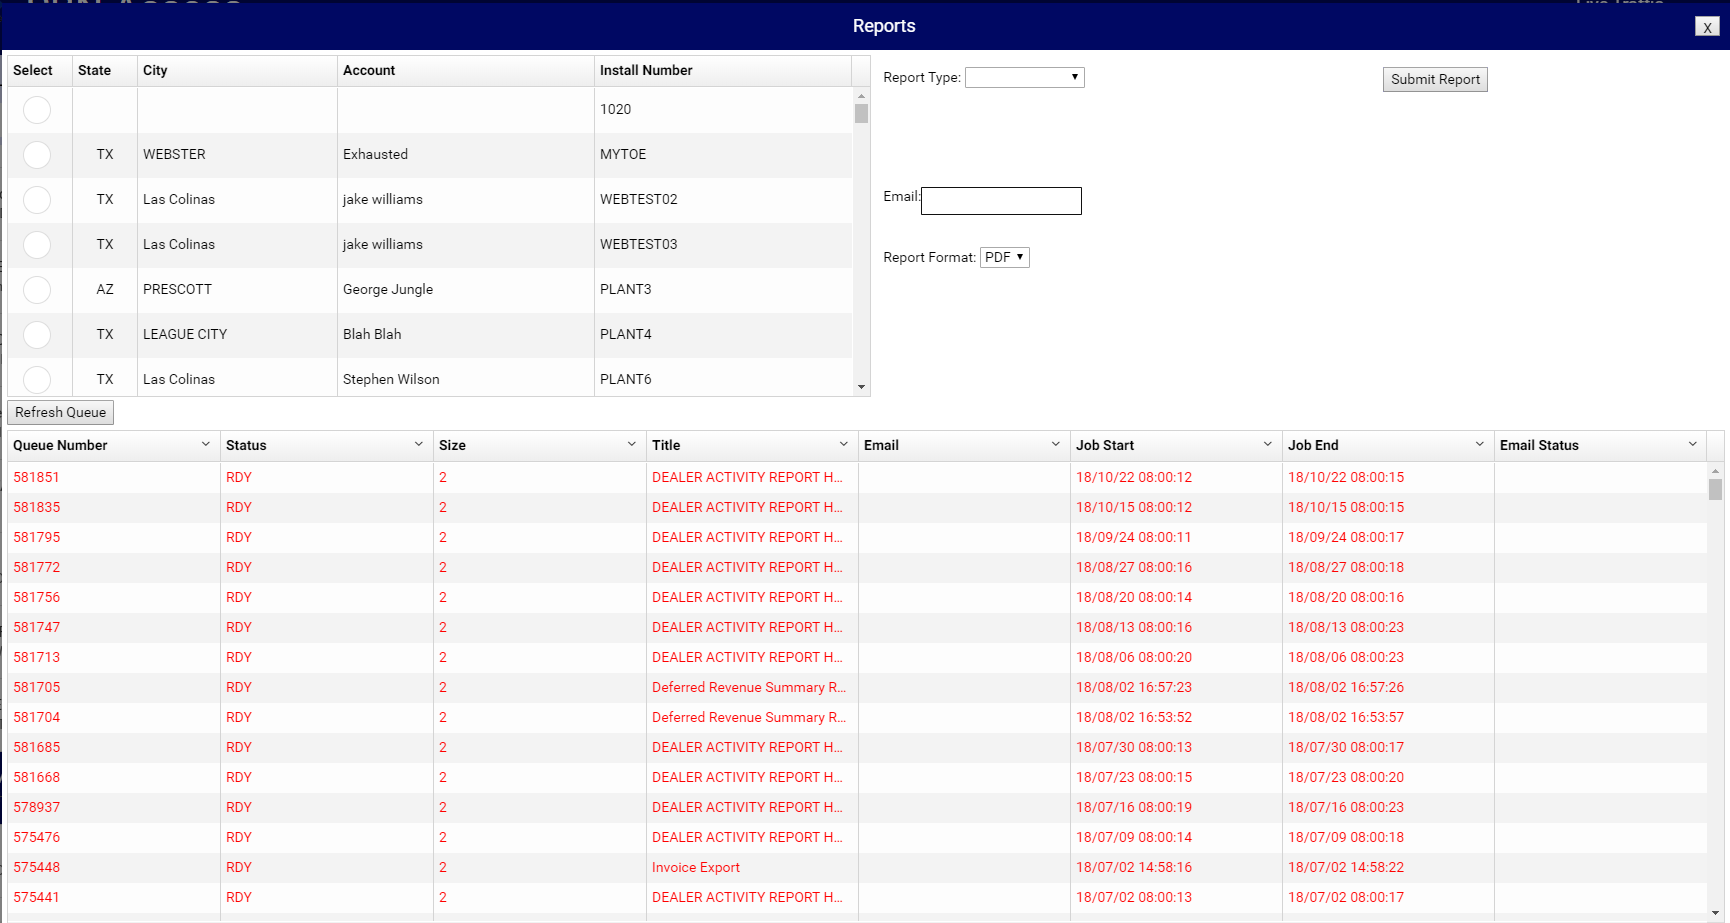
Reports
A user may e-mail a report by selecting the Reports tab in the top-right corner. You may also select for what installations you would like to run the report. The report will allow a user to select from four report types: Alarm Log, Zone Details, Call List Details, and Contact Details. Reports are e-mailed in two formats: PDF and XLS.
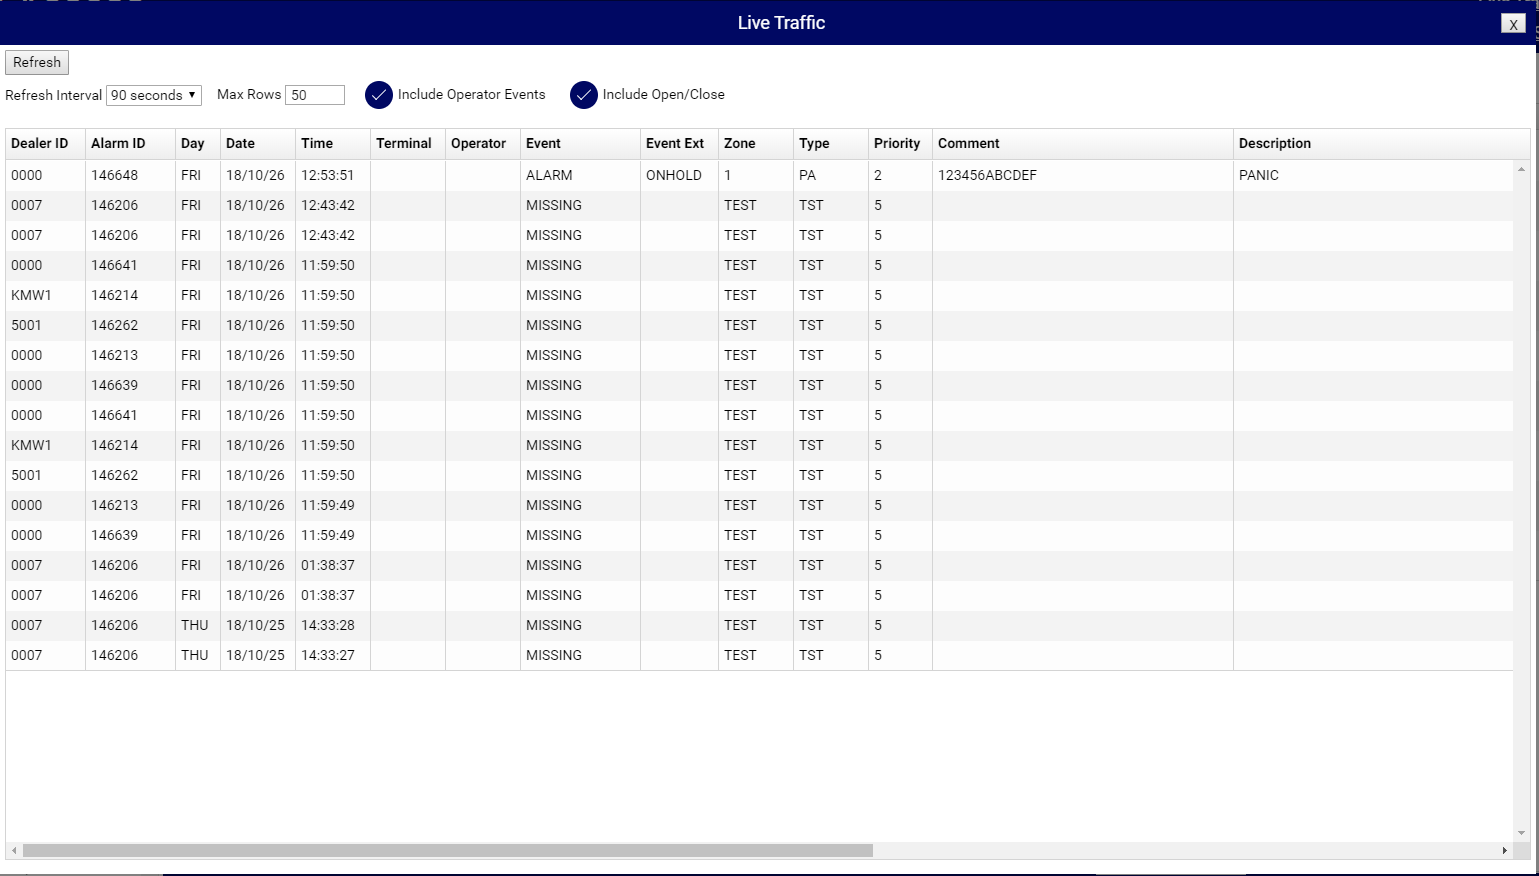
Live Traffic
Users may select the Live Traffic field in the top right corner to view Operator Events and/or Open/Closes. The Live Traffic view will automatically refresh itself based of the interval a user selects.
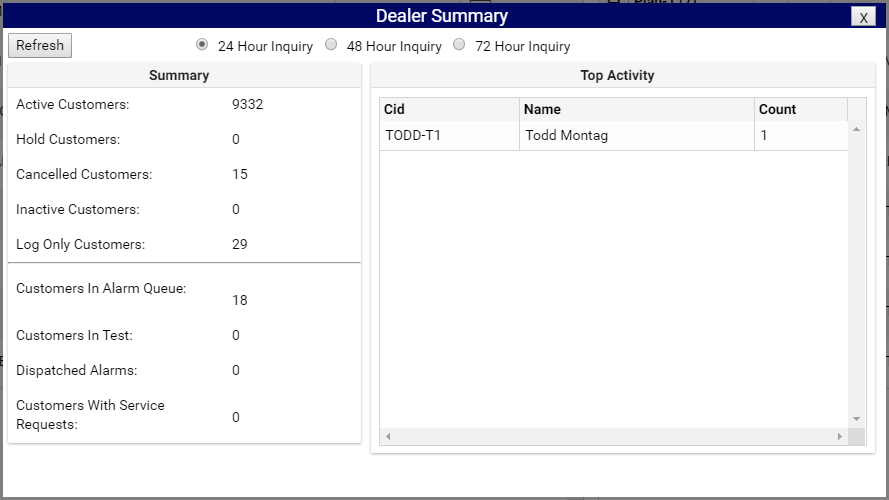
Dealer Summary
A user may view a general summary of activity spanning from 24 hours to 72 hours by selecting the Dealer Summary field in the top right corner of SBN Access. In this view, they can see details related to their customer accounts.
Logout
Use the exit  icon on the far top right of the Administrator
page to Logout.
icon on the far top right of the Administrator
page to Logout.
Button Descriptions - Logout Interface
The following table describes the buttons used in the Logout interface.
Button |
Description |
Logout: |
Click this button to log out of SBN Access. |
Deactivate: |
Click this button to deactivate this account number. You will have to re-activate this account to reach it through SBN Access again. |
Modifications and Updates to SBN Access
The following table lists modifications and updates to the SBN Access document.
Mod Number |
Date |
Description |
07.81.23559, 07.81.23558 |
08/21/14 |
Created document. |
n/a |
02/13/15 |
Updated images. |
07.89.25971, 08.89.11463 |
10/25/18 |
Document Revision. Images updated. |
F1 Help
| Delphi Forms | macidprefixform, ubusacdeprofform |
| Program Numbers | 1743 |