
Floor Plans
Floor Plans
Floor Plans
Module: Account Management
Overview
Use the Floor Plans tab in Data Entry (program #559) to attach floor plan image files to a specific installation. This feature supports the following file types:
-
.jpg (and .jpeg)
-
.bmp
-
.ico
-
.emf
-
.wmf
You can specify a default directory for floor plan images in the Directories tab of the SBN Client Options window. This default directs the file browser in the Floor Plans tab to this folder first when you use the browse feature to link floor plan images to an installation. (See the Setting the Default Directory section of this document for more information.)
Note: You must enable action 559/430 in program #1502 in order to access the Floor Plans tab.
This document covers the following topics:
Navigating to Floor Plans
Use the following steps to access the Floor Plans tab:
1. From the main SBN toolbar, select Menu.
2. From the drop-down menu, select Go To.
3. In the Go To Program dialog box, type in "559" and press Enter.
w Data Entry Master and Basics opens.
4. Choose the Floor Plans tab in the lower pane of Data Entry.
The Floor Plans Tab
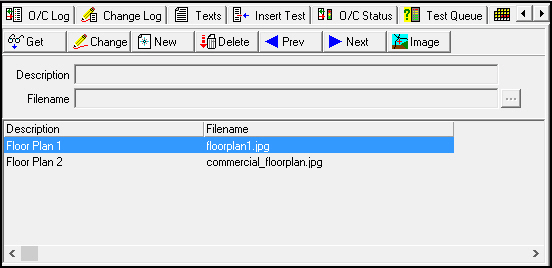
The following graphic displays the Floor Plans tab with sample information.
Field/Column Descriptions
The following table describes the fields and columns in the Floor Plans tab.
|
Field/Column |
Description |
|
Description |
Text description of the floor plan. |
|
Filename |
File name of the floor plan graphic. Note: The field that displays the file name displays the entire file path. The column only displays the file name and extension. |
Linking a Floor Plan
You may link floor plan images to a specific installation.
Use the following steps to link a floor plan to an installation:
1. In Floor Plans, choose New Record.
w The Description and Filename fields open for changes.
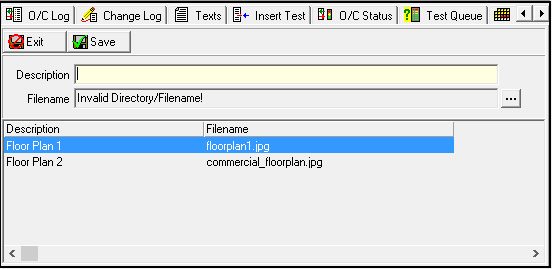
2. Type a description of the file.
3. Choose ... to browse for the file.
w The Browse for Folder dialog box opens.
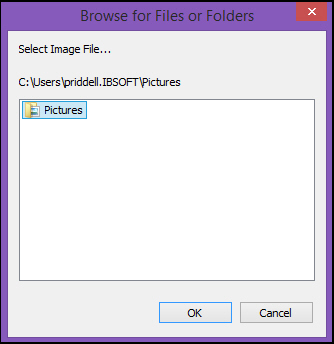
Note: If you have set the default directory in SBN Client Options, it displays as the current folder. See Setting the Default Directory.
4. Select the file name.
5. Choose OK.
w The file name appears in the field.

6. Choose Save.
Changing a Floor Plan
You may change the description of a floor plan, or link a different image to a description.
Use the following steps to change the details of a floor plan:
1. Select the line of the floor plan that you want to change.
2. Double-click on the selection or choose Get Record.
3. Choose Change Record.
w The Description and Filename fields open for changes.
4. Edit the description as necessary.
5. Choose ... to browse for a different file if you desire.
w The file name appears in the field.
6. Choose Save.
Displaying a Floor Plan
Use the following steps to view a floor plan image:
1. Select the line of the floor plan that you want to view.
2. Double-click on the selection or choose Get Record.
3. Choose Display Image.
w The floor plan image opens in the program you have associated with the file type.
Setting the Default Directory
Use the following steps to set the default directory for your floor plan images:
1. From the main menu of SBN, choose View > Options.
w The Options window appears displaying the Regional tab.
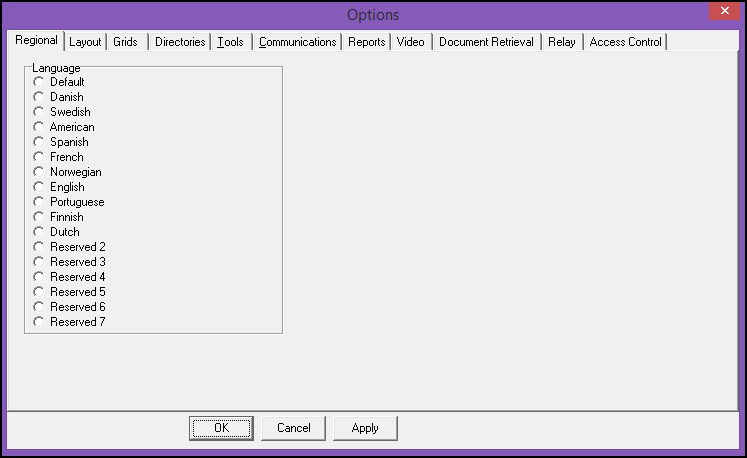
2. Select the Directories tab.
w The Directories tab appears.
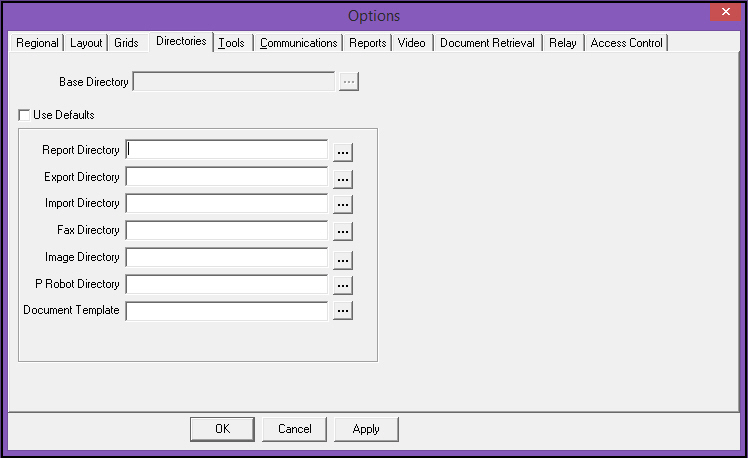
3. Choose ... next to the Image Directory field.
w The Select Directory dialog box opens.
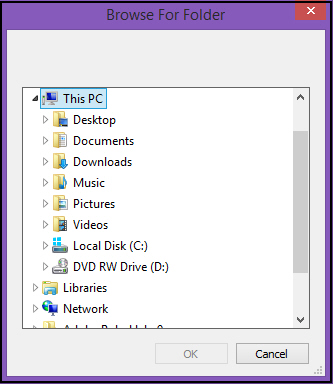
4. Browse to the folder or drive you want to set as the default.
5. Choose OK.
w The directory path appears in the Image Directory field.
6. Choose Apply.
7. Choose OK.
Related Programs
The following table lists programs related to Floor Plans.
|
Program |
Number |
Document Link |
Description |
|
Data Entry Master and Basics |
559 |
View and edit customer installation details. Access the Floor Plans tab from this program. |
|
|
SBN Client Options |
N/A |
Customize the way SBN displays information throughout the system. Specify a default directory for Floor Plan images in the Directories tab of the Options window. |
|
|
Actions |
1502 |
Create profiles that restrict or allow users access to specific programs and functions. Enable action 559/430 in your action profile in order to access the Floor Plans tab. |
Button Functions
The following table displays the buttons, describes the shortcut keys, actions, and functionality.
|
Button |
Name |
Shortcut Key |
Action |
Description |
|
|
Get Record |
Alt+f1 |
No actions for the buttons in this tab. |
View the selected floor plan description and file name. |
|
|
Change Record |
f2 |
Alter the selected floor plan description and/or file name. |
|
|
|
New Record |
f3 |
Create a new floor plan description and file name. |
|
|
|
Delete Record |
shift+f10 |
Remove the selected floor plan from the installation. |
|
|
|
Previous Record |
f4 |
View the previous floor plan description and file name. |
|
|
|
Next Record |
f5 |
View the next floor plan description and file name. |
|
|
|
Display Image |
shift+f7 |
Open the floor plan image in the program you have associated with the file type listed. |
|
|
|
Browse (no label) |
no shortcut |
Browse for the image file you want to link to the installation. |
|
|
|
Exit |
Esc |
Exit without saving changes. |
|
|
|
Save |
Enter |
Save the existing record. |










Modifications and Updates to Floor Plans
The following table lists modifications and updates to the Floor Plans document.
|
Mod Number |
Date |
Description |
|
N/A |
05/29/09 |
document rewritten |
|
07.02.20023, 08.03.07754 |
08/19/10 |
added Delete button |
|
n/a |
7/18/14 |
Images updated. |