
Data Entry Master and Basics
Module: Account Management
Overview
Use Customer Service/Data Entry Master (program #559) and the Data Entry Basics tab to enter customer contact and monitoring information about new alarm system installations. From Data Entry you can also search for, edit, and maintain information on existing installations. Using Data Entry and all the Data Entry tabs, you can set up and maintain details for every aspect of an installation, such as how to handle alarms from each zone at the premises, determine whom to contact in the event of an alarm, schedule and track equipment maintenance, and test alarm signals. You can use this information to provide customer service for a new or existing installation.
This document covers the following topics:
Navigating to Data Entry Master
Interactive_SQL_Email_and Phone2_Command
Customizing the Order of Program Tabs in Data Entry
Creating an Installation Record
Changing an Installation Record
Importing Zones or Action Plans
Toggling Between Operator and Premises Time
Document Retrieval and Scanning
Jumping Between Billing and Monitoring SBN Sessions
Entering Blue Field Information
Exporting Installation Data into Document Templates
Inserting Installations into the PSAP Queue
Navigating to Data Entry Master
Access Data Entry from the SBN main menu or from Marketing (program #562) by choosing the Jump to Data Entry/Cust Serv button. When working with a new inquiry and installation in Marketing, use Jump to Data Entry/Cust Serv to access Data Entry. If you want to make changes to an existing installation record, choose Customer Data (program #559) from the main menu of SBN.
Use the following steps to access Data Entry Master from the main menu:
1. From the main SBN toolbar, select Menu.
2. From the drop-down menu, select Go To.
3. In the Go To Program dialog box, type in "559" and press [Enter].
w Data Entry Master and Basics opens.
Jumping to Data Entry From Marketing
When you create an inquiry in Marketing (program #562) and choose Jump to Data Entry/Cust Serv, SBN imports some of the information from the sales process into the Data Entry program. If you save the new installation that you create after jumping to Data Entry from Marketing, SBN creates an action plan for that account. SBN populates the action plan with the contacts from the Marketing Basics tab. When you save a new installation that you create after jumping from Marketing, SBN automatically creates a service ticket with a default status defined by option sv045. If the Email 1 and Email 2 fields in Data Entry are blank, then the information in the Email Address 1 and Email Address 2 fields in Marketing will be imported into Email 1 and Email 2. Option bl266 must be turned ON for this feature to import the data from Marketing.
Data Entry Options
Options control many of the functions in the Data Entry program. The following list describes the options related to Data Entry. For detailed information on each option and its default setting, see SBN Options.
Option albgcol - A numerical value that can be set anywhere from 0-5 that changes the background color of the Alarm Log. Each number represents a color. Colors include: 0 (light gray), 1 (dark gray), 2 (black), 3 (light blue), 4 (dark blue), and 5 (white).
Option aqbgcol - A numerical value that can be set anywhere from 0-5 that changes the background color of the Alarm Queue. Each number represents a color. Colors include: 0 (light gray), 1 (dark gray), 2 (black), 3 (light blue), 4 (dark blue), and 5 (white).
Option ba139 - When on, the installation number must be unique in SBN and the dealer ID can be reused. When off, both the installation number and the dealer ID must be unique.
Option ba142 - When on, the installation date defaults to the current date when you save a new installation record. When off, the Installation Date field remains blank unless you enter a date.
Option ba198 - When on, the Mail Group fields in the Basics tab appear as drop-down menus that originate from program #1800. When off, the drop-down menus do not appear, and you may type any mail groups in the fields.
Option ba239 - When on, SBN automatically enters data in the State field based on the entry in the Zip Code field.
Option ba286 - When this option is on, SBN creates an index on the Member Number in the Installation pane of Contract Basics. This makes searches faster. This option works with option ba201 and option ba343.
When option ba286 is ON the pop up for the member search results will display up to 1500 rows, it was previously set at 50 rows. If option is off, no search results will populate.
Option ba288 - When on, SBN uses the Panel Phone number of the second CID for caller ID purposes rather than the Telco number in the Basics tab. When using Event 110, comments entered in alarm call will auto-populate into the subsequent CID rows, creating a new CID.
Option ba320 - When on, SBN compares the caller ID to the SIM card number. When off, SBN compares the caller ID to the Panel Phone number in the CID grid.
Option ba332 - When on, SBN uses a custom automatic generator that embeds the generated installation number into the CID number for each line in the CID grid.
Option ba385 - When on, you may run separate SBN sessions for Billing and Monitoring and jump between the two sessions. The Bill/Mon Jump button only appears when you start SBN as a Billing or Monitoring session and option ba385 is on. See Jumping Between Billing and Monitoring SBN Sessions for more information.
Option ba390 - When on and you choose Copy Current Record, SBN does not clear the Installation Date field in the Basics tab if you choose not to clear required fields. If this option is on and the Installation Date field is protected if filled in program #1843, SBN copies the installation date, and you cannot modify it.
Option ba422 - When on, if you select the Misc49 (Secondary Archive) check box in the Basics tab, SBN stores the data from the Alarm Log and O/C Log in a secondary archive when you choose Archive in the Alarm Log tab. Background tasks 61, 62, and 63 determine what data SBN moves into the secondary archive.
Option ba429 - When on and you select the Protected if filled check box for the app_col1 (CID) in the CID_grid of Required Fields (program #1843), SBN restricts users from changing the first CID in the CID grid.
Note: This restriction works regardless of the user's action profile.
Option ba434 - When on and you press [CTRL+B] in Data Entry, SBN first matches the branch in the Installation Branch field with a record in Branch Call List (program #1506) when Branch Call List opens. If there are no Branch Call List records for the installation branch, SBN then matches the installation dealer with a Branch Call List record. When this option is off and you press [CTRL+B] in Data Entry, SBN first matches the installation dealer with a record in Branch Call List when the program opens. If there are no Branch Call List records for the installation dealer, SBN then matches the installation branch with a Branch Call List record.
Option ba477 - Defines the mapping software application that SBN opens when you choose the Map button. If you enter the word google (in lowercase letters) as the value of this option, SBN opens the website maps.google.com on the latitude and longitude entered for the selected installation. If this option is blank, SBN launches Microsoft MapPoint when you choose the Map button.
Option ba479 - When on, SBN accepts free-form text in the Version column of the CID grid. When off, the Version column of the CID grid displays a drop-down menu that contains the only valid selections for the column.
Option ba480 - When on, SBN only allows users to access contracts and installations associated with the business unit types included in the user's selected business unit access profile in program #1811. When option ba480 is off, the business unit access restriction is not active.
Option ba481 - When on, SBN opens Microsoft MapPoint on the installation address when you choose the Map button, even if there are values entered in the Latitude and Longitude fields. When option ba481 is off, SBN opens MapPoint on the latitude and longitude of an installation when you choose Map.
Option ba482 - When on, SBN sends an email to the address in the E_mail1 field of program #1530 for the installation branch when the monitoring status of an installation changes.
Option ba483 - Use this option to define the message ID in program #1766 that contains the text of the email that SBN sends when the monitoring status of an installation changes. (Option ba482 must be on for SBN to send this email.)
Option ba484 - When on, SBN sends an email to the address or email distribution group defined by option ba486 when the permit type of an installation changes in the Basics tab of Data Entry.
Option ba485 - Use this option to define the message ID in program #1766 that contains the text of the email that SBN sends when the permit type of an installation changes in the Basics tab of Data Entry. (Option ba484 must be on for SBN to send this email.)
Option ba486 - Use this option to define the email address or email distribution group (from program #1898) to which SBN sends an email when the permit type of an installation changes.
Option ba511 - Use this option to create an assigned generating source code for Communication Log entries created through the Checkbox1 and Checkbox 2 fields.
Option bm_bserv - Defines the default Billing server to access when you choose the Bill/Mon Jump button. See Jumping Between Billing and Monitoring SBN Sessions for more information.
Option bm_mserv - Defines the default Monitoring server to access when you choose the Bill/Mon Jump button. See Jumping Between Billing and Monitoring SBN Sessions for more information.
Option gpsweb - Defines the URL that opens when a user chooses the Lat/Long Data button and lists the variables that SBN replaces with the values from the selected installation and passes to the web site.
Option ma044 - This is a static on/off option, If the option changed, the fiile ./ma/pro_mabg_jobs_testtimers.sql must be recompiled.
Option ma045 - This is a dynamic value option. The option is 0 by default. This option is dealer-based (ma_installations.deal_id). Any value other than an integer (number) will generate an exception within the stored procedures.
Option ma047 - This is a dynamic value option. This option when On allows for the use of two (2) CID's on the same installation for trouble/restore. If Off, restore must come from different zones.
Option mo007 - When on, open/closed monitoring handles test timer. If off it is a background job.
Option mo137 - When on, the Test Timer Close Only flag in the Basics tab causes SBN to only generate test timers when an account is in Closed status. SBN does not generate test timers when an account is in Open status.
Option mo154 - When on, the passcard extension defaults from the Misc37 field in the Basics tab instead of from the Installation Branch.
Option mo163 - When on, the Dispatch window displays the UL grade in the Misc42 field of the Basics tab instead of the UL grade from the Zones tab.
Option mo191 - When on, and a user logs out of SBN after acknowledging an alarm and another user logs into the same terminal but does not have identical skills, the terminal number is removed and the alarm returned to the queue. When off, the terminal number will not be removed for the next user that logs in.
Option mo193 - This dynamic option controls guard out functionality. If the option is on, after selecting Alt+Ctrl+O, SBN requires you to also complete Alt+Ctrl+D, then Alt+Ctrl+A, and then Alt+Ctrl+F10.
Option mo194 - Dynamic option. When on, a warning message appears for any alarm with an action plan of "0." This prevents an operator from processing an alarm with an action plan of 0.
Option msmp - Defines the country default used with Microsoft MapPoint when you choose the Map button.
Option mo258 - Stores the CID to send duress signal in for the remote worker.
Option pbxdelay - Defines the delay, in milliseconds, between a first click of a phone icon and the recognition of a second click. This can prevent multiple clicking of the phone icon. The default setting is "2000," or 2 seconds.
Option psap - When on, the PSAP interface is active.
Option psapauto - When on, (and option psap is on), SBN automatically inserts an installation into the PSAP Queue when the installation address changes in program #559, (if the monitoring status of the installation has the Include In PSAP check box selected in program #1540).
Option psapgq - The value of this option determines whether SBN sends latitude/longitude updates or address updates to the PSAP Queue. Installations with a GeoCode Quality greater than or equal to the value of option psapgq send latitude/longitude updates to the PSAP Queue. Installations with a GeoCode Quality less than the value of option psapgq send address updates to the PSAP Queue.
Option qas - When on, SBN enables QAS Pro address validation software.
Option qasPath - Defines the server path for QAS Pro Software.
Option qasUpper - When on, all addresses validated by QAS automatically appear in uppercase.
Option sbncolor - Defines the background color of the Data Entry Master window. (The default color is clgray. See the Options S document for a complete list of available colors.)
Option sv037 - Defines the service request work type for which SBN updates the Last Maintenance Date column of the Maintenance field in the Basics tab when you close a service ticket.
Option sv045 - Defines the default status of the service ticket SBN automatically creates when you save a new installation after jumping to Data Entry from Marketing.
Option sv059 - When on, if you access an installation with a bulletin assigned in program #1720 (group type: Service), the Bulletin text window automatically opens.
Option sv062 - When on, SBN displays the Classes grid in the Data Entry Master screen.
Option sv079 - When on, SBN includes the email address(es) from the Email 1 field in new service requests with a blank email for the selected installation.
Option svtmzone - When defined, SBN retains the default time zone when you save an installation.
Option tm013 - When on and a dynamic grouping is entered in this specific format, "<dealer>|<Inst Br>|<Mon Br>" (Dealer Number/Installation Branch/Monitoring Branch), you can enter a new record in the Marketing - Basics program (program #562) and select the dealer number from the Member Dealer dropdown menu, and it will insert your installation and monitoring branch information from your record in the Customer Data program (program #559) record when you click the "Jump DE" button. If the value is blank when clicking "Jump DE," the install branch and monitoring branch remain blank. If an Installation Branch value entered in the option and if you enter a new inquiry in program #562 without choosing a dealer, then the installation branch will auto-populate with the same branch as chosen in the Marketing - Basics program record for the sales branch. You must make sure the branches are valid for the given dealer, otherwise the installation will not save. You can include as many of these groupings in the option as you like, as long as the total length does not exceed the standard 255.
Option temp171 - When on, the text color field for "Member" will change to Red, when off the text is Black in Program #559.
The Data Entry Master Window
The following graphic shows the updated Data Entry Master with installation details.
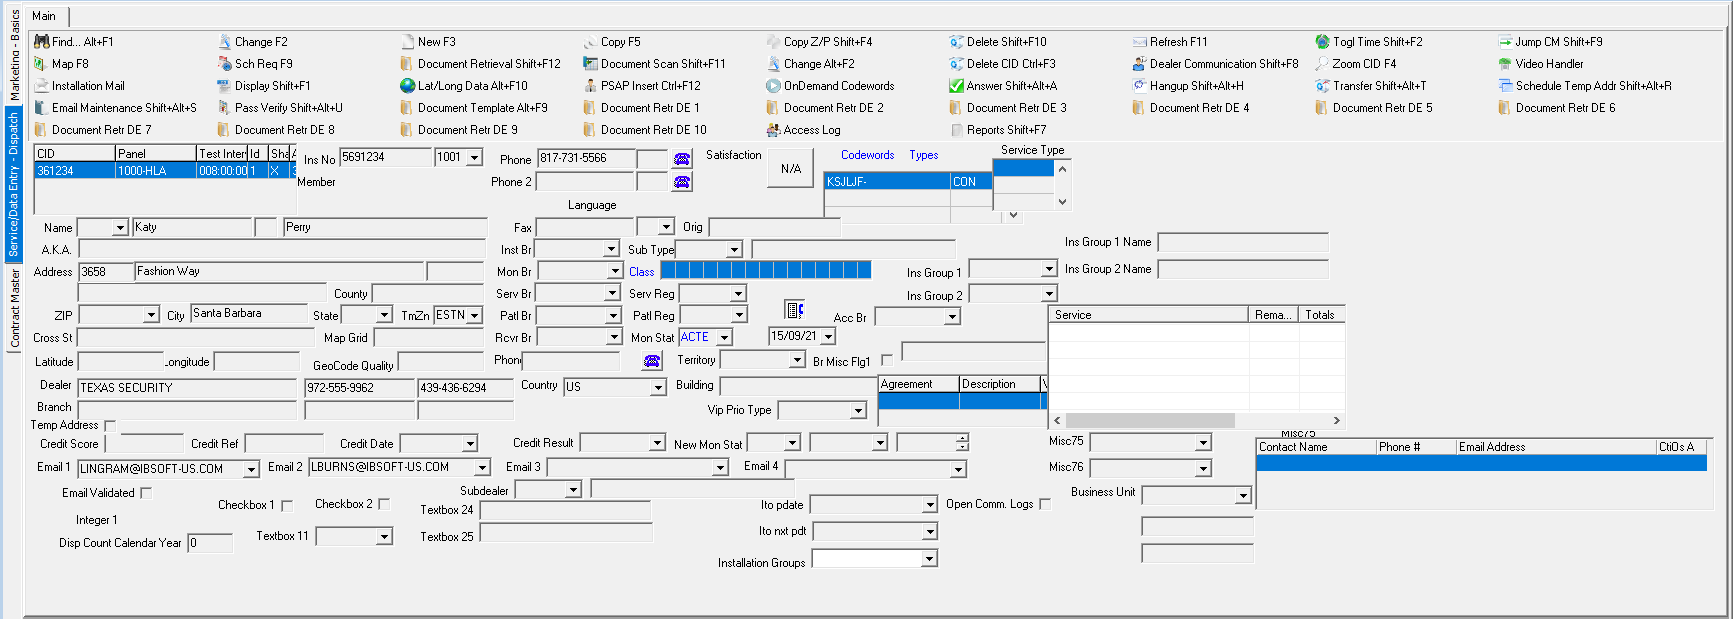
Note: Use option sbncolor to change the background color of the Data Entry Master window. (See the Options S document for a complete list of available colors.) Choose the color of the Installation Number field in Skills (program #1862).
Field Descriptions - Data Entry Master
The following table describes the fields in the Data Entry Master window.
Field |
Description |
CID Grid All fields in this grid are in Required Fields (program #1843). This grid is dynamic, allowing you to change: l The order of the columns l The width of the columns l The column labels |
|
CID |
Customer identification number; used throughout SBN as a unique identifier for this account.
Note: A CID cannot be changed or deleted if it has any incidents in queue. Note: The text color in this field depends on the monitoring status of the CID in the MonSt field of the CID grid. The text color indicates the monitoring status: l Blue - monitored l Purple - log only l Red - not monitored |
Panel |
Panel number that identifies the physical panel installed at this location. (This menu originates from program #1742.) The panel rule of the primary CID (assigned to the panel type in program #1742) determines Action Plan passcard generation requirements for the installation; (see the Panel Rules document for program #1603 in Utilities). If no CID has the Primary check box selected, SBN considers the first CID in the grid the primary CID. Note: If a package is installed at this location, this field may default with the panel associated with that package. For more information, see Packages (program #1777). |
Test Interval |
Define a maximum test interval for the installation. If a signal is not received within this time, SBN generates a missing test signal. Enter test intervals in the format "ddd:hh:mm:ss". For example, a value of 005:15:38:00 sets the interval for 5 days, 15 hours, 38 minutes, and 0 seconds. Note: SBN adds five minutes to test intervals longer than one hour. Leave this field blank if you do not want to use the test timer feature. The Zone Type column in the CID grid of Data Entry works in conjunction with the test timer feature. If the Zone Type column is blank, the test timer feature works as usual. If the field is not blank, only zones with the selected type will update the test timer. The field allows the use of the specific test timers or deferred test timer option. Changes to this field appear in the Change Log. |
ID |
ID used to determine the correct translation table to use in program #1876. This field defaults from Panel Types (program #1742). Note: This field accepts alphanumeric entries in formats 0-9 and A-Z. Letters entered in this field automatically display in uppercase. |
Shared Zone Pickup |
Type an X in this field if the selected CID allows global zones. Note: If a CID allows global zones, the CID column of Zones displays a %. Signals for a global zone can come in on any CID associated with an installation and display a % for each CID within that global zone. |
Address |
IP of the video receiver (Teldat, General Solutions, VideoProtein). |
User |
User login for the video receiver. |
Password |
User password for the video receiver, or master PIN used to arm, disarm, or send other commands via web services for an AlarmNet Vista panel. |
Parameters |
Parameters of the video receiver; not yet functional in SBN. |
External Test Interval |
Customer-defined field; not yet functional in SBN. |
Panel Phone |
Stores the panel phone number; can be stored and updated using Caller ID. Note: SBN inserts the caller ID number in phone number format with hyphens; (example 972-555-5555 rather than 9725555555). |
Caller ID |
An X in this field indicates that the panel sends caller ID information and the system compares information received with that stored in the Panel Phone field(s). Note: If the Panel Phone fields are blank, the system inserts the caller ID data in the first Panel Phone field. SBN inserts the caller ID number in phone number format with hyphens; (example 972-555-5555 rather than 9725555555). If the Panel Phone fields are not blank, the system compares the data received with the data in the Panel Phone field(s). If the phone numbers are different, SBN generates an alarm. |
Primary |
Check box used to indicate the primary CID for the installation. Only one CID may be designated as the primary. The panel rule of the primary CID (assigned to the panel type in program #1742) determines Action Plan passcard generation requirements for the installation; (see the Panel Rules document for program #1603 in Utilities). If no CID has the Primary check box selected, SBN considers the first CID in the grid the primary CID. |
Version |
Displays the version number of the selected panel. (This menu originates from the Revision tab of Panel Types, program #1742.) Note: When option ba479 is on, SBN accepts free-form text in this column. When off, this column displays a drop-down menu that contains the only valid selections. |
Panel Phone (2) |
Alternate panel phone number to compare with caller ID information; user can update this phone number manually. (Panel Phone fields 2-4 are not used when options ba288 or ba320 are on.) |
Panel Phone (3) |
Alternate
panel phone number to compare with caller ID information;
user can update this phone number manually. |
Panel Phone (4) |
Alternate
panel phone number to compare with caller ID information;
user can update this phone number manually. |
MonSt |
Current monitoring status of the CID. (This menu originates from program #1540.) Note: When option ba482 is on, SBN sends an email to the address in the E_mail1 field of program #1530 for the installation branch when the monitoring status of an installation changes. The text of the email comes from the message ID in program #1766 that is entered as the value of option ba483. |
Date |
Drop-down allows selection of the date assigned to the selected CID. User may also manually type date in mmddyy format, or mm/dd/yy as well. If past date is picked, error message will pop up stating "New monitoring status date/time cannot be in the past!" |
Line Type |
Drop-down selection handles CID requirements defined in Line Types (program #1631). |
Comment |
Free-form text comment about the line type. |
Location |
Location of the CID. This field accepts up to 30 characters. |
Comment |
Free-form text comment about this installation. |
Template |
Template CID for the zones of the selected CID. |
Zone Type |
You may select a zone type for test signals. If a zone type is selected in this field, only signals from zones of the selected type reset the Test Interval for the selected CID. Note: Alarm signals on zones with a "-" in the Class field in the Zones Tab refresh the Test Interval for the CID. Static on/off option ma040, off by default. |
New Monitoring Status |
You may select a future monitoring status for the selected CID. Background Task 14 in program #1712 changes the monitoring status of any CID with a status in this field on the selected date. (This menu originates from program #1540.) |
Date |
Select a date when the monitoring status in the New Monitoring Status field and the test interval in the New Test Interval field become active. Background Task 14 in program #1712 changes the status of any CID with a selection in the New Monitoring Status field on the selected date, and changes the test interval of any CID with an entry in the New Test Interval field on the selected date. |
Test Interval |
You may enter a future test interval for the selected CID. Background Task 14 in program #1712 changes the test interval of any CID with an entry in this field on the date selected in the Date field and at the time selected in the Time field. |
Time |
Select a time when the monitoring status in the New Monitoring Status field and the test interval in the New Test Interval field become active. Background Task 14 in program #1712 changes the status of any CID with a selection in the New Monitoring Status field at the selected time, and changes the test interval of any CID with an entry in the New Test Interval field at the selected time. |
UL Grade |
You may enter a UL security grade for the selected CID. (This menu originates from program #1732.) Note: The CID UL grade appears on Format G of Report #2193. If the CID has no UL grade assigned, the installation UL grade (in the Basics tab) appears on Report #2193. |
Notification |
Notification code of the selected CID. (This menu originates from program #1590/35.) Note: This code appears on Format G of Report #2193. |
Line Type 2 |
You may select a second line type for the CID. (This menu originates from program #1631.) |
Comment |
Free-form text comment about the second line type. |
Line Type 3 |
You may select a third line type for the CID. (This menu originates from program #1631.) |
Comment |
Free-form text comment about the third line type. |
Test Interval 2 |
Define an additional test interval for the installation, allowing more time before SBN starts logging missing test signals. If a signal is not received within this time, SBN generates a missing test signal. Enter test intervals in the format "ddd:hh:mm:ss". For example, a value of 005:15:38:00 sets the interval for 5 days, 15 hours, 38 minutes, and 0 seconds. Note: SBN adds five minutes to test intervals longer than one hour. Leave this field blank if you do not want to use the test timer feature. |
Installation Number |
User-assigned number that identifies the installation. This number is unique and works together with the dealer ID. If option ba139 is on, the installation number alone must be unique and the dealer ID can be reused. If option ba139 is off, the installation number together with the dealer ID must be unique. You can automatically generate new installation numbers when you choose Auto Generate Ins#. Note: Choose the color of this field in Skills (program #1862). The Skills field in the Basics tab to which you assign a skill with the highest priority in program #1862 determines the color of the Installation Number field in Data Entry Master. |
Max Missing Test |
This field allows the operator to set the maximum number of consecutive missed test signals that are sent out on an installation. This works in coordination with the set Test Interval. Example: when the test interval it set to once a day, and the Max Missing Test is set to 2, then only 2 missing test signals will be sent to the operator until the service is fixed and reset. This feature is option driven and option ma044 must be on and file ./ma/pro_ma_bg_jobs_testtimers.sql must be recompiled. If the interval in Program 1712 is set to 0, this feature will not work. The interval must be set to greater that 0 to work. |
Base Action Plan |
This dropdown allows an operator to select a different Action Plan for different CID's associated with the same account. |
Last Signal |
Date and time of the last signal received for a specific CID within an installation. |
Dealer ID (No label) This menu contains several columns of information. (This menu originates from program #1537.) Note: The color of this field is determined by the selection in the Background Color field of program #1537 for the selected dealer. |
|
Dealer |
ID of the servicing dealer for this installation. The dealer ID may also identify how your company acquired the account. Note: When option ba473 is on, users can only access installations with a dealer and subdealer (assigned in the Basics tab) that match their Dealer Access Profile in program #1811. |
Contact Name |
Name of the contact at the selected dealer. |
Description |
Name of the dealer. |
City |
City in which the dealer is located. |
Phone |
Primary phone number for the dealer. |
Phone |
Primary phone number for the installation. Note: The color of this field is determined by the selection in the Background Color field of program #1537 for the installation dealer, or by the selection in the Background Color field of program #1530 for the installation branch. If both the installation dealer and branch have background colors defined, the color of this field is determined by the Background Color field of program #1530 for the installation branch. |
Phone
Extension |
Extension for the primary phone number. Note: The color of this field is determined by the selection in the Background Color field of program #1537 for the installation dealer, or by the selection in the Background Color field of program #1530 for the installation branch. If both the installation dealer and branch have background colors defined, the color of this field is determined by the Background Color field of program #1530 for the installation branch. |
Phone 2 |
Secondary phone number for the installation. Note: The color of this field is determined by the selection in the Background Color field of program #1537 for the installation dealer, or by the selection in the Background Color field of program #1530 for the installation branch. If both the installation dealer and branch have background colors defined, the color of this field is determined by the Background Color field of program #1530 for the installation branch. |
Phone
2 Extension |
Extension for the secondary phone number. Note: The color of this field is determined by the selection in the Background Color field of program #1537 for the installation dealer, or by the selection in the Background Color field of program #1530 for the installation branch. If both the installation dealer and branch have background colors defined, the color of this field is determined by the Background Color field of program #1530 for the installation branch. |
Member |
Customer or member number with which your company has a marketing alliance. |
Codewords/Types |
Code words that pertain to the installation. You can enter up to 10 code words (up to 20 characters each) for the installation. The Type menu originates from program #1575. Note: Right-clicking on the blue label or field opens a code word details window, which displays code word definitions. You can only edit code words from Data Entry Master if none of the code words contain a type or expiration date. (See Codewords.) You can enter wildcards to search for a code word within the Codewords field. This feature is only used for codes, not passcards. When you screen scrape the Codewords grid from the Data Entry Master window, SBN disables hot key CTRL+F5, and you cannot access the grid. |
Service Type |
Displays the service types for contracts attached to the selected installation. Note: If multiple contracts are attached to the selected installation, only service types from active contracts appear in this grid. |
Name |
Four fields containing the name of the homeowner or business. l An optional title field for the homeowner if the account is residential. If the account is commercial, leave this field blank. (This menu originates from program #1704/57.) l A first name field for the homeowner if the account is residential. If the account is commercial, leave this field blank. l A middle initial field for the homeowner if the account is residential. If the account is commercial, leave this field blank. l A last name field for the homeowner if the account is residential. If the account is commercial, this field displays the name of the business. This field accepts up to 60 characters. |
Fax |
Fax number for the installation. |
Language |
A language code that indicates reports for the installation print in a language other than English. Note: Functionality is currently limited to French only and reports #2005 and #2033. |
Language Description (No label) |
A language description displayed above the Language field based on the language selected. This field will flashes red. Note: For this field to be displayed, option ba544 must be "On". |
Origin |
Origin of the dealer associated with the installation. (The data in this read-only field originates from program #1537.) |
A.K.A. |
Also Known As or alias. An optional field for a customer who is called by more than one name. |
Installation Branch |
Branch responsible for equipment installation at this location. (This menu originates from program #1530.) This field may fill with a default branch based on the zip code, but you can override the default. Note: This drop-down menu displays areas restricted to Branch/Dealer Profiles assigned to the user. This menu only displays branches associated in program #1530 with the dealer you select for the installation. The color of this field is determined by the selection in the Background Color field of program #1530 for the selected branch. |
Subscriber Type |
The type of customer, such as residential or commercial. (This menu originates from program #1534.) SBN may enter a default in this field based on the customer type selected in Marketing; you can override the default. |
Subscriber
Type Description |
Text description of the subscriber type. (This text originates from program #1534.) |
Address |
Three fields containing the installation address. l The street number for this installation. l The street name for this installation. This field accepts up to 60 characters. l The apartment or suite number for this installation. |
Monitoring Branch |
Location where monitoring occurs. (This menu originates from program #1530.) Note: This drop-down menu is restricted by Branch/Dealer Profiles assigned to the user. This menu only displays branches associated in program #1530 with the dealer you select for the installation. |
Class |
You may select up to 15 codes from the drop-down menus for tracking services provided or other customer-specific information. (These menus originate from program #1555.) Note: Right-clicking on the blue label or field opens the Class Description window in which you view class codes and descriptions. (See Class.) |
Installation Group 1 |
Financial group assigned to this installation; often used to group invoice and report information. Any entry in this field will also appear in the Ins Group 1 field in the Installation Pane of Contract Master (program #548). (This menu originates from program #1868.) |
Installation Group 2 |
Financial group assigned to this installation; often used to group invoice and report information. Any entry in this field will also appear in the Ins Group 2 field in the Installation Pane of Contract Master (program #548). (This menu originates from program #1868.) |
Installation Group 1 Name |
Financial group name assigned to the installation. This field auto-populates when a user selects the Installation Group 1. This field is write protected. |
Installation Group 2 Name |
Financial group name assigned to the installation. This field auto-populates when a user selects the Installation Group 2. This field is write protected. |
Additional
Address |
An additional line for the street address. |
County |
The county of the homeowner or business. Note: SBN may enter a default county based on the Zip Code field, which originates from program #1718. You can override the default. |
Service Branch |
Branch responsible for installation service. (This menu originates from program #1530.) Note: This drop-down is restricted by Branch/Dealer Profiles assigned to the user. This menu only displays branches associated in program #1530 with the dealer you select for the installation. Note: When running maintenance tickets for a branch in Maintenance Ticket Generation (program #701), a Service Branch MUST be assigned. |
Service Region |
Geographic subdivision of the service branch. Use the Service Region to schedule service. (This menu originates from program #1530.) |
ZIP |
Installation zip code. SBN may use a valid zip code to create defaults for the City, County, State, Time Zone, and Branch fields. (This menu originates from program #1718.) Note: You can type a few digits or characters of the zip code to narrow the choices in the menu. If dealer restrictions apply, this menu displays l Those zip codes associated with the same dealer ID that is associated with the selected customer l Zip codes not associated with a dealer ID When you change an installation zip code, if the GeoCode Quality of the zip code record in program #1718 is higher than the GeoCode Quality entered for the installation, SBN automatically updates the installation latitude, longitude, and GeoCode Quality with the values entered for the zip code in program #1718. When you enter a zip code that does not exist in program #1718, a New Zip Code window opens in which you may enter zip code details that SBN uses to create an entry for the zip code in program #1718. |
City |
City of the installation. This field holds a maximum of 50 characters. Note: SBN may enter a default city based on the Zip Code field, which originates from program #1718. You can override the default. |
State |
State of the installation. (This menu originates from program #1510.) This field holds a maximum of 60 characters. Note: SBN may enter a default state based on the Zip Code field, which originates from program #1718. You can override the default. When option ba239 is off, SBN does not create a default based on the Zip Code field. You can change the zip code without SBN generating a state. |
Time Zone |
Time zone of the installation. (This menu originates from program #1739.) Note: SBN may enter a default time zone based on the Zip Code field, which originates from program #1718. |
Patrol Branch |
Branch responsible for sending patrol agencies to this location. (This menu originates from program #1530.) Note: SBN may enter a default branch based on the Zip Code field, which originates from program #1718. This drop-down is restricted by Branch/Dealer Profiles assigned to the user. This menu only displays branches associated in program #1530 with the dealer you select for the installation. |
Patrol Region |
Geographic subdivision of the patrol branch, generally used for scheduling patrol dispatch. (This menu originates from program #1530.) Note: SBN may enter a default region based on the Zip Code field, which originates from program #1718. |
Cross Street |
Nearest major cross street to the installation, for dispatch information. This field accepts up to 60 characters. |
Map Grid |
Map coordinates for the installation site. |
Receiver Branch |
Branch where the backup host resides. If the main system fails, backup monitoring or manual monitoring can occur at this location. (This menu originates from program #1530.) Note: This drop-down is restricted by Branch/Dealer Profiles assigned to the user. This menu only displays branches associated in program #1530 with the dealer you select for the installation. |
Monitoring Status |
Determines whether SBN places alarm signals in the Alarm Queue, only records signals in the Alarm Log, or disregards signals for the installation. The monitoring status also defines what type of billing is allowed, if any. (This menu originates from program #1540.) This field displays the monitoring status of the entire installation and does not reflect changes to the monitoring status of individual CIDs within the installation. The monitoring statuses are color coded: l Blue - monitored l Purple - log only l Red - accounts not monitored Note: If the monitoring status changes to Active, the detector inspection dates attached to the installation update automatically to reflect the status change date. |
Monitoring
Status Date |
This field defaults to the last date a user changed the monitoring status. You can override the default. |
Access Branch |
You may select an access branch to associate with this installation. (This menu originates from program #1530.) Note: Use Access Branch with Securitas Partner Invoicing. This menu only displays branches associated in program #1530 with the dealer you select for the installation. |
Latitude |
Latitude of the installation location. Range is 0º to (+/-) 90º. For example: 34.33896. Note: When your company integrates with MapPoint, if the Latitude/Longitude fields contain coordinates, MapPoint displays a push pin at those coordinates on the image it displays. If these fields are blank, MapPoint displays a map zoomed into the installation address. When you change an installation zip code, if the GeoCode Quality of the zip code record in program #1718 is higher than the GeoCode Quality entered for the installation, SBN automatically updates the installation latitude, longitude, and GeoCode Quality with the values entered for the zip code in program #1718. |
Longitude |
Longitude of the installation location. Range is 0º to (+/-) 180º. For example: -79.43433. Note: When your company integrates with MapPoint, if the Latitude/Longitude fields contain coordinates, MapPoint displays a push pin at those coordinates on the image it displays. If these fields are blank, MapPoint displays a map zoomed into the installation address. When you change an installation zip code, if the GeoCode Quality of the zip code record in program #1718 is higher than the GeoCode Quality entered for the installation, SBN automatically updates the installation latitude, longitude, and GeoCode Quality with the values entered for the zip code in program #1718. |
Geocode Quality |
You may type a rating for the geocode of the installation. Note: When you change an installation zip code, if the GeoCode Quality of the zip code record in program #1718 is higher than the GeoCode Quality entered for the installation, SBN automatically updates the installation latitude, longitude, and GeoCode Quality with the values entered for the zip code in program #1718. |
Phone 3 |
Third phone number for the installation. |
Territory |
Identifies the territory to which the selected installation is attached. (This menu originates from program #1616.) |
Br Misc Flg 1 |
If this box displays a check mark, the customer is an active franchise partner. (This is a read-only check box.) |
Dealer |
Name of the dealer associated with this installation. (This read-only field displays data from program #1537.) Note: The color of this field is determined by the selection in the Background Color field of program #1537 for the installation dealer, or by the selection in the Background Color field of program #1530 for the installation branch. If both the installation dealer and branch have background colors defined, the color of this field is determined by the Background Color field of program #1530 for the installation branch. |
Dealer Phone 1 (No label) |
Primary phone number of the dealer contact associated with this installation. (This read-only field displays data from program #1537.) Note: The color of this field is determined by the selection in the Background Color field of program #1537 for the installation dealer, or by the selection in the Background Color field of program #1530 for the installation branch. If both the installation dealer and branch have background colors defined, the color of this field is determined by the Background Color field of program #1530 for the installation branch. |
Dealer Phone 2 (No label) |
Secondary phone number of the dealer contact associated with this installation. (This read-only field displays data from program #1537.) Note: The color of this field is determined by the selection in the Background Color field of program #1537 for the installation dealer, or by the selection in the Background Color field of program #1530 for the installation branch. If both the installation dealer and branch have background colors defined, the color of this field is determined by the Background Color field of program #1530 for the installation branch. |
Country |
Country of the installation. Note: When you create or change an account address, this field defaults to the country value defined for your user ID in program #1811. |
Building |
Name of the building for the installation. Note: QAS address validation uses this field for UK addresses. |
Ito Pdate |
The last date that the installation address was processed by the PSAP Lookup Service Intrado integration. (For more information about the PSAP Queue and PSAP Lookup Service, see the PSAP Lookup Service section of the SBN Service Manager document.) |
Branch |
Name of the branch associated with the installation. (This read-only field displays data from program #1530 and depends on the branch entered in the Installation Branch field.) |
Branch Phone 1 (No label) |
Primary phone number of the branch contact associated with the installation. (This read-only field displays data from program #1530 and depends on the branch entered in the Installation Branch field.) |
Branch Phone 2 (No label) |
Secondary phone number of the branch contact associated with the installation. (This read-only field displays data from program #1530 and depends on the branch entered in the Installation Branch field.) |
Business Unit |
Business unit associated with the installation. (This menu originates from program #1600.) Note: When option ba480 is on, SBN only allows users to access contracts and installations associated with the business unit types included in the user's selected business unit access profile in program #1811. When option ba480 is off, the business unit access restriction is not active. In Program #559 a user can view and select a Business Unit from the drop down, this field will be a Read Only. |
Ito Nxt Pdt |
Next date that the installation address is scheduled to be processed by the PSAP Lookup Service Intrado integration. (For more information about the PSAP Queue and PSAP Lookup Service, see the PSAP Lookup Service section of the SBN Service Manager document.) |
Credit Score |
Credit score of the homeowner. This field accepts up to four digits. Note: If you chose Jump to Data Entry/Cust Serv to reach Data Entry from Marketing (program #562), SBN fills this field with the data from the Credit Score field in that screen. If you choose Jump to Contract Master, SBN fills the Credit Score field in that screen with the data from this field. |
Credit Ref |
Credit reference for the homeowner. Note: If you chose Jump to Data Entry/Cust Serv to reach Data Entry from Marketing (program #562), SBN fills this field with the data from the Credit Ref field in that screen. If you choose Jump to Contract Master, SBN fills the Credit Ref field in that screen with the data from this field. |
Credit Date |
Date the credit score was received. SBN updates this field when a user changes the Credit Score or Credit Result. Note: If you chose Jump to Data Entry/Cust Serv to reach Data Entry from Marketing (program #562), SBN fills this field with the data from the Credit Date field in that screen. If you choose Jump to Contract Master, SBN fills the Credit Date field in that screen with the data from this field. |
Credit Result |
Select a credit result for the homeowner. (This menu originates from program #1590/66.) Note: If you chose Jump to Data Entry/Cust Serv to reach Data Entry from Marketing (program #562), SBN fills this field with the data from the Credit Result field in that screen. If you choose Jump to Contract Master, SBN fills the Credit Result field in that screen with the data from this field. |
New Mon Stat |
You may select a future monitoring status for the installation. Background Task 14 in program #1712 changes the monitoring status of any installation with a status in this field on the selected date. (This menu originates from program #1540.) |
New Mon Stat Date |
Select a date when the monitoring status in the New Mon Stat field becomes active. Background Task 14 in program #1712 changes the monitoring status of any installation with a selection in the New Mon Stat field on the selected date. |
New Mon Stat Time |
Select a time when the monitoring status in the New Mon Stat field becomes active. Background Task 14 in program #1712 changes the monitoring status of any installation with a selection in the New Mon Stat field on the selected date. |
VIP Priority Type |
You may select a VIP priority type that determines the priority adjustment of alarm signals on this installation with priorities that fall within the range defined for the selected VIP priority type in program #1657. (This menu originates from program #1657.) |
Classes Scroll Box |
View the 15 class codes for the installation. You can only view information in this scroll box. To edit Class information, right-click on the blue Class fields in Change mode and select codes from the drop-down menus. (See Class.) Note: Option sv062 controls this feature. When this option is on, the Classes scroll box appears. When off, the scroll box does not appear. |
Email 1 |
Primary email address(es) for the installation. You may enter a single email address, a list of email addresses separated by commas, or an email distribution group from program #1898 in this field. Note: When option sv079 is on, SBN includes the email address(es) from this field in new service requests with a blank email for the selected installation. |
Email 2 |
Secondary email address(es) for the installation. You may enter a single email address, a list of email addresses separated by commas, or an email distribution group from program #1898 in this field. |
Email 3 |
Third email address(es) for the installation. You may enter a single email address, a list of email addresses separated by commas, or an email distribution group from program #1898 in this field. |
Email 4 |
Fourth email address(es) for the installation. You may enter a single email address, a list of email addresses separated by commas, or an email distribution group from program #1898 in this field. |
Misc75 |
Customer-defined field; no functionality in SBN. (This menu originates from program #1590/42.) Note: If you define a default value for this field in program #1843, you must select the Protect If Filled check box as well. Otherwise, SBN displays an 'Invalid Entry' message when you attempt to save changes in program #559. |
Misc76 |
Customer-defined field; no functionality in SBN. (This menu originates from program #1590/43.) Note: If you define a default value for this field in program #1843, you must select the Protect If Filled check box as well. Otherwise, SBN displays an 'Invalid Entry' message when you attempt to save changes in program #559. |
Agreements Grid |
|
Agreement |
Service agreements associated with the installation. (These menus originate from program #1643.) |
Description |
Text descriptions of the service agreements. |
Valid From |
Dates when the service agreements become valid. |
Valid To |
Dates when the service agreements are no longer valid. |
Version |
Number of times the service agreements have been changed. |
Not Current |
An X in this column indicates the service agreement is not current. |
Checkbox 1 |
Selecting this checkbox will also populate the Checkbox 1 field in the CS Basics tab. |
Checkbox 2 |
Selecting this checkbox will also populate the Checkbox 2 field in the CS Basics tab. |
Textbox 11 |
Making a selection in this dropdown menu will enter the same selection into the Textbox 11 field in the CS Basics tab. |
Textbox 24 |
If any information is saved in the CS Basics tab, this box will contain the login name of the person doing so and the date and time of the save. |
Communication Log Number (not labeled) |
The number in the hyperlink displayed is the same as the Communication Log number (program #1888) assigned to this account. Click on the link to open the communications log entry. |
Textbox 25 |
If any information is saved in the CS Basics tab, this box will contain the login name of the person doing so and the date and time of the save. |
Dispatch Count Calendar Year |
This field keeps a continued count for the total number of dispatches made in the current calendar year for the selected installation. |
Data Entry Basics
Use the Data Entry Basics tab to enter additional customer information for the installation during setup. You must be in Change mode or New mode to enter information in the Basics tab.
To access Data Entry Basics, select Customer Data (program #559) from the main menu of SBN and then choose the Basics tab.
The Data Entry Basics Tab
The following graphic shows the Data Entry Basics tab.
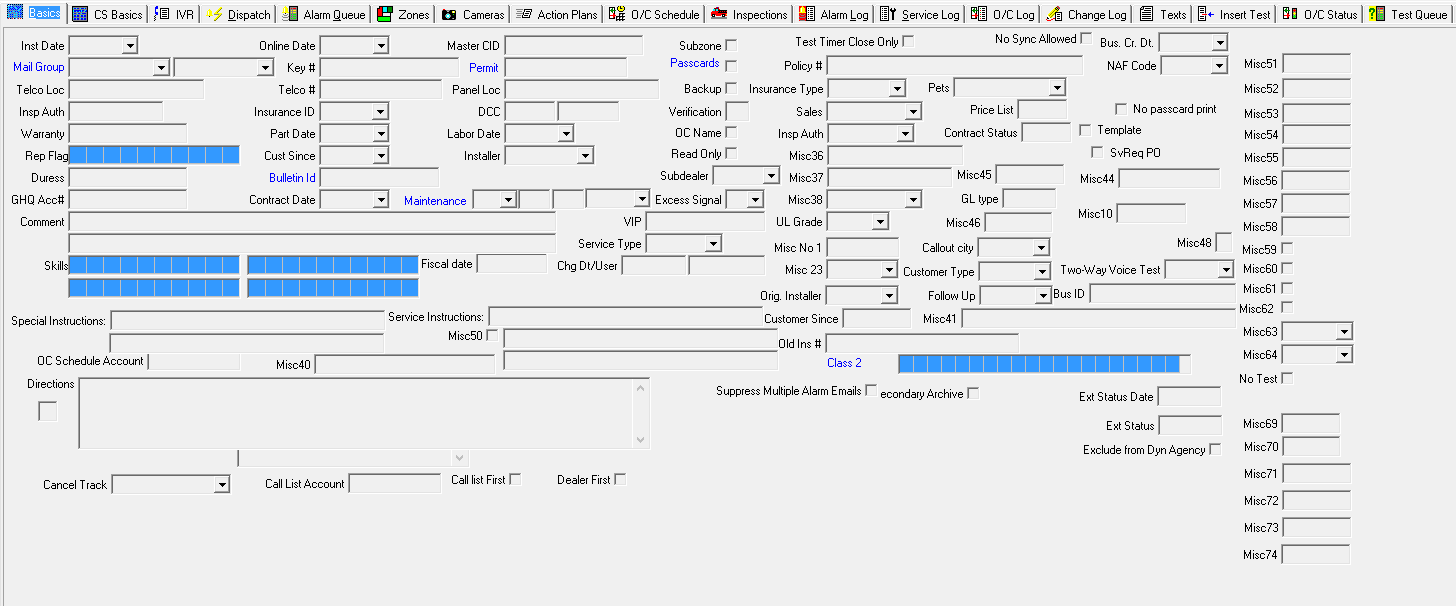
Field Descriptions - Data Entry Basics
The following table describes the fields in the Data Entry Basics tab.
Field |
Description |
Installation Date |
Date on which the system was installed. You cannot select a date in the future. |
Online Date |
Date on which signal monitoring began. |
Master CID |
For a subzoned installation, this field displays a master CID to which this subzoned installation belongs. Linking the subzoned installations to a master CID enables you to view a combined Alarm Log for the master account and its subzoned accounts. Note: Before setting up any sub-zoned installations, you must create the related master CID installation. |
Subzone |
Select this check box to indicate this account is a master CID that contains related subzoned installations. |
No Sync Allowed |
If you select this check box, SBN does not allow users to sync contacts in the Action Plans tab call list. |
Bus. Cr. Date |
Business creation date. Customer-defined field; no functionality in SBN. |
Mail Group (1) |
Use this field to group mailings for those subscribers with more than one account, so that they receive a single mailing of reports. If you right-click on the blue label or field and select Installation Mail, a dialog box opens in which you can enter mailing group information. (See Mail Group.) Note: When option ba198 is on, this field appears as a menu. (This menu originates from program #1800.) |
Mail Group 2 (No label) |
Optional additional mailing group. |
Key Number |
50 character field for the identification number of the key held at the monitoring station. |
Permit |
Permit information. After a user enters permits for this installation, a permit number displays in this field. If you right-click on the blue label or field and select Permits, a dialog box opens in which you can enter permit information. (See Permit.) Note: This field holds a maximum of 12 alphanumeric characters. |
Passcards |
A passcard is a unique entry device assigned to an individual. If this check box is selected, SBN allows users to add passcards to the Action Plan tab for this installation. If this check box is not selected, SBN does not allow users to add passcards in the Action Plans tab. If you right-click on the blue label and select Passcards, a window opens that displays a list of downloadable passcards for this CID and any sub-zoned accounts. (Passcards must be downloadable and have a line index assigned to appear in this list.) Note: Complete this field properly when initially setting up an installation. If you select or clear this check box after you create action plans, SBN requires you to delete all contacts before continuing. Note: You must select this check box in order to use the High Security column in Action Plans. See Column Descriptions - Agency and Contact Details in the Action Plans document. Note: Access to edit this check box is determined by action 559/738. |
Test Timer Close Only |
If you select this check box, test timers only expire when the alarm system is armed (or closed). While the alarm system remains in an open status, SBN does not send test timer signals. Note: Turn option mo137 on to activate this function. Note: If this box is checked and a value is input into the Misc38 field, any alarm disarmed within the preset time will send a duress alarm. This feature is for Company 105 only. |
Policy Number |
Policy number of the customer's insurance coverage. |
NAF Code |
Code that indicates the type of business. Customer-defined field that has no functionality in SBN. (This menu originates from program #1660.) |
Telco Location |
Location of the telephone company termination block. This field accepts up to 30 characters. |
Telco Number |
Phone number or leased line connected to the panel. |
Panel Location |
Physical location of the panel at the premises. |
Backup |
If this box displays a check mark, a verification backup signal is required at this installation: every signal received from the first CID must get a corresponding signal from the second CID within 60 seconds. If the backup signal is not received, SBN generates a missing backup signal exception. Note: This feature is currently available for installations containing two CIDs only. |
Insurance Type |
Type of insurance the customer has. (This menu originates from program #1590/48.) |
Pets |
Identifies the type of pets located at the installation. (This menu originates from program #1590/3.) For clients using IVR, this is the IVR_REST field. The selection in the drop-down menu of this field determines whether the installation is IVR restricted. Note: SBN does not permit users to start IVR processing in program #537 on installations that are IVR restricted, and does not permit users to set up IVR details in the IVR tab. When a user indicates in this field that the installation is IVR restricted, SBN selects the None radio button in the IVR tab, wiping out any existing IVR setup for the installation. |
Template |
If you select this check box, the CID is available in the Template menu in the CID Zoom window. |
Inspection Authority |
Inspection authority for fire system devices; entered in the Inspections tab. (This is a read-only field.) |
Insurance ID |
Insurance company responsible for the installation premises. (This menu originates from program #1541.) |
DCC (Derived Channel Communication Scanner Number) |
Code for tracking the installation DCC scanner number. Note: DCC is a telecommunication method involving two-way receivers, which requires special handling. |
DCC
Port Number |
Code for tracking the installation DCC port number. Note: DCC is a telecommunication method involving two-way receivers, which requires special handling. |
Verification |
Indicates whether verification reports run for this installation. Verification reports show data entry changes for this installation. l Type a minus sign if you should never run verification reports for this installation. l Leave this field blank to run verification reports for this installation. l This field defaults to an X when you save a new installation record or when you make a change to any of the data windows. |
Sales |
ID of the sales person associated with the installation. (This menu originates from program #1539.) This menu displays only those resources l Associated with the same dealer ID as the work order l Not associated with any dealer ID |
Price List |
Read-only field. Displays the price list group for an installation with an active contract status. Note: If an installation has multiple contracts with active status, this field displays the price list of the first created contract. |
Business ID |
Business identification number. Customer-defined field; no functionality in SBN. |
No Passcard Print |
If you select this check box, SBN does not allow you to select the Print check box for any contacts in the Contact Details pane of the Action Plans tab, preventing you from printing passcards for the installation. |
Warranty |
Text generally used for company-specific warranty information. |
Part Date |
Parts warranty expiration date. (An entry in this field is optional.) |
Labor Date |
Labor warranty expiration date. (An entry in this field is optional.) |
Open/Close Name |
Printing option for open/close reports; only affects reports #2047, #2049, and #2073. l If you select this check box, the O/C reports print both the user ID and the actual passcard holder name. l If you leave this check box blank, the O/C reports print only the user ID. |
Inspection Authority |
The inspection authority for the account. (This menu originates from program #1832.) |
Contract Status |
Displays the status of the most recently created contract for the selected installation. Note: This read-only field displays data from Contract Master (program #548). |
Misc10 |
Customer-defined field; no functionality in SBN. |
Report Flag |
Codes for tracking customer-specific report functionality. You may enter up to 10 codes. (This menu originates from program #1555.) |
Customer Since |
Original installation date. This field is generally used for chain accounts to indicate the date on which installers set up the first installation of a chain. |
Installer |
Person responsible for the installation at this premises. (This menu originates from program #1543.) This menu displays only those resources l Associated with the same dealer ID as the work order l Not associated with any dealer ID |
Read Only |
Select this check box to make this installation record a read-only template for new installations. Note: Your action profile must include action 559/17 to change a read-only template. |
Misc36 |
Company-defined field; no functionality in SBN. |
Duress |
Special downloaded code for duress. Note: When you use this code instead of the normal disarm code, SBN generates an alarm signal to Monitoring. Information in this field displays in the Installation pane of Contract Master (program #548). |
Bulletin ID |
Bulletin ID that is a cross reference to program #1720, where users post text messages to a bulletin board using a match type on TXTREF. When you make a change in this field, it appears in the Change Log as a change to field Textzonfef. When installations have something in common, they can share messages by using the same bulletin ID. A shared bulletin ID prevents the user from having to separately attach the same message to each installation. If you right-click on the blue label or field and select Bulletin, a dialog box opens that displays the current messages for this bulletin ID. (See Bulletin ID.) |
Subdealer |
Secondary dealer for the installation. (This menu originates from program #1537; only dealers flagged as subdealers appear in this menu.) Note: When option ba473 is on, users can only access installations with a dealer and subdealer that match their Dealer Access Profile in program #1811. |
Misc37 |
If option mo154 is on, the passcard extension defaults from the number in this field instead of from Installation Branch. |
Misc45 |
Company-defined field that accepts integers only; no functionality in SBN. |
Misc44 |
Company-defined field; no functionality in SBN. This field accepts up to 20 characters. |
GHQ Account Number (No label) |
General Headquarters or Corporate account number. |
Contract Date |
Date on which a user created the contract for this installation. Note: SBN does not validate this entry against the entry in Contract Master. |
Maintenance |
Maintenance type for installations with a maintenance contract or scheduled services. (This menu originates from program #1555.) If you right-click on the blue label or field and select Maintenance, a maintenance dialog box opens for entering multiple maintenance types and dates. (See Maintenance.) |
Frequency in Months |
Frequency of maintenance visits in months. (SBN only calculates maintenance tickets in program #701 for a frequency in months that the number 12 divides into, such as 1, 2, 3, 4, 6, and 12 months.) You should use either months or days for frequency of maintenance visits, not both. IBS recommends that you remove the Frequency field that you do not use. (See the Customizing Layouts in SBN document in Reference for how to remove a field.) |
Frequency
in Days |
Frequency of maintenance visits in days. You should use either months or days for frequency of maintenance visits, not both. IBS recommends that you remove the Frequency field that you do not use. (See the Customizing Layouts in SBN document in Reference for how to remove a field.) |
Last
Maintenance Date |
Last maintenance date for this installation. Note: Option sv037 defines the service request work type for which SBN updates the Last Maintenance Date when you close a service ticket. |
Excess Signal |
Billing rates for excessive signal traffic at this installation. (This menu originates from program #1817.) |
Misc38 |
Company-defined field; no functionality in SBN. Note: This menu may include a value that, when selected, blocks VRU access to this installation. Create this selection in Installation Miscellaneous Fields (program #1590/33). Note: In Company 105, if this field contains a value and the Test Timer Close Only checkbox is checked, any alarm disarmed within the preset time will send a duress alarm. |
GL Type |
Type of general ledger account to which users can send revenue from the selected installation. The data in this read-only field originates from the GL Type field of the Installation pane in Contract Master (program #548). Note: If the selected installation is linked to more than one contract, it may have more than one GL Type. |
Comment |
Free-form text comment about this account. Note: This comment appears in the first Comment field in the Insert Test window when a user inserts this account into test. When you use the Special Change function (the second Change Record button), SBN clears this field. |
VIP |
Free-form text. |
UL Grade (Misc42) |
UL security grade; controls special actions in Monitoring that must occur for UL events. (This menu originates from program #1732.) Note: If option mo163 is on, the Dispatch window displays this UL grade instead of the UL grade from the Zones tab. |
Misc46 |
Company-defined field; no functionality in SBN. |
Comment
2 |
Additional free-form text comment about this account. Note: This comment appears in the first Comment field in the Insert Test window when a user inserts this account into test. When you use the Special Change function (the second Change Record button), SBN clears this field. |
Service Type |
Installation service type. (This menu originates from program #1892.) Note: This menu appears in the user's language. |
Misc No 1 |
Company-defined field; no functionality in SBN. |
Callout City |
Company-defined field. (This menu originates from program #1590/04.) |
Skills (1) |
Set of up to 20 skills a user should have to service or monitor this installation, such as fluency in a specific language. (These menus originate from program #1862.) Define user skill sets in program #1501, program #531, or in the Users tab of program #1811. Note: You may assign a color code and priority to each of these Skills fields in program #1862. The Skills field to which you assign a skill with the highest priority in program #1862 determines the color of the Installation Number field in Data Entry Master. |
Skills 2 (No label) |
Set of up to 20 skills a terminal should have to service or monitor this installation, such as access to two-way voice equipment. (These menus originate from program #1862.) Define terminal skill sets in program #1861. Note: You may assign a color code and priority to each of these Skills fields in program #1862. The Skills field to which you assign a skill with the highest priority in program #1862 determines the color of the Installation Number field in Data Entry Master. |
Fiscal Date |
First fiscal date on which the associated account received revenue for this installation. This date defaults according to the following rules: l If the installation date is greater than the fiscal date, the fiscal date remains blank. l If the installation date and fiscal date are blank, both fields remain blank. l If the installation date is less than the fiscal date, SBN enters the fiscal date based on program #568. l If the installation date and the fiscal date are filled, all dates remain the same. Option ba142 should be off for this function. Note: If the option ba142 is on, SBN fills the Installation Date field as soon as you tab through the Fiscal Date field. This could result in the fiscal date being filled before the installation is complete. |
Change Date |
Last date a user saved changes to the installation record. |
Change User |
ID of the user who last changed the installation record. |
Misc23 |
Company-defined field; no functionality in SBN. (This menu originates from program #1771.) |
Customer Type |
Company-defined field. (This menu originates from program #1590/21.) |
Special Instructions |
Any special instructions regarding this installation. |
Service Instructions |
Any service instructions regarding this installation. This text also appears in the Service Log Details window. |
Original Installer |
Identifies the original installer. (This menu originates from program #1811.) Note: This menu displays only those resources l Associated with the same dealer ID as the work order l Not associated with any dealer ID The telemarketer ID Picklist will display instead of the Installer ID picklist when Option temp105 is ON.
|
Follow Up |
Company-defined field. (This menu originates from program #1590/22.) |
Two-Way Voice Test |
Date of the last successful IVR two-way voice test. (ATOM procedure inet_ivr_audio_gateway_upd updates this field on a successful two-way voice test of the installation.) |
Special Instructions 2 (No label) |
Any special instructions regarding this installation. |
Misc50 |
Customer-defined field; no functionality in SBN. |
Service Instructions 2 (No label) |
Any service instructions regarding this installation. This text also appears in the Service Log Details window. |
Customer Since |
Date on which a user first recorded the customer online. Note: SBN populates this field with the date from the Customer Since field in the Installation pane of Contract Master (program #548). |
Misc41 |
Customer-defined field; no functionality in SBN. |
OC Schedule Account |
Use this field to link a CID that controls all open/close schedules for this installation. When you enter a CID in this field, the open/close schedules from that CID appear in the Open/Close Schedule tab for this installation. You cannot add or update O/C schedules from this installation; you must update them in the Open/Close Schedule account. |
Misc40 |
Use this field to type a web address that users can view from the Alarm Log when they choose Get HTTP. (This field accepts up to 160 characters.) |
Service Instructions 3 (No label) |
Any service instructions regarding this installation. This text also appears in the Service Log Details window. |
Directions |
Driving directions to the installation; Dispatch uses this information. |
Old Ins # |
Previous policy number of the customer’s insurance, if applicable. |
Misc43 (Suppress Multiple Alarm Emails) |
If you select this check box, SBN does not send emails if more alarms are generated from a CID already in the Alarm Queue. |
Misc48 |
Customer-defined field; no functionality in SBN. |
Misc49 (Secondary Archive) |
This check box controls where SBN stores data when you choose Archive in the Alarm Log tab. If you select this check box, SBN stores the data from the Alarm Log and O/C Log in a secondary archive. Background tasks 61, 62, and 63 determine what data SBN moves into the secondary archive. Note: Option ba422 must be on for SBN to store data in the secondary archive. Once you select this check box, do not change it. It is not retroactive. |
Pet Agreement |
Details of any agreement with the customer about the pets at the installation. |
Ext Status |
Customer-defined field; no functionality in SBN. |
Ext Status Date |
Customer-defined field; no functionality in SBN. |
Class 2 |
You may select up to 20 codes from the drop-down menus for tracking services provided or other customer-specific information. (These menus originate from program #1555, indexes 60-79.) Note: The Class 2 fields do not generate cycle fees. |
Cancel Track |
Cancellation date of the monitoring contract. Use this field to include the installation in the Cancellation Tracking Report (#2172). |
Call List Account |
SBN includes the action plan contacts of the account entered in this field with the selected installation's contacts in the Dispatch (program #537) call list when option mo180 is on. |
Call List First |
When you select this check box, SBN lists the action plan contacts of the account in the Call List Account field before the selected installation's contacts in the call list when an operator handles alarms in the Dispatch tab. Note: When you select both this check box and the Dealer First check box, the contacts of the account entered in the Default Account field of program #1537 for the dealer associated with this installation are listed first in the Dispatch call list, followed by the Call List Account contacts. SBN lists the installation action plan contacts last in the Dispatch call list. |
Dealer First |
When you select this check box, SBN lists the action plan contacts of the account in the Dealer Profiles (program #1537) Default Account field before the selected installation's contacts in the call list when an operator handles alarms in the Dispatch tab. Note: When you select both this check box and the Call List First check box, the contacts of the account entered in the Default Account field of program #1537 for the dealer associated with this installation are listed first in the Dispatch call list, followed by the Call List Account contacts. SBN lists the installation action plan contacts last in the Dispatch call list. |
Misc51 |
Company-defined field; no functionality in SBN. This field accepts up to 40 characters. |
Misc52 |
Company-defined field; no functionality in SBN. This field accepts up to 40 characters. |
Misc53 |
Company-defined field; no functionality in SBN. This field accepts up to 40 characters. |
Misc54 |
Company-defined field; no functionality in SBN. This field accepts up to 40 characters. |
Misc55 |
Company-defined field; no functionality in SBN. This field accepts up to 40 characters. |
Misc56 |
Company-defined field; no functionality in SBN. This field accepts up to 40 characters. |
Misc57 |
Company-defined field; no functionality in SBN. This field accepts up to 40 characters. |
Misc58 |
Company-defined field; no functionality in SBN. This field accepts up to 40 characters. |
Misc59 |
Company-defined check box; no functionality in SBN. |
Misc60 |
Company-defined check box; no functionality in SBN. |
Misc61 |
Company-defined check box; no functionality in SBN. |
Misc62 |
Company-defined check box; no functionality in SBN. |
Misc63 |
Company-defined field; no functionality in SBN. (This menu originates from program #1590, index 52.) |
Misc64 |
Company-defined field; no functionality in SBN. (This menu originates from program #1590, index 53.) |
No Test |
Select this check box to indicate that the installation cannot be put into Test or Runaway mode in the Insert Test tab of Data Entry. Note: Users with action 559/218 can put installations into Test or Runaway mode whether this check box is selected or not. |
Misc65-70 |
Company-defined fields; no functionality in SBN. These fields are hidden by default. Note: To make these fields visible, right-click anywhere in the Basics tab and choose Toggle Edit Mode from the drop-down menu. Right-click again, choose Save Field Defaults and choose an access level. In the Save Fields window that opens, place an X in the Visible column for each field you want to appear. For more information, see the Customizing Layouts in SBN document. |
Misc71 |
Company-defined field; no functionality in SBN. This field accepts up to 50 characters. |
Misc72 |
Company-defined field; no functionality in SBN. This field accepts up to 50 characters. |
Misc73 |
Company-defined field; no functionality in SBN. This field accepts up to 50 characters. |
Misc74 |
Company-defined field; no functionality in SBN. This field accepts up to 50 characters. |
SvReqPO |
When you select this check box, the P.O. number on the Service Ticket tab is required. When left unchecked, the P.O. number is not required. |
View Menu Options
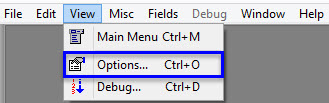
You can view the Options tab :
Select the View tab, then Options.
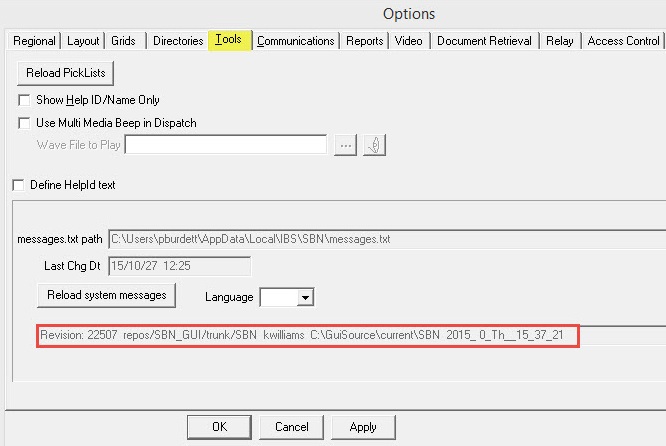
In the Options/Tool tab a message.txt path box displays, it list the message.txt path for a particular machine. Below the message.txt box is a Last Chg Dt box. In program 1606, if the GUI Messages are changed then the Last Chg Dt will be update.
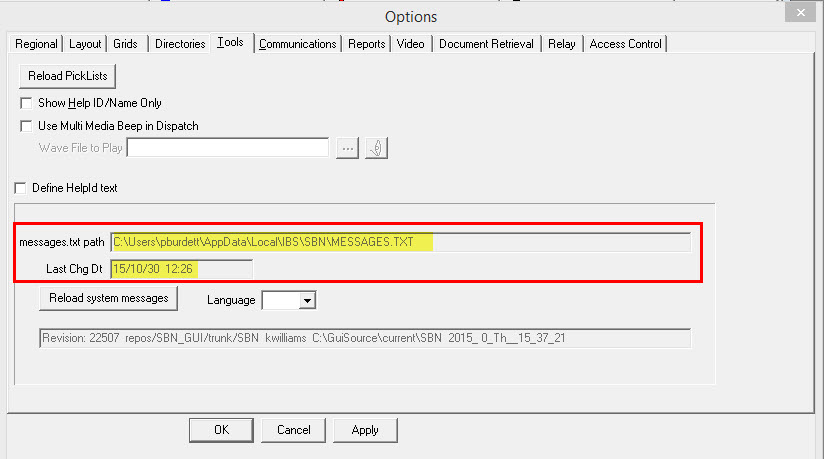
In the Options/Tool tab a svn repository and build path are displays when a new branch is created.
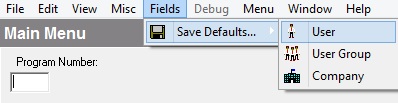
Field Menu Save Defaults
You can save customized grids and fields as a User, User Group, or Company defaults:
Select the Fields Menu and the type of default to be saved.
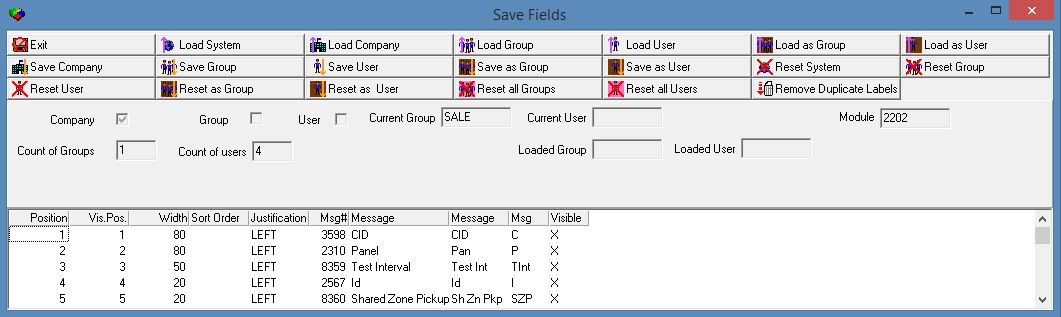
The Save Fields popup window will display.
Select the appropriate save button, then Exit.
Customizing the Order of Program Tabs in Data Entry
You can customize the order of the program tabs that appear in Data Entry after the Basics tab. There are three ways to customize the order of these tabs:
Dragging and dropping the program tabs into a different order. (You must enable action 193/49 in your user action profile in program #1502 to use this method.)
Setting up the Prg 559 Tabs field for your user action profile in program #1502
Defining the value of dynamic option detab in program #1887
SBN determines the order of the tabs in Data Entry primarily based on the entry in the Prg 559 Tabs field for your user action profile in program #1502. If this field is blank, SBN uses the value of option detab to determine the order of the tabs. If the option value is blank as well, SBN orders the tabs in their default sequence. The default order of the Data Entry program tabs is: 1 Basics, 2 Dispatch, 3 Alarm Queue, 4 Zones, 5 Cameras, 6 Action Plans, 7 Notification (appears if option sdi002 is on), 8 Notify Account (appears if option sdi002 is on), 9 O/C Schedule, 10 Inspections, 11 Alarm Log, 12 Customer Specific (appears if option sdi002 is on), 13 Service Log, 14 O/C Log, 15 Change Log, 16 Texts, 17 Insert Test, 18 O/C Status, 19 Test Queue, 20 Service Aging, 21 Work Orders, 22 Internet Log, 23 Floor Plans, 24 Phasing, 25 SIM Phone, 26 Installed Components, 27 Pending Service, 28 Access Control. (The Overflow and Customer Service Basics tabs, formerly second and third in the default sequence, have been removed.)
Note: The order of the Data Entry Basics tab cannot be changed; it always appears first.
Working in Data Entry
In Data Entry, you can change, create, copy, and delete an installation. You can also copy zones and action plans for an installation, toggle between operator and premises time, jump to Contract Master, view installations on a map, create schedule requests, scan and view related documents, view panel information, jump between billing and monitoring SBN sessions, and email dealers. The following sections explain these functions in more detail.
Searching for Accounts
See the reference document Searches for information about searching for accounts from Data Entry.
There are three kinds of searches you can perform:
Basic - requires that you search with specific information, such as a phone number or passcard.
Advanced - allows you to search with partial information using wildcards.
Check - allows you to search with a wildcard for a check number. You can also search by a range of payment dates or by a range of payment amounts.
The search results grid holds a maximum of 9999 results.
You must perform a search to view the details of an installation. If option sv059 is on, when you access an installation with a bulletin assigned in program #1720 (group type: Service), the bulletin text window automatically opens.
Note: If the Exclude from Search checkbox in the Monitoring Status program (program #1540) is selected, then the checked status will not appear in an Advanced Search.
Note: When entering a Work Order number in the search field, then click OK SBN will open in the Work Order tab with the requested Work Order highlighted.
When entering a Service Request number in the Service Request field, then click Ok, SBN will open in the Service Log and highlight the Service Request Number.
Zooming Into the CID Grid
You may view the CID grid in the upper left corner of the Data Entry Master pane in a separate window for convenience.
Use the following steps to zoom into the CID grid:
1. Choose Zoom CID.
w The CID Zoom window opens. This window is read-only.
2. Use the scroll bar to view all fields.
3. Choose Exit to close the window.
Creating an Installation Record
Use the following steps to create an installation record:
1. In Data Entry Master (program #559), choose New Record.
w Most of the fields open. A new row of buttons appears above the CID grid.
2. In the CID grid, type a new CID.
or...
Enter a panel ID and choose Auto Generate CID.
w If you choose Auto Generate CID, SBN enters the generated CID.
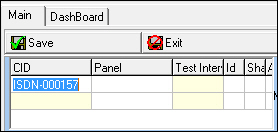
3. Enter details in the CID grid.
or...
Choose Zoom in/out of Sublevel.
w The CID grid appears in a separate window.
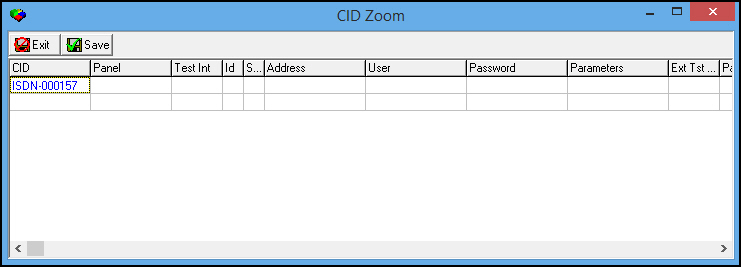
Note: Action 559/19 controls access to the CID Zoom window.
4. Enter details in the CID Zoom window.
5. Choose Save.
w The CID Zoom window closes, and the details appear in the CID grid.
6. In Ins No type a new installation number or choose Auto-Generate Ins#.
Note: When you choose Auto-Generate Ins#, SBN generates the installation number looked up in Installation Number Auto Generation (program #1791) according to the combination of Branch/Dealer/Subtype fields you define in Data Entry Master.
7. Complete the remaining fields, as needed.
8. To use QAS address validation, see QAS Pro Address Validation.
9. Choose Save.
Note: When option svtmzone is on, SBN retains the default time zone when a user saves an installation.
Note: If you create and save a new installation after you use Jump to Data Entry/Customer Service, SBN creates an action plan for that account. SBN populates that action plan with the contacts from the Marketing Basics tab.
Note: When you save a new account, SBN automatically creates a service ticket with a default status defined by option sv045.
Test Time Interval
When a CID is created or pulled up a user can click Change and Zoom, then the CID Zoom screen will display. In the Test Interval section a user can set the Test Interval time. The purpose of this is reduce the number of missing test signals entered into the Alarm Queue. If the time is set to 000:00:05:00 a new signal will hit the Alarm Queue every 5 minutes, after the initial signal. The missing test will be logged in the Alarm Log every 5 minutes.
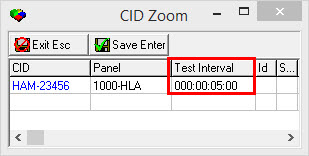
The missing test will be logged into the Alarm Log every 5 minutes or whenever the Test Interval time is set.
Using the New Zip Code Window
When you create or change an installation record and enter a zip code that does not exist in program #1718, a New Zip Code window opens. You may enter zip code details that SBN uses to create an entry in Zip Codes (program #1718). (Action 559/722 controls access to the New Zip Code window.)
Use the following steps to enter details in the New Zip Code window:
1. Choose New Record or Change Record.
2. In the ZIP field, enter a zip code.
w If the zip code does not exist in program #1718, SBN displays an error message: 'Zip code not covered.'
3. Choose OK.
w The New Zip Code window opens with the details you entered in 559.
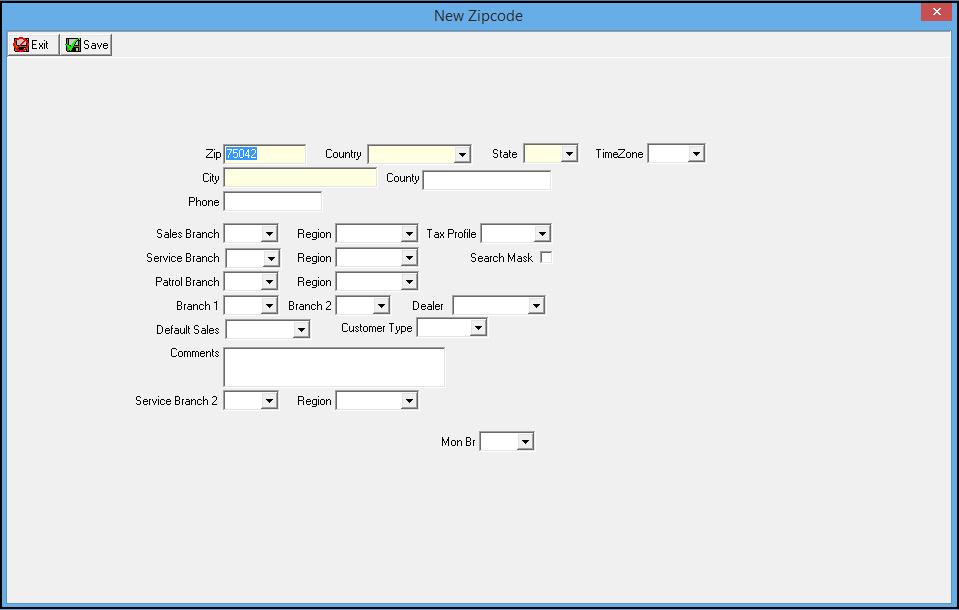
4. Enter more zip code details in the window if necessary.
5. Choose Save.
w SBN creates a record for the zip code in program #1718 and returns you to the Data Entry Master window with fields open for changes.
Using Auto Generate with Option ba332
Option ba332 allows SBN to generate CIDs with a generated installation number embedded, as defined in CID Auto Generation (program #1724). For more information on this program, see CID Auto Generation.
To use this feature, you must first generate the installation number and then generate the CIDs for each panel selected in the CID grid.
Also, with option ba332 on, you can add multiple CIDs with the embedded installation number to one installation.
Use the following steps to auto generate installation and CID numbers with option ba332:
1. Choose New Record.
2. In the Dealer field (no label), select a dealer ID that is defined in CID Auto Generation (program #1724).
3. Choose Auto Generate Ins#.
4. In the CID grid, select as many panels as are needed for the installation.
5. Choose Auto Generate CID.
w SBN embeds the generated installation number in the generated CIDs.
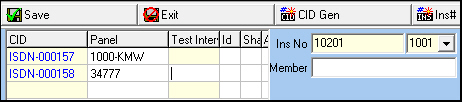
Note: If program #1724 contains defined test intervals for the selected panels, SBN fills the Test Interval column of the CID grid.
6. Complete the remaining fields, as needed.
7. Choose Save.
Note: In Change mode, you can generate additional CIDs for an existing installation by using steps 4 - 6.
Changing an Installation Record
Use the following steps to change the details of an installation record:
1. Use the Search function to access the installation record you want to change. See Searching for Accounts.
2. Choose Change Record.
w Fields in Data Entry Master and Basics open for changes.
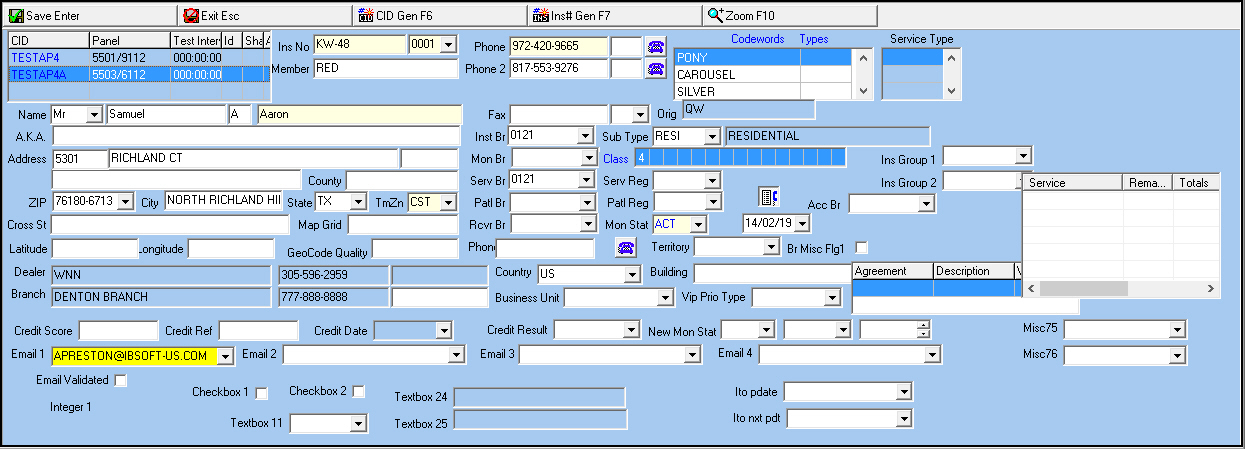
3. Enter changes, as needed.
Note: You may access the CID Zoom window in Change mode. See Creating an Installation Record for more information on the CID Zoom window.
Note: A CID cannot be changed or deleted if it has any incidents in queue.
4. To use QAS address validation, see QAS Pro Address Validation.
5. Choose Save.
Note: When action 559/52 is enabled in a user's action profile and option psap is on, SBN displays a pop-up message asking the operator if he/she would like to insert the installation into the PSAP Queue when the operator saves changes to an installation. (Option psap must be on to activate the PSAP interface.)
When option psapauto is on and option psap is on, SBN automatically inserts an installation into the PSAP Queue when the installation address changes in program #559, (if the monitoring status of the installation has the Include In PSAP check box selected in program #1540). The value of option psapgq determines whether SBN sends latitude/longitude updates or address updates to the PSAP Queue. Installations with a GeoCode Quality greater than or equal to the value of option psapgq send latitude/longitude updates to the PSAP Queue. Installations with a GeoCode Quality less than the value of option psapgq send address updates to the PSAP Queue.
Using the Special Change Function
Your company may direct you to change records using the Special Change function, which is the second Change Record button. When you use the Special Change function, required fields may be different than when you use Change. Define required fields for the Special Change function in Required Fields (program #1843). Using the Special Change function clears the Codewords grid but maintains the code words for the installation in the ins_codewords table rather than delete them. Special Change also clears the Comment fields in the Basics tab.
Note: Action 559/18 controls access to the Special Change button. If your action profile includes action 559/18, it should also include action 559/19. You may access the CID Zoom window in Special Change mode. Action 559/19 controls access to the CID Zoom window.
Note: When you use the Special Change button on an account with a canceled contract (in program #548) and the Expiration Date of the contract is in the future, SBN resets the expiration date to today's date.
Copying an Installation
You can copy the current account information into a new installation. You may copy the required fields or leave them blank when you copy the record.
Use the following steps to copy a current record:
1. Choose Copy Current Record.
w SBN asks if you want to clear the required fields.
2. Choose Yes if you want to leave the required fields blank; choose No if you want to copy the entire installation.
Note: When option ba390 is on and you choose Copy Current Record, SBN does not clear the Installation Date field in the Basics tab if you choose not to clear required fields at the prompt. If ba390 is on and the Installation Date field is protected if filled in program #1843, SBN copies the installation date and you cannot modify it.
3. Type a CID manually or choose Auto Generate CID.
4. Complete the fields, as needed.
w In Ins No, you can manually type the installation number or choose Auto Generate Ins#.
5. Choose Save New Record.
Note: SBN copies all zones into the new installation, including any test template masks associated with the zones.
Importing Zones or Action Plans
Use Copy Zone/Plan to copy existing zones or action plans from a selected CID or installation into the current installation. You can copy:
Zones from the Zones tab (controlled by action 559/730)
Action plans from the Action Plans tab (controlled by action 559/731)
All contacts from the Action Plans tab (controlled by action 559/732)
All inspection devices (controlled by action 559/733)
All physical components (controlled by action 559/734)
Panel defaults (controlled by action 559/735)
Agencies (controlled by action 559/736)
Open/Close schedules (controlled by action 559/737)
When you copy zones or action plans, the results of the copy function appear in the Change Log. SBN displays an
X - for each item copied
O - for each item not copied
For example, if you choose to copy zones, action plans, contacts, devices, components, and open/close schedules, but you choose not to copy panel defaults, then panel defaults appears in the Change Log with an O beside it, and all the copied items appear with an X.
Note: If the panel of the CID you attempt to import zones, action plans, or other information from is flagged for Template Zones in program #1742, SBN will not import any information into the destination CID.
You may define defaults for the fields in this dialog box in Required Fields (program #1843).
The following graphic shows the Import Zone/Action Plan dialog box as it opens.
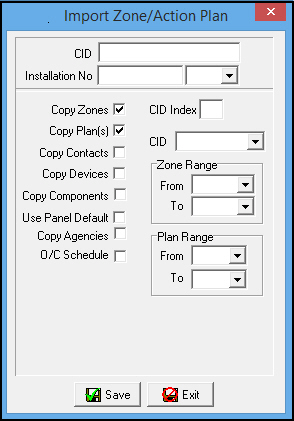
If you select the O/C Schedule check box, additional fields for entering a range of open/close schedules appears.
Note: You can only select a check box in the Import Zone/Action Plan window if the associated action is active for your action profile in program #1502.
When copying contacts, you must select both the Copy Plans and Copy Contacts check boxes.
Note: If zones you are attempting to copy from (Source) have a % in the CID field (Global zones), those zones with % in CID field will not copy (if using the CID field to import).
In order to copy Global zones (% in CID of zone), instead use the installation number, or link the zones to a CID for all zones you are attempting to copy.
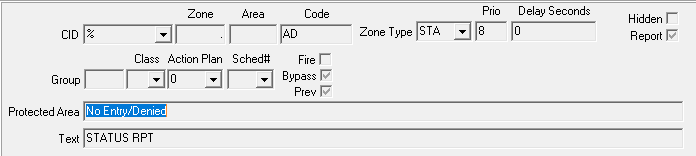
Field Descriptions - Import Zone/Action Plan
The following table describes the fields in the Import Zone/Action Plan window.
Field |
Description |
CID |
CID number from which to copy. |
Installation Number |
Installation number from which to copy. |
Dealer ID (No label) |
Dealer ID of the installation from which to copy. |
Copy Zones |
If you select this check box, SBN copies all zones for the CID or installation along with any test template masks associated with the zones. Access to this check box is determined by action 559/730. Note: SBN resets zones to plan 0 if the selected destination plan does not exist. |
Copy Plan(s) |
If you select this check box, SBN copies all action plans for the CID or installation. Access to this check box is determined by action 559/731. |
Copy Contacts |
If you select this check box, SBN copies all contacts from the action plans for the CID or installation. Access to this check box is determined by action 559/732. |
Copy Devices |
If you select this check box, SBN copies all inspection devices for the CID or installation. Access to this check box is determined by action 559/733. |
Copy Components |
If you select this check box, SBN copies all physical components for the CID or installation. Access to this check box is determined by action 559/734. |
Use Panel Default |
If you select this check box, SBN copies all zones for the CID in the Default Account field in program #1742. Access to this check box is determined by action 559/735. |
Copy Agencies |
If this box displays a check mark, SBN copies all agencies from the CID or installation. Access to this check box is determined by action 559/736. |
O/C Schedule |
If this box displays a check mark, SBN copies all open/close schedules from the CID or installation. Access to this check box is determined by action 559/737. |
CID Index |
If multiple CID numbers are attached to the current installation, type the correct number for the CID to which you want to copy the zones or action plans. For example, if there are three CIDs, type 1, 2, or 3. Note: Complete either this field or the CID field, not both. |
CID |
CID number to which you want to copy the zones or action plans. Note: Complete either this field or the CID Index field, not both. |
Zone Range |
|
From |
You may select one zone or a range of zones to copy to the specified account along with any test template masks associated with the zones; select the beginning zone of the range. Note: SBN resets zones to plan 0 if the selected destination plan does not exist. |
To |
You may select one zone or a range of zones to copy to the specified account along with any test template masks associated with the zones; select the ending zone of the range. Note: SBN resets zones to plan 0 if the selected destination plan does not exist. |
Plan Range |
|
From |
You may select one action plan or a range of action plans to copy to the specified account; select the beginning action plan of the range. |
To |
You may select one action plan or a range of action plans to copy to the specified account; select the ending action plan of the range. |
O/C Range These fields appear only when you select the O/C Schedule check box. |
|
From |
You may select one open/close schedule or a range of O/C schedules to copy to the specified account; select the beginning open/close schedule of the range. |
To |
You may select one open/close schedule or a range of O/C schedules to copy to the specified account; select the ending open/close schedule of the range. |
Use the following steps to import a zone or action plan:
1. In Data Entry Master, choose Copy Zone/Plan.
w The Import Zone/Action Plan dialog box opens.
2. Complete the fields, as needed.
Note: If you select the O/C Schedule check box, additional fields appear for selecting a range of schedules to copy.
3. Choose Save.
w SBN asks you to confirm your selection.
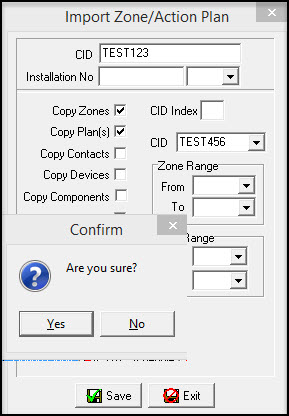
4. Choose Yes.
w SBN states that the destination installation already has zones and action plans and asks if you want to continue.
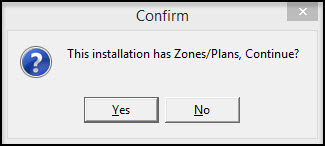
5. Choose Yes.
w SBN copies all selected information into the specified CID.
Note: SBN overwrites the zones of the destination installation and deletes any delayed alarms on the installation's previously existing zones.
Deleting an Installation
You may delete an installation; however, when you use this function, SBN deletes only the following information from the installation:
Open/Close schedules
All zone test data
All mailing addresses
All contacts and text from the Action Plans tab
When you delete an installation, SBN resets all action plan fields of the zones to plan zero (0) with no Open/Close schedules assigned, resets all test intervals to zero (0), and adds a Change Log entry to the account.
Note: A CID cannot be changed or deleted if it has any incidents in queue.
Use the following steps to delete an installation:
1. Select the installation you want to delete.
2. Choose Delete Record.
w SBN displays a warning that asks if you want to delete all information for the installation.
Note: The warning message defaults to No to prevent users from accidentally deleting a record.
3. Choose Yes.
w SBN deletes the installation.
Toggling Between Operator and Premises Time
When you toggle between operator and premises time, you switch between the time zone of the operator monitoring the installation and the time zone of the premises. SBN displays the time in the status bar.
Note: The default time zone is the premises time. Every time you log on, SBN displays the premises time.
Use the following steps to toggle between operator and premises time:
1. In Data Entry Master, choose Toggle Operator/Premises Time.
w The operator time now displays in the status bar.

2. Choose Toggle Operator/Premises Time again.
w The time reverts back to the premises time zone.
Jumping to Contract Master
When you jump to Contract Master (program #548), you can import information from Data Entry. When jumping to jumping to Data Entry Master for the first time, the Billing Account tab opens automatically. This copies the contents of Deal ID, Group 1 and 2 for the Contract Master to the Billing Account tab. If you have not previously set up a contract for this installation, when you jump to the Contract Master you can enter a new contract for the installation. If a contract already exists for this installation, when you jump to Contract Master you can view or change the existing contract information. For existing contracts, SBN displays the first active contract. (For more information, see Contract Master.)
To jump to Contract Master, choose Jump to Contract Master.
Jumping to Branch Call List
To view On Call phone numbers for the branch and/or dealer associated with the selected installation, press [Ctrl+B]. Branch Call List (program #1506) opens with the On Call Numbers tab open for the record matching the installation branch, dealer, or both. When on, option ba434 first matches the installation branch, then the installation dealer when opening Branch Call List. When this option is off, SBN first matches the installation dealer, then the installation branch when opening Branch Call List.
Using MapPoint
Use the Map button to integrate SBN with Microsoft MapPoint mapping software. Option msmp defines the country default the software uses.
If a user has defined the latitude and longitude in Data Entry Master, MapPoint opens on the specific latitude and longitude instead of the installation address when option ba481 is off. When option ba481 is on, MapPoint opens on the installation address even if the latitude and longitude are defined for the installation.
Note: Option ba477 defines the mapping software application that SBN opens when you choose Map. If you enter the word google (in lowercase letters) as the value of this option, SBN opens the website maps.google.com. If this option is blank, SBN launches Microsoft MapPoint when you choose the Map button.
Creating a Schedule Request
You can create a schedule request directly from the Data Entry Master.
Use the following steps to schedule a request:
1. Choose Schedule Request.
w The Schedule Request dialog box appears.
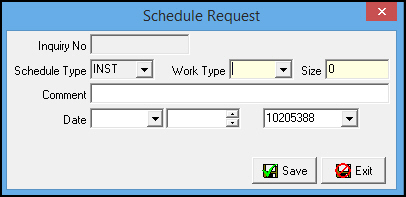
2. Enter information in the following fields:
In Work Type, select the type of work to schedule.
In Size, type the number of units to schedule for the job.
In Comment, type comments on this particular job.
In Date, select the date to schedule service.
In Time, select the time to schedule service.
In Work Order Number, select the work order number to attach to the request.
3. Choose Save.
w SBN logs the schedule request in the Data Entry Change Log tab.
Schedule Temporary Address
The Schedule Temporary Address feature allow the user to schedule a temporary address for an installation. In order for this feature to be visible action 559/741 needs to be turned on in Program #1502. During the scheduled date and time the temporary address will display in program #559 in place of the customer's original information. Once the expiration date passes the user can refresh the screen and the original information will display.

Use the following steps to create a Temporary Address
1. Click Schedule Temp Addr .or use the assigned shortcut key assigned in Program #1621.
w The Temporary Address dialog box displays
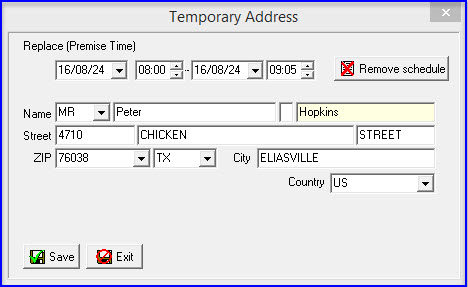
2. Enter or select the start date/time and an end date/time
3. Enter a name and address for the temporary address
4. Click Save
Use the following steps to cancel the Temporary Address
1. Click Schedule Temp Addr
w The Temporary Address dialog box displays
2.
Click
the Remove schedule button 
w The Confirm Cancel Schedule dialog box displays
3. Click Yes to remove schedule
When a temporary address is added or cancelled in an installation, the process will be recorded in the Change Log.
Email Maintenance
This feature allows the user to view and change email addresses for all billing accounts/contracts, contacts, and marketing, associated with an installation from within one SBN form. The email text is displayed along with a description/location to indicate where in SBN the email is used. In this form, the user can define a new email text string and select which email(s) will be updated.
Additionally, all email field drop-downs associated with an installation will now display the same contents.
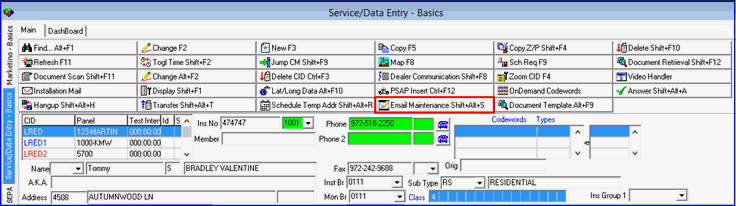
To select an email for updating, the user double clicks the box next to the email address.
The “Mark all� button selects all emails in the list for updating.
Enter a new valid email address in the Update email field and click “Save Enter�.
The user is prompted with an “Are you sure? � dialog box before committing the changes.
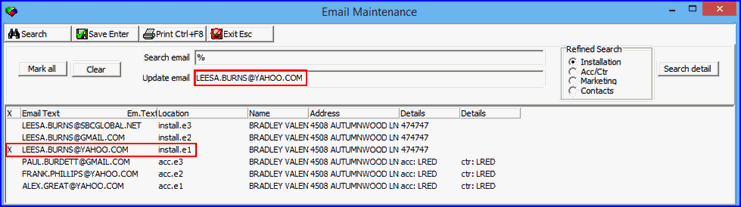
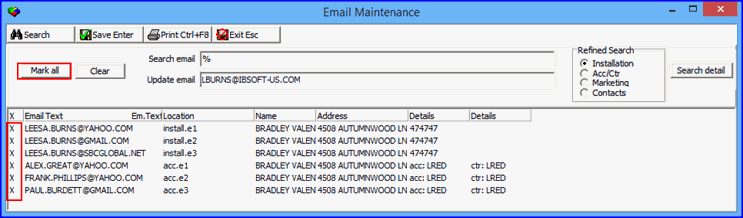
The user must click the “Refresh� button in Program #559, 548, and 562 to view the updated email addresses.
If the email addresses have been changed using the Email Maintenance, the user will need to click the “Reload Picklist� button in the main SBN application menu under View > Option > Tools to force a refresh of the email field drop-down contents.
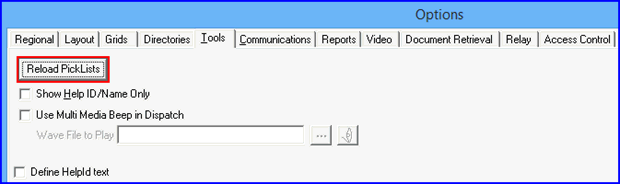
Document Retrieval and Scanning
Use Document Retrieval to pass search parameters to a third-party software application to find documents related to the installation.
Use the Document Scan to launch the scan document integration.
Configure the application and database location specifications in SBN Client Options. (Press [CTRL+O] to access the Client Options window.)
The following graphic is the Document Retrieval Screen in Program #559.
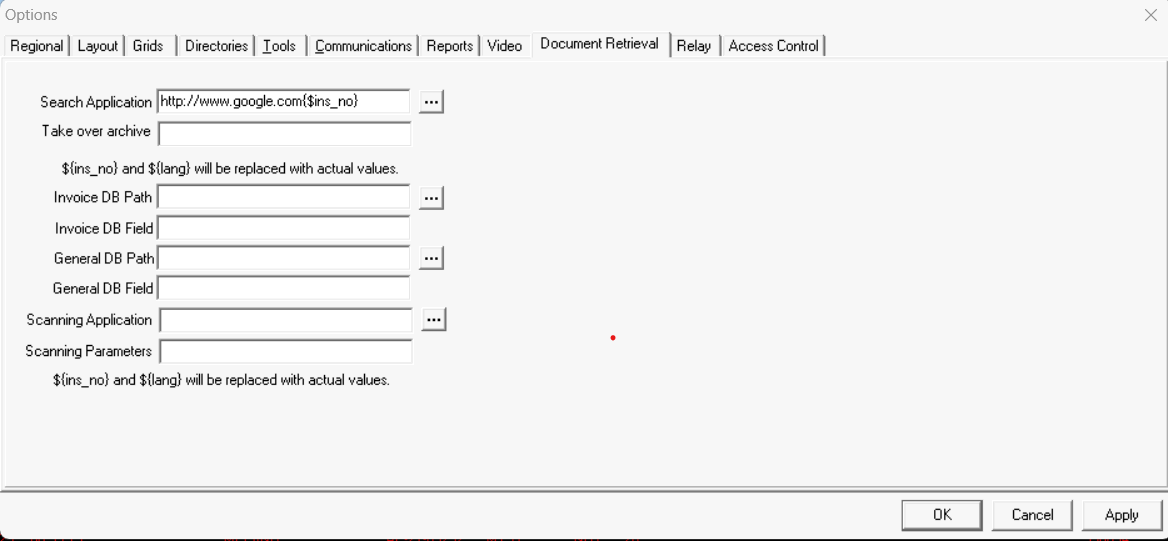
If the user enters a http// internet address in the search application field, the following param will replace the actual values
{$s_ins}, {$ins_no}. {$s_svrq}, {$s_us}, {$userid}, {$alias}, {$phone_1}, {$email_1}, {$dealer}, {$sub_dealer}, or {$orig_deal_id}.
The
Search buttom  next to each search field, allows the
user to select a server to obtain information.
next to each search field, allows the
user to select a server to obtain information.
Deleting a CID
Use Delete CID to remove the highlighted CID from the installation. This button is only functional when you display an installation in Data Entry Master.
w If the CID has zones attached, a Confirm dialog box opens.
Choose Yes if you want to proceed and delete the CID.
Note: SBN logs the deleted CID in the Data Entry Change Log tab. When you delete a CID, SBN deletes any delayed alarms for the zones of the CID as well.
If you attempt to delete a CID that has zones in test, or that has any incidents in queue, SBN displays an error message notifying you of this and does not allow you to delete the CID.
SBN only allows users with action 559/729 active in their action profile to delete the first CID on an installation. If action 559/729 is inactive in your action profile, the following error message appears when you attempt to delete the first CID: 'You are not authorized to delete the first CID.'
Jumping Between Billing and Monitoring SBN Sessions
If you run separate SBN sessions for Billing and Monitoring, you can jump from your Billing Server to your Monitoring Server (or from Monitoring to Billing) using the Bill/Mon Jump buttons in Data Entry Master and Contract Master (program #548). The Bill/Mon Jump buttons only appear when you start SBN as a Billing or Monitoring session and turn option ba385 on.
Use the following steps to access the Bill/Mon Jump buttons. Always take the steps in the order shown here.
1. You must have a Billing Server and a Monitoring Server. Each server must have options bm_bserv and bm_mserv defined.
Option bm_bserv must have the alias name of the Billing Server.
Option bm_mserv must have the alias name of the Monitoring Server.
2. Each server must have option ba385 on.
All sprocs using this option must be recompiled with the option on.
3. Each server must have GUI message 9347 compiled into the system in GUI Messages (program #1606).
4. Each server must have IBS messages 3085 and 3086 compiled into the system in IBS Messages (program #1610).
5. Each server must have actions 559/629 (Bill/Mon Jump button in Data Entry Master) and 548/316 (Bill/Mon Jump button in Contract Master) compiled into the system.
6. You must use SBN version 67 (build 0084 or later), version 69, or a later version.
7. In the action profile for your user ID, you must select the Bill/Mon Jump button actions (559/629 and 548/316).
8. You must have the correct startup parameter assigned to your SBN shortcut:
If you run the Monitoring SBN, your shortcut must say "sbn.exe-billmonmon."
If you run the Billing SBN, your shortcut must say "sbn.exe-billmonbill."
Note: You only need the startup parameter assigned to the initial SBN you start from your desktop (or wherever your shortcut resides).
Using Dealer Communication
Use Dealer Communication to open the Dealer Communication dialog box. This dialog box allows you to send an email to a dealer directly from Data Entry Master. When you send the email, SBN records the action in the Communication Log (program #1888).
Note: You must display an installation in Data Entry to use Dealer Communication.
When you choose Dealer Communication, SBN automatically enters the dealer information associated with the selected installation in the dialog box. You can change the information as necessary.
The following graphic displays the Dealer Communication dialog box as it opens.
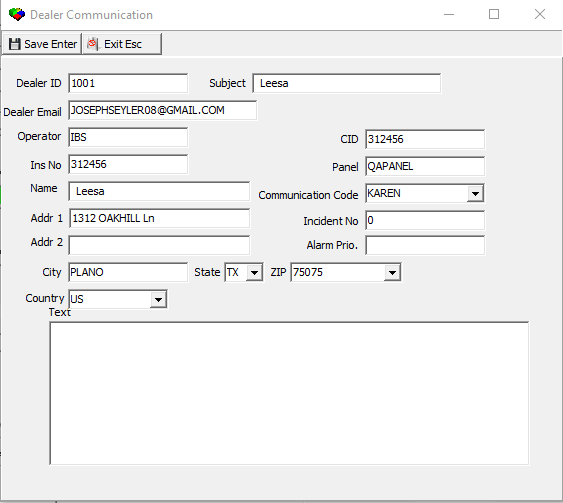
Field Descriptions - Dealer Communication
The following table describes the fields in the Dealer Communication dialog box.
Field |
Description |
Dealer ID |
ID of the dealer associated with the selected installation. |
Subject |
Text for the subject line of the email. (SBN automatically enters the installation customer name.) |
Dealer Email |
Email address of the dealer associated with the selected installation. Note: Define email addresses for dealers in Dealer Profiles (program #1537). |
Operator |
ID of the operator sending the email. |
CID |
Customer Identification Number |
Ins No |
ID number of the selected installation. |
Panel |
Panel ID of the selected CID. |
Name |
Customer's full name. |
Communication Code |
Type of communication. (This menu originates from program #1517.) |
Addr 1 |
Customer's address line 1. |
Incident No |
If there is an active incident for this installation, SBN enters the incident number. |
Addr 2 |
Customer's address line 2. |
Alarm Prio. |
If there is an active incident for this installation, SBN enters the alarm priority of the incident. |
City |
Customer's city. |
State |
Customer's state. (This field holds a maximum of 60 characters.) |
Zip |
Customer's zip code. |
Country |
Customer's country. |
Text |
Text to include in the email. |
Use the following steps to email a dealer from Data Entry:
1. In Data Entry, choose Dealer Communication.
w The Dealer Communication dialog box appears.
Note: SBN automatically fills many fields with customer and dealer information of the selected installation.
2. Select the type of communication in the Communication Code drop-down menu.
3. Complete the fields, as needed.
4. Choose Save to send an email to the dealer.
w SBN sends an email to the dealer defined in the selected installation. The email displays information entered in the Dealer Communication dialog box.
w SBN creates an entry for this email in the Communication Log (program #1888).
w The Dealer Communication dialog box remains open to send additional emails, if desired.
5. If you want to send another email, change the fields as needed, and then choose Save.
6. When you have finished sending emails, choose Exit to return to Data Entry.
w The Dealer Communication dialog box closes.
Using Auto Answer
To automatically answer all incoming phone calls to your workstation, choose Auto Answer (below the Class field).
w SBN turns the Auto Answer feature on.
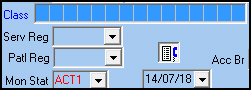
To turn Auto Answer off, choose Auto Answer again.
Note: When action 559/53 is on, and when the Auto Answer button is visible, the Auto Answer button is automatically pressed when the Data Entry program loads. When action 559/53 is off, the Auto Answer button is off when Data Entry loads. Action 559/53 is off by default for all action profiles except the ALL profile in program #1502.
Accessing Panel Information
Use the Panel Description dialog box to view:
The type of panel installed at the customer site
A description of the panel
Trouble-shooting techniques for the panel
Action 559/472 controls access to the Panel Description dialog box.
Note: This information originates from program #1742.
Field Descriptions - Panel Description
The following table describes the fields in the Panel Description dialog box.
Field |
Description |
Description |
Abbreviation of the selected panel. |
Text |
Text description of the selected panel. |
Default Account |
Default account associated with the selected panel in Panel Types (program #1742.) |
Text |
Text entered in the Description field of Panel Types (program #1742). |
Address |
You may type the IP address or DNS name of the panel. |
Password |
You may type the password required to access the IP address of the video panel. |
User Name |
You may type the user name required to access the IP address of the video panel. |
Parameters |
You may type the parameters for configuring individual video panels, such as Teldat, OzVision, DigiOp. The parameters are optional per panel. |
Use the following steps to view panel information:
1. Access the installation record you want to view, and press [Shift+F3] to open the Panel Description dialog box.
or...
Right-click the CID grid.
w A menu appears.
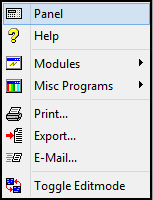
2. Choose Panel.
w The Panel Description dialog box opens.
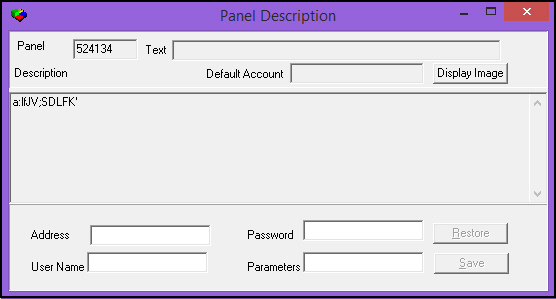
3. Click Display Image to view a picture associated with the panel type.
Note: Use Panel Types (program #1742) to link an image with a panel.
4. You may type information in the following fields:
Address
Password
User Name
Parameters
Note: To cancel changes typed into the fields, select Restore.
Note: Action 559/471 controls access to these fields.
5. Close the dialog box or choose Save to save changes.
Entering Blue Field Information
Many fields in the Data Entry Master and the Data Entry Basics tab have blue labels. You may open dialog boxes with expanded views of these fields so you can:
View additional information
Add new information and change existing information
The following sections explain these fields in more detail.
Code Words
Code words are security codes for the installation that the customer chooses. You can enter up to ten code words for each account. You may view all ten by scrolling through the Codewords field using the scroll bar or the arrows on the keyboard. You can access an expanded view of code words by right-clicking on the blue Codewords label or field. In this expanded view, you can view or make changes to code word details. You can also change a code word from the Codewords field without accessing the expanded view, but only if none of the code words contain a type or expiration date.
Note: When you use the Special Change function (the second Change Record button), SBN clears the Codewords grid but maintains the code words for the installation in the ins_codewords table rather than delete them.
Use the following steps to make changes to code words:
1. Right-click on the blue Codewords label or field.
w A menu appears.
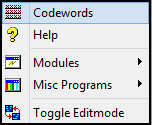
2. Choose Codewords.
w The Codewords dialog box opens.
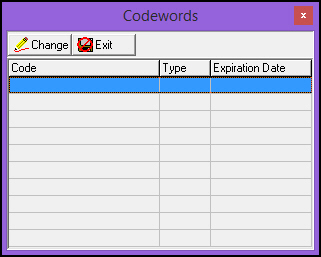
3. Choose Change Record.
4. Enter Code Word, Type, and/or Expiration Date, as required.
Note: You can select a type and expiration date with a blank code word record.
5. Choose Save Existing Record.
6. Choose Exit to close the dialog box.
Class
Use the Class field to track services that a customer requests or other customer-specific information. This field contains up to 15 class codes that you can use to describe customer or account information. If you right-click on the blue Class label or field, an expanded window opens that displays additional information about the classes.
Note: Information in the Class field is read-only and originates from program #1555. You may configure class codes that automatically generate cycle fees when Background Task 76 runs after selecting the code. For more information, see Installation Classes.
Use the following steps to view class information:
1. Right-click on the blue Class label or field.
w A menu appears.
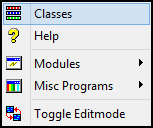
2. Choose Classes.
w The Class Descriptions dialog box opens.
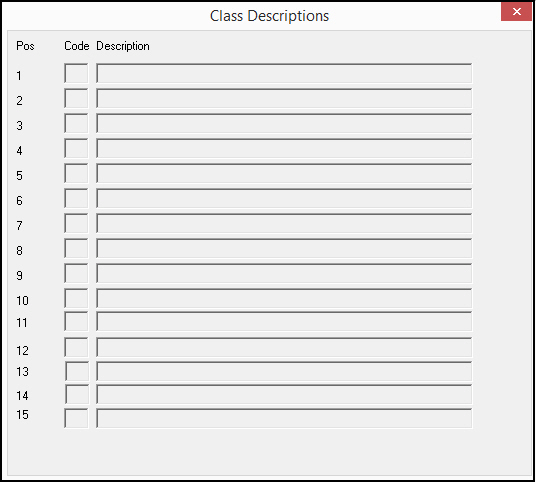
3. After viewing class information, close the dialog box.
Mail Group
Use the Mail Group fields in the Basics tab or the Installation Mail button in the main Data Entry window to enter more detailed information about mailing addresses. If you right-click on the blue Mail Group label or fields, a dialog box opens in which you can enter two mailing addresses in addition to the ones available in the Mail Group menu. You can also copy the mailing address information for the installation. (These additional addresses have no functionality in SBN.) All changes you make in the Mail Group dialog box appear in the Change Log tab. Press [SHIFT+F6] or choose the Installation Mail button in the main Data Entry window to open the Mailing Address dialog box, or follow the steps below.
To use QAS address validation in the Mailing Address dialog box, see QAS Pro Address Validation.
Use the following steps to enter mailing information or to copy mail group information:
1. Right-click on the blue Mail Group label or field.
w A menu appears.
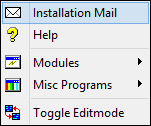
2. Choose Installation Mail.
w The Mailing Address dialog box opens.
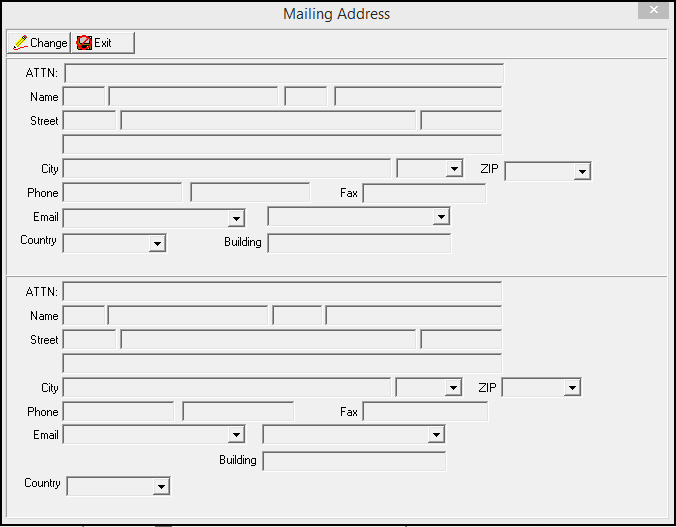
3. To enter mailing address information or copy the current record, choose Change Record.
4. Complete the fields, as needed, or choose Copy Current Record.
w When you choose the Copy Current Record button, SBN copies the record in which you were focused.
5. Choose Save Existing Record.
6. Choose Exit to close the dialog box.
Permit
Use the Permit field in the Basics tab to enter unique reference numbers for customer permits and attach them to action plans by permit type and agency type. You may also enter agency levels for permits for a selected period of time. If you right-click on the blue Permit label or field, a window opens in which you can enter additional information about permits. Permit Numbers can be up to 12 characters long.
Use the following steps to add or change permit information:
1. In the Data Entry Basics tab, right-click on the blue Permit label or field.
w A menu appears.
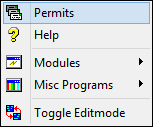
2. Choose Permits.
w The Permits window opens.
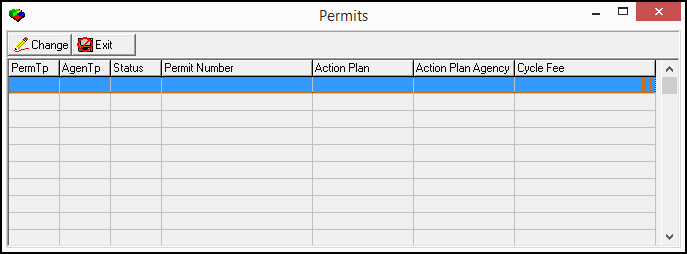
3. To make changes to permits or add new permit information, choose Change Record.
Note: When option ba484 is on, SBN sends an email to the address or email distribution group defined by option ba486 when the permit type of an installation changes. The text of the email comes from the message ID in program #1766 that is entered as the value of option ba485.
4. Complete the fields, as needed.
5. Choose Save Existing Record.
6. Choose Exit to close the dialog box.
Passcards
Passcards are unique entry devices assigned to an individual. If you right-click on the blue Passcards label or check box, a window opens in which you can view a list of downloadable and indexed passcards for the installation and all sub installations, if the installation is sub-zoned.
Note: You cannot add Passcards in this window. Add or generate passcards in the Action Plans tab.
Use the following steps to view passcard information:
1. Right-click on the blue Passcards label or check box.
w A menu appears.
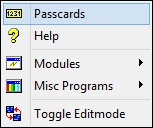
2. Choose Passcards.
w The Passcard Assignment window opens.
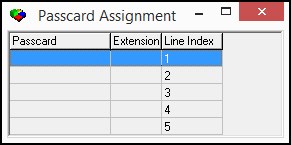
3. After viewing passcards, close the window.
Bulletin ID
Use the Bulletin ID field in the Basics tab to view current messages associated with the bulletin ID. You can view bulletins that are associated with a specific user or customer. You can also view bulletins that can be seen by all users, service users, and monitoring users or bulletins that can only be seen in Contract Master. If you right-click on the blue Bulletin ID label or field, a window opens in which you can view the bulletins.
Use the following steps to view bulletins:
1. Right-click on the blue Bulletin ID label or field.
w A menu appears.
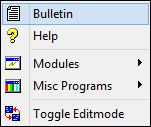
2. Choose Bulletin.
w The Bulletins dialog box opens.


3. Use the scroll bar to view all features.
4. Select the check boxes of bulletins you want to view.
5. After viewing bulletins, close the dialog box.
Maintenance
The Maintenance section in the Basics tab allows you to specify recurring maintenance types, frequency, and last test dates for automatic ticket generation for scheduled installation maintenance in program #701. If you right-click on the blue Maintenance label or field, a dialog box opens in which you can view and enter additional maintenance information.
Note: Option sv037 defines the service request work type for which SBN updates the Last Maintenance Date when you close a service ticket.
SBN supports maintenance ticket calculation for:
Frequency in Days
Frequency in Months
Frequency in Months + Base Month
Note: SBN only calculates maintenance tickets in program #701 for a frequency in months that the number 12 divides into, such as 1, 2, 3, 4, 6, and 12 months.
The number of the month (1 = January, 2 = February, etc.) you enter in the Maintenance dialog box is the Base Month which SBN uses with the Frequency in Months to determine when to generate maintenance tickets for the installation in program #701. For example, if you enter Base Month 11 (November) and 3 for Frequency in Months, you could generate maintenance tickets for February, May, August, and the following November. You may leave the Month field blank if you do not wish to use this method of maintenance ticket calculation.
Use the following steps to add or change maintenance information:
1. Right-click on the blue Maintenance label or field.
w A menu appears.
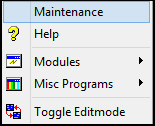
2. Choose Maintenance.
w The Maintenance dialog box opens.
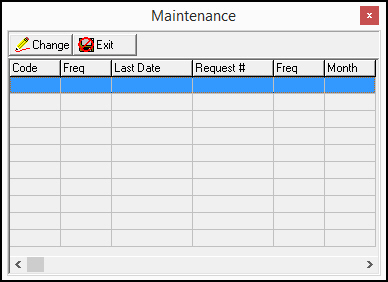
3. To make changes or add new maintenance information, choose Change Record.
4. Complete the fields, as needed.
Note: The first Frequency field is in days and the second is in months. Use only one of the Frequency fields, not both.
5. Choose Save Existing Record.
6. Choose Exit to close the dialog box.
Exporting Installation Data into Document Templates
You may export data from Data Entry Master and Basics into a document template by choosing Document Template.
To use this feature, first store the MS Word document or MS Excel spreadsheet templates to use in the file path defined by option ba469 with the names of the Data Entry fields from which you want to export data within the documents. Then go to Document Templates (program #1645) and create an entry for each document template, indicating from which Data Entry fields to export data into the template. Select the In Use check box in program #1645 for each template record that you want to appear in the Document Templates drop-down menu in Data Entry.
Use the following steps to export data into document templates:
1. Open the installation record from which you want to export details and choose Document Template.
w A drop-down menu appears with the available document templates.
2. Select the document template you want to use.
w If you choose a template associated with a Service Ticket status in Document Templates, a prompt appears reading "This template will create a Service Ticket. Do you want to continue?" If you choose "Yes," a new Service Ticket is generated and the template opens. If you choose "No,", no Service Ticket is generated and the template is not opened.
w The Word document opens and SBN replaces the field names in the document with the data from the fields in Data Entry Master and Basics.
w SBN creates an entry in the Communication Log (program #1888) with the following text: 'Document exported --> [document name].[file type], Installation: [installation number]'.
3. Save the updated document.
4. To access the Document Templates available to Data Entry programs:
Select the Document Template button at the top of the window or Alt+F9.
The dropdown menu will display the available documents.
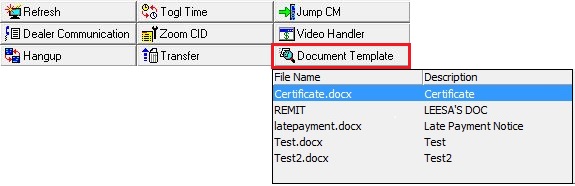
Inserting Installations into the PSAP Queue
You may insert the selected installation into the PSAP Queue by choosing the PSAP Insert button when option psap is on. (When option psap is off, the PSAP interface is not active and no installations are inserted into the PSAP Queue.)
When option psapauto is on and option psap is on, SBN automatically inserts an installation into the PSAP Queue when the installation address changes in program #559, (if the monitoring status of the installation has the Include In PSAP check box selected in program #1540). The value of option psapgq determines whether SBN sends latitude/longitude updates or address updates to the PSAP Queue. Installations with a GeoCode Quality greater than or equal to the value of option psapgq send latitude/longitude updates to the PSAP Queue. Installations with a GeoCode Quality less than the value of option psapgq send address updates to the PSAP Queue.
When option psapauto is off, option psap is on, and action 559/52 is on, SBN displays a pop-up message asking the operator if he/she would like to insert the installation into the PSAP Queue when the operator saves changes to an installation. (The PSAP Insert button and pop-up message do not appear when action 559/52 is disabled in the user's action profile.)
The PSAP Lookup Service pulls installation records from the PSAP Queue and sends queries to the Pitney Bowes PSAP web service. The web service looks up the nearest Public Safety Answering Point for each installation, then updates police agency information on the installation action plan call lists accordingly.
For more information about the PSAP Queue and PSAP Lookup Service, see the PSAP Lookup Service section of the SBN Service Manager document.
Managing Codeword Permissions
Choose the On Demand Codewords button if you want to view the codewords for an account. Options 559/916, 559/917, 559/918, and 559/919 were added to manage the permissions for when codewords do and do not appear.
These actions control the following settings:
559/916 - Never see codewords
559/917 - Always see codewords
559/918 - See codewords if alarm incident is in terminal
559/919 - Controls On Demand Codewords button
559/924 - Allow display of first and last character only (OFF) of the codeword or all characters (ON).
559/925 - Must be ON to maintain backwards compatibility and grid is modified as in previous releases. If OFF, 924 is looked at.
The operator will never see codewords in the following situations:
When all four actions are turned off
When 559/916 is on and the rest are off
When 559/916 and 559/917 are on and the rest are off
When 559/916 and 559/918 are on and the rest are off
When 559/916, 559/917, and 559/918 are on and the 559/919 is off
When 559/916 and 559/919 are on and the rest are off
When 559/916, 559/917, and 559/919 are on and 559/918 is off
When 559/916, 559/918, and 559/919 are on and 559/917 is off
The operator will always see codewords in the following situations:
When all four actions are on
When 559/917 is on and the rest are off
When 559/917 and 559/918 are on and the rest are off
When 559/917 and 559/919 are on and the rest are off
When 559/917, 559/918, and 559/919 are on and 559/916 is off
The operator will only see codewords if the incident is in the terminal when if 559/918 is on and the rest are off.
The operator will only see codewords on demand when 559/919 is on and the rest are off.
The operator will see codewords on demand and in the terminal when 559/918 and 559/919 are on and the rest are off.
Genesys Telephony Integration
Genesys CTI has been integrated with SBN to allow operators to handle incoming phone calls while working in program #559. SBN records phone call details in the Alarm Log tab and in the Communication Log (program #1888).
SBN polls this registry value for a phone number: HKEY_CURRENT_USER\Software\IBS\SBN\General\PBX\Incoming
When a value is found, SBN clears out the registry value, then attempts to find a matching installation. Software outside of SBN writes to this registry at the same time that a call is transferred to the operator.
Choose the Answer button to answer an incoming phone call, display the customer's information in program #559, and create a new entry in the Communication Log with the details of the call. The Auto Answer button must be pressed in order to use the Answer button.
Note: When you choose the Answer button to answer an incoming call, SBN records monitoring event 155 CALL IN in the Alarm Log.
Choose the Hangup button to end the phone call.
Note: When you complete a phone call, SBN records monitoring event 156 CALL IF in the Alarm Log with the call duration.
Choose the Transfer button to transfer a phone call to another extension. When you choose the Transfer button, a Call Transfer dialog box opens in which you may enter transfer preferences for the current phone call.
Note: When you transfer a call, SBN records monitoring event 157 CALL XF in the Alarm Log with the phone extension to which the call was transferred.
Use the following steps to perform a blind transfer:
1. With a phone call on the line, choose the Transfer button.
w The Call Transfer dialog box opens.
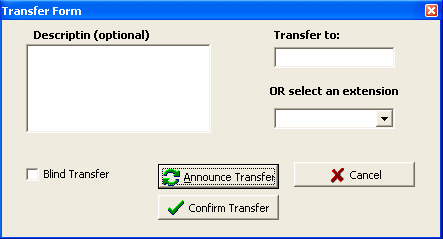
2. Enter the extension to transfer the call to in the Transfer To field, or select an extension from the drop-down menu of the Or Select An Extension field.
3. Select the Blind Transfer check box.
4. You may enter a description in the Description field for the entry that SBN creates in the Communication Log (program #1888); (this is optional).
5. Choose the Confirm Transfer button to place the call to the extension.
Use the following steps to announce a phone call transfer to a co-worker:
1. With a phone call on the line, choose the Transfer button.
w The Call Transfer dialog box opens.
2. Enter the extension to transfer the call to in the Transfer To field, or select an extension from the drop-down menu of the Or Select An Extension field.
3. You may enter a description in the Description field for the entry that SBN creates in the Communication Log (program #1888); (this is optional).
4. Choose the Announce Transfer button to initiate the call to the extension and place the original call on hold.
5. When the recipient of the call picks up the extension, they may accept or reject the call.
6. Choose the Confirm Transfer button if the call is accepted to complete the transfer, or...
7. Choose the Cancel button if the call is rejected to cancel the transfer.
Twilio's Two-Way Voice
Twilio is a two-way voice solution between SBN operators and mobile device users. It will allow an SBN operator the ability to communicate with a mobile device user through a Web browser within program #559.
Note: For this feature to work properly, an operator must have a microphone connected to their computer.
Use the following steps to use Twilio Technologies:
1. With a valid mobile phone number placed within the panel phone number box, an operator will than have the ability to communicate with the user via a microphone and a web browser.
w The phone number below is an example of a potential mobile user.
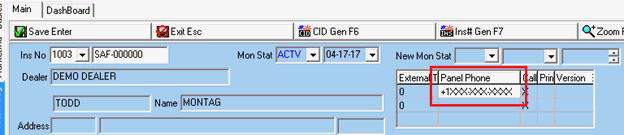
2. In program #559, open the Alarm Log tab and highlight the line with the URL displayed in the Comment field.
w The alarm log below is an example of an alarm incident from a mobile user.

3. Click on the login link located in the upper right hand corner with the correct credentials.
4. When the browser window opens, add the incident number at the end of the URL.
Note: The incident number for this example is "3364" and you can see it within the alarm log picture after step 2 on the far right.
5. Click the Connect button and the button will turn green and say “Hang up�.
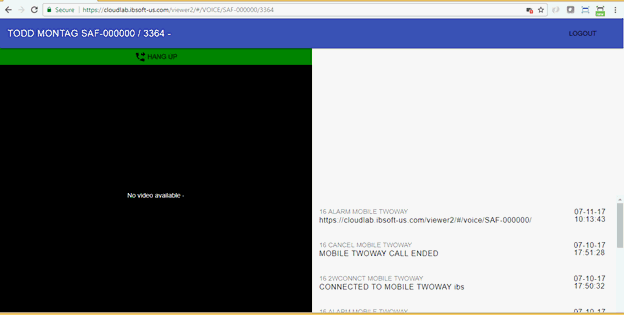
6. If the user chooses, they can verify a "2WCONNCT" signal appears in the alarm log.
w The alarm log below in green is an example of how a successful connection would look to an operator.

7. Upon the user clicking the "Hang Up" button within the browser, a hang-up screen will disappear.
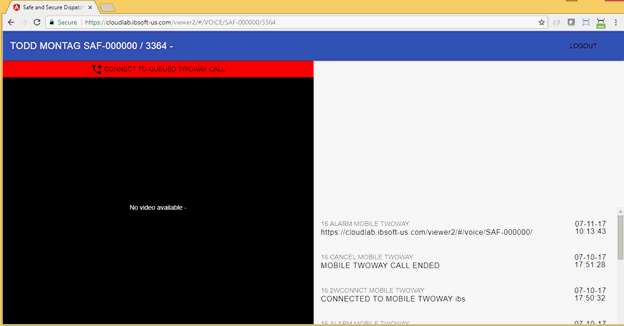
8. The operator can than verify that the cancel signal appears within the Alarm Log by checking the log.
w The Alarm log below in red is an example of how a successful cancel signal may look like within the log.

Related Programs
The following table lists programs related to Data Entry Master and Basics.
Program |
Number |
Document Link |
Description |
Marketing |
562 |
Make sales, track leads, and market alarm systems. Jump to Data Entry Master from Marketing to automatically import marketing inquiry details into a new installation record, or to view or change existing installation details. |
|
Contract Master |
548 |
Enter and manage contract billing information for an installation. Jump to Contract Master from Data Entry to import customer information into a new contract, or to view or change an existing contract. |
|
Dispatch (Monitoring) Tab |
537 |
View and treat incoming alarms for the selected installation, or any alarms that match your user skill profile. |
|
Alarm Queue Tab |
538 |
View all incoming alarms that have not been resolved. |
|
Zones Tab |
N/A |
Define groups of areas or devices at the selected installation site from which alarm signals generate. |
|
Action Plans Tab |
N/A |
Create and maintain customer-defined plans for handling alarm events for the selected installation. Add or generate passcards for the installation. |
|
O/C Schedule Tab |
N/A |
Create and maintain open/close monitoring schedules for the selected installation. |
|
Inspections Tab |
N/A |
Designate inspection agencies for installations, and track installed devices and their inspection histories. |
|
Alarm Log Tab |
N/A |
View information about all actions taken on alarm incidents for the selected installation. |
|
Service Log Tab |
N/A |
Create and maintain service requests for the selected installation. |
|
O/C Log Tab |
N/A |
View all open/close alarm events for the selected installation. |
|
Change Log Tab |
N/A |
View all changes made to the selected installation record. |
|
Texts Tab |
N/A |
View action plan text for the selected installation; enter and edit temporary comments. |
|
Insert Test Tab |
N/A |
Insert the selected installation into Test or Runaway mode; change the monitoring status of the installation. |
|
O/C Status Tab |
N/A |
Search for and view the status of zones attached to downloadable passcards. |
|
Test Queue Tab |
N/A |
View all signal activity in the Test and Runaway alarm queues. |
|
Service Aging Tab |
N/A |
View outstanding payment balances for the selected installation. |
|
Work Orders Tab |
N/A |
Set up and track the progress of installations and maintenance work calls. |
|
Internet Log Tab |
N/A |
View customers' online account activity history. |
|
Floor Plans Tab |
N/A |
Set up and maintain floor plan images for the selected installation. |
|
Phasing Tab |
N/A |
Track work progress phases of a new installation. |
|
SIM Phone Tab |
N/A |
Create and maintain SIM card information for GSM phone numbers tied to panels on the selected installation. |
|
Installed Components Tab |
N/A |
View installed item details and a log of changes to items for the selected installation. |
|
Pending Service Tab |
N/A |
Enter non-urgent service issues for the selected installation. |
|
Access Control Tab |
N/A |
Set up and maintain controls to determine which users may access software programs or physical locations within a company. |
|
QAS Pro |
N/A |
Use QAS Pro to validate addresses entered in Data Entry Master and the Mailing Address dialog box. |
|
Countries |
1865 |
Select the QAS check box for the countries that are supported by a QAS dataset. |
|
Panel Types |
1742 |
Create and define panel types that appear in the Panel menu of Data Entry. |
|
CID Auto Generation |
1724 |
Define how SBN generates customer IDs when you create new installation records in Data Entry. |
|
Branch Profiles |
1530 |
Create and maintain monitoring and installation branch profiles that appear in menus throughout Data Entry. |
|
Dealer Profiles |
1537 |
Create and maintain dealer profiles to assign to installations. |
|
Cancellation Tracking |
2172 |
Generate a report to track cancelled monitoring contracts within a specified period. |
|
Subscriber Types |
1534 |
Create and define subscriber types to assign in Data Entry that indicate whether the selected customer is commercial, residential, etc. |
|
Document Templates |
1645 |
Define from which fields in Data Entry SBN exports data into MS Word document templates. |
Button Functions
The following table displays the buttons, describes the shortcut keys, actions, and functionality.
Button |
Name |
Shortcut Key |
Action |
Description |
|
Find Customer |
alt+f1 |
559/ 1 |
Search for a specific customer ID or installation number. |
|
Change Record |
f2 |
559/ 2 |
Change the details of an installation record. Note: A CID cannot be changed or deleted if it has any incidents in queue. |
|
New record |
f3 |
559/ 3 |
Create an installation record. |
|
Copy Current Record |
f5 |
559/ 6 |
Copy details of the selected installation into a new installation record. |
|
Copy Zone/Plan |
shift+f4 |
559/ 9 |
Copy existing zones or action plans from a selected installation into the current installation. |
|
Delete Record |
shift+f10 |
559/10 |
Delete an installation. |
|
SQL Refresh |
f11 |
559/11 |
Refresh program data to reflect recent changes. |
|
Toggle Operator/Premises Time |
shift+f2 |
559/12 |
Switch between the time zone of the operator monitoring the installation and the time zone of the premises. |
|
Jump To Contract Master |
shift+f9 |
559/13 |
Open Contract Master (program #548) with the selected customer's information displayed. |
|
Map |
f8 |
559/14 |
Open MapPoint on the specific installation address or latitude and longitude, if defined in the Data Entry Master. |
|
Schedule Request |
f9 |
559/15 |
Create a schedule request. |
|
Document Retrieval |
shift+f12 |
559/16 |
Pass search parameters to a third-party software application to find documents related to the installation. |
|
Document Scan |
shift+f11 |
559/45 |
Launch the scan document integration. |
|
(Special) Change Record |
alt+f2 |
559/18 |
Change installation details with different required fields than in regular Change mode. Define the required fields for this "Special Change" function in program #1843. |
|
Delete CID |
Ctrl+f3 |
559/520 |
Remove the highlighted CID from the installation. Note: A CID cannot be changed or deleted if it has any incidents in queue. |
|
Dealer Communication |
SHIFT+F8 |
559/47 |
Send an email to the dealer for the selected installation. |
|
Zoom CID |
F4 |
559/48 |
View the CID grid in a separate window. |
|
Video Handler |
N/A |
559/49 |
Opens an external video application if the installation includes a CID of the Video line type. This button is client-specific for company 161. |
|
Installation Mail |
SHIFT+F6 |
559/360 |
Opens the Mailing Address dialog box to enter two additional mailing addresses for the installation. |
|
Display |
shift+f1 |
559/382 |
Opens external application SDTools.exe (if installed). |
|
Lat/Long Data |
ALT+F10 |
559/51 |
Opens a web site defined by option gpsweb and passes latitude, longitude, and other data defined by the option from the selected installation to the web site. |
|
PSAP Insert |
CTRL+F12 |
559/52 |
Insert the selected installation into the PSAP Queue. |
|
On Demand Codewords |
F11 |
559/919 |
Displays the code words for an installation. |
|
Answer |
SHIFT+ALT+A |
559/739 |
Answer an incoming phone call; the Auto Answer button must be pressed to use this button. This button is part of the Genesys telephony integration for Company 106. |
|
Hangup |
SHIFT+ALT+H |
559/739 |
End a phone call. This button is part of the Genesys telephony integration for Company 106. |
|
Transfer |
SHIFT+ALT+T |
559/739 |
Open the Call Transfer dialog box to enter transfer preferences for the current phone call. This button is part of the Genesys telephony integration for Company 106. |
|
Schedule Temp Address |
SHIFT+ALT+R |
559/741 |
This button allow the operator to add a temporary address on an installation and set the time and date for the temp. address to start and expire. Once the date expires the user can refresh and the address will revert to the original entry. |
|
Email Maintenance |
SHIFT+ALT+S |
559/743 |
This button allows the user to view and change email addresses for all billing accounts/contracts, contacts, and marketing, associated with an installation from within one SBN form. |
|
Document Template |
ALT+F9 |
559/383 |
Opens a menu of MS Word document or MS Excel spreadsheet templates. You may select a template into which SBN imports data from the selected installation. |
|
Passcard Verification |
SHIFT+ALT+U |
|
This button is used to open the Passcard Verification dialog box. When the dialog box appears, a user may verify a passcard number and extension for a contact or a user-select Action Plan, or to verify a VRU code and its passcode for an installer or technician. (Note: For additional information, please see "Passcard Verification" under Dispatch.) |
|
Document Retrieval 1-10 |
|
|
These buttons can display the s_ins, ins_no, and s_svrq in a URL Each button is defined by Options docde1-docde10. |
|
Access Log |
|
559/944 |
When selected the Access Log Search (Program #1684) opens and shows who has accessed the Installation/Dealer user is currently viewing. |
|
Reports |
SHIFT+F7 |
559/753 |
Quick Access to various reports. |
|
Duress |
|
559/754 |
Duress button added for remote worker |
|
External User Management |
N/A |
559/650 |
Jump to External User Management (program #1630). Part of Company 120's Gatewatch; company-specific. |
|
One Time Password |
N/A |
559/651 |
Part of Company 120's Gatewatch; company-specific. |
New/Change Mode |
||||
|
Save |
Enter |
559/ 3 |
Save existing record. |
|
Exit |
Esc |
559/ 3 |
Exit without saving. |
|
Auto Generate CID |
f6 |
559/ 4 |
Generate a customer ID number for the selected installation. |
|
Auto Generate Ins# |
f7 |
559/ 5 |
Generate an installation number for the selected customer. |
|
Zoom in/out of sublevel |
f10 |
559/19 |
Display the CID grid in an easier to view separate window. |







































Modifications and Updates to Data Entry Master and Basics
The following table lists modifications and updates to the Data Entry Master and Basics document.
Mod Number |
Date |
Description |
07.02.17580 |
11/26/08 |
Added Dealer Communication button and dialog box |
08.03.06298, 07.02.17701 |
12/15/08 |
Class grid can now hold up to fifteen classes |
07.02.17732 08.03.06311 |
12/16/08 |
Added option sv059 to automatically display related bulletin text when on. |
N/A |
01/05/09 |
Document rewritten |
08.03.06375, 07.02.17831 |
02/06/09 |
City field now holds up to 50 characters. |
08.03.06228, 07.02.17583 |
02/09/09 |
Cancel track field; link to Cancellation Tracking Report (#2172). |
07.02.17670, 08.03.06283 |
03/02/09 |
Added Call List Account field, Call List First, and Dealer First check boxes to Basics tab. |
07.02.18105, 08.03.06524 |
03/24/09 |
Added Zoom CID button. |
08.03.06598, 07.02.18168, 07.02.17800 07.02.18081, 07.02.18055 08.03.06447, 08.03.06358 |
04/02/09 |
QAS address validation integration. |
07.02.18160, 08.03.06563 |
04/06/09 |
Option sv062 controls the Classes Scroll Box. |
07.02.18736, 08.03.06910 |
06/29/09 |
Expanded Misc40 field to 160 characters. |
07.02.18767, 08.03.06934 |
07/09/09 |
Added option ba429 to control access to the first CID in the CID grid. |
07.02.18830, 08.03.06974 |
07/29/09 |
Expanded Permit field to 12 alphanumeric characters. |
07.02.18933 |
09/09/09 |
Special Change maintains code words cleared from the Codewords grid in the ins_codewords table. |
07.02.19020, 08.03.07077 |
09/28/09 |
Added Branch Name and Contact fields. Added option ba434. |
07.02.19045 |
10/15/09 |
Special Change clears the Comment fields in the Basics tab. |
07.02.18907, 08.03.07017 |
10/15/09 |
Added Video Handler button. |
07.02.18857 |
10/20/09 |
SBN deletes delayed alarms on the zones of deleted CIDs. |
07.02.19148 |
11/18/09 |
When you use the Special Change button on an account with a canceled contract (in program #548) and the Expiration Date of the contract is in the future, SBN resets the expiration date to today's date. |
08.03.07164, 07.02.19171 |
11/24/09 |
The text color in the CID field depends on the monitoring status in the MonSt field of the CID grid. |
07.02.19218 |
12/03/09 |
SBN copies test template masks along with zones when you use the Copy Zone/Plan or Copy Current Record buttons. |
07.02.19764, 08.03.07573, 07.02.19775 |
06/10/10 |
Added four Credit fields to main Data Entry window. |
07.02.19842 |
07/13/10 |
The Panel Rule of the Primary CID determines installation passcard generation requirements. |
07.02.19924, 08.03.07688 |
07/16/10 |
Added Misc44 field to the Basics tab. |
07.02.19978, 08.03.07723, 07.02.19988 |
08/11/10 |
Added New Mon Stat and New Mon Stat Date fields to the CID grid and the main Data Entry window. |
07.02.20016, 08.03.07753 |
08/20/10 |
Added Installation Mail button to the main Data Entry window. |
07.02.20071, 08.03.07792 |
08/31/10 |
Background color of Dealer ID, Installation Branch, Phone, and Phone 2 fields determined by dealer or branch profile. |
07.02.20165, 08.03.07847 |
09/30/10 |
Moved Display button from CS Basics tab to Data Entry Master window. |
07.02.19939, 08.03.07697 |
10/04/10 |
Added New Zip Code window. |
07.02.19611, 08.03.07450 |
11/03/10 |
Added ability to customize order of program tabs in 559. |
08.03.07944 |
12/21/10 |
Background color of Dealer and Dealer Phone fields determined by dealer or branch profile. |
07.02.20262, 08.03.07913 |
12/28/10 |
Added Misc51-70 fields and check boxes to Basics tab. |
07.02.20308, 08.03.07952 |
12/29/10 |
Added Document Template button. |
07.02.20490, 08.03.08058 |
01/31/11 |
Class codes from program #1555 may generate cycle fees. |
07.02.20581 |
02/04/11 |
Subdealer field in Basics now contains a drop-down menu; added option ba473. |
07.02.20415, 08.03.08019 |
02/08/11 |
Removed Overflow and Customer Service Basics tabs. |
07.02.20671, 08.03.08176 |
03/02/11 |
Added No Test check box to Basics tab and action 559/218 to override the check box setting. |
07.02.20727, 08.03.08212 |
03/16/11 |
Added option ba477. |
07.02.20768, 08.03.08236 |
04/05/11 |
Added option ba479. |
07.02.20780, 07.02.20792 |
04/27/11 |
Added Business Unit field and option ba480. |
07.02.20954, 08.03.08332 |
06/17/11 |
Added Lat/Long Data button and option gpsweb. |
07.02.20923, 08.03.08318 |
08/26/11 |
Added option ba481. |
07.02.21011, 08.03.08356 |
09/14/11 |
Added options ba482, ba483, ba484, ba485, and ba486. |
08.03.08639 |
02/27/12 |
Added Maintenance Frequency in Months fields and Maintenance Base Month field to Basics tab. |
07.02.21513, 08.03.08616 |
03/07/12 |
Added Misc71-74 fields to Basics tab. |
08.03.08532, 07.02.21365 |
03/12/12 |
Added Email 1 and 2 fields and option sv079. |
07.02.21594, 08.03.08658 |
03/29/12 |
Added Misc75 and Misc76 fields. |
07.02.21622, 08.03.08672 |
04/10/12 |
Added UL Grade and Notification columns to CID grid. |
07.02.21676, 08.03.08718 |
04/17/12 |
Added Line Type 2 and 3 columns and Comment columns to the CID grid. |
07.02.21799 |
06/19/12 |
Updated Maintenance Frequency in Months ticket generation logic. |
07.02.21744, 08.03.08766 |
09/27/12 |
Define drop-down menu for Credit Result field in program #1590/66. |
07.02.21798, 08.03.08786 |
10/04/12 |
Added Class 2 fields to Basics tab. |
08.03.08906, 07.02.22054, 08.03.08908 |
11/11/12 |
Added 10 more User and Terminal Skills fields to Basics tab. Added a VIP Priority Type field. |
08.03.08964 |
11/26/12 |
Added PSAP Insert button. |
08.78.09122, 07.78.22396 08.78.09102, 07.78.22359 |
03/12/13 |
Added On Demand button and actions 559/916, 559/917, 559/918, and 559/919 to manage permissions for viewing codewords. |
08.78.09156, 07.78.22462 08.78.09146, 07.78.22443 |
04/02/13 |
Added Business Cr. Date, NAF Code, and Business ID customer-defined fields. These fields have no functionality in SBN. |
07.78.22384 |
04/12/13 |
Added Two-Way Voice Test field to Basics tab. |
07.79.22772, 07.79.22775 |
07/10/13 |
Added action 559/729 to allow deletion of first CID. |
08.79.09336, 07.79.22852 |
08/12/13 |
Added action 559/53 to determine default selection of Auto Answer button. |
07.79.22867, 07.79.22841 |
08/27/13 |
SBN does not allow you to delete a CID that has zones in test. |
07.79.22850 |
08/28/13 |
Added option psapgq. |
07.79.22918, 08.79.09390 08.79.09388, 07.79.22911 |
09/13/13 |
Added actions 559/730-559/737 to grant access to the check boxes in the Import Zone/Action Plan window. Added action 559/738 to grant access to the Passcards check box in the Basics tab. |
07.79.22771, 08.79.09299 |
10/11/13 |
Added options psap and psapauto. |
07.79.23037, 08.79.09459 |
11/25/13 |
Added Answer, Hangup, and Transfer buttons for Genesys telephony integration. |
07.80.23151, 08.80.09519, 08.80.09511, 07.80.23143 |
3/19/14 |
Added a note in Searching for Accounts that if the Exclude from Search checkbox in the Monitoring Status program (program #1540) is selected, then the checked status will not appear in an Advanced Search. |
07.79.23087, 07.79.23080 |
3/21/14 |
Updated Option ba288. |
08.80.09563, 07.80.23233, 07.80.23226, 08.80.09558 |
4/1/14 |
Added Checkbox 1, Checkbox 2, Textbox 11, Textbox 24, Communications Log, Textbox 24, and Textbox 25. |
07.81.23437, 07.81.23422 |
6/09/14 |
Added Company 105-specific information on Test Timer Close Only checkbox and Misc38 dropdown menu. |
07.81.23439, 07.81.23367 |
6/17/14 |
Added note to Zone Type entry on how Alarm signals on zones with a "-" in the Class field refresh the test interval for the CID. |
07.81.23484, 07.81.23471 |
6/24/14 |
Added note that running maintenance tickets in program #701 requires that a Service Branch must be assigned. |
07.81.23436, 08.81.09693, 07.81.23434, 08.81.09691 |
6/25/14 |
Added note about Email address information being imported from Marketing when jumping to Data Entry. |
n/a |
7/18/14 |
Images updated. |
08.81.09732, 07.81.23481, 07.81.23478, 07.81.23477, 07.81.23475, 08.81.09699, 07.81.23446 |
7/25/14 |
Added Ito pdate and Ito nxt pdt fields. |
07.81.23622, 08.81.09808 |
9/11/14 |
Added notes about information in Ins Group 1 and 2 appearing in Contract Master. |
08.81.09651, 07.81.23377, 07.80.23343 |
9/12/14 |
Added notes about how changes cannot be made to a CID while an incident is in queue. |
07.81.23572, 08.81.09781, 08.81.09759, 07.81.23544 |
9/16/14 |
Added updates on exporting installation data into document templates. |
08.81.09788, 08.81.09786, 07.81.23586, 07.81.23585, 07.81.23490, 07.81.23489, 08.81.09707, 08.81.09694 |
9/29/14 |
Added option pbxdelay. |
08.81.09839, 07.81.23667, 08.81.09837, 07.81.23624 |
10/10/14 |
Added Test Interval 2 column in CID table. |
08.82.10040 |
03/05/15 |
The SBN Main Menu includes the Fields selection. to allow saving of field defaults. |
07.83.24272 |
08/07/15 |
Log On Demand button press in Accesslog |
07.83.24202 |
07/10/15 |
07.83.24202 to Release 80.199 |
08.87.11026, 07.87.25344, 07.87.25338, 08.87.11024 |
05/17/17 |
Alarm ID for both Open and Close are now displayed in Alarm ID column. |
08.84.10486, 08.84.10478, 07.84.24651, 07.84.24647 |
08/09/17 |
SVReqPO checkbox added to Basics tab. When checked, P.O. Number required. |
N/a |
08/09/17 |
Updated Program #559 Basics tab photo. |
07.87.25390, 08.87.11042 |
12/15/17 |
Added new Twilio Technologies within Program #559. |
07.88.25627, 07.88.25657 |
01/22/18 |
Added new option ma047 - This is a dynamic value option. This option when On allows for the use of two (2) CID's on the same installation for trouble/restore. If Off, restore must come from different zones. |
08.88.11351, 07.88.25816, 08.88.11349, 07.88.25811 |
05/17/18 |
Added new column, Base Action Plan, to the CID Grid. |
08.89.11366, 07.89.25845, 08.89.11365, 07.89.25844 |
05/17/18 |
Added two new options: albgcol (Alarm Log Background Color) and aqbgcol (Alarm Queue Background Color).. These can change the background colors of either section to a different default color. |
07.89.25945 |
08/01/18 |
Service Type grid can now be populated via the Cycle Fee's tab from within Contract Master. |
08.89.11469, 07.89.25953, 07.89.25961, 08.89.11478 |
08/07/18 |
New button, Pass Verify, added. This button is used to open the Passcard Verification dialog box. |
08.89.11522, 08.89.11523 |
09/17/18 |
CID field has been added to the pre-populated Dealer Communication screen. This screen appears when a user selects the Dealer Communication button in Data Entry Master and Basics. |
07.90.26120, 08.90.11637, 07.90.26122, 08.90.11639 |
02/21/19 |
10 new Document Retrieval buttons. These buttons can display the s_ins, ins_no, and s_svrq. Each button is defined by Options docde1-docde10. Images updated. |
08.90.11676, 07.90.26169 |
05/15/19 |
New "Dispatch Count Calendar Year." This field keeps a continued count for the total number of dispatches made in the current calendar year for the selected installation. Images updated. |
07.91.26341, 08.91.11796 |
01/09/20 |
Added tab – Access Log. When selected the Access Log Search (Program #1684) opens and shows who has accessed the Installation/Dealer user is currently viewing. Images updated. |
07.91.26343, 08.91.11797 |
01/13/20 |
Two new fields added: Installation Group 1 Name and Installation Group 2 Name. |
07.93.26711, 08.93.12022, 07.93.26717, 08.93.12025 |
09/17/21 |
A new language description field displaying the text description of language will flash above the language dropdown in Data Entry Master and Basics (#559). This field has no border and no label and is only visible when option ba544 is 'On'. |
07.93.26943, 08.93.12182 |
07/06/22 |
Last Signal field added within the CID grid. |
08.93.12183, 07.93.26944, 07.93.26947, 08.93.12185 |
07/07/22 |
New Report dropdown button added to the top of Data Entry Master and Basics. Images updated. |
07.93.27170, 07.93.27169 |
04/05/23
|
Change log report (#1994) added to Report dropdown. |
08.93.12296,07.93.27123,07.93.27099,08.93.12282 |
01/30/23 |
Added Duress button at the top of 559 for the remote worker |
Email and Paging Field Lengths
Email and paging text fields support longer entries.